
7-51单片机ESP8266学习-AT指令(8266TCP服务器,编写自己的C#TCP客户端发信息给单片机控制小灯的亮灭)
http://www.cnblogs.com/yangfengwu/p/8780182.html
自己都是现做现写,如果想知道最终实现的功能,请看最后
先把源码和资料链接放到这里
链接: https://pan.baidu.com/s/1jpHZjW_7pQKNfN9G4B6ZjA 密码:nhn3
先说一下哈,不要嫌界面不好看,自己是为了程序尽量的简单,可以通过调整颜色或者通过重绘来使使界面好看,,,,,,,,咱先学会走.....
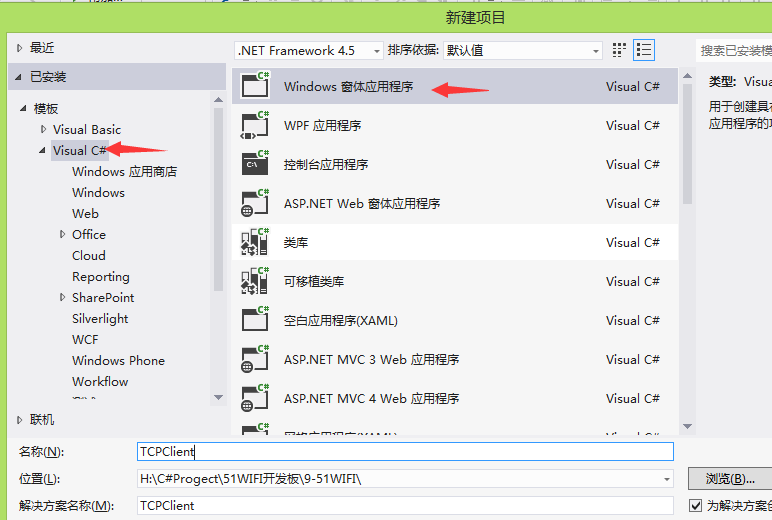
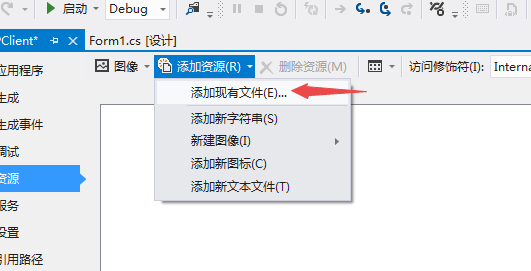
因为咱们会用到图片所以先把图片资源加载上来,为了
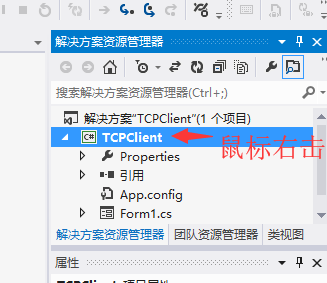
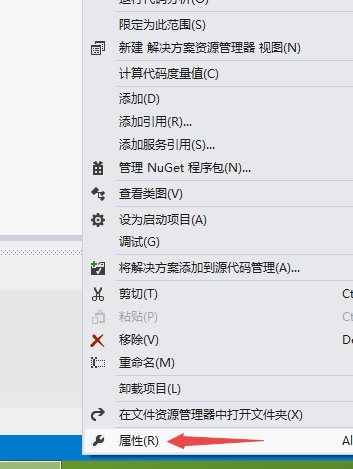
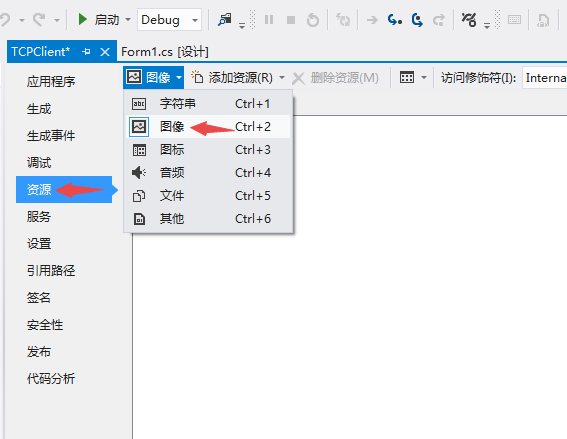

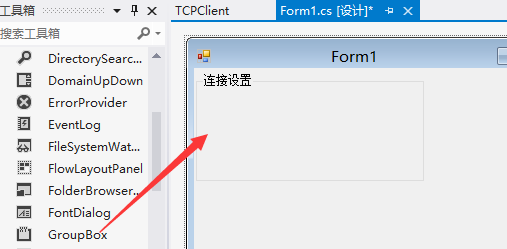
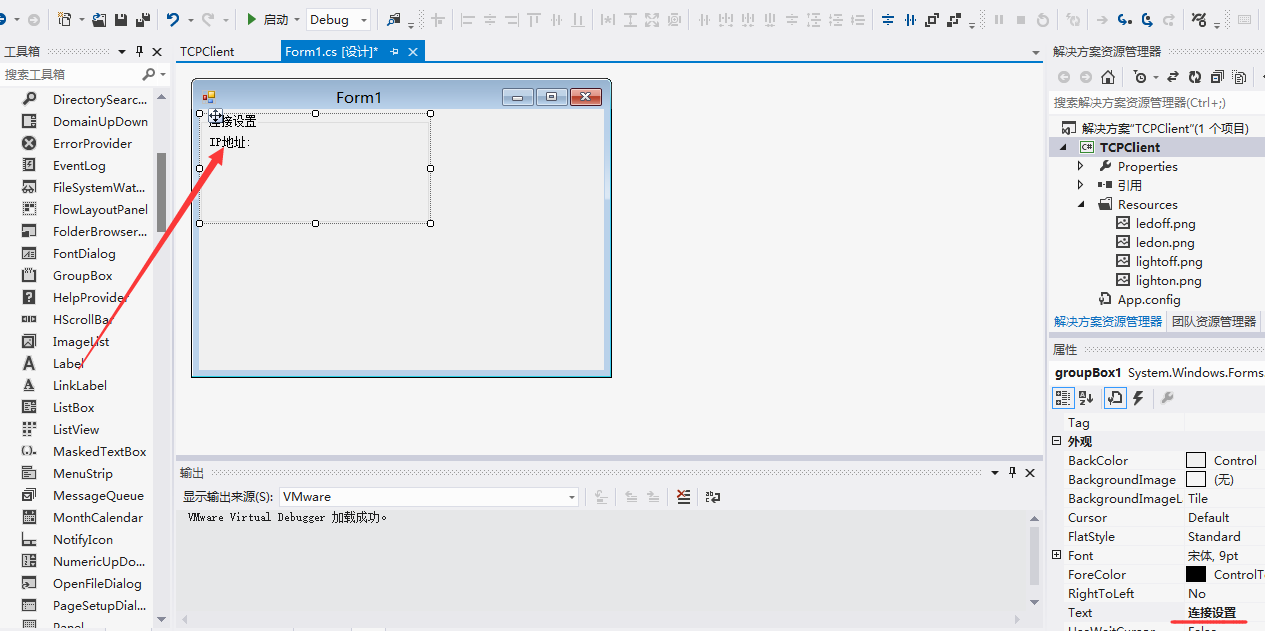
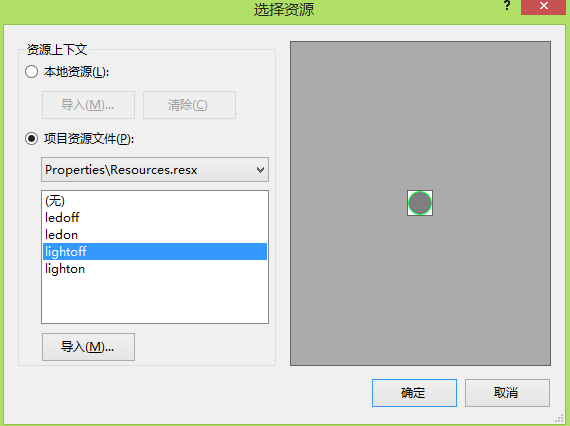
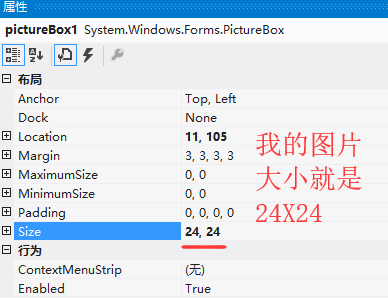
调整的好看一点
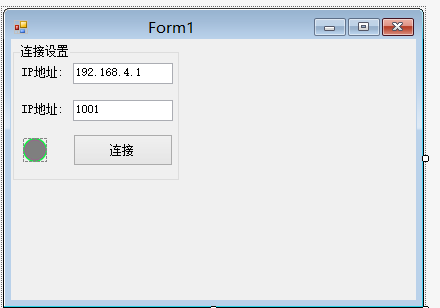
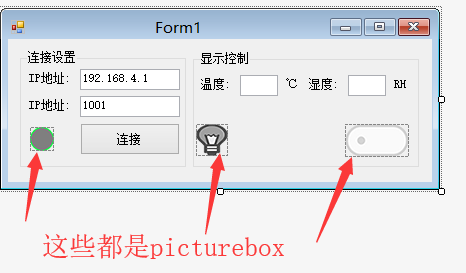
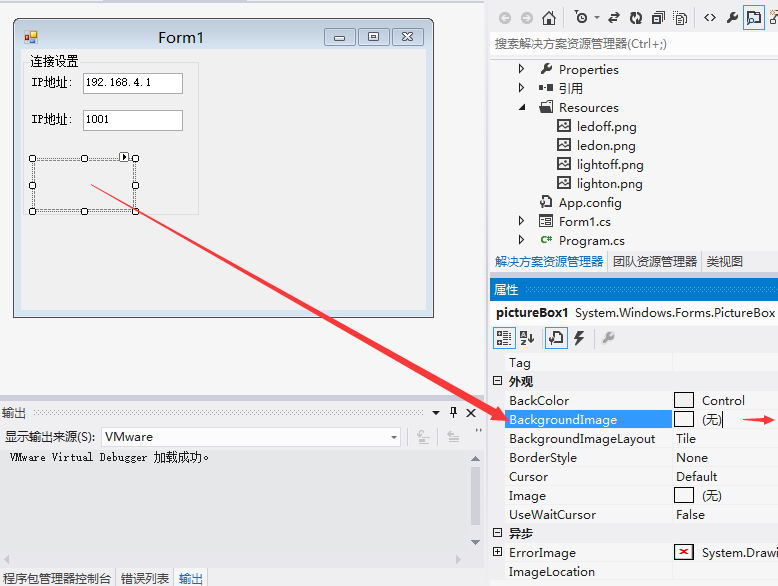
现在设置,切换图片
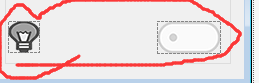
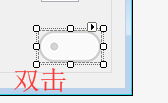
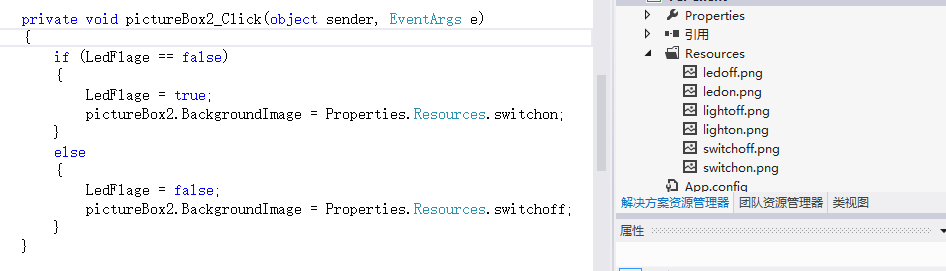
其实呢导入图片应该先建一个资源文件更合理,后期再说
现在是让按钮状态改变了
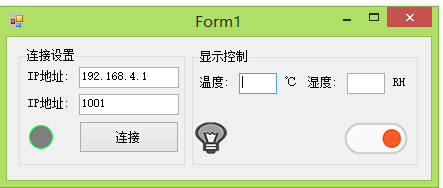
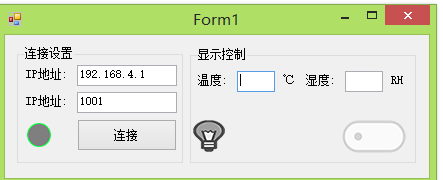
也修改一下灯的
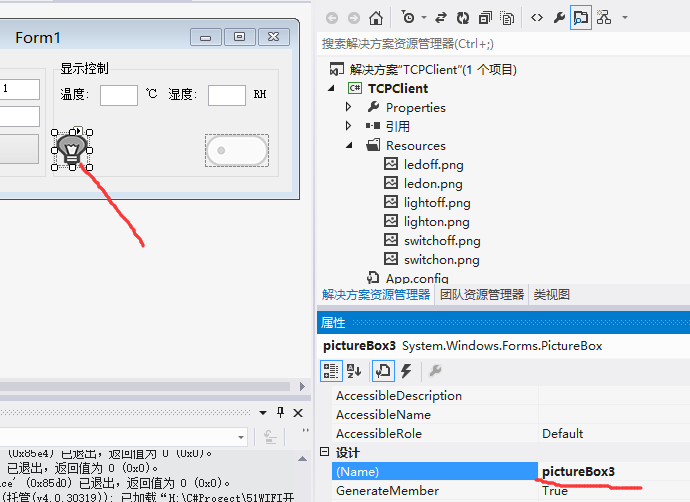
private void pictureBox2_Click(object sender, EventArgs e)

        {

            if (LedFlage == false)

            {

                LedFlage = true;

                pictureBox2.BackgroundImage = Properties.Resources.switchon;

                pictureBox3.BackgroundImage = Properties.Resources.ledon;

            }

            else

            {

                LedFlage = false;

                pictureBox2.BackgroundImage = Properties.Resources.switchoff;

                pictureBox3.BackgroundImage = Properties.Resources.ledoff;

            }

        }
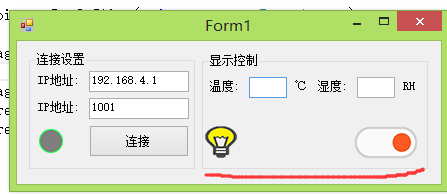
现在做连接服务器
先说一下很多初学者会遇到的问题
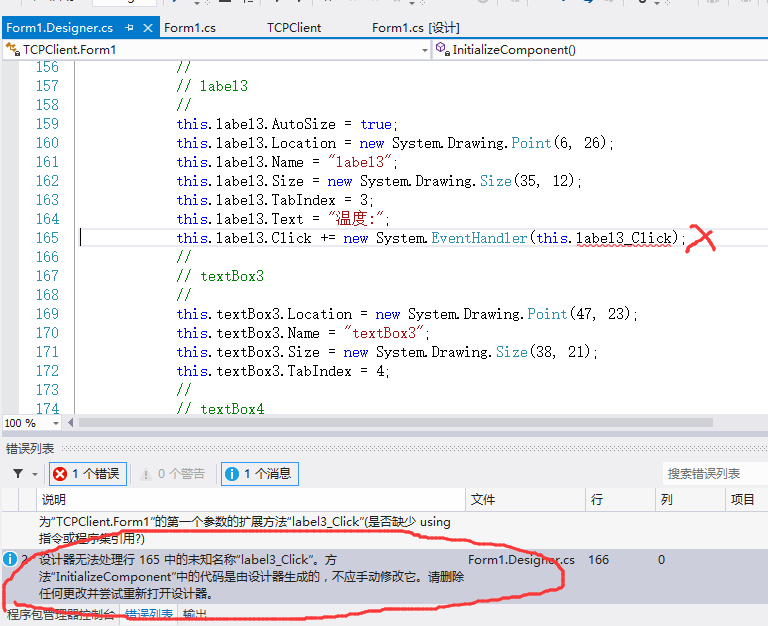
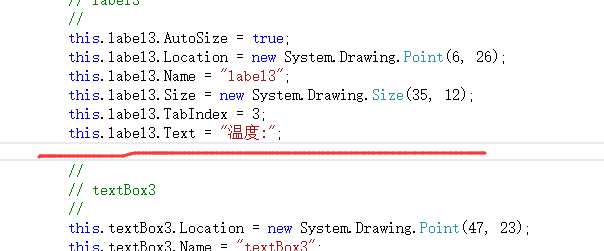
这种情况是你添加了控件的事件函数,然后你又删除了,,,因为我也是经常删.................
我刚才在考虑要不要用委托和回调.....后来想了想这篇就不用了,
大家记得自己试一下这个(反正给大家说了,下次自己肯定用委托和回调写,记住不要偷懒,如果你偷懒了,后期的文章你就会无从下手,因为你连基础的都不知道)
http://www.cnblogs.com/yangfengwu/p/5761841.html
因为和android 一样只有主线程才允许操作控件,咱们就

现在做连接服务器和断开连接
先在电脑上测试
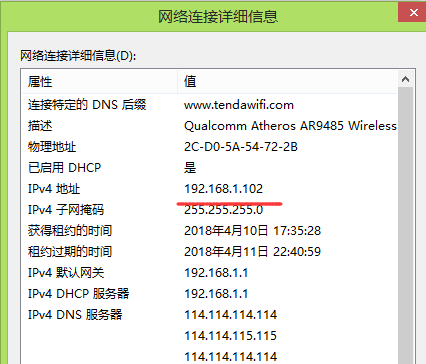
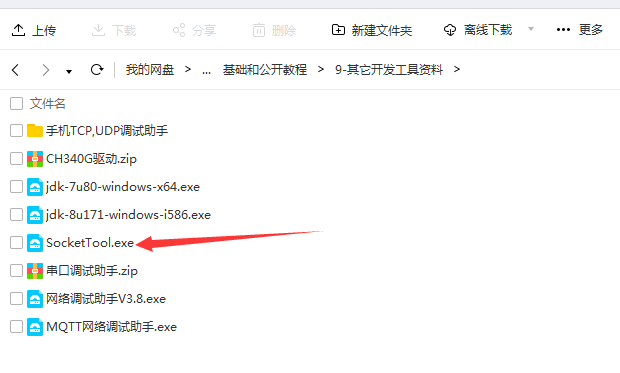
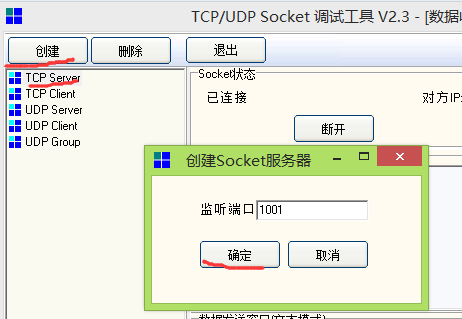

先给现在的程序
using System;

using System.Collections.Generic;

using System.ComponentModel;

using System.Data;

using System.Drawing;

using System.Linq;

using System.Net;

using System.Net.Sockets;

using System.Text;

using System.Threading;

using System.Threading.Tasks;

using System.Windows.Forms;

namespace TCPClient

{

    public partial class Form1 : Form

    {

        bool LedFlage = false;

        bool ConncetFlage = false;

        private Thread ThreadConnectService;//连接服务器线程

        private IPAddress ipAddress;//ip地址

        int Port = ;//端口号

        private TcpClient myTcpClient = null;// TcpClient

        private NetworkStream networkstrem = null;//网络数据流

        public Form1()

        {

            InitializeComponent();

        }

        private void Form1_Load(object sender, EventArgs e)

        {

            System.Windows.Forms.Control.CheckForIllegalCrossThreadCalls = false;//加了这一句

        }

        /*连接按钮点击事件*/

        private void button1_Click(object sender, EventArgs e)

        {

            if (ConncetFlage == false)

            {

                try{ThreadConnectService.Abort();}//先清除一下以前的

                catch (Exception){}

                ThreadConnectService = new Thread(ConncetService);//把连接服务器的函数加入任务

                ThreadConnectService.Start();//启动任务

            }

            else

            {

                ConncetFlage = false;

                button1.Text = "连接";

                pictureBox1.BackgroundImage = Properties.Resources.lightoff;

                try{  myTcpClient.Close(); }catch (Exception){}//关闭通道

            }

        }

        /*LED灯控制按钮(图片)*/

        private void pictureBox2_Click(object sender, EventArgs e)

        {

            if (LedFlage == false)

            {

                LedFlage = true;

                pictureBox2.BackgroundImage = Properties.Resources.switchon;

                pictureBox3.BackgroundImage = Properties.Resources.ledon;

            }

            else

            {

                LedFlage = false;

                pictureBox2.BackgroundImage = Properties.Resources.switchoff;

                pictureBox3.BackgroundImage = Properties.Resources.ledoff;

            }

        }

        /*连接服务器函数*/

        private void ConncetService()

        {

            ipAddress = IPAddress.Parse(textBox1.Text);//获取IP地址

            Port = Convert.ToInt32(textBox2.Text);     //获取端口号

            try

            {

                myTcpClient = new TcpClient(); //实例化myTcpClient

                myTcpClient.Connect(ipAddress, Port);//连接服务器

                ConncetFlage = true;

                button1.Text = "断开";

                pictureBox1.BackgroundImage = Properties.Resources.lighton;

            }

            catch (Exception)

            {

                ConncetFlage = false;

                button1.Text = "连接";

                pictureBox1.BackgroundImage = Properties.Resources.lightoff;

                try { myTcpClient.Close(); }

                catch (Exception) { }

            }

        }

    }

}
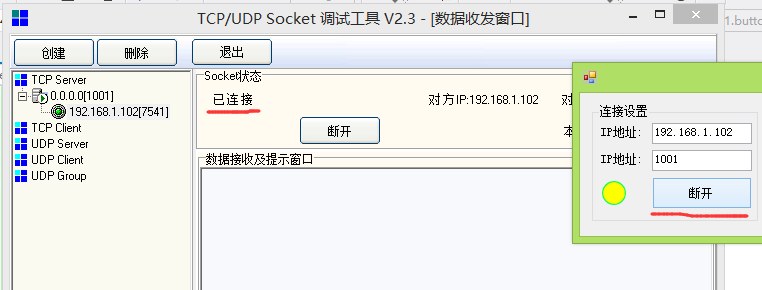
断开
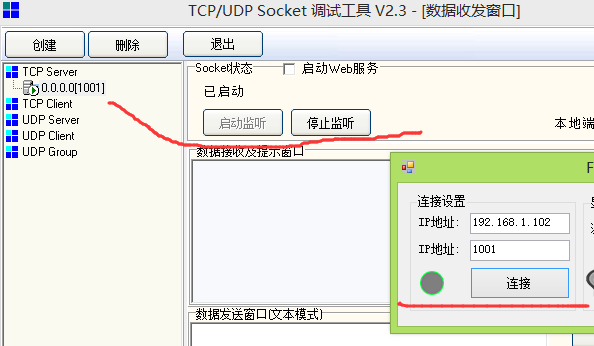
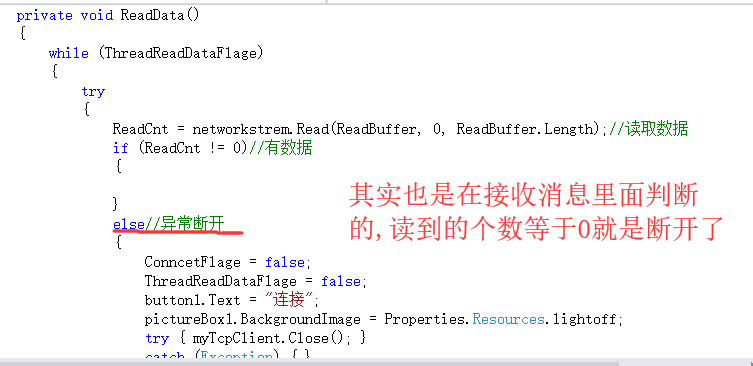
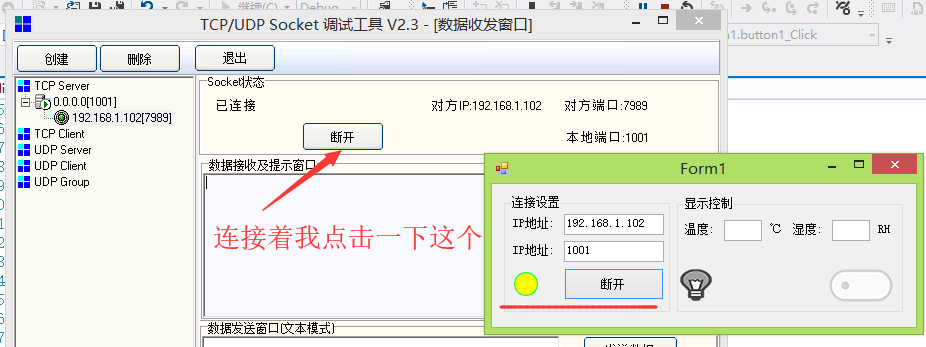
忘了加一个功能,,,判断服务器是不是断开了
using System;

using System.Collections.Generic;

using System.ComponentModel;

using System.Data;

using System.Drawing;

using System.Linq;

using System.Net;

using System.Net.Sockets;

using System.Text;

using System.Threading;

using System.Threading.Tasks;

using System.Windows.Forms;

namespace TCPClient

{

    public partial class Form1 : Form

    {

        bool LedFlage = false;

        bool ConncetFlage = false;

        private Thread ThreadConnectService;//连接服务器线程

        private IPAddress ipAddress;//ip地址

        int Port = ;//端口号

        private TcpClient myTcpClient = null;// TcpClient

        private NetworkStream networkstrem = null;//网络数据流

        private Thread ThreadReadData;//接收消息线程

        private bool ThreadReadDataFlage = false;//接收数据任务循环用

        byte[] ReadBuffer = new byte[];//设置缓冲区1024个字节

        int ReadCnt = ;//获取接收到了几个字节

        public Form1()

        {

            InitializeComponent();

        }

        private void Form1_Load(object sender, EventArgs e)

        {

            System.Windows.Forms.Control.CheckForIllegalCrossThreadCalls = false;//加了这一句

        }

        /*连接按钮点击事件*/

        private void button1_Click(object sender, EventArgs e)

        {

            if (ConncetFlage == false)

            {

                try{ThreadConnectService.Abort();}//先清除一下以前的

                catch (Exception){}

                ThreadConnectService = new Thread(ConncetService);//把连接服务器的函数加入任务

                ThreadConnectService.Start();//启动任务

            }

            else

            {

                ConncetFlage = false;

                ThreadReadDataFlage = false;

                button1.Text = "连接";

                pictureBox1.BackgroundImage = Properties.Resources.lightoff;

                try{  myTcpClient.Close(); }catch (Exception){}//关闭通道

            }

        }

        /*LED灯控制按钮(图片)*/

        private void pictureBox2_Click(object sender, EventArgs e)

        {

            if (LedFlage == false)

            {

                LedFlage = true;

                pictureBox2.BackgroundImage = Properties.Resources.switchon;

                pictureBox3.BackgroundImage = Properties.Resources.ledon;

            }

            else

            {

                LedFlage = false;

                pictureBox2.BackgroundImage = Properties.Resources.switchoff;

                pictureBox3.BackgroundImage = Properties.Resources.ledoff;

            }

        }

        /*连接服务器函数*/

        private void ConncetService()

        {

            ipAddress = IPAddress.Parse(textBox1.Text);//获取IP地址

            Port = Convert.ToInt32(textBox2.Text);     //获取端口号

            try

            {

                myTcpClient = new TcpClient(); //实例化myTcpClient

                myTcpClient.Connect(ipAddress, Port);//连接服务器

                ConncetFlage = true;

                button1.Text = "断开";

                pictureBox1.BackgroundImage = Properties.Resources.lighton;

                networkstrem = myTcpClient.GetStream();//获取数据流

                ThreadReadDataFlage = true;

                try { ThreadReadData.Abort(); }//先清除一下以前的

                catch (Exception) { }

                ThreadReadData = new Thread(ReadData);//把接收数据的函数加入任务

                ThreadReadData.Start();

            }

            catch (Exception)

            {

                ConncetFlage = false;

                ThreadReadDataFlage = false;

                button1.Text = "连接";

                pictureBox1.BackgroundImage = Properties.Resources.lightoff;

                try { myTcpClient.Close(); }

                catch (Exception) { }

            }

        }

        /*接收消息函数*/

        private void ReadData()

        {

            while (ThreadReadDataFlage)

            {

                try

                {

                    ReadCnt = networkstrem.Read(ReadBuffer, , ReadBuffer.Length);//读取数据

                    if (ReadCnt != )//有数据

                    {

                    }

                    else//异常断开

                    {

                        ConncetFlage = false;

                        ThreadReadDataFlage = false;

                        button1.Text = "连接";

                        pictureBox1.BackgroundImage = Properties.Resources.lightoff;

                        try { myTcpClient.Close(); }

                        catch (Exception) { }

                    }

                }

                catch (Exception)

                {

                    ThreadReadDataFlage = false;

                }

            }

        }

    }

}
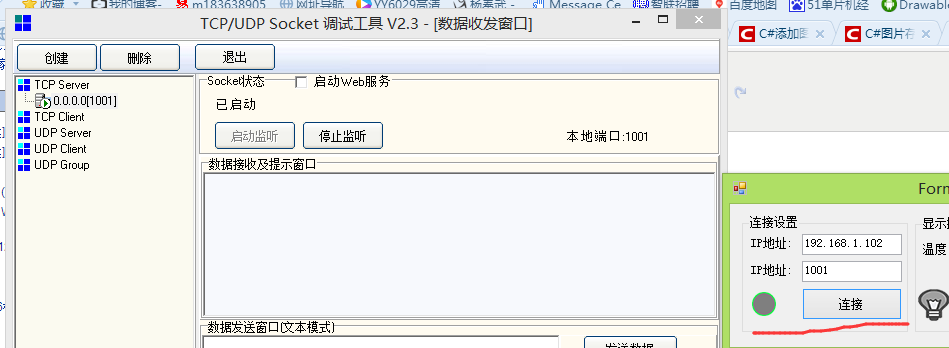
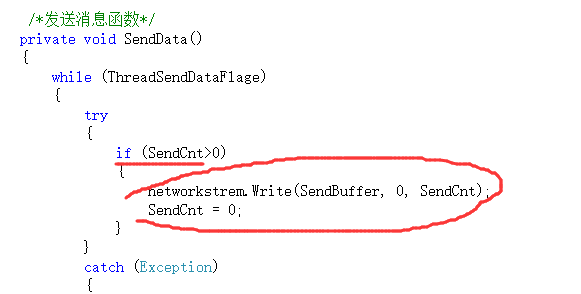
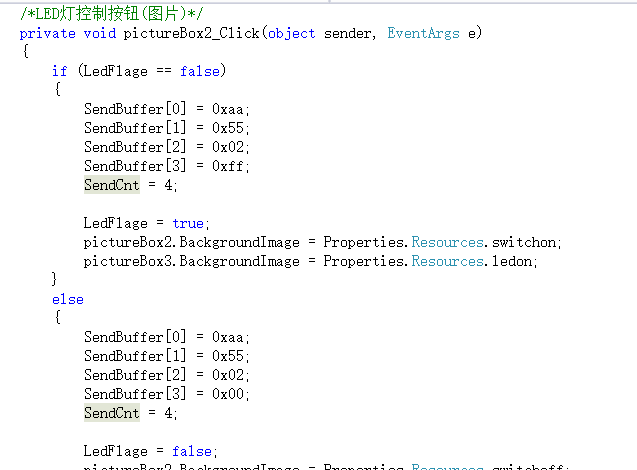
现在做数据发送部分,和APP那块几乎是一个模子刻出来的
using System;

using System.Collections.Generic;

using System.ComponentModel;

using System.Data;

using System.Drawing;

using System.Linq;

using System.Net;

using System.Net.Sockets;

using System.Text;

using System.Threading;

using System.Threading.Tasks;

using System.Windows.Forms;

namespace TCPClient

{

    public partial class Form1 : Form

    {

        bool LedFlage = false;

        bool ConncetFlage = false;

        private Thread ThreadConnectService;//连接服务器线程

        private IPAddress ipAddress;//ip地址

        int Port = ;//端口号

        private TcpClient myTcpClient = null;// TcpClient

        private NetworkStream networkstrem = null;//网络数据流

        private Thread ThreadReadData;//接收消息线程

        private bool ThreadReadDataFlage = false;//接收数据任务循环用

        private Thread ThreadSendData;//发送消息线程

        private bool ThreadSendDataFlage = false;//发送数据任务循环用

        byte[] ReadBuffer = new byte[];//设置缓冲区1024个字节

        int ReadCnt = ;//获取接收到了几个字节

        byte[] SendBuffer = new byte[];//设置发送缓冲区1024个字节

        int SendCnt = ;//发送的个数

        public Form1()

        {

            InitializeComponent();

        }

        private void Form1_Load(object sender, EventArgs e)

        {

            System.Windows.Forms.Control.CheckForIllegalCrossThreadCalls = false;//加了这一句

        }

        /*连接按钮点击事件*/

        private void button1_Click(object sender, EventArgs e)

        {

            if (ConncetFlage == false)

            {

                try{ThreadConnectService.Abort();}//先清除一下以前的

                catch (Exception){}

                ThreadConnectService = new Thread(ConncetService);//把连接服务器的函数加入任务

                ThreadConnectService.Start();//启动任务

            }

            else

            {

                ConncetFlage = false;

                ThreadReadDataFlage = false;

                ThreadSendDataFlage = false;

                button1.Text = "连接";

                pictureBox1.BackgroundImage = Properties.Resources.lightoff;

                try{  myTcpClient.Close(); }catch (Exception){}//关闭通道

            }

        }

        /*LED灯控制按钮(图片)*/

        private void pictureBox2_Click(object sender, EventArgs e)

        {

            if (LedFlage == false)

            {

                SendBuffer[] = 0xaa;

                SendBuffer[] = 0x55;

                SendBuffer[] = 0x02;

                SendBuffer[] = 0xff;

                SendCnt = ;

                LedFlage = true;

                pictureBox2.BackgroundImage = Properties.Resources.switchon;

                pictureBox3.BackgroundImage = Properties.Resources.ledon;

            }

            else

            {

                SendBuffer[] = 0xaa;

                SendBuffer[] = 0x55;

                SendBuffer[] = 0x02;

                SendBuffer[] = 0x00;

                SendCnt = ;

                LedFlage = false;

                pictureBox2.BackgroundImage = Properties.Resources.switchoff;

                pictureBox3.BackgroundImage = Properties.Resources.ledoff;

            }

        }

        /*连接服务器函数*/

        private void ConncetService()

        {

            ipAddress = IPAddress.Parse(textBox1.Text);//获取IP地址

            Port = Convert.ToInt32(textBox2.Text);     //获取端口号

            try

            {

                myTcpClient = new TcpClient(); //实例化myTcpClient

                myTcpClient.Connect(ipAddress, Port);//连接服务器

                ConncetFlage = true;

                button1.Text = "断开";

                pictureBox1.BackgroundImage = Properties.Resources.lighton;

                networkstrem = myTcpClient.GetStream();//获取数据流

                /*接收消息任务*/

                ThreadReadDataFlage = true;

                try { ThreadReadData.Abort(); }//先清除一下以前的

                catch (Exception) { }

                ThreadReadData = new Thread(ReadData);//把接收数据的函数加入任务

                ThreadReadData.Start();

                /*发送消息任务*/

                ThreadSendDataFlage = true;

                try { ThreadSendData.Abort(); }//先清除一下以前的

                catch (Exception) { }

                ThreadSendData = new Thread(SendData);

                ThreadSendData.Start();

            }

            catch (Exception)

            {

                ConncetFlage = false;

                ThreadReadDataFlage = false;

                ThreadSendDataFlage = false;

                button1.Text = "连接";

                pictureBox1.BackgroundImage = Properties.Resources.lightoff;

                try { myTcpClient.Close(); }

                catch (Exception) { }

            }

        }

        /*接收消息函数*/

        private void ReadData()

        {

            while (ThreadReadDataFlage)

            {

                try

                {

                    ReadCnt = networkstrem.Read(ReadBuffer, , ReadBuffer.Length);//读取数据

                    if (ReadCnt != )//有数据

                    {

                    }

                    else//异常断开

                    {

                        ConncetFlage = false;

                        ThreadReadDataFlage = false;

                        ThreadSendDataFlage = false;

                        button1.Text = "连接";

                        pictureBox1.BackgroundImage = Properties.Resources.lightoff;

                        try { myTcpClient.Close(); }

                        catch (Exception) { }

                    }

                }

                catch (Exception)

                {

                    ThreadReadDataFlage = false;

                }

            }

        }

         /*发送消息函数*/

        private void SendData()

        {

            while (ThreadSendDataFlage)

            {

                try

                {

                    if (SendCnt>)

                    {

                        networkstrem.Write(SendBuffer, , SendCnt);

                        SendCnt = ;

                    }

                }

                catch (Exception)

                {

                    ConncetFlage = false;

                    ThreadReadDataFlage = false;

                    ThreadSendDataFlage = false;

                    button1.Text = "连接";

                    pictureBox1.BackgroundImage = Properties.Resources.lightoff;

                    try { myTcpClient.Close(); }

                    catch (Exception) { }

                }

            }

        }

    }

}
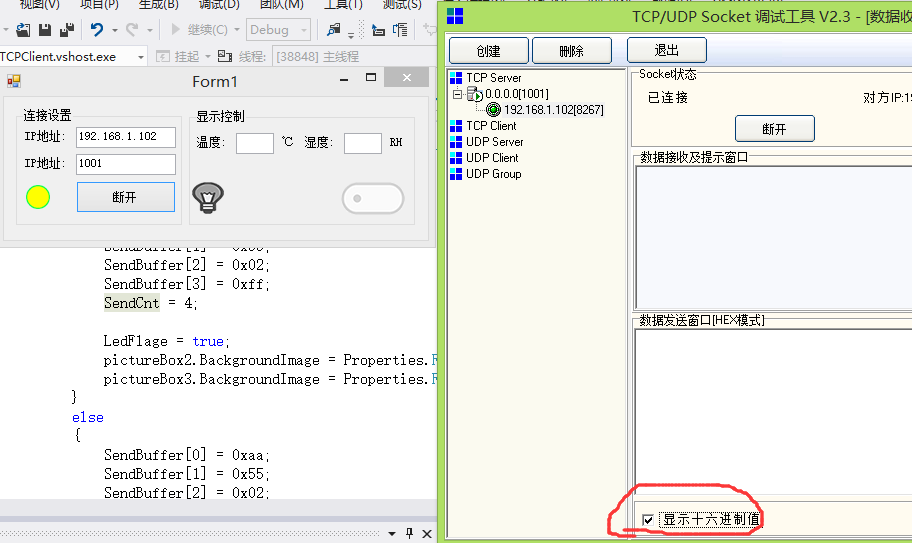
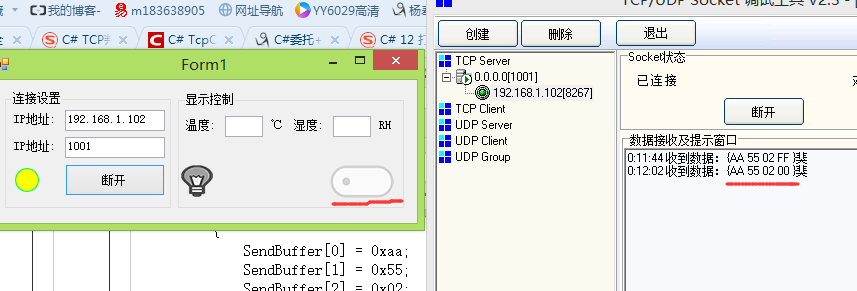
现在用调试助手试一下

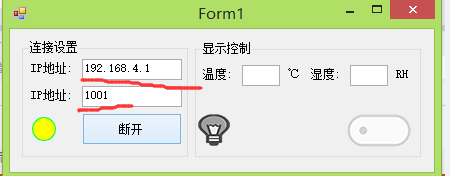
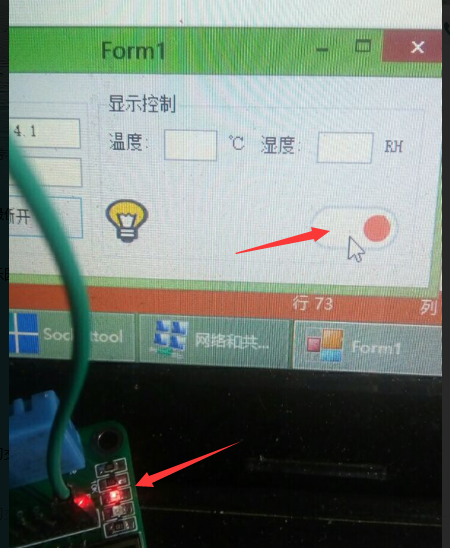
好了咱现在用8266试一试


C#的源码
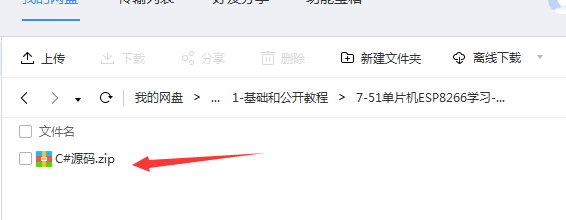
好了.....但是刚才我在软件连接的时候复位了一下芯片发现软件没有检测出来断开..现在如果服务器主动断开
可以检测的到,异常好像不可以,后期再看看....今天太晚了写的匆忙,不知道软件还有没有其它的Bug,慢慢的去发现吧...
突然有想起来单片机程序有个BUG
http://www.cnblogs.com/yangfengwu/p/8798512.html
7-51单片机ESP8266学习-AT指令(8266TCP服务器,编写自己的C#TCP客户端发信息给单片机控制小灯的亮灭)的更多相关文章
- 5-51单片机ESP8266学习-AT指令(8266TCP服务器--用手机TCP调试助手发信息给单片机控制小灯的亮灭)
http://www.cnblogs.com/yangfengwu/p/8759294.html 源码链接:https://pan.baidu.com/s/1wT8KAOIzvkOXXNpkDI7E8 ...
- 6-51单片机ESP8266学习-AT指令(8266TCP服务器--做自己的AndroidTCP客户端发信息给单片机控制小灯的亮灭)
http://www.cnblogs.com/yangfengwu/p/8776712.html 先把源码和资料链接放到这里 链接: https://pan.baidu.com/s/1jpHZjW_7 ...
- 8-51单片机ESP8266学习-AT指令(单片机采集温湿度数据通过8266发送给C#TCP客户端显示)
http://www.cnblogs.com/yangfengwu/p/8785516.html 先写单片机端的程序 先把源码和资料链接放到这里 链接: https://pan.baidu.com/s ...
- 10-51单片机ESP8266学习-AT指令(ESP8266连接路由器,建立TCP服务器,分别和C#TCP客户端和AndroidTCP客户端通信+花生壳远程通信)
http://www.cnblogs.com/yangfengwu/p/8871464.html 先把源码和资料链接放到这里 源码链接:https://pan.baidu.com/s/1wT8KAOI ...
- 1-51单片机ESP8266学习-AT指令(开发板介绍)
51单片机+ESP8266开发教程(AT指令篇) 开发板资源分布: 开发板部分原理图: 1--通信下载 2--51单片机 3--ESP8266(WIFI模块) 4--DHT11(温湿度传感器) 5-- ...
- 9-51单片机ESP8266学习-AT指令(单片机采集温湿度数据通过8266发送给AndroidTCP客户端显示)
http://www.cnblogs.com/yangfengwu/p/8798512.html 补充:今天答应了一个朋友写一下如果单片机发过的是字符串应该怎么解析,答应了今天写,哦哦哦是明天了,闲话 ...
- 2-51单片机ESP8266学习-AT指令(开发板51单片机自动冷启动下载原理)
前言:了解就行,不必深究 上一篇链接 http://www.cnblogs.com/yangfengwu/p/8720148.html 源码链接:https://pan.baidu.com/s/1wT ...
- 12,13,14节-51单片机ESP8266学习-AT指令(暂停更新)需要整理
从这一节开始,以视频加源码的形式,后期视频和程序将放在链接中 资料链接 链接: https://pan.baidu.com/s/1jpHZjW_7pQKNfN9G4B6ZjA 密码:nhn3 ...
- 3-51单片机ESP8266学习-AT指令(学会刷固件)
前言:体验一下刷固件(给单片机更新程序) 上一篇链接 http://www.cnblogs.com/yangfengwu/p/8757036.html 源码链接:https://pan.baidu. ...
随机推荐
- Vue性能优化
今天来谈一谈Vue中一些性能优化的问题,仅仅是个人使用中的一些小心得,来,今天我一句废话不多说,直接上内容好吧 1.v-if和v-show的使用, 我们都知道这两个都可以控制显隐,那我们用哪个呢,个人 ...
- ExtJS学习之MessageBox
MessageBox为ExtJS中的消息对话框,包括alert confirm prompt show四种. 1.index.html <!DOCTYPE html PUBLIC " ...
- ionic 项目中ios上遇到的软键盘输入法自动弹出的问题
一. 安装插件 cordova plugin add ionic-plugin-keyboard 二. 软键盘显示监听 window.addEventListener('native.keyboar ...
- FI / CO 配置步骤清单
一.FI配置 01. 创建公司代码:企业结构-定义-财务会计-编辑/复制/删除/检查公司代码.编辑公司OX02 02. 创建会计科目表 OB13 03. 定义会计年度变式 OB29 04. 创建信贷控 ...
- Linux 学习笔记之超详细基础linux命令 Part 2
Linux学习笔记之超详细基础linux命令 by:授客 QQ:1033553122 ---------------------------------接Part 1----------------- ...
- 前端路由简介以及vue-router实现原理
后端路由简介 路由这个概念最先是后端出现的.在以前用模板引擎开发页面时,经常会看到这样 http://www.xxx.com/login 大致流程可以看成这样: 浏览器发出请求 服务器监听到80端口( ...
- MySQL复制ERROR 1794 (HY000): Slave is not configured or failed to initialize properly.
ERROR 1794 (HY000): Slave is not configured or failed to initialize properly. You must at least set ...
- 请问在EXECUTE IMMEDIATE中如何使用带有引号
转自:http://bbs.csdn.net/topics/300191423 从第一引号向后,如果遇到第二个引号,则看这个引号后面时候有紧挨着的引号,如果有则第二个引号被转义,即该保留该引号后面紧跟 ...
- is_valid校验机制
先来归纳一下整个流程 (1)首先is_valid()起手,看seld.errors中是否值,只要有值就是flase(2)接着分析errors.里面判断_errors是都为空,如果为空返回self.fu ...
- February 5th, 2018 Week 6th Monday
The world is what it is; men who are nothing, who allow themselves to become nothing, have no place ...