iOS 动画篇 (二) CAShapeLayer与CoreAnimation结合使用
接上一篇博客 iOS 动画篇(一) Core Animation
CAShapeLayer是CALayer的一个子类,使用这个类能够很轻易实现曲线的动画。
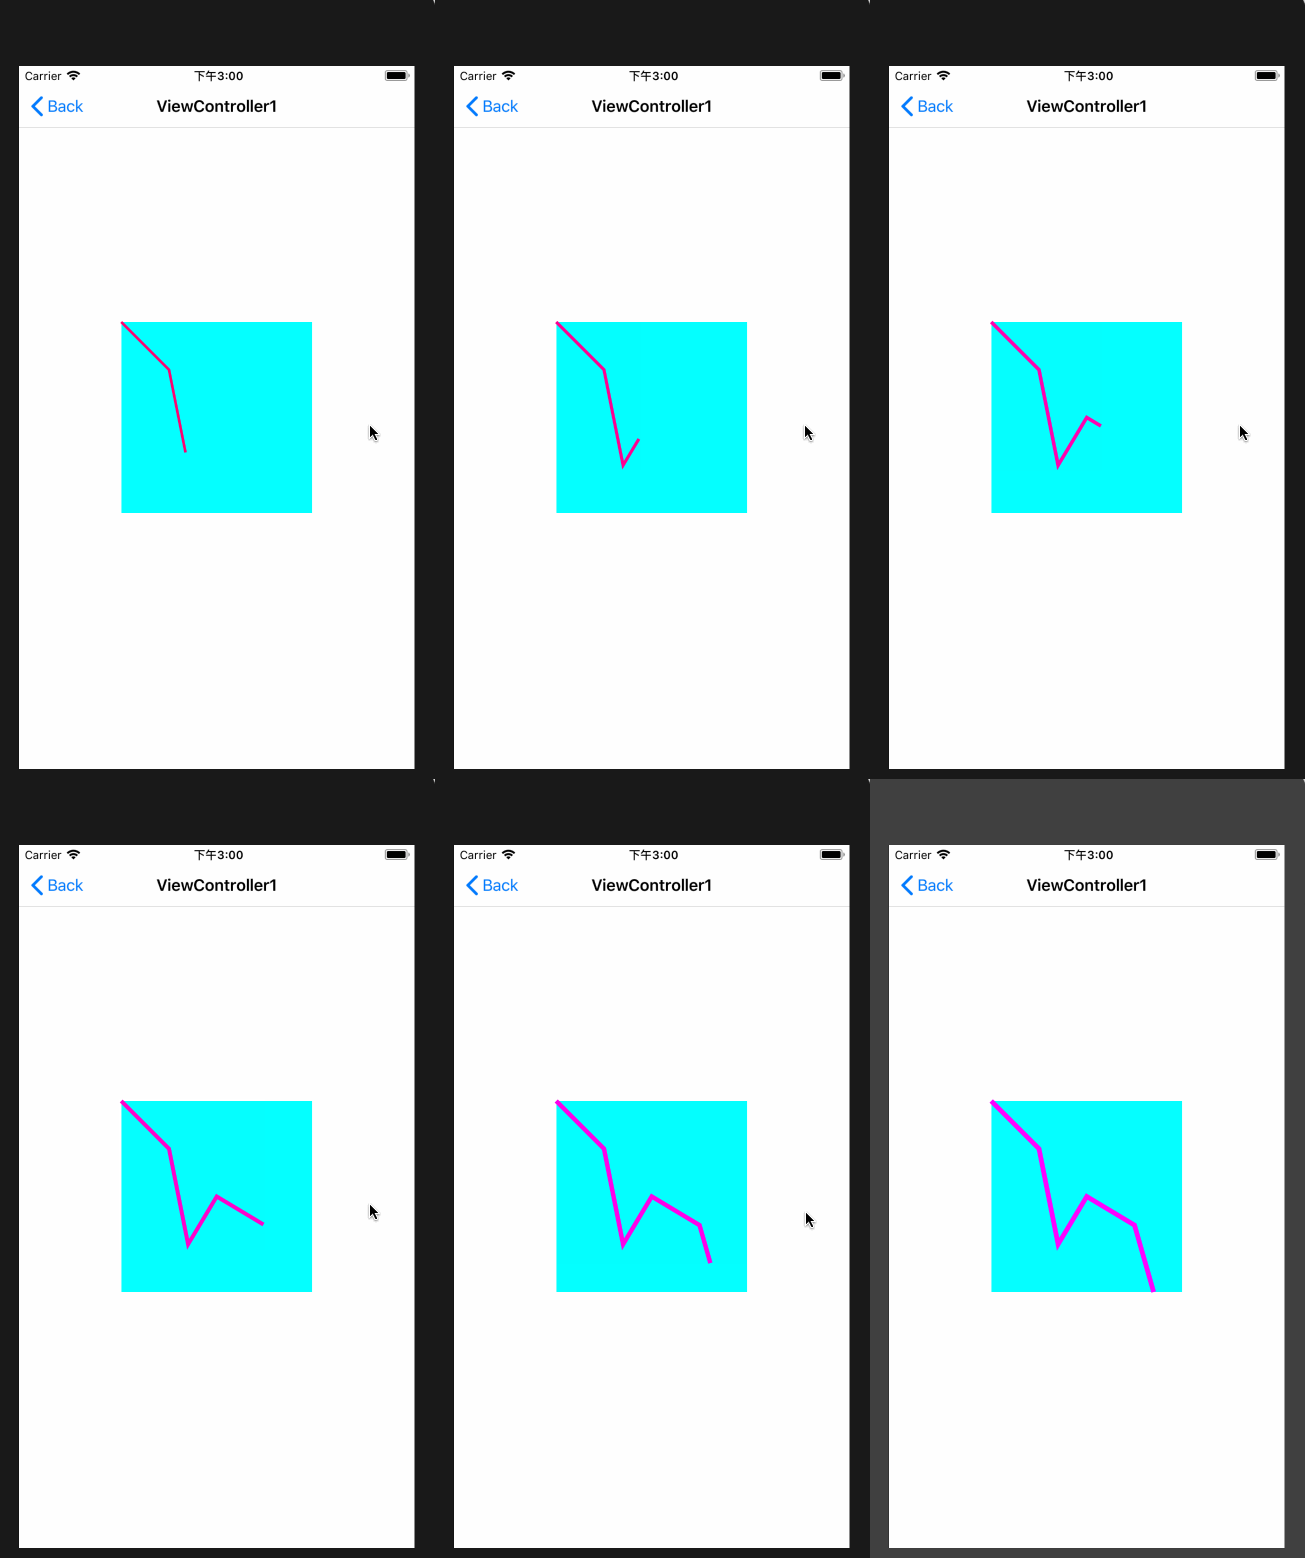
先来一个折线动画效果:

示例代码:
//1.生成path

    UIBezierPath *path = [UIBezierPath bezierPath];

    [path moveToPoint:CGPointMake(, )];

    [path addLineToPoint:CGPointMake(, )];

    [path addLineToPoint:CGPointMake(, )];

    [path addLineToPoint:CGPointMake(, )];

    [path addLineToPoint:CGPointMake(, )];

    [path addLineToPoint:CGPointMake(, )];

    self.shapeLayer.path = path.CGPath;

    //设置animation

    CABasicAnimation *strokeAnimation = [CABasicAnimation animationWithKeyPath:@"strokeEnd"];

    strokeAnimation.fromValue = @;

    strokeAnimation.toValue = @;

    strokeAnimation.duration = .f;

    CABasicAnimation *lineWidthAnimation = [CABasicAnimation animationWithKeyPath:@"lineWidth"];

    lineWidthAnimation.fromValue = @;

    lineWidthAnimation.toValue = @;

    lineWidthAnimation.duration = .f;

    CABasicAnimation *strokeColorAnimation = [CABasicAnimation animationWithKeyPath:@"strokeColor"];

    strokeColorAnimation.fromValue = (id)([UIColor redColor].CGColor);

    strokeColorAnimation.toValue = (id)([UIColor magentaColor].CGColor);

    strokeColorAnimation.duration = .f;

    CAAnimationGroup *group = [CAAnimationGroup animation];

    group.animations = @[strokeAnimation, lineWidthAnimation, strokeColorAnimation];

    group.duration = .f;

    group.fillMode = kCAFillModeForwards;

    group.removedOnCompletion = NO;

    [self.shapeLayer addAnimation:group forKey:@"groupAnimation"];
现在介绍CAShapeLayer,CAShapeLayer几乎所有的属性都可以用来做动画,比如说path、strokeEnd、strokeStart、lineWidth等等,利用这些属性可以实现多种曲线动画。
接下来,介绍一个CAShapeLayer与贝塞尔曲线结合的曲线动画,效果图:

代码:
//二次贝塞尔曲线

    UIBezierPath *path = [UIBezierPath bezierPath];

    [path moveToPoint:CGPointMake(, self.shapeLayer.bounds.size.height / )];

    [path addCurveToPoint:CGPointMake(self.shapeLayer.bounds.size.width, ) controlPoint1:CGPointMake(, ) controlPoint2:CGPointMake(, )];

    self.shapeLayer.path = path.CGPath;

    //绘制动画

    CABasicAnimation *strokeEndAnimation = [CABasicAnimation animationWithKeyPath:@"strokeEnd"];

    strokeEndAnimation.fromValue = @0.5;

    strokeEndAnimation.toValue = @;

    strokeEndAnimation.duration = .f;

    [self.shapeLayer addAnimation:strokeEndAnimation forKey:@"strokeAnimation"];

    CABasicAnimation *strokeStartAnimation = [CABasicAnimation animationWithKeyPath:@"strokeStart"];

    strokeStartAnimation.fromValue = @0.5;

    strokeStartAnimation.toValue = @;

    strokeStartAnimation.duration = .f;

    [self.shapeLayer addAnimation:strokeStartAnimation forKey:@"strokeStartAnimation"];
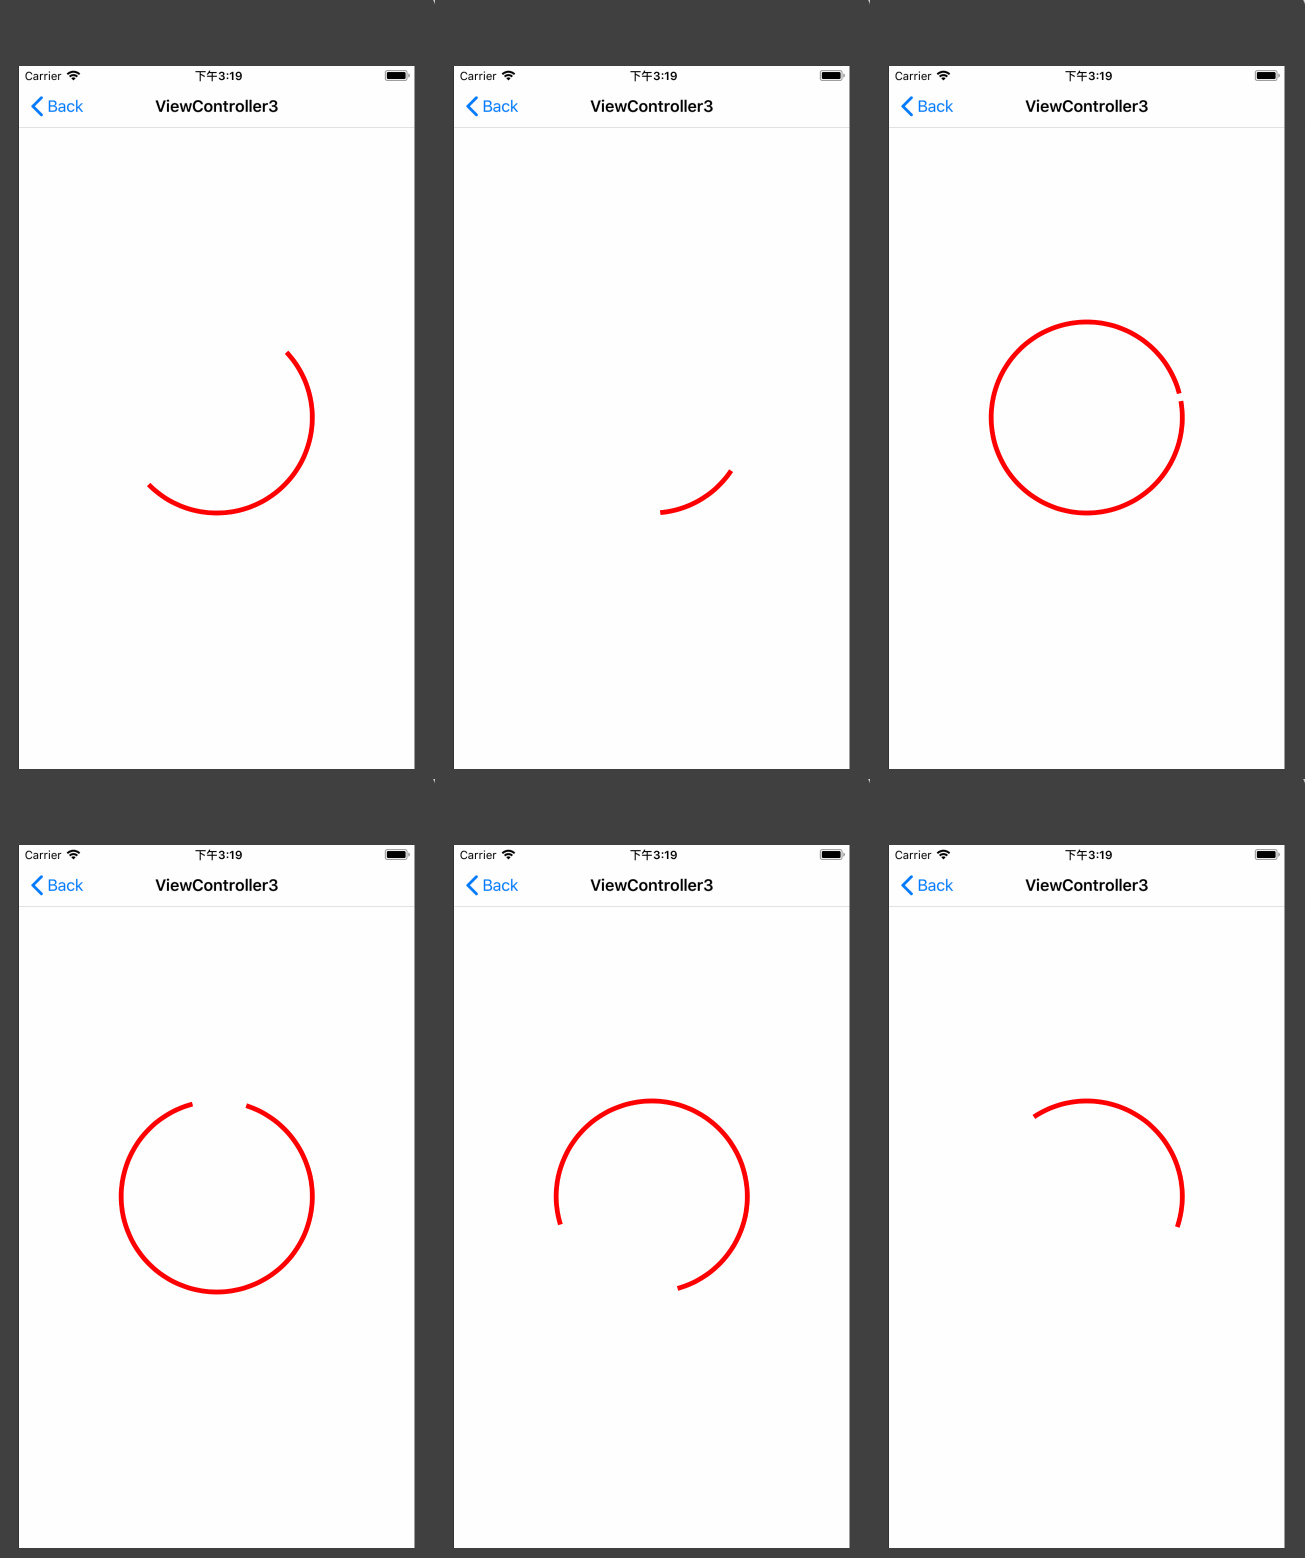
再来一个看着酷一点的loading动画,效果:

代码如下:
self.shapeLayer.backgroundColor = [UIColor clearColor].CGColor;

    self.shapeLayer.strokeColor = [UIColor redColor].CGColor;

    self.shapeLayer.fillColor = [UIColor clearColor].CGColor;

    self.shapeLayer.lineWidth = .f;

    UIBezierPath *storkePath = [UIBezierPath bezierPathWithOvalInRect:self.shapeLayer.bounds];

    self.shapeLayer.path = storkePath.CGPath;

    self.shapeLayer.strokeStart = ;

    self.shapeLayer.strokeEnd = 0.1;

    //旋转动画

    CABasicAnimation *rotateAnimaiton = [CABasicAnimation animationWithKeyPath:@"transform.rotation.z"];

    rotateAnimaiton.duration = .f;

    rotateAnimaiton.repeatCount = CGFLOAT_MAX;

    rotateAnimaiton.removedOnCompletion = NO;

    rotateAnimaiton.fillMode = kCAFillModeForwards;

    rotateAnimaiton.toValue = @(M_PI * );

    //stroke动画

    CABasicAnimation *storkeAnimation = [CABasicAnimation animationWithKeyPath:@"strokeEnd"];

    storkeAnimation.duration = .f;

    storkeAnimation.repeatCount = CGFLOAT_MAX;

    storkeAnimation.fillMode =  kCAFillModeForwards;

    storkeAnimation.removedOnCompletion = NO;

    storkeAnimation.toValue = @();

    CAAnimationGroup *animationGroup = [CAAnimationGroup animation];

    animationGroup.duration = .f;

    animationGroup.repeatCount =CGFLOAT_MAX;

    animationGroup.fillMode = kCAFillModeForwards;

    animationGroup.removedOnCompletion = NO;

    animationGroup.animations = @[rotateAnimaiton, storkeAnimation];

    animationGroup.timingFunction = [CAMediaTimingFunction functionWithName:kCAMediaTimingFunctionDefault];

    [self.shapeLayer addAnimation:animationGroup forKey:@"indicatorAnimation"];
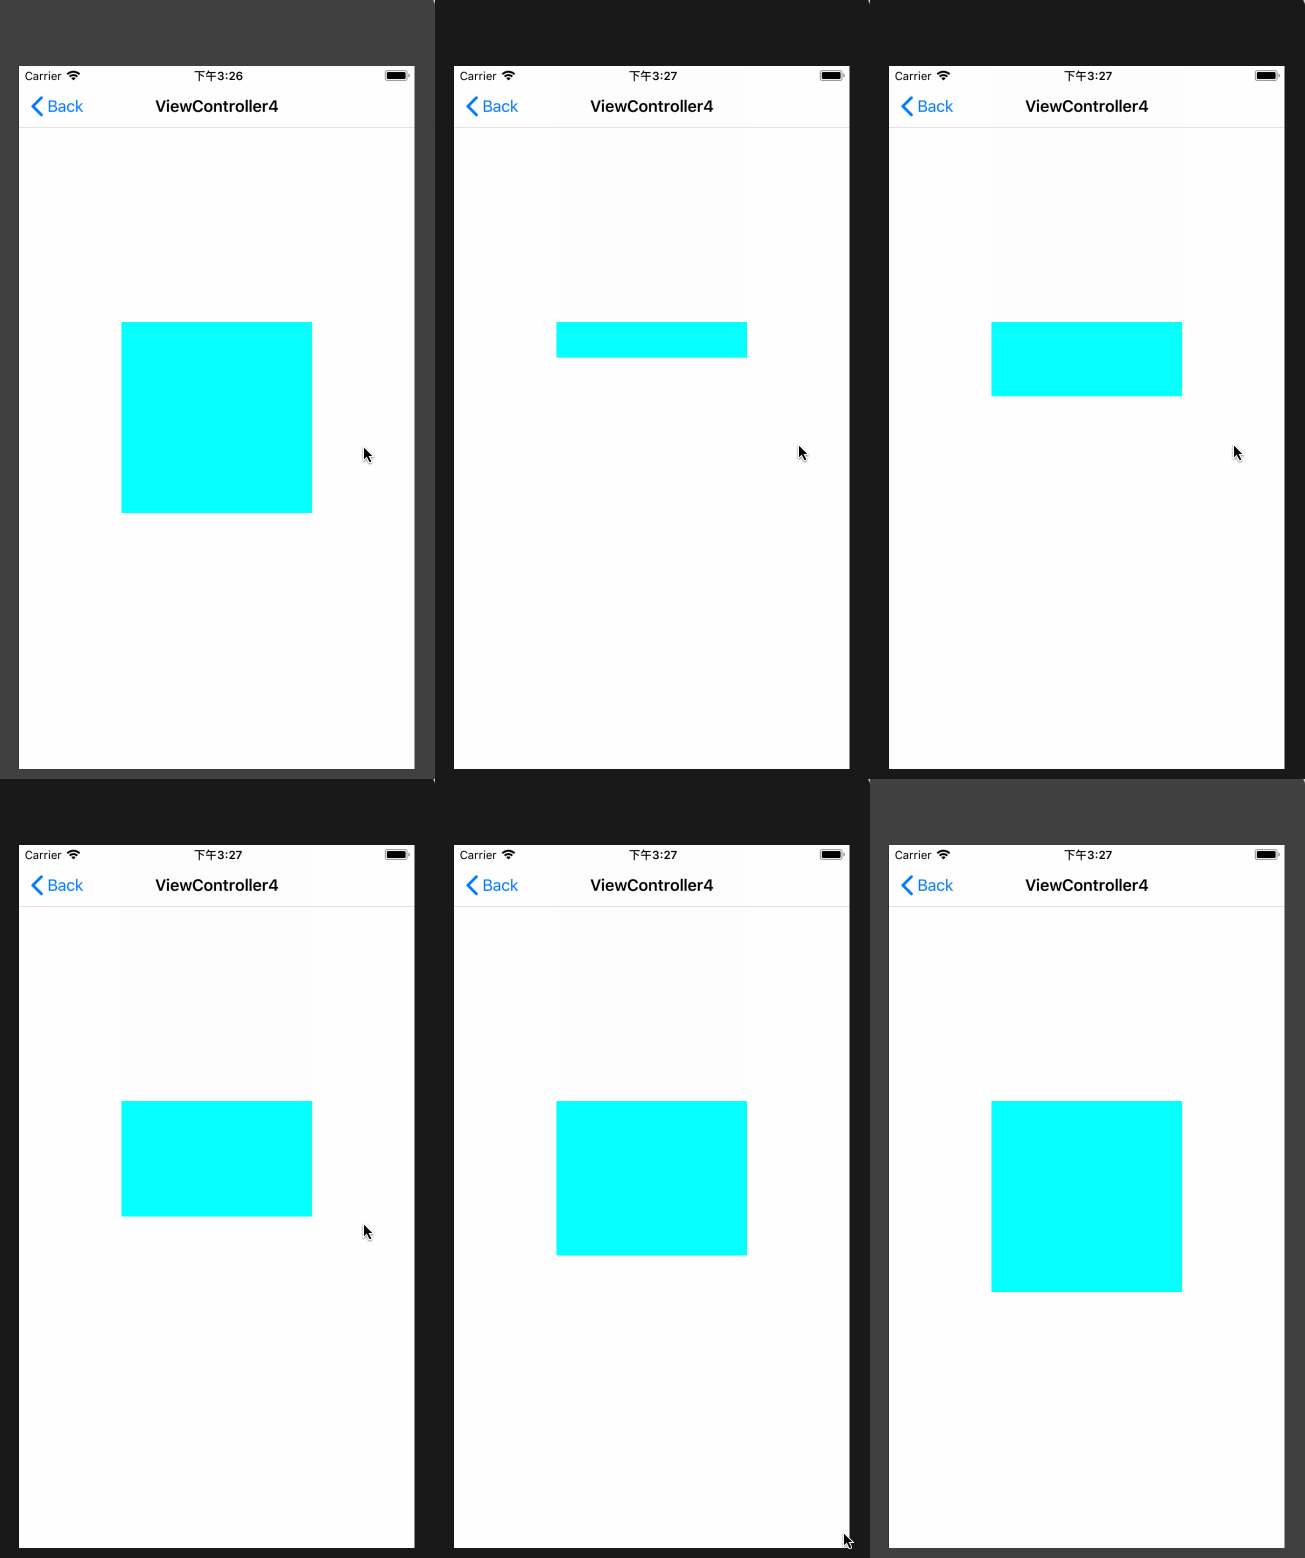
现在我们来看一个CAShapeLayer与mask结合的动画

代码:
CAShapeLayer *shapeLayer = [CAShapeLayer layer];

    self.shapeLayer.mask = shapeLayer;

    UIBezierPath *fromPath = [UIBezierPath bezierPathWithRect:CGRectMake(, , , )];

    UIBezierPath *toPath = [UIBezierPath bezierPathWithRect:CGRectMake(, , , )];

    shapeLayer.path = fromPath.CGPath;

    CABasicAnimation *animation = [CABasicAnimation animationWithKeyPath:@"path"];

    animation.fromValue = (id)fromPath.CGPath;

    animation.toValue = (id)toPath.CGPath;

    animation.duration = .f;

    animation.removedOnCompletion = NO;

    animation.fillMode = kCAFillModeForwards;

    [shapeLayer addAnimation:animation forKey:@"animation"];
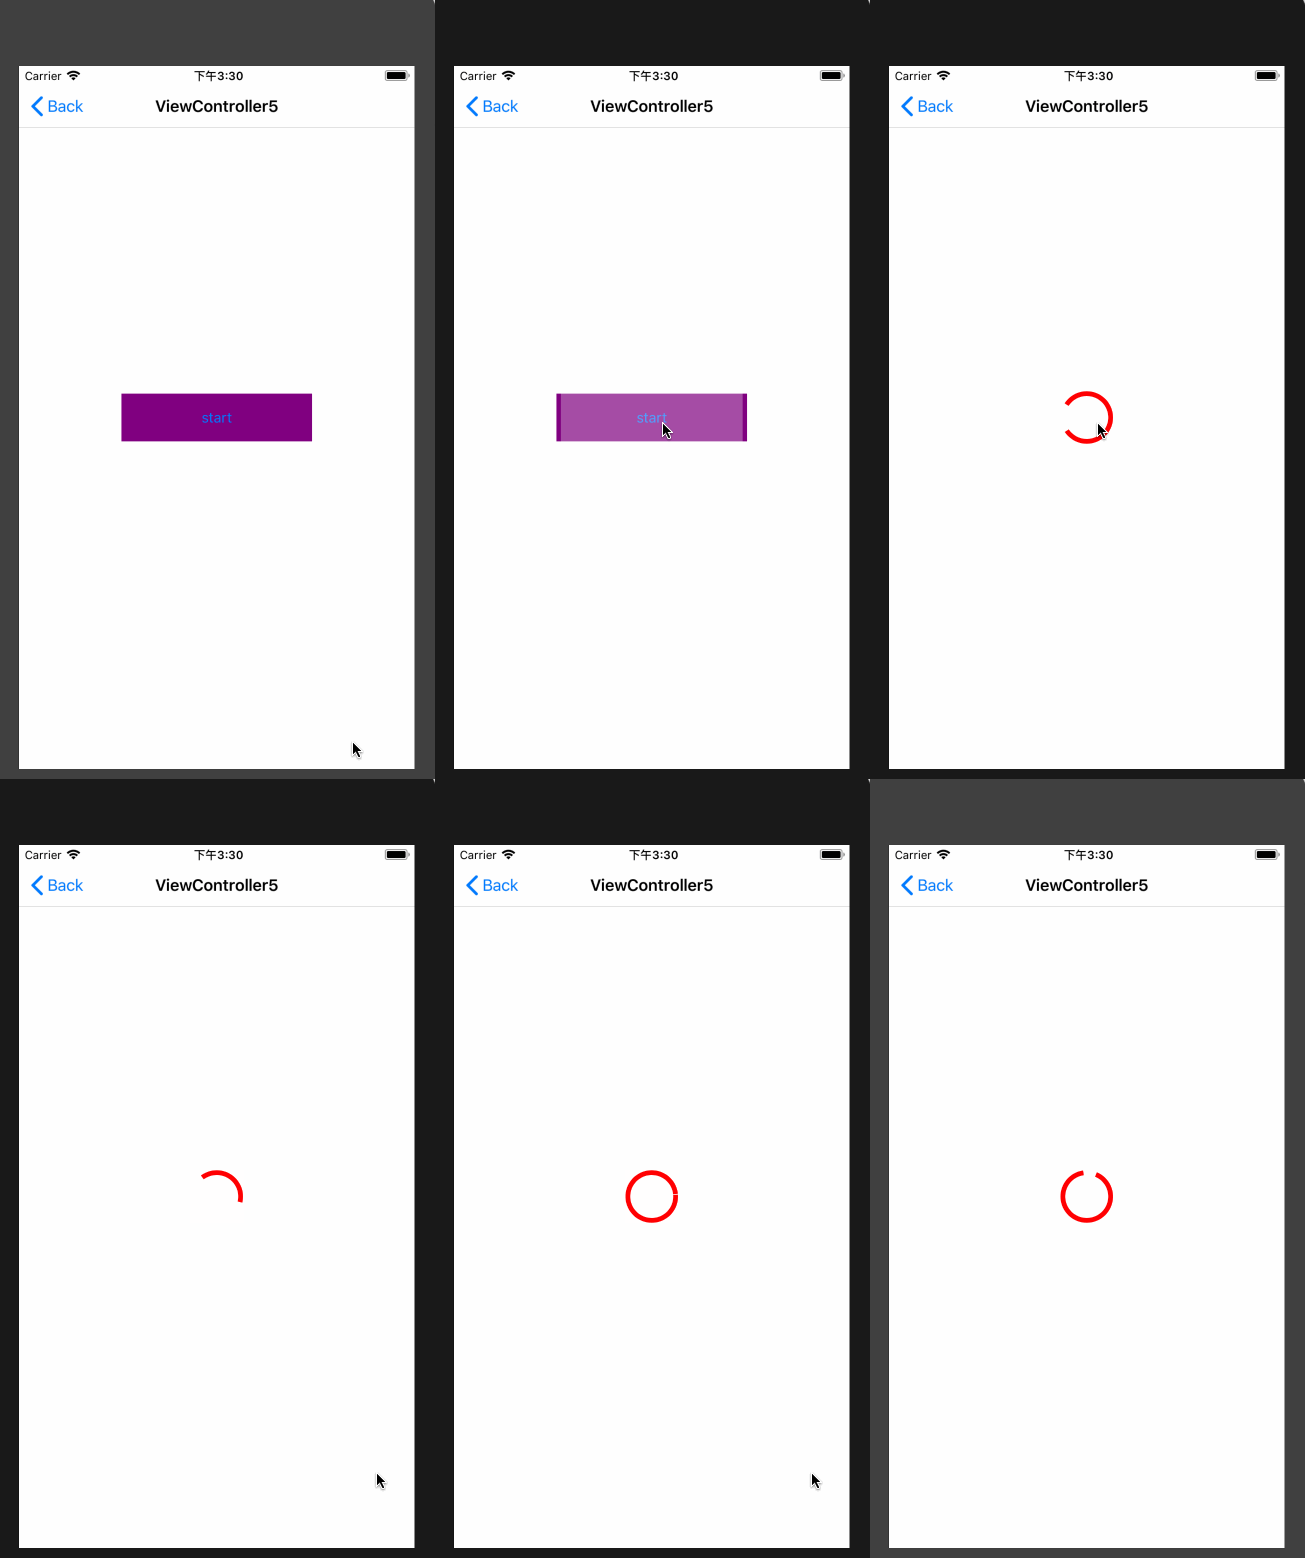
最后再介绍一个登录动画:

分析:这个登录动画一共分为三步
1. 在button上添加一个shapeLayer,用path属性实现layer的展开动画
2. 在展开动画结束后,为button设置一个shapeLayer的mask,利用layer的path和opacity属性实现收起按钮动画
3. 添加一个loading动画到view上
详情见代码:
- (void)viewDidLoad {

    [super viewDidLoad];

    NSLog(@"一个复杂一点的登录动画");

    [self.shapeLayer removeFromSuperlayer];

    UIButton *startButton = ({

        UIButton *btn = [UIButton buttonWithType:UIButtonTypeSystem];

        btn.backgroundColor = [UIColor purpleColor];

        [btn setTitle:@"start" forState:UIControlStateNormal];

        btn.frame = (CGRect){{, }, {, }};

        btn.center = self.view.center;

        [btn addTarget:self action:@selector(startAction:) forControlEvents:UIControlEventTouchUpInside];

        btn;

    });

    [self.view addSubview:startButton];

    self.startButton = startButton;

}

- (IBAction)startAction:(UIButton *)sender {

    [self addMaskAnimation];

}

- (void)addMaskAnimation

{

    CAShapeLayer *shapeLayer = [CAShapeLayer new];

    shapeLayer.frame = self.startButton.bounds;

    shapeLayer.fillColor = [UIColor whiteColor].CGColor;

    shapeLayer.strokeColor = [UIColor whiteColor].CGColor;

    shapeLayer.opacity = .3f;

    shapeLayer.path = [UIBezierPath bezierPathWithRect:CGRectMake(self.startButton.bounds.size.width / , , , self.startButton.bounds.size.height)].CGPath;//不初始化则无动画效果

    [self.startButton.layer addSublayer:shapeLayer];

    CABasicAnimation *animation = [CABasicAnimation animationWithKeyPath:@"path"];

    animation.duration = 0.5f;

    animation.toValue = (__bridge id)[UIBezierPath bezierPathWithRect:self.startButton.bounds].CGPath;

    animation.fillMode = kCAFillModeForwards;

    animation.removedOnCompletion = NO;

    [shapeLayer addAnimation:animation forKey:@"shapeAnimation"];

    dispatch_after(dispatch_time(DISPATCH_TIME_NOW, (int64_t)(0.5f * NSEC_PER_SEC)), dispatch_get_main_queue(), ^{

        [self addPackupAnimation];

    });

}

- (void)addPackupAnimation

{

    CAShapeLayer *maskLayer = [CAShapeLayer layer];

    maskLayer.frame = self.startButton.bounds;

    self.startButton.layer.mask = maskLayer;

    //path动画

    CABasicAnimation *pathAnimation = [CABasicAnimation animationWithKeyPath:@"path"];

    pathAnimation.duration = 0.3f;

    pathAnimation.removedOnCompletion = NO;

    pathAnimation.toValue = (__bridge id)[UIBezierPath bezierPathWithArcCenter:CGPointMake(self.startButton.bounds.size.width / , self.startButton.bounds.size.height / ) radius: startAngle: endAngle:M_PI *  clockwise:YES].CGPath;

    pathAnimation.fromValue = (__bridge id)[UIBezierPath bezierPathWithArcCenter:CGPointMake(self.startButton.bounds.size.width / , self.startButton.bounds.size.height / ) radius:self.startButton.bounds.size.width /  startAngle: endAngle:M_PI *  clockwise:YES].CGPath;

    pathAnimation.fillMode = kCAFillModeForwards;

    //透明度动画

    CABasicAnimation *opacityAnimation = [CABasicAnimation animationWithKeyPath:@"opacity"];

    opacityAnimation.duration = 0.3f;

    opacityAnimation.toValue = @();

    opacityAnimation.fromValue = @();

    opacityAnimation.removedOnCompletion = YES;

    opacityAnimation.fillMode = kCAFillModeForwards;

    CAAnimationGroup *group = [CAAnimationGroup new];

    group.animations = @[pathAnimation];

    group.removedOnCompletion = NO;

    group.fillMode = kCAFillModeForwards;

    group.duration = pathAnimation.duration;

    [maskLayer addAnimation:group forKey:@"packupAnimation"];

    dispatch_after(dispatch_time(DISPATCH_TIME_NOW, (int64_t)(0.3 * NSEC_PER_SEC)), dispatch_get_main_queue(), ^{

        self.startButton.hidden = YES;

        [self addLoadingAnimation];

    });

}

- (void)addLoadingAnimation

{

    CAShapeLayer *shapeLayer =  ({

        CAShapeLayer *layer = [CAShapeLayer layer];

        layer.position = self.view.center;

        layer.bounds = CGRectMake(, , , );

        layer.backgroundColor = [UIColor clearColor].CGColor;

        layer.strokeColor = [UIColor redColor].CGColor;

        layer.fillColor = [UIColor clearColor].CGColor;

        layer.lineWidth = .f;

        UIBezierPath *storkePath = [UIBezierPath bezierPathWithOvalInRect:layer.bounds];

        layer.path = storkePath.CGPath;

        layer.strokeStart = ;

        layer.strokeEnd = 0.1;

        layer;

    });

    [self.view.layer addSublayer:shapeLayer];

    //旋转动画

    CABasicAnimation *rotateAnimaiton = [CABasicAnimation animationWithKeyPath:@"transform.rotation.z"];

    rotateAnimaiton.duration = .f;

    rotateAnimaiton.repeatCount = CGFLOAT_MAX;

    rotateAnimaiton.removedOnCompletion = NO;

    rotateAnimaiton.fillMode = kCAFillModeForwards;

    rotateAnimaiton.toValue = @(M_PI * );

    //stroke动画

    CABasicAnimation *storkeAnimation = [CABasicAnimation animationWithKeyPath:@"strokeEnd"];

    storkeAnimation.duration = .f;

    storkeAnimation.repeatCount = CGFLOAT_MAX;

    storkeAnimation.fillMode =  kCAFillModeForwards;

    storkeAnimation.removedOnCompletion = NO;

    storkeAnimation.toValue = @();

    CAAnimationGroup *animationGroup = [CAAnimationGroup animation];

    animationGroup.duration = .f;

    animationGroup.repeatCount =CGFLOAT_MAX;

    animationGroup.fillMode = kCAFillModeForwards;

    animationGroup.removedOnCompletion = NO;

    animationGroup.animations = @[rotateAnimaiton, storkeAnimation];

    animationGroup.timingFunction = [CAMediaTimingFunction functionWithName:kCAMediaTimingFunctionDefault];

    [shapeLayer addAnimation:animationGroup forKey:@"indicatorAnimation"];

}
核心动画就介绍到这,你可以在这里查看demo。
个人原创,转载请注明出处 http://www.cnblogs.com/pretty-guy/p/8268745.html
下一篇博客打算介绍利用CADisplayLink与CoreGraphics结合实现动画
iOS 动画篇 (二) CAShapeLayer与CoreAnimation结合使用的更多相关文章
- iOS 动画笔记 (二)
有它们俩你就够了! 说明:下面有些概念我说的不怎么详细,网上实在是太多了,说了我觉得也意义不大了!但链接都给大家了,可以自己去看,重点梳理学习写动画的一个过程和一些好的博客! 一:说说这两个三方库,C ...
- iOS动画篇:UIView动画
iOS的动画效果一直都很棒很,给人的感觉就是很炫酷很流畅,起到增强用户体验的作用.在APP开发中实现动画效果有很多种方式,对于简单的应用场景,我们可以使用UIKit提供的动画来实现. UIView动画 ...
- iOS 动画篇 之 Core Animation (一)
iOS中实现动画有两种方式,一种是自己不断的通过drawRect:方法来绘制,另外一种就是使用核心动画(Core Animation). 导语: 核心动画提供高帧速率和流畅的动画,而不会增加CPU的负 ...
- iOS 动画篇 (三) CADisplayLink与CoreGraphics实现动画
本文主要介绍利用CoreGraphics和CADisplayLink来实现一个注水动画.来一个效果图先: 在介绍注水动画前,先介绍利用CoreGraphics实现进度条的绘制. 一.扇形进度绘制 效果 ...
- iOS动画篇:核心动画
转:http://www.cocoachina.com/ios/20160517/16290.html 基本概念 1.什么是核心动画 Core Animation(核心动画)是一组功能强大.效果华丽的 ...
- iOS 动画笔记 (一)
你也肯定喜欢炫酷的动画! 在APP中,动画就是一个点睛之笔!可以给用户增加一些独特的体验感,估计也有许多的和我一样的,看着那些觉得不错的动画,也就只能流口水的孩子,毕竟可能不知道从哪里下手去写!动画学 ...
- iOS动画学习
学习一下动画,感谢以下大神的文章: UIView:基础动画.关键帧动画.转场动画 Core Animation :基础动画,关键帧动画,动画组,转场动画,逐帧动画 CALayer :CALaye ...
- ios 动画学习的套路 (二)
有它们俩你就够了! 说明:下面有些概念我说的不怎么详细,网上实在是太多了,说了我觉得也意义不大了!但链接都给大家了,可以自己去看,重点梳理学习写动画的一个过程和一些好的博客! (一) 说说这两个三方库 ...
- iOS 动画基础总结篇
iOS 动画基础总结篇 动画的大体分类(个人总结可能有误) 分类.png UIView 动画 属性动画 1 2 3 4 5 6 7 8 9 10 11 12 13 14 15 16 17 18 1 ...
随机推荐
- Nginx事件处理中的connection和read、write事件的关联
/********************************************************************* * Author : Samson * Date ...
- redmine工作流程总结
1.需求调研员和測试员新建问题,问题跟踪为支持,指派给产品经理 2.产品经理对收到的问题进行分类处理,功能类型的,改动跟踪状态为功能,指派给自己.是bug类型的,将跟踪类型改动错误类型,指派给技术经理 ...
- 黑马day16 jquery&内容过滤选择器&可见度选择器
内容过滤选择器的过滤规则主要体如今它所包括的子元素和文本内容上 .:contains(text) 使用方法: $("div:contains('John')") 返回值 集 ...
- 入门Webpack
---恢复内容开始--- 什么是WebPack,为什么要使用它? 为什要使用WebPack 现今的很多网页其实可以看做是功能丰富的应用,它们拥有着复杂的JavaScript代码和一大堆依赖包.为了简化 ...
- CentOS中安装配置Nginx
一.安装Nginx '首先我们需要在nginx官网中下载nginx安装包,在这就下载最新版 nginx-1.13.7版本 下载完成以后我们进入下载页面进行查看 下载文件目录为 home/userNam ...
- Python3 将txt数据转换成列表,进行排序,筛选
Python 程序员需要知道的 30 个技巧 首先是数据: 将上边的四个数据分别写在新建的txt文件中 1.将txt数据转为列表 with open('james.txt') as jaf: data ...
- 使用VSCode创建Asp.Net Core
前言 .Net Core 2.0已经发布几个月了,惭愧!身为一个开发人员现在才开始接触,有人说有VS这一宇宙第一IDE在,为啥还要用VSCode,为啥?因为我们是程序猿啊!我们是攻城狮啊!我们爱折腾啊 ...
- Qt--自定义Delegate
这是Model/View中的最后一篇了,Qt官方显然弱化了Controller在MVC中的作用,提供了一个简化版的Delegate:甚至在Model/View框架的使用中,提供了默认的委托,让这个控制 ...
- Anaconda多版本Python管理
Anaconda是一个集成python及包管理的软件,记得最早使用时在2014年,那时候网上还没有什么资料,需要同时使用py2和py3的时候,当时的做法是同时安装Anaconda2和Anaconda3 ...
- 清北学堂 NOIP2017模拟赛 越赛越心塞
连续考了一个星期发现自己真的是手感型选手,成绩全靠天意.手感好了码出200+也没什么问题,推出式子并且打出自己都不信的操作也有过.手感差了......就一个呵呵二字. 然后开始是T总让我们休息了一个星 ...
