
iOS 动画篇 (三) CADisplayLink与CoreGraphics实现动画
本文主要介绍利用CoreGraphics和CADisplayLink来实现一个注水动画。来一个效果图先:
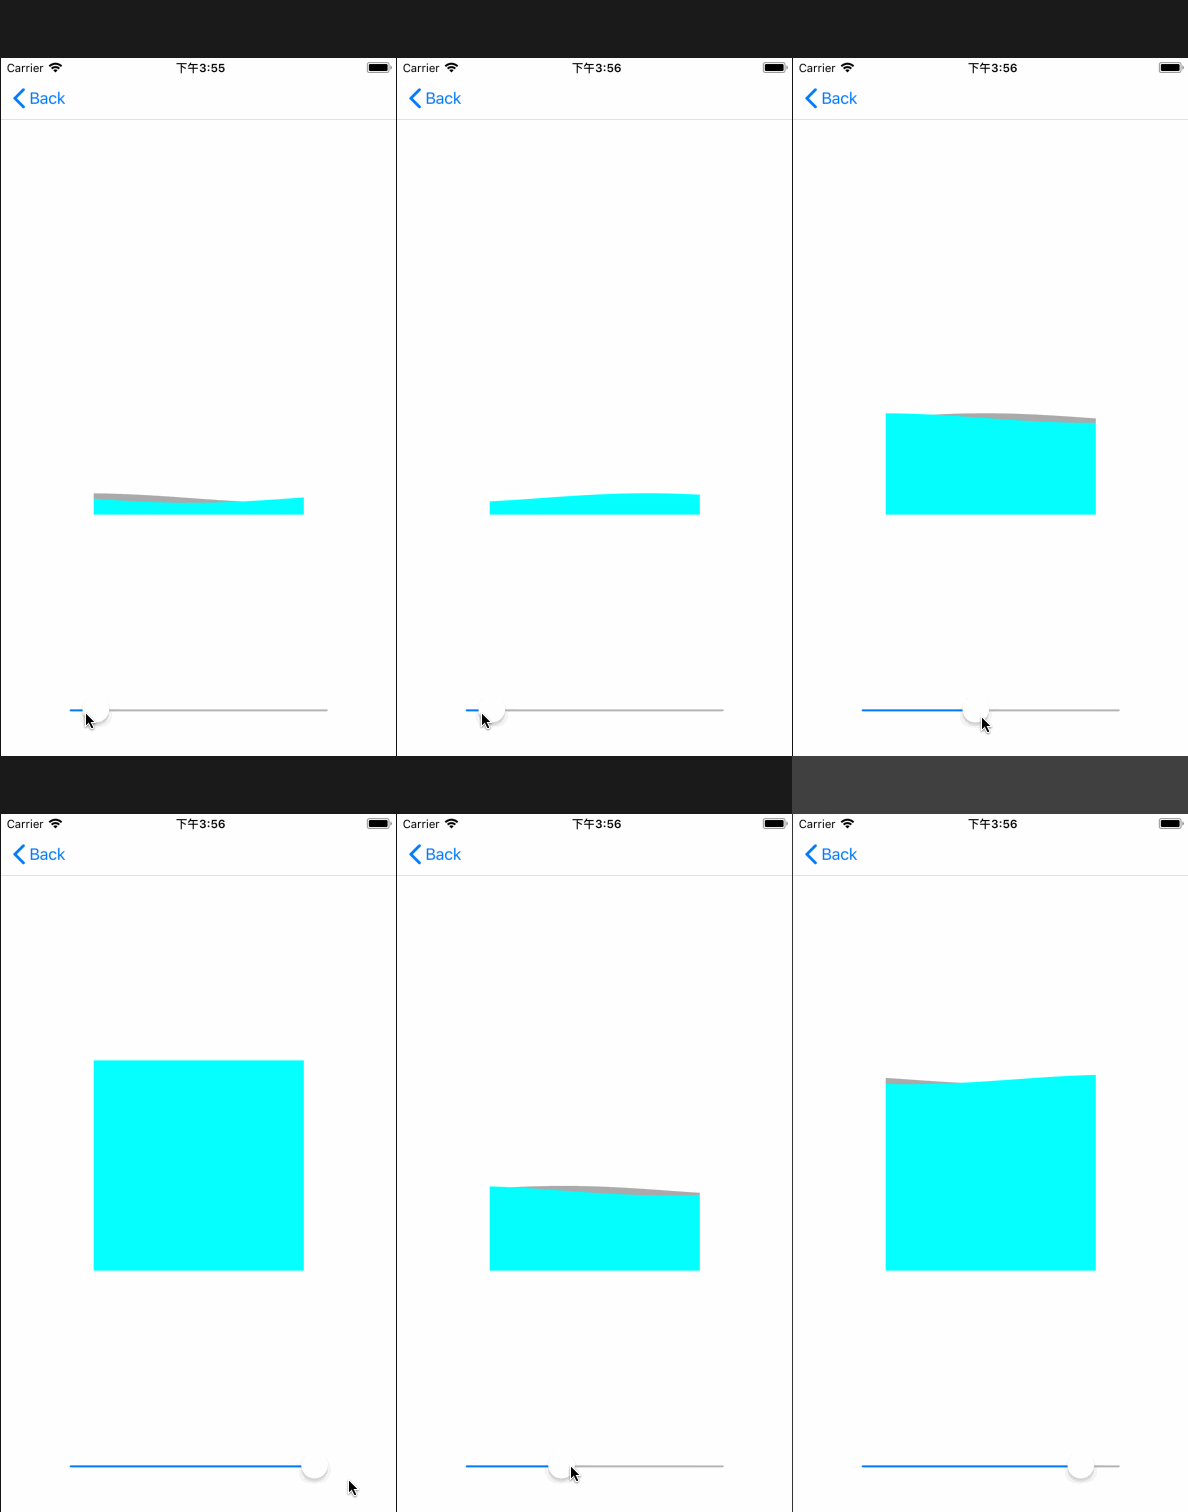
在介绍注水动画前,先介绍利用CoreGraphics实现进度条的绘制。
一、扇形进度绘制
效果: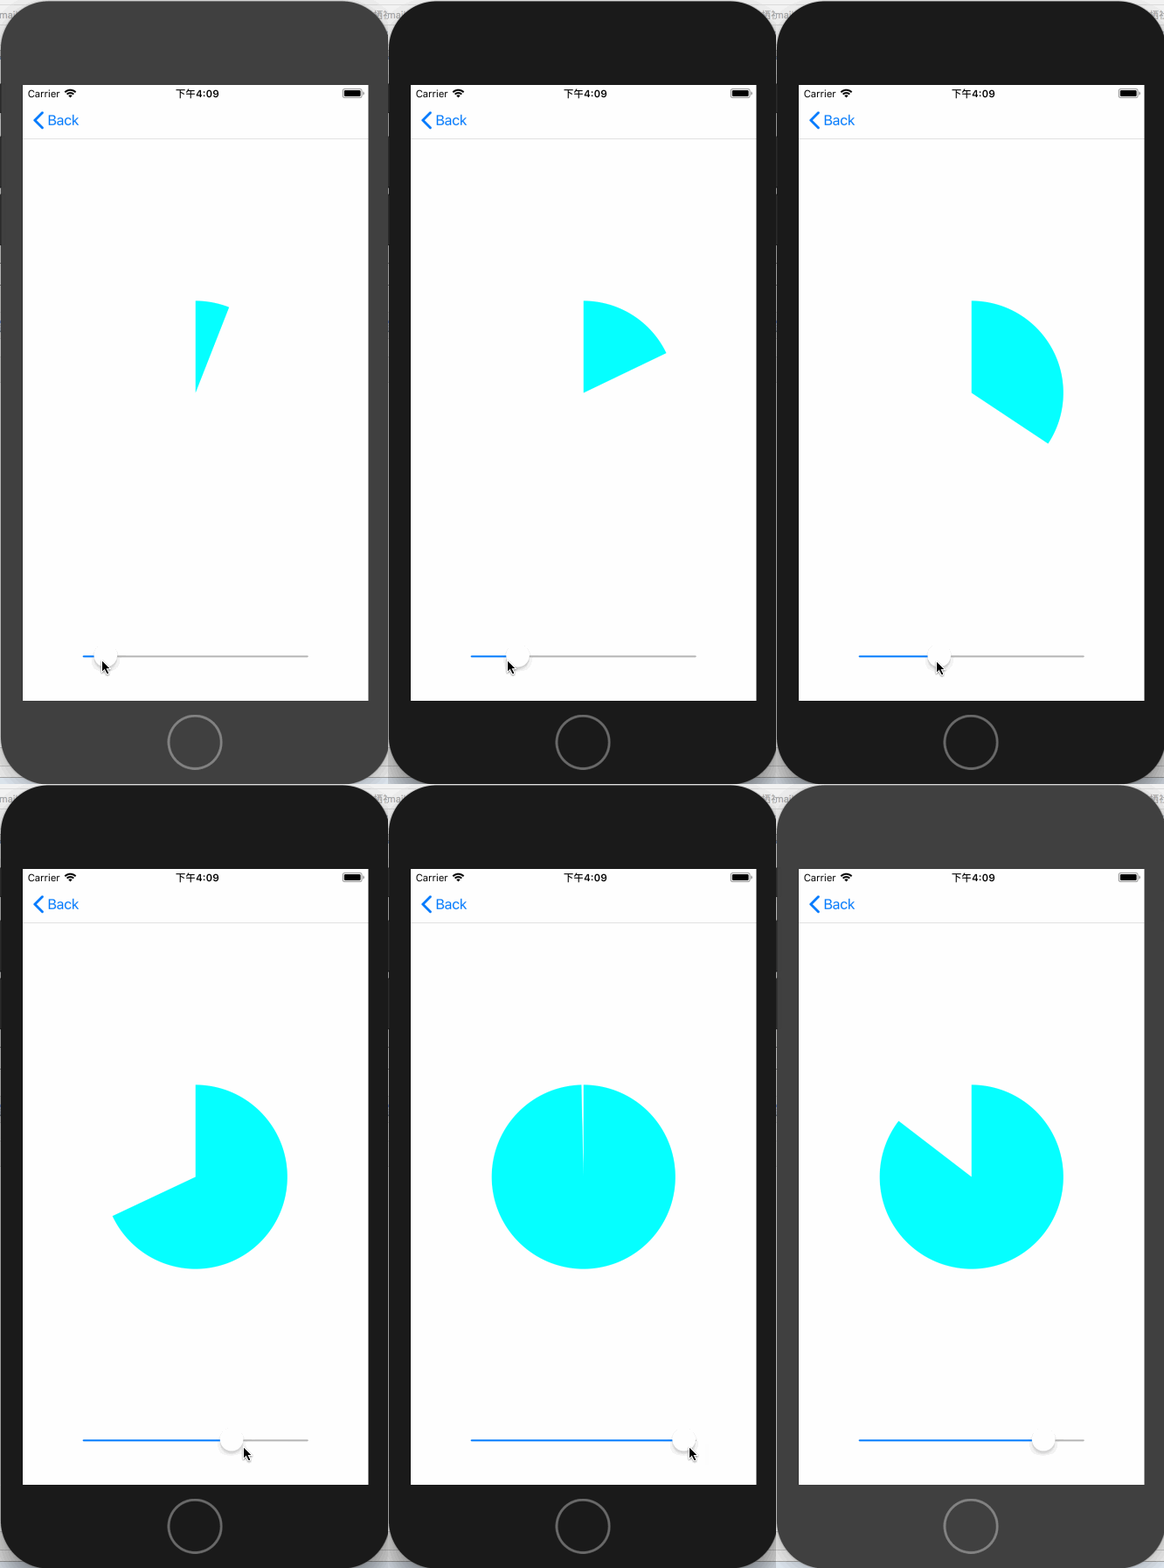
代码如下:
- (instancetype)initWithCoder:(NSCoder *)coder

{

    self = [super initWithCoder:coder];

    if (self) {

        self.arcColor = [UIColor cyanColor];

    }

    return self;

}

- (void)drawRect:(CGRect)rect {

    [super drawRect:rect];

    CGContextRef context = UIGraphicsGetCurrentContext();

    [self.arcColor setFill];

    CGFloat startAngle = -M_PI_2;

    CGFloat endAngle  = self.progress * M_PI *  + startAngle;

    CGPoint center = CGPointMake(rect.size.width / , rect.size.height / );

    UIBezierPath *path = [UIBezierPath bezierPathWithArcCenter:center radius:rect.size.width /  startAngle:startAngle endAngle:endAngle clockwise:YES];

    CGContextAddPath(context, path.CGPath);

    CGContextAddLineToPoint(context, center.x, center.y);

    CGContextDrawPath(context, kCGPathFill);

}

- (void)setProgress:(CGFloat)progress

{

    NSLog(@"%g", progress);

    if (progress > ) {

        progress = ;

    }else if (progress < ){

        progress = ;

    }

    _progress = progress;

    dispatch_async(dispatch_get_main_queue(), ^{

        [self setNeedsDisplay];

    });

}
原理就是根据不同的进度值不停的重新绘制扇形。
二、绘制带边缘的扇形进度图
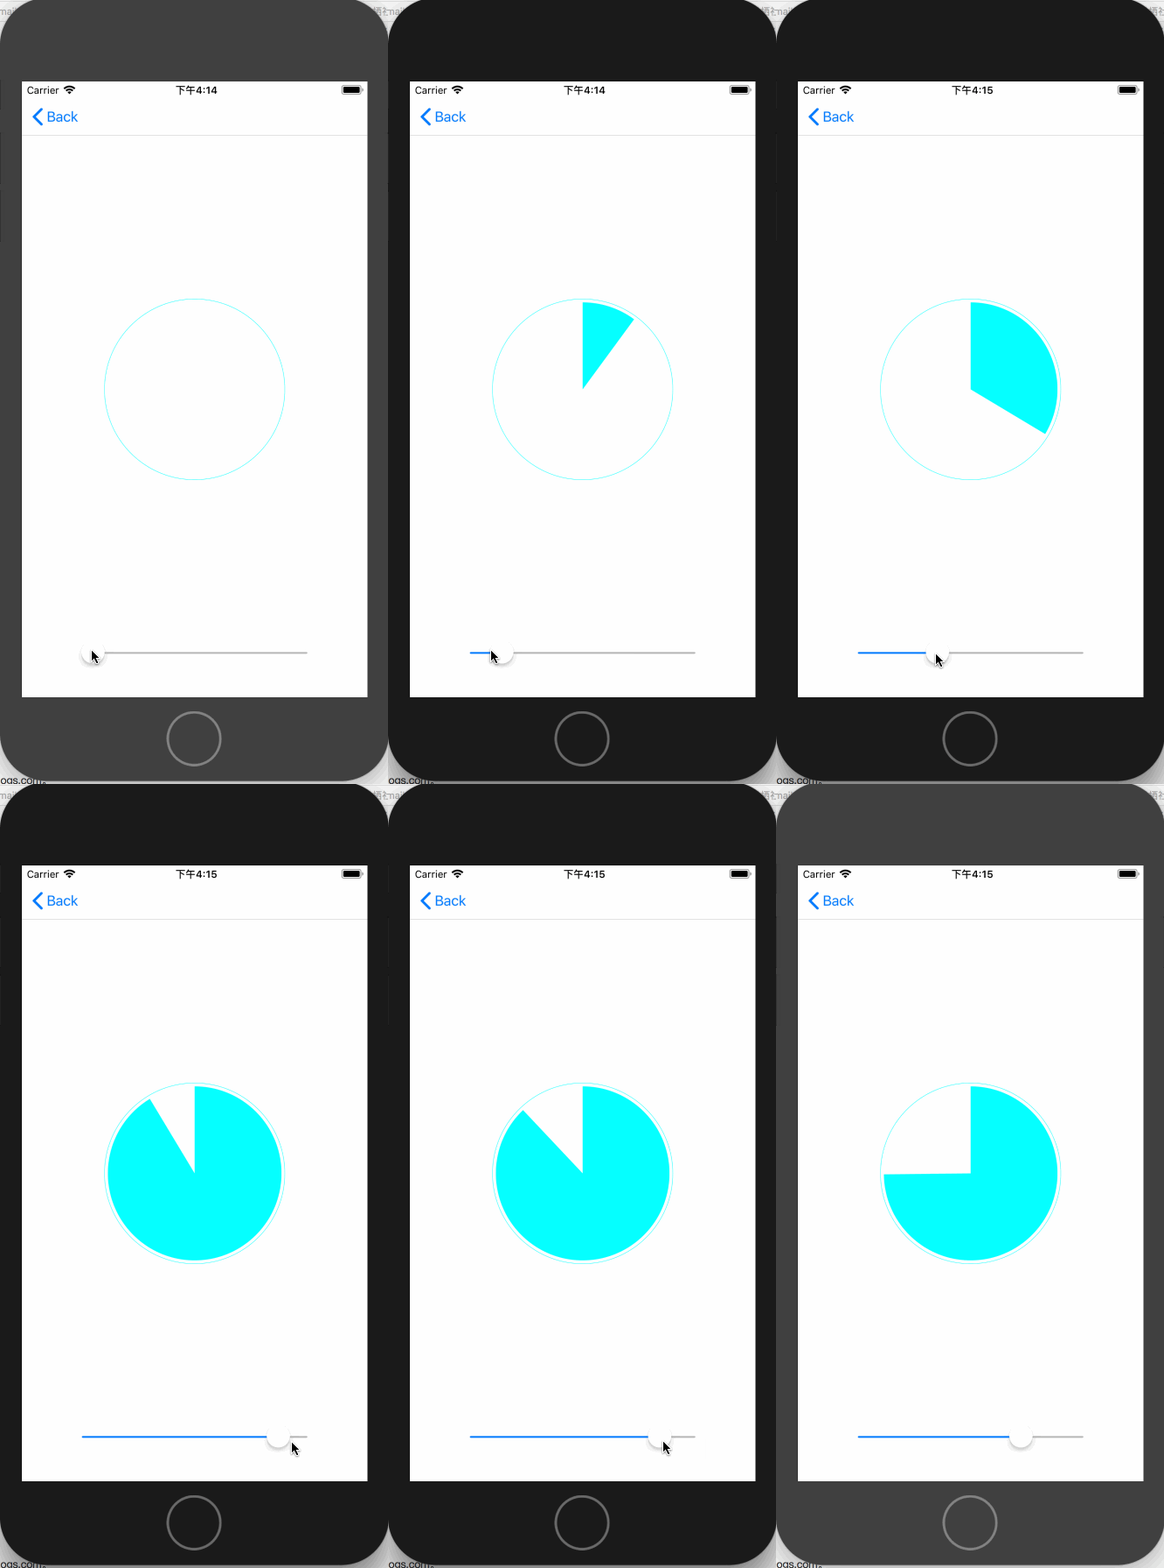
代码如下:
@implementation ArcWithTrackProgressView

- (instancetype)initWithCoder:(NSCoder *)coder

{

    self = [super initWithCoder:coder];

    if (self) {

        self.backgroundColor = [UIColor clearColor];

        self.trackColor = [UIColor cyanColor];

        self.progressColor = [UIColor cyanColor];

    }

    return self;

}

- (void)drawRect:(CGRect)rect

{

    //绘制圈

    UIBezierPath *trackPath = [UIBezierPath bezierPathWithOvalInRect:CGRectInset(rect, , )];

    CGContextRef context = UIGraphicsGetCurrentContext();

    CGContextSetLineWidth(context, 0.5);

    CGContextAddPath(context, trackPath.CGPath);

    [self.trackColor setStroke];

    CGContextDrawPath(context, kCGPathStroke);//绘制进度

    [self.progressColor setFill];

    CGFloat startAngle = - M_PI_2;

    CGFloat endAngle = self.progress *  * M_PI + startAngle;

    CGPoint center = CGPointMake(CGRectGetWidth(rect) / , CGRectGetHeight(rect) / );

    CGFloat radius = CGRectGetHeight(rect) /  - ;//设置半径

    UIBezierPath *progressPath = [UIBezierPath bezierPathWithArcCenter:center radius:radius startAngle:startAngle endAngle:endAngle clockwise:YES];

    CGContextAddPath(context, progressPath.CGPath);

    CGContextAddLineToPoint(context, center.x, center.y);

    CGContextDrawPath(context, kCGPathFill);

}

- (void)setProgress:(CGFloat)progress

{

    NSLog(@"%g", progress);

    if (progress > ) {

        progress = ;

    }else if (progress < ){

        progress = ;

    }

    _progress = progress;

    dispatch_async(dispatch_get_main_queue(), ^{

        [self setNeedsDisplay];

    });

}

@end
三、绘制一个圆环进度
效果图如下:
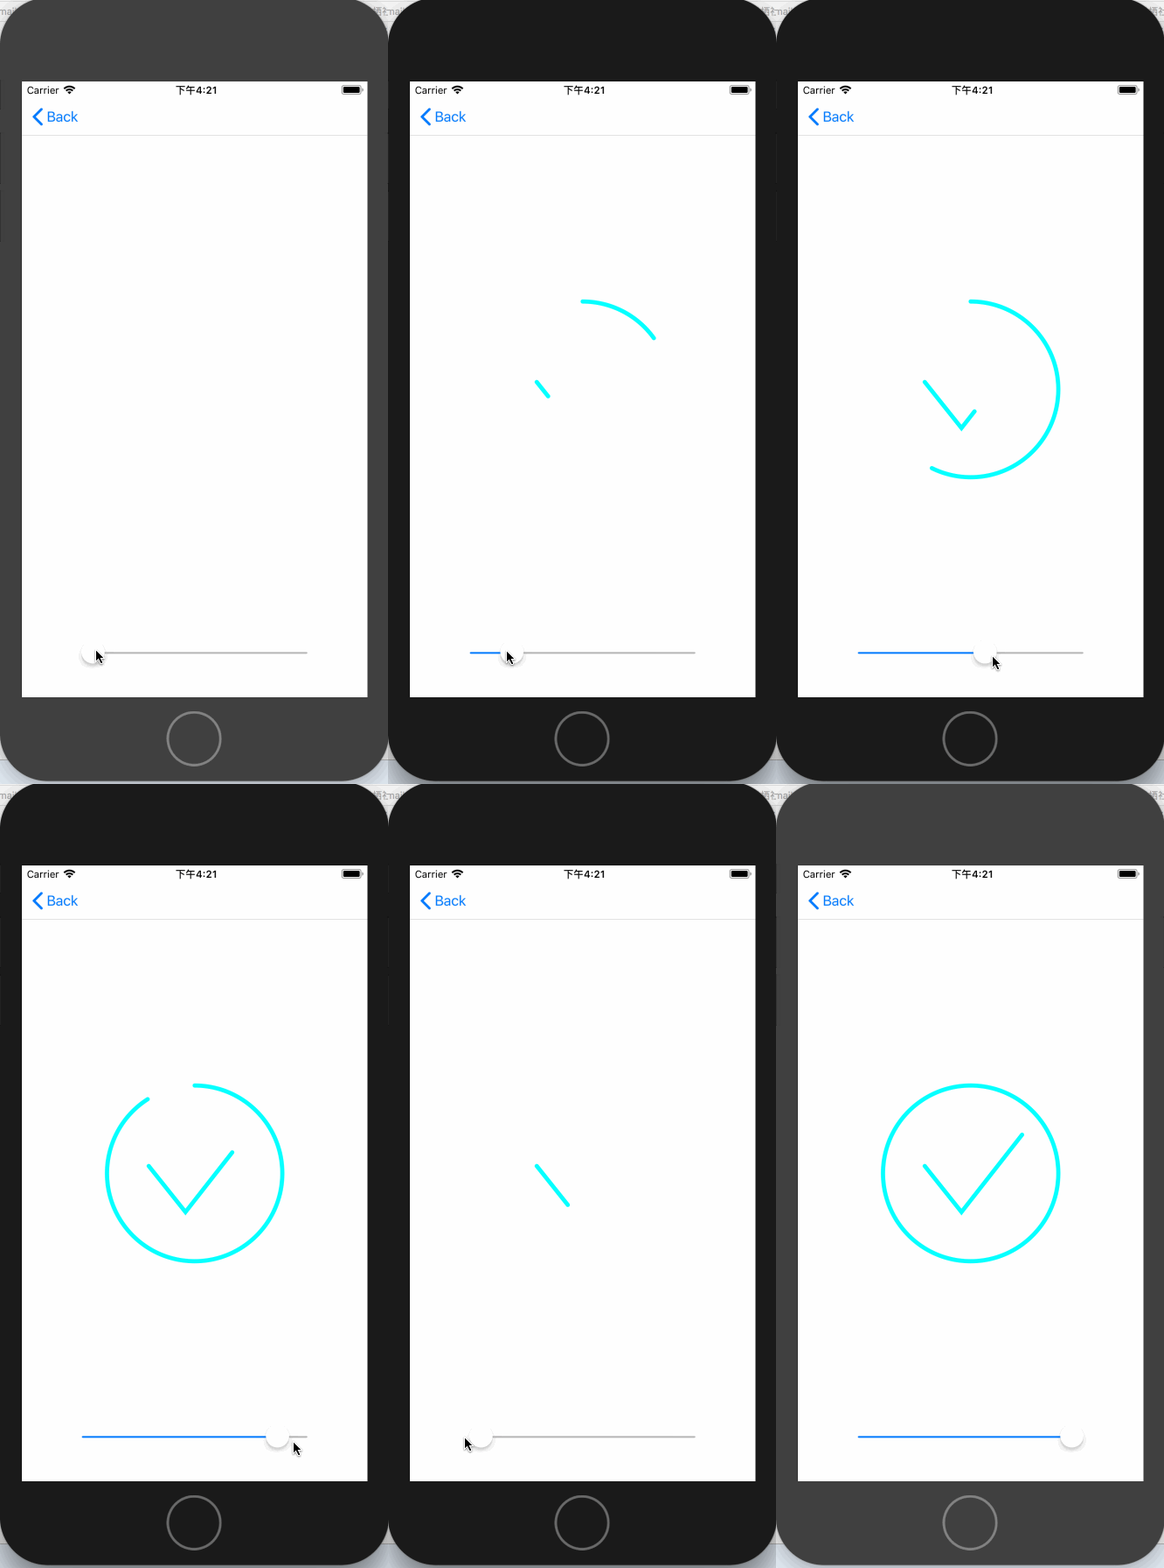
此效果分为两步实现,一部分是绘制圆环,一部分是绘制勾。我在这里使用的CoreGraphics来绘制环,勾的话是利用CAShapeLayer来实现的。代码如下:
@implementation AnnularProgressView

- (instancetype)initWithFrame:(CGRect)frame

{

    self = [super initWithFrame:frame];

    if (self) {

        [self commonSetup];

    }

    return self;

}

- (instancetype)initWithCoder:(NSCoder *)coder

{

    self = [super initWithCoder:coder];

    if (self) {

        [self commonSetup];

    }

    return self;

}

- (void)commonSetup

{

    self.arcColor = [UIColor cyanColor];

    self.lineWidth = .f;

    //设置shapeLayer

    CAShapeLayer *tick = [[CAShapeLayer alloc] init];

    tick.bounds = self.bounds;

    tick.position = CGPointMake(CGRectGetWidth(self.bounds) / , CGRectGetHeight(self.bounds) / );

    CGFloat width = CGRectGetWidth(self.bounds);

    CGFloat height = CGRectGetHeight(self.bounds);

    UIBezierPath *bezierPath = [[UIBezierPath alloc] init];

    [bezierPath moveToPoint:CGPointMake(width * 0.25, height * 0.46)];

    [bezierPath addLineToPoint:CGPointMake(width * 0.45, height * 0.71)];

    [bezierPath addLineToPoint:CGPointMake(width * 0.78, height * 0.29)];

    tick.path = bezierPath.CGPath;

    tick.fillColor = [UIColor clearColor].CGColor;

    tick.strokeColor = [UIColor cyanColor].CGColor;

    tick.strokeStart = ;

    tick.strokeEnd = ;

    tick.lineWidth = self.lineWidth;

    tick.lineCap = kCALineJoinRound;

    [self.layer addSublayer:tick];

    self.tick = tick;

}

- (void)drawRect:(CGRect)rect {

    CGContextRef context = UIGraphicsGetCurrentContext();

    CGContextSetLineCap(context, kCGLineCapRound);

    CGContextSetLineWidth(context, self.lineWidth);

    [self.arcColor setStroke];

    //绘制圆环

    CGFloat startAngle = -M_PI_2;

    CGFloat endAngle  = self.progress * M_PI *  + startAngle;

    CGPoint center = CGPointMake(rect.size.width / , rect.size.height / );

    UIBezierPath *path = [UIBezierPath bezierPathWithArcCenter:center radius:rect.size.width /  - self.lineWidth startAngle:startAngle endAngle:endAngle clockwise:YES];

    CGContextAddPath(context, path.CGPath);

    CGContextDrawPath(context, kCGPathStroke);

    self.tick.strokeEnd = self.progress;//设置勾的进度

}

- (void)setProgress:(CGFloat)progress

{

    NSLog(@"%g", progress);

    if (progress > ) {

        progress = ;

    }else if (progress < ){

        progress = ;

    }

    _progress = progress;

    dispatch_async(dispatch_get_main_queue(), ^{

        [self setNeedsDisplay];

    });

}
四、注水动画
效果:
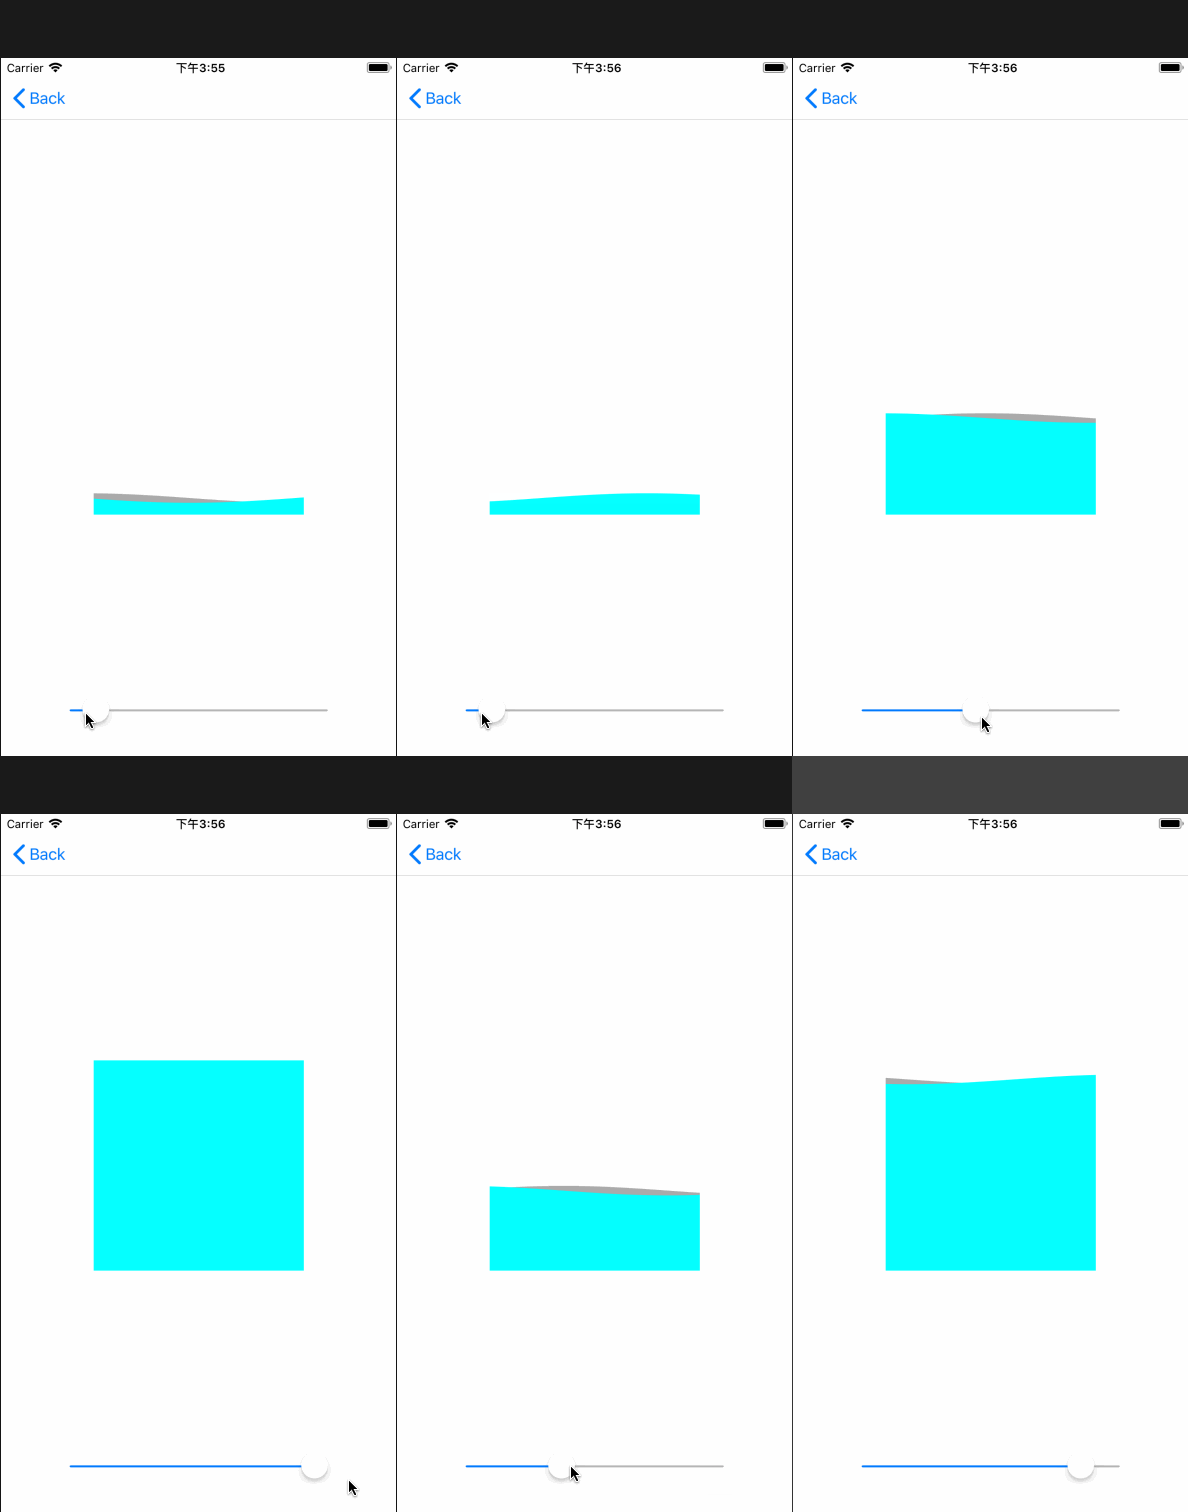
注水动画的实现主要是通过正余弦函数绘制来实现的。正余弦曲线公式如下:
正弦函数
y=Asin(ωx+φ)+k //正弦函数

y=Acos(ωx+φ)+k //余弦函数
其中
@interface WaveProgressView ()

@property (nonatomic, assign) CGFloat initialPhase;//初相

@property (nonatomic, strong) CADisplayLink *timer;

@end

//y=Asin(ωx+φ)+k

@implementation WaveProgressView

- (instancetype)initWithCoder:(NSCoder *)coder

{

    self = [super initWithCoder:coder];

    if (self) {

        [self commonSetup];

    }

    return self;

}

- (instancetype)initWithFrame:(CGRect)frame

{

    self = [super initWithFrame:frame];

    if (self) {

       [self commonSetup];

    }

    return self;

}

- (void)commonSetup

{

    CADisplayLink *timer = [CADisplayLink displayLinkWithTarget:self selector:@selector(moveWave:)];

    [timer addToRunLoop:[NSRunLoop mainRunLoop] forMode:NSRunLoopCommonModes];

    self.backgroundColor = [UIColor clearColor];

}

- (void)drawRect:(CGRect)rect

{

    CGContextRef context = UIGraphicsGetCurrentContext();

    UIBezierPath *sinPath = [UIBezierPath bezierPath];

    UIBezierPath *cosPath = [UIBezierPath bezierPath];

    CGFloat y;

    CGFloat amplitude = ;//振幅

    CGFloat palstance = M_PI / self.bounds.size.width;//角速度

    CGPoint startPoint = CGPointMake(, CGRectGetHeight(rect));

    [sinPath moveToPoint:startPoint];

    [cosPath moveToPoint:startPoint];

    //正弦曲线

    for (CGFloat x = 0.0 ; x <= rect.size.width; x++) {

        y = amplitude * sin(palstance * x + self.initialPhase);

        CGPoint point = CGPointMake(x, y + CGRectGetHeight(rect) * ( - self.progress) - amplitude);

        [sinPath addLineToPoint:point];

    }

    //余弦曲线

    for (int x =  ; x <= rect.size.width; x++) {

        y = amplitude * cos(palstance * x + self.initialPhase);

        CGPoint point = CGPointMake(x, y + CGRectGetHeight(rect) * ( - self.progress) - amplitude);

        [cosPath addLineToPoint:point];

    }

    CGPoint endPoint = CGPointMake(CGRectGetWidth(rect), CGRectGetHeight(rect));

    [sinPath addLineToPoint:endPoint];

    [cosPath addLineToPoint:endPoint];

    [[UIColor lightGrayColor] setFill];

    CGContextAddPath(context, sinPath.CGPath);

    CGContextDrawPath(context, kCGPathFill);

    [[UIColor cyanColor] setFill];

    CGContextAddPath(context, cosPath.CGPath);

    CGContextDrawPath(context, kCGPathFill);

}

- (void)moveWave:(CADisplayLink *)timer

{

    self.initialPhase += 0.1;

    dispatch_async(dispatch_get_main_queue(), ^{

        [self setNeedsDisplay];

    });

}

- (void)setProgress:(CGFloat)progress

{

    NSLog(@"%g", progress);

    if (progress > ) {

        progress = ;

    }else if (progress < ){

        progress = ;

    }

    _progress = progress;

}

- (void)dealloc

{

    [self.timer invalidate];

}
实现原理:设定好曲线的振幅、角速度,然后根据progress来设置正余弦曲线的绘制路径。利用CADisplayLink来不断的改变曲线的初相来达到曲线移动的效果。
你可以从这里下载demo
iOS 动画篇 (三) CADisplayLink与CoreGraphics实现动画的更多相关文章
- 自己定义控件三部曲之动画篇(十三)——实现ListView Item进入动画
前言:宝剑锋从磨砺出,梅花香自苦寒来 相关文章: <Android自己定义控件三部曲文章索引>: http://blog.csdn.net/harvic880925/article/det ...
- iOS开发UI篇—iOS开发中三种简单的动画设置
iOS开发UI篇—iOS开发中三种简单的动画设置 [在ios开发中,动画是廉价的] 一.首尾式动画 代码示例: // beginAnimations表示此后的代码要“参与到”动画中 [UIView b ...
- iOS 动画篇 (二) CAShapeLayer与CoreAnimation结合使用
接上一篇博客 iOS 动画篇(一) Core Animation CAShapeLayer是CALayer的一个子类,使用这个类能够很轻易实现曲线的动画. 先来一个折线动画效果: 示例代码: //1. ...
- iOS 开发之动画篇 - 从 UIView 动画说起
毋庸置疑的:在iOS开发中,制作动画效果是最让开发者享受的环节之一.一个设计严谨.精细的动画效果能给用户耳目一新的效果,吸引他们的眼光 —— 这对于app而言是非常重要的. 本文作为动画文集的第一篇, ...
- iOS开发--动画篇之layout动画深入
"不得不说,单单是文章的标题,可能不足以说明本文的内容.因此,在继续讲述约束动画之前,我先放上本文要实现的动画效果." 编辑:Bison投稿:Sindri的小巢 约束动画并不是非常 ...
- iOS动画篇:UIView动画
iOS的动画效果一直都很棒很,给人的感觉就是很炫酷很流畅,起到增强用户体验的作用.在APP开发中实现动画效果有很多种方式,对于简单的应用场景,我们可以使用UIKit提供的动画来实现. UIView动画 ...
- iOS开发——动画篇Swift篇&动画效果的实现
Swift - 动画效果的实现 在iOS中,实现动画有两种方法.一个是统一的animateWithDuration,另一个是组合出现的beginAnimations和commitAnimation ...
- iOS 动画篇 之 Core Animation (一)
iOS中实现动画有两种方式,一种是自己不断的通过drawRect:方法来绘制,另外一种就是使用核心动画(Core Animation). 导语: 核心动画提供高帧速率和流畅的动画,而不会增加CPU的负 ...
- iOS动画篇:核心动画
转:http://www.cocoachina.com/ios/20160517/16290.html 基本概念 1.什么是核心动画 Core Animation(核心动画)是一组功能强大.效果华丽的 ...
随机推荐
- 《程序设计实践》【PDF】下载
<程序设计实践>[PDF]下载链接: https://u253469.ctfile.com/fs/253469-231196319 内容简介 本书从排错.测试.性能.可移植性.设计.界面. ...
- Android开发之常见事件响应方式
常见的事件有 (1)单击事件 onClickListener (2)长按事件 onLongClickListener (3)滑动事件 onTouchListener (4)键盘事件 onKeyLi ...
- zTree模糊搜索,显示全部节点和高亮显示
function searchFun() { var value; if($("#code2").val()!=null && $("#code2&quo ...
- 【java设计模式】责任链模式
可以随时添加过滤器,并在主方法中添加删除: Main package com.tn.filter; public class Main { public static void main(String ...
- Python 爬虫实战(一):使用 requests 和 BeautifulSoup
Python 基础 我之前写的<Python 3 极简教程.pdf>,适合有点编程基础的快速入门,通过该系列文章学习,能够独立完成接口的编写,写写小东西没问题. requests requ ...
- 通过 JS 实现简单的拖拽功能并且可以在特定元素上禁止拖拽
前言 关于讲解 JS 的拖拽功能的文章数不胜数,我确实没有必要大费周章再写一篇重复的文章来吸引眼球.本文的重点是讲解如何在某些特定的元素上禁止拖拽.这是我在编写插件时遇到的问题,其实很多插件的拖拽功能 ...
- HDFS租约实践
一.租约详解 Why租约 HDFS的读写模式为 "write-once-read-many",为了实现write-once,需要设计一种互斥机制,租约应运而生租约本质上是一个有时间 ...
- Oracle添加记录的时候报错:违反完整性约束,未找到父项关键字
今天需要向一个没有接触过的一个Oracle数据库中添加一条记录,执行报错: 分析: 报错的根本原因:未找到父项关键字的原因是因为你在保存对象的时候缺失关联对象. 问题的解决思路:先保存关联对象后再保存 ...
- IDLE3.6.3 Mac版不支持中文输入解决办法
最近安装了IDLE 3.6.3版本 但是在IDLE中要输入中文注释时发现虽然输入法切换到了中文,但输入的还是英文.然后我在IDLE外试了下,输入中文没问题,于是就确认应该是IDLE的问题. 网上查询到 ...
- Linux如何让进程在后台运行的三种方法详解
问题分析: 我们知道,当用户注销(logout)或者网络断开时,终端会收到 HUP(hangup)信号从而关闭其所有子进程.因此,我们的解决办法就有两种途径:要么让进程忽略 HUP 信号,要么让进程运 ...