Linux环境下安装Nginx及其使用
https://www.jb51.net/article/136161.htm
一、查看CentOS的版本
|
1
|
cat /etc/redhat-release |
二、添加资源库
在 CentOS 系统上安装 Nginx ,得先去添加一个资源库:
|
1
2
3
4
5
6
|
vim /etc/yum.repos.d/nginx.repo [nginx] name=nginx repo baseurl=http://nginx.org/packages/centos/$releasever/$basearch/ gpgcheck=0 enabled=1 |
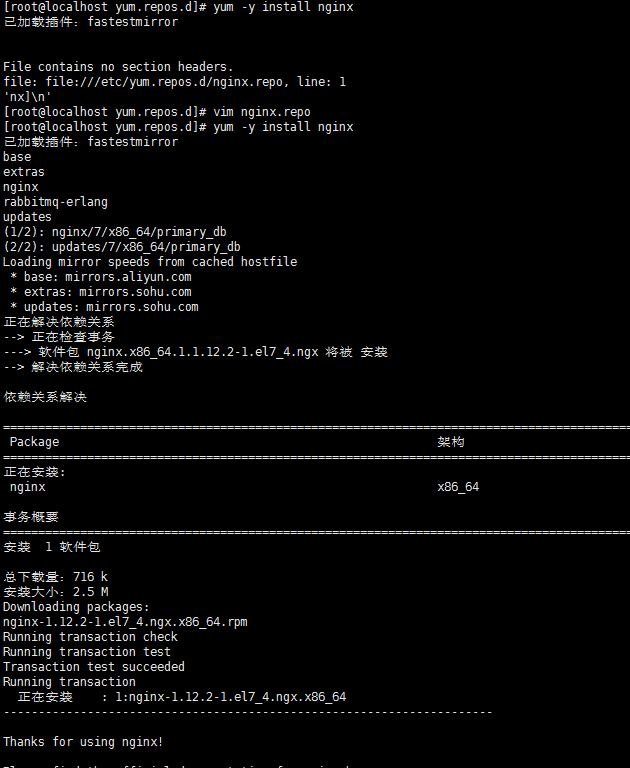
三、安装nginx
|
1
|
yum -y install nginx |
四、测试nginx配置文件是否正确
|
1
|
nginx -t |
打印如下:
nginx: the configuration file /etc/nginx/nginx.conf syntax is ok
nginx: configuration file /etc/nginx/nginx.conf test is successful
五、CentOS7.0+ nginx实现停止、启动、重启
|
1
2
3
4
|
systemctl stop nginx.service systemctl start nginx.servicesystemctl restart nginx.servicesystemctl status nginx.service |
开机自启:
|
1
|
systemctl enable nginx.service |
取消开机自启:
|
1
|
systemctl disable nginx.service |
六、nginx.conf配置示例
我的配置:
|
1
2
3
4
5
6
7
8
9
10
11
12
13
14
15
16
17
18
19
20
21
22
23
24
25
26
27
28
29
30
31
32
33
34
35
36
37
38
39
40
41
42
43
44
45
46
47
48
49
50
51
52
53
54
55
56
57
58
59
60
61
62
63
64
65
66
67
68
69
70
71
72
73
74
75
|
user nginx;worker_processes 4;error_log /var/log/nginx/error.log warn;pid /var/run/nginx.pid;events { worker_connections 1024;}http { include /etc/nginx/mime.types; default_type application/octet-stream; log_format main '$remote_addr - $remote_user [$time_local] "$request" ' '$status $body_bytes_sent "$http_referer" ' '"$http_user_agent" "$http_x_forwarded_for"'; access_log /var/log/nginx/access.log main; sendfile on; #tcp_nopush on; keepalive_timeout 65; #gzip on; include /etc/nginx/conf.d/*.conf; #设定负载均衡的服务器列表 upstream pay_server { ip_hash; server 10.74.248.01:8088 max_fails=2 fail_timeout=2; server 10.74.248.02:8088 max_fails=2 fail_timeout=2; } upstream print_server { ip_hash; server 10.74.248.03:2001 max_fails=2 fail_timeout=2; server 10.74.248.04:2001 max_fails=2 fail_timeout=2; } upstream accss_door_server { ip_hash; server 10.74.248.05:2002 max_fails=2 fail_timeout=2; server 10.74.248.06:2002 max_fails=2 fail_timeout=2; } server { listen 80; server_name wab.kupu.ccoop.com.cn; location /invengo { proxy_pass http://pay_server; index index.jsp index.html index.htm; } location /invengo/epc { proxy_pass http://print_server; index index.jsp index.html index.htm; } location /invengo/print { proxy_pass http://print_server; index index.jsp index.html index.htm; } location /checkout { proxy_pass http://accss_door_server; index index.jsp index.html index.htm; } location /asset { proxy_pass http://accss_door_server; index index.jsp index.html index.htm; } } |
常用的nginx.conf配置:
|
1
2
3
4
5
6
7
8
9
10
11
12
13
14
15
16
17
18
19
20
21
22
23
24
25
26
27
28
29
30
31
32
33
34
35
36
37
38
39
40
41
42
43
44
45
46
47
48
49
50
51
52
53
54
55
56
57
58
59
60
61
62
63
64
65
66
67
68
69
70
71
72
73
74
75
76
77
78
79
80
81
82
83
84
85
86
87
88
89
90
91
92
93
94
95
|
user www www;worker_processes 2;error_log logs/error.log;#error_log logs/error.log notice;#error_log logs/error.log info;pid logs/nginx.pid;events { use epoll; worker_connections 2048;}http { include mime.types; default_type application/octet-stream; #log_format main '$remote_addr - $remote_user [$time_local] "$request" ' # '$status $body_bytes_sent "$http_referer" ' # '"$http_user_agent" "$http_x_forwarded_for"'; #access_log logs/access.log main; sendfile on; # tcp_nopush on; keepalive_timeout 65; # gzip压缩功能设置 gzip on; gzip_min_length 1k; gzip_buffers 4 16k; gzip_http_version 1.0; gzip_comp_level 6; gzip_types text/html text/plain text/css text/javascript application/json application/javascript application/x-javascript application/xml; gzip_vary on; # http_proxy 设置 client_max_body_size 10m; client_body_buffer_size 128k; proxy_connect_timeout 75; proxy_send_timeout 75; proxy_read_timeout 75; proxy_buffer_size 4k; proxy_buffers 4 32k; proxy_busy_buffers_size 64k; proxy_temp_file_write_size 64k; proxy_temp_path /usr/local/nginx/proxy_temp 1 2; # 设定负载均衡后台服务器列表 upstream backend { #ip_hash; server 192.168.10.100:8080 max_fails=2 fail_timeout=30s ; server 192.168.10.101:8080 max_fails=2 fail_timeout=30s ; } # 很重要的虚拟主机配置 server { listen 80; server_name itoatest.example.com; root /apps/oaapp; charset utf-8; access_log logs/host.access.log main; #对 / 所有做负载均衡+反向代理 location / { root /apps/oaapp; index index.jsp index.html index.htm; proxy_pass http://backend; proxy_redirect off; # 后端的Web服务器可以通过X-Forwarded-For获取用户真实IP proxy_set_header Host $host; proxy_set_header X-Real-IP $remote_addr; proxy_set_header X-Forwarded-For $proxy_add_x_forwarded_for; proxy_next_upstream error timeout invalid_header http_500 http_502 http_503 http_504; } #静态文件,nginx自己处理,不去backend请求tomcat location ~* /download/ { root /apps/oa/fs; } location ~ .*\.(gif|jpg|jpeg|bmp|png|ico|txt|js|css)$ { root /apps/oaapp; expires 7d; } location /nginx_status { stub_status on; access_log off; allow 192.168.10.0/24; deny all; } location ~ ^/(WEB-INF)/ { deny all; } #error_page 404 /404.html; # redirect server error pages to the static page /50x.html # error_page 500 502 503 504 /50x.html; location = /50x.html { root html; } } ## 其它虚拟主机,server 指令开始} |
Linux环境下安装Nginx及其使用的更多相关文章
- Linux 环境下安装 Nginx+php+mysql 开发环境
一直以来都没有养成记录学习的好习惯,我想从这么一天开始,把自己学习和工作中的经验和坑都记录下来.等到以后老的时候还有可以回忆的地方. 最近在学习linux,虽然已经玩linux很久了,但是没有怎么用心 ...
- linux环境下安装nginx步骤
开始前,请确认gcc g++开发类库是否装好,默认已经安装. ububtu平台编译环境可以使用以下指令 apt-get install build-essential apt-get install ...
- linux环境下安装nginx步骤(不错)
开始前,请确认gcc g++开发类库是否装好,默认已经安装. ububtu平台编译环境可以使用以下指令 apt-get install build-essential apt-get install ...
- 【Nginx】 linux环境下安装nginx步骤
开始前,请确认gcc g++开发类库是否装好,默认已经安装. centos平台编译环境使用如下指令 安装make: yum -y install gcc automake autoconf libto ...
- Linux环境下安装nginx
#一般我们都需要先装pcre, zlib,前者为了重写rewrite,后者为了gzip压缩cd /usr/local/devmkdir nginxcd nginxmkdir softcd soft # ...
- Linux centos7环境下安装Nginx
Linux centos7环境下安装Nginx的步骤详解 1. 首先到Nginx官网下载Nginx安装包 http://nginx.org/download/nginx-1.5.9.tar.gz ...
- Linux和Windows环境下安装Nginx
Nginx的安装 windows环境下安装Nginx 安装 Nginx 的下载地址如下: http://nginx.org/en/download.html 选择时尽量选择 Stable 稳定版本,点 ...
- Linux 环境下安装python相关
目录 Linux 环境下安装python相关 linux软件包管理工具之yum工具(如同pip3工具) yum源理解 下载阿里云的.repo仓库文件 ,放到/etc/yum.repos.d/ yum安 ...
- Linux环境下安装Tigase XMPP Server
Tigase是一种XMPP服务器,可以作为采用XMPP协议的各种IM(Instant Messeging)工具(如Pandion.Spark等)的服务器. 在Linux环境下安装Tigase的步骤如下 ...
随机推荐
- 粘性定位 sticky
position:sticky 粘性定位 top:200px 这是他的阈值,意思是当我们页面滚动到 200 像素的使用,我们的元素会自动变成固定定位,不到200像素的时候,我们的元素走的是相对定位 ...
- ios UISegmentedControl 用法举例
UISegmentedControl * segmentControl = [[UISegmentedControl alloc]initWithFrame:CGRectMake(0, 0, 160, ...
- Nonce
Nonce是或Number once的缩写,在密码学中Nonce是一个只被使用一次的任意或非重复的随机数值. 在加密技术中的初始向量和加密散列函数都发挥着重要作用,在各类验证协议的通信应用中确保验证信 ...
- Spring Cloud(6.1):搭建OAuth2 Authorization Server
配置web.xml 添加spring-cloud-starter-security和spring-security-oauth2-autoconfigure两个依赖. </dependency& ...
- hibernate 第二次深入接触
1.session 到底如何进行脏处理? 当一个Dept对象加入到session缓存时,Session会为Dept对象的值属性复制一份快照,当Session刷新缓存时,会进行脏处理. 2.OID 用来 ...
- 神经网络手写数字识别numpy实现
本文摘自Michael Nielsen的Neural Network and Deep Learning,该书的github网址为:https://github.com/mnielsen/neural ...
- harbor清理存储
harbor仓库中镜像按tag清理,删除tag后需要清理gc才能释放空间 #!/bin/bash set -e HARBOR_URL=127.0.0.1 HARBOR_PASSWD=harbor123 ...
- 小技巧 Mongodb 动态查询 除去 _class 条件
最近在做通用模板标准示例项目,在使用 spring data jpa Mongodb 的时候,动态查询会代入 _class条件. 为什么这么做其实也很好理解,写入数据库的数据中是有这个字段的.接受 ...
- 最新 钢银电商java校招面经 (含整理过的面试题大全)
从6月到10月,经过4个月努力和坚持,自己有幸拿到了网易雷火.京东.去哪儿.钢银电商等10家互联网公司的校招Offer,因为某些自身原因最终选择了钢银电商.6.7月主要是做系统复习.项目复盘.Leet ...
- vue兄弟组件和v-slot之间的关系
如果子组件 没有包含一个 < slot > 元素,则任何传入它的内容都会被抛弃 ,因此我们引入了插槽,可以添加任意内容进子组件.