
Spring整合CXF,发布RSETful 风格WebService
原文地址:http://www.cnblogs.com/hoojo/archive/2012/07/23/2605219.html
这篇文章是承接之前CXF整合Spring的这个项目示例的延伸,所以有很大一部分都是一样的。关于发布CXF WebServer和Spring整合CXF这里就不再多加赘述了。如果你对Spring整合CXF WebService不了解,具体你可以参看这两篇文章:
http://www.cnblogs.com/hoojo/archive/2011/03/30/1999563.html
http://www.cnblogs.com/hoojo/archive/2012/07/13/2590593.html
如果你不了解restful风格的WebService,你可以参考:
http://www.oracle.com/technetwork/articles/javase/index-137171.html
SpringMVC对RESTful的支持:
http://www.cnblogs.com/hoojo/archive/2011/06/10/2077422.html
使用 Jersey框架,搭建RESTful WebService(这个也比较简单)
http://www.ibm.com/developerworks/cn/web/wa-aj-tomcat/
官方文档:http://jersey.java.net/nonav/documentation/latest/user-guide.html#d4e8
其中,比较常用的RESTful框架就有Jersey、Spring REST、CXF RESTful,这些都可以很好的整合Spring框架,发布也相当的简单。且简单、易用、易上手,文档也比较丰富。
开发环境:
System:Windows
JavaEE Server:tomcat6
JavaSDK: jdk6+
IDE:eclipse、MyEclipse 6.6
开发依赖库:
JDK6、 JavaEE5、CXF-2.3.3、Spring 3.0.4
Email:hoojo_@126.com
下面我们就接着http://www.cnblogs.com/hoojo/archive/2011/03/30/1999563.html这篇文章,开始我们CXF RESTful WebService的旅程,enjoy~!^_*
准备工作
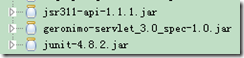
首先,你需要添加相关的jar包
其中,jsr331-api-1.1.1.jar是必须的,利用CXF发布REST服务得用到它,在cxf的lib库中可以找到这个jar。
下载地址:http://www.apache.org/dyn/closer.cgi?path=/cxf/2.3.11/apache-cxf-2.3.11.zip
其它的jar包都是非必须的!
JavaEntity
package com.hoo.entity;import java.util.Map;import javax.xml.bind.annotation.XmlRootElement;/*** <b>function:</b> MapBean 封装Map集合元素* @author hoojo* @createDate 2012-7-20 下午01:22:31* @file MapBean.java* @package com.hoo.entity* @project CXFWebService* @blog http://blog.csdn.net/IBM_hoojo* @email hoojo_@126.com* @version 1.0*/@XmlRootElementpublic class MapBean {private Map<String, User> map;//@XmlElement(type = User.class)public Map<String, User> getMap() {return map;}public void setMap(Map<String, User> map) {this.map = map;}}package com.hoo.entity;import java.util.HashMap;import java.util.List;import javax.xml.bind.annotation.XmlRootElement;/*** <b>function:</b> Users Entity* @author hoojo* @createDate 2011-3-18 上午09:27:31* @file Users.java* @package com.hoo.entity* @project CXFWebService* @blog http://blog.csdn.net/IBM_hoojo* @email hoojo_@126.com* @version 1.0*/@XmlRootElement(name = "UserInfos")public class Users {private List<User> users;private User[] userArr;private HashMap<String, User> maps;// getter/setter}package com.hoo.entity;import java.io.Serializable;import javax.xml.bind.annotation.XmlRootElement;/*** <b>function:</b>User Entity* @author hoojo* @createDate Dec 16, 2010 10:20:02 PM* @file User.java* @package com.hoo.entity* @project AxisWebService* @blog http://blog.csdn.net/IBM_hoojo* @email hoojo_@126.com* @version 1.0*/@XmlRootElement(name = "UserInfo")public class User implements Serializable {private static final long serialVersionUID = 677484458789332877L;private int id;private String name;private String email;private String address;//getter/setter@Overridepublic String toString() {return this.id + "#" + this.name + "#" + this.email + "#" + this.address;}}
一、定义你的WebService的接口RESTSample.java,代码如下
package com.hoo.service;
import java.io.IOException;
import javax.servlet.http.HttpServletRequest;
import javax.servlet.http.HttpServletResponse;
import javax.ws.rs.Consumes;
import javax.ws.rs.DELETE;
import javax.ws.rs.GET;
import javax.ws.rs.POST;
import javax.ws.rs.PUT;
import javax.ws.rs.Path;
import javax.ws.rs.PathParam;
import javax.ws.rs.Produces;
import javax.ws.rs.core.Context;
import javax.ws.rs.core.MediaType;
import com.hoo.entity.MapBean;
import com.hoo.entity.User;
import com.hoo.entity.Users;
/*
注释(Annotation):在 javax.ws.rs.* 中定义,是 JAX-RS (JSR 311) 规范的一部分。
@Path:定义资源基 URI。由上下文根和主机名组成,资源标识符类似于 http://localhost:8080/RESTful/rest/hello。
@GET:这意味着以下方法可以响应 HTTP GET 方法。
@Produces:以纯文本方式定义响应内容 MIME 类型。
@Context: 使用该注释注入上下文对象,比如 Request、Response、UriInfo、ServletContext 等。
@Path("{contact}"):这是 @Path 注释,与根路径 “/contacts” 结合形成子资源的 URI。
@PathParam("contact"):该注释将参数注入方法参数的路径,在本例中就是联系人 id。其他可用的注释有 @FormParam、@QueryParam 等。
@Produces:响应支持多个 MIME 类型。在本例和上一个示例中,APPLICATION/XML 将是默认的 MIME 类型。
*/
/**
* <b>function:</b> CXF RESTful风格WebService
* @author hoojo
* @createDate 2012-7-20 下午01:23:04
* @file RESTSampleSource.java
* @package com.hoo.service
* @project CXFWebService
* @blog http://blog.csdn.net/IBM_hoojo
* @email hoojo_@126.com
* @version 1.0
*/
@Path(value = "/sample")
public interface RESTSample {
@GET
@Produces(MediaType.TEXT_PLAIN)
public String doGet();
@GET
@Produces(MediaType.TEXT_PLAIN)
@Path("/request/{param}")
public String doRequest(@PathParam("param") String param,
@Context HttpServletRequest servletRequest, @Context HttpServletResponse servletResponse);
@GET
@Path("/bean/{id}")
@Produces({ MediaType.APPLICATION_XML, MediaType.APPLICATION_JSON })
public User getBean(@PathParam("id") int id);
@GET
@Path("/list")
@Produces({ MediaType.APPLICATION_JSON, MediaType.APPLICATION_XML })
public Users getList();
@GET
@Path("/map")
@Produces({ MediaType.APPLICATION_XML, MediaType.APPLICATION_JSON })
public MapBean getMap();
/*
@Consumes:声明该方法使用 HTML FORM。
@FormParam:注入该方法的 HTML 属性确定的表单输入。
@Response.created(uri).build(): 构建新的 URI 用于新创建的联系人(/contacts/{id})并设置响应代码(201/created)。
您可以使用 http://localhost:8080/Jersey/rest/contacts/<id> 访问新联系人
*/
@POST
@Path("/postData")
public User postData(User user) throws IOException;
@PUT
@Path("/putData/{id}")
@Consumes(MediaType.APPLICATION_XML)
public User putData(@PathParam("id") int id, User user);
@DELETE
@Path("/removeData/{id}")
public void deleteData(@PathParam("id") int id);
}
二、RESTSample接口的实现,这里我们只是简单的实现下,并不是涉及实际的具体业务
package com.hoo.service;
import java.io.IOException;
import java.util.ArrayList;
import java.util.HashMap;
import java.util.List;
import java.util.Map;
import javax.servlet.http.HttpServletRequest;
import javax.servlet.http.HttpServletResponse;
import javax.ws.rs.DELETE;
import javax.ws.rs.GET;
import javax.ws.rs.POST;
import javax.ws.rs.PUT;
import javax.ws.rs.Path;
import javax.ws.rs.PathParam;
import javax.ws.rs.Produces;
import javax.ws.rs.core.Context;
import javax.ws.rs.core.MediaType;
import javax.ws.rs.core.Request;
import javax.ws.rs.core.UriInfo;
import com.hoo.entity.MapBean;
import com.hoo.entity.User;
import com.hoo.entity.Users;
/*
注释(Annotation):在 javax.ws.rs.* 中定义,是 JAX-RS (JSR 311) 规范的一部分。
@Path:定义资源基 URI。由上下文根和主机名组成,资源标识符类似于 http://localhost:8080/RESTful/rest/hello。
@GET:这意味着以下方法可以响应 HTTP GET 方法。
@Produces:以纯文本方式定义响应内容 MIME 类型。
@Context: 使用该注释注入上下文对象,比如 Request、Response、UriInfo、ServletContext 等。
@Path("{contact}"):这是 @Path 注释,与根路径 “/contacts” 结合形成子资源的 URI。
@PathParam("contact"):该注释将参数注入方法参数的路径,在本例中就是联系人 id。其他可用的注释有 @FormParam、@QueryParam 等。
@Produces:响应支持多个 MIME 类型。在本例和上一个示例中,APPLICATION/XML 将是默认的 MIME 类型。
*/
/**
* <b>function:</b> CXF RESTful风格WebService
* @author hoojo
* @createDate 2012-7-20 下午01:23:04
* @file RESTSampleSource.java
* @package com.hoo.service
* @project CXFWebService
* @blog http://blog.csdn.net/IBM_hoojo
* @email hoojo_@126.com
* @version 1.0
*/
@Path(value = "/sample")
public class RESTSampleSource implements RESTSample {
@Context
private UriInfo uriInfo;
@Context
private Request request;
@GET
@Produces(MediaType.TEXT_PLAIN)
public String doGet() {
return "this is get rest request";
}
@GET
@Produces(MediaType.TEXT_PLAIN)
@Path("/request/{param}")
public String doRequest(@PathParam("param") String param,
@Context HttpServletRequest servletRequest, @Context HttpServletResponse servletResponse) {
System.out.println(servletRequest);
System.out.println(servletResponse);
System.out.println(servletRequest.getParameter("param"));
System.out.println(servletRequest.getContentType());
System.out.println(servletResponse.getCharacterEncoding());
System.out.println(servletResponse.getContentType());
return "success";
}
@GET
@Path("/bean/{id}")
@Produces({ MediaType.APPLICATION_XML, MediaType.APPLICATION_JSON })
public User getBean(@PathParam("id") int id) {
System.out.println("####getBean#####");
System.out.println("id:" + id);
System.out.println("Method:" + request.getMethod());
System.out.println("uri:" + uriInfo.getPath());
System.out.println(uriInfo.getPathParameters());
User user = new User();
user.setId(id);
user.setName("JojO");
return user;
}
@GET
@Path("/list")
@Produces({ MediaType.APPLICATION_JSON, MediaType.APPLICATION_XML })
public Users getList() {
System.out.println("####getList#####");
System.out.println("Method:" + request.getMethod());
System.out.println("uri:" + uriInfo.getPath());
System.out.println(uriInfo.getPathParameters());
List<User> list = new ArrayList<User>();
User user = null;
for (int i = 0; i < 4;i ++) {
user = new User();
user.setId(i);
user.setName("JojO-" + i);
list.add(user);
}
Users users = new Users();
users.setUsers(list);
return users;
}
@GET
@Path("/map")
@Produces({ MediaType.APPLICATION_XML, MediaType.APPLICATION_JSON })
public MapBean getMap() {
System.out.println("####getMap#####");
System.out.println("Method:" + request.getMethod());
System.out.println("uri:" + uriInfo.getPath());
System.out.println(uriInfo.getPathParameters());
Map<String, User> map = new HashMap<String, User>();
User user = null;
for (int i = 0; i < 4;i ++) {
user = new User();
user.setId(i);
user.setName("JojO-" + i);
map.put("key-" + i, user);
}
MapBean bean = new MapBean();
bean.setMap(map);
return bean;
}
/*
@Consumes:声明该方法使用 HTML FORM。
@FormParam:注入该方法的 HTML 属性确定的表单输入。
@Response.created(uri).build(): 构建新的 URI 用于新创建的联系人(/contacts/{id})并设置响应代码(201/created)。
您可以使用 http://localhost:8080/Jersey/rest/contacts/<id> 访问新联系人
*/
@POST
@Path("/postData")
@Produces({ MediaType.APPLICATION_XML, MediaType.APPLICATION_JSON })
public User postData(User user) throws IOException {
System.out.println(user);
user.setName("jojo##12321321");
return user;
}
@PUT
@Path("/putData/{id}")
@Produces({ MediaType.APPLICATION_XML })
public User putData(@PathParam("id") int id, User user) {
System.out.println("#####putData#####");
System.out.println(user);
user.setId(id);
user.setAddress("hoojo#gz");
user.setEmail("hoojo_@126.com");
user.setName("hoojo");
System.out.println(user);
return user;
}
@DELETE
@Path("/removeData/{id}")
public void deleteData(@PathParam("id") int id) {
System.out.println("#######deleteData#######" + id);
}
}
三、配置我们的WebService,修改applicationContext-server.xml。这里主要是添加jaxrs标签的支持,修改头部文件如下:
<?xml version="1.0" encoding="UTF-8"?><beans xmlns="http://www.springframework.org/schema/beans"xmlns:context="http://www.springframework.org/schema/context"xmlns:jaxws="http://cxf.apache.org/jaxws"xmlns:jaxrs="http://cxf.apache.org/jaxrs"xmlns:xsi="http://www.w3.org/2001/XMLSchema-instance"xsi:schemaLocation="http://www.springframework.org/schema/beanshttp://www.springframework.org/schema/beans/spring-beans-3.0.xsdhttp://www.springframework.org/schema/contexthttp://www.springframework.org/schema/context/spring-context-3.0.xsdhttp://cxf.apache.org/jaxwshttp://cxf.apache.org/schemas/jaxws.xsdhttp://cxf.apache.org/jaxrshttp://cxf.apache.org/schemas/jaxrs.xsd">特别注意上面加粗带下划线的部分,这是新增加的配置。我们发布restful WebService需要用到它。然后在配置文件中添加如下配置<import resource="classpath:META-INF/cxf/cxf.xml"/><import resource="classpath:META-INF/cxf/cxf-extension-soap.xml"/><import resource="classpath:META-INF/cxf/cxf-servlet.xml"/><bean id="restSample" class="com.hoo.service.RESTSampleSource"/><!-- 这里的地址很重要,客户端需要通过这个地址来访问WebService --><jaxrs:server id="restServiceContainer" address="/rest"><jaxrs:serviceBeans><ref bean="restSample" /></jaxrs:serviceBeans><jaxrs:extensionMappings><entry key="json" value="application/json" /><entry key="xml" value="application/xml" /></jaxrs:extensionMappings><jaxrs:languageMappings><entry key="en" value="en-gb"/></jaxrs:languageMappings></jaxrs:server>这样服务器端就完成了CXF RESTful WebService的发布,启动你的tomcat。然后在浏览器中服务地址:http://localhost:8000/CXFWebService/ (其实这里请求的是CXFServlet,你可以看看上一篇Spring整合CXF文章的web.xml的配置)
你就可以看到我们这里刚刚发布的RESTSample rest的WebService
你也可以看看里面的xml,也就是WebService的wsdl文件内容。我们找一个GET方式的WebService的方法,在浏览器中调用一下试试
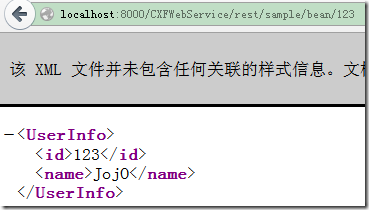
http://localhost:8000/CXFWebService/rest/sample/bean/123
这个url对应到下面这个方法
@GET@Path("/bean/{id}")@Produces({ MediaType.APPLICATION_XML, MediaType.APPLICATION_JSON })public User getBean(@PathParam("id") int id)结果如下
一篇xml文档内容。

四、编写客户端代码,调用RESTful WebService
package com.hoo.client;import java.io.IOException;import javax.ws.rs.core.MediaType;import org.apache.cxf.jaxrs.client.WebClient;import org.junit.After;import org.junit.Before;import org.junit.Test;import org.springframework.context.ApplicationContext;import org.springframework.context.support.ClassPathXmlApplicationContext;import com.hoo.entity.MapBean;import com.hoo.entity.User;import com.hoo.entity.Users;import com.hoo.service.RESTSample;/*** <b>function:</b> RESTful风格WebService* @author hoojo* @createDate 2012-7-20 下午03:31:03* @file RSETServiceClient.java* @package com.hoo.client* @project CXFWebService* @blog http://blog.csdn.net/IBM_hoojo* @email hoojo_@126.com* @version 1.0*/public class RSETServiceClient {private static WebClient client;@Beforepublic void init() {// 手动创建webClient对象,注意这里的地址是发布的那个/rest地址//String url = "http://localhost:8000/CXFWebService/rest/";//client = WebClient.create(url);// 从Spring Ioc容器中拿webClient对象ApplicationContext ctx = new ClassPathXmlApplicationContext("applicationContext-client.xml");client = ctx.getBean("webClient", WebClient.class);}@Afterpublic void destory(){}@Testpublic void testGet() {System.out.println(client.path("sample").accept(MediaType.TEXT_PLAIN).get(String.class));}@Testpublic void testRequest() {System.out.println(client.path("sample/request/234234").accept(MediaType.TEXT_PLAIN).get(String.class));}@Testpublic void testBean() {User user = client.path("sample/bean/{id}", 25).accept(MediaType.APPLICATION_XML).get(User.class);System.out.println(user);}@Testpublic void testList() {System.out.println(client.path("sample/list").accept(MediaType.APPLICATION_XML).get(Users.class).getUsers());}@Testpublic void testMap() {System.out.println(client.path("sample/map").accept(MediaType.APPLICATION_XML).get(MapBean.class).getMap());}@Testpublic void testDeleteData() {client.path("sample/removeData/23").delete();}@Testpublic void testPostData() {User user = new User();user.setId(21432134);user.setAddress("hoojo#gz");user.setEmail("hoojo_@126.com");user.setName("hoojo");System.out.println(client.path("sample/postData").accept(MediaType.APPLICATION_XML).post(user, User.class));}@Testpublic void testPutData() {User user = new User();user.setId(21432134);System.out.println(client.path("sample/putData/1").accept(MediaType.APPLICATION_XML).put(user).getEntity());}}如果你喜欢用Spring的方式,还需要在applicationContext-client.xml中增加如下配置<?xml version="1.0" encoding="UTF-8"?><beans xmlns="http://www.springframework.org/schema/beans"xmlns:context="http://www.springframework.org/schema/context"xmlns:jaxws="http://cxf.apache.org/jaxws"xmlns:xsi="http://www.w3.org/2001/XMLSchema-instance"xsi:schemaLocation="http://www.springframework.org/schema/beanshttp://www.springframework.org/schema/beans/spring-beans-3.0.xsdhttp://www.springframework.org/schema/contexthttp://www.springframework.org/schema/context/spring-context-3.0.xsdhttp://cxf.apache.org/jaxwshttp://cxf.apache.org/schemas/jaxws.xsd"><bean id="webClient" class="org.apache.cxf.jaxrs.client.WebClient" factory-method="create"><constructor-arg type="java.lang.String" value="http://localhost:8000/CXFWebService/rest/" /></bean></beans>这种是利用WebClient对象来调用WebService,还有一种方法也可以调用WebService,代码如下:
// 手动创建//RESTSample sample = JAXRSClientFactory.create("http://localhost:8000/CXFWebService/rest", RESTSample.class);// 从Spring Ioc容器中拿webClient对象ApplicationContext ctx = new ClassPathXmlApplicationContext("applicationContext-client.xml");RESTSample sample = ctx.getBean("restSampleBean", RESTSample.class);System.out.println(sample);System.out.println(sample.doGet());//System.out.println(sample.doRequest("haha", null, null));System.out.println(sample.getBean(22));System.out.println(sample.getList());System.out.println(sample.getMap().getMap());User user = new User();user.setId(21432134);user.setAddress("hoojo#gz");user.setEmail("hoojo_@126.com");user.setName("hoojo");System.out.println(sample.postData(user));System.out.println(sample.putData(111, user));sample.deleteData(2);这种方式相对比WebClient要简单,直接使用接口中的方法即可。同样如果你要整合到Spring可以在applicationContext-client.xml中增加配置如下:
<bean id="restSampleBean" class="org.apache.cxf.jaxrs.client.JAXRSClientFactory" factory-method="create"><constructor-arg type="java.lang.String" value="http://localhost:8000/CXFWebService/rest/" /><constructor-arg type="java.lang.Class" value="com.hoo.service.RESTSample" /></bean>执行以上方法可以看到控制台打印结果如下:
client consoleorg.apache.cxf.jaxrs.client.ClientProxyImpl@1cf7491this is get rest request22#JojO#null#nullcom.hoo.entity.Users@16eb6bc{key-0=0#JojO-0#null#null, key-1=1#JojO-1#null#null, key-2=2#JojO-2#null#null, key-3=3#JojO-3#null#null}21432134#jojo##12321321#hoojo_@126.com#hoojo#gz111#hoojo#hoojo_@126.com#hoojo#gzserver console####getBean#####id:22Method:GETuri:sample/bean/22{id=[22]}####getList#####Method:GETuri:sample/list{}####getMap#####Method:GETuri:sample/map{}21432134#hoojo#hoojo_@126.com#hoojo#gz#####putData#####21432134#hoojo#hoojo_@126.com#hoojo#gz111#hoojo#hoojo_@126.com#hoojo#gz#######deleteData#######2就这样,整合restful WebService成功。
Spring整合CXF,发布RSETful 风格WebService的更多相关文章
- Spring整合CXF发布及调用WebService
这几天终于把webService搞定,下面给大家分享一下发布webService和调用webService的方法 添加jar包 (官方下载地址:http://cxf.apache.org/downlo ...
- Spring整合CXF,发布RSETful 风格WebService(转)
Spring整合CXF,发布RSETful 风格WebService 这篇文章是承接之前CXF整合Spring的这个项目示例的延伸,所以有很大一部分都是一样的.关于发布CXF WebServer和Sp ...
- So easy Webservice 8.spring整合CXF 发布WS
1.添加jar包(cxf的jar包中包含了spring的jar包),添加spring配置文件 2.web.xml中配置CXFServlet,过滤WS服务的地址 <!-- 配置CXFServlet ...
- 使用cxf 发布 jax-rs 风格webservice 。并客户端测试。
详细介绍:http://www.ibm.com/developerworks/cn/java/j-lo-jaxrs/ 1.定义一个User对象 package com.zf.test; import ...
- Spring整合CXF之发布WebService服务
今天我们来讲下如何用Spring来整合CXF,来发布WebService服务: 给下官方文档地址:http://cxf.apache.org/docs/writing-a-service-with-s ...
- SpringMVC4整合CXF发布WebService
SpringMVC4整合CXF发布WebService版本:SpringMVC 4.1.6,CXF 3.1.0项目管理:apache-maven-3.3.3 pom.xml <project x ...
- Spring整合CXF步骤,Spring实现webService,spring整合WebService
Spring整合CXF步骤 Spring实现webService, spring整合WebService >>>>>>>>>>>> ...
- Java WebService 教程系列之 Spring 整合 CXF
Java WebService 教程系列之 Spring 整合 CXF 一.引入 jar 包 <dependency> <groupId>org.apache.cxf</ ...
- Spring集成CXF发布WebService并在客户端调用
Spring集成CXF发布WebService 1.导入jar包 因为官方下载的包里面有其他版本的sprring包,全导入会产生版本冲突,所以去掉spring的部分,然后在项目根目录下新建了一个CXF ...
随机推荐
- 文件IO 练习题
3.1 当读/写磁盘文件时,本章中描述的函数是否具有缓冲机制?请说明原因. 3.1 所有的磁盘 I/O 都要经过内核的块缓冲区(也称为内核的缓冲区高速缓存),唯一例 外的是对原始磁盘设备的 I/O,但 ...
- QT实现多语言切换
功能需求: 网盘客户端要能够实现多国语言的切换,第一版要支持中.英文的切换.在实现过程中感觉QT对多国语言的支持还是很不错的,制作多语言包很方便,切换的逻辑也很简单.下面就来看一下QT中如何制作多语言 ...
- java 中能否使用 动态加载的类(Class.forName) 来做类型转换?
今天同事提出了一个问题: 将对象a 转化为类型b,b 的classpath 是在配置文件中配置的,需要在运行中使用Class.forName 动态load进来,因为之前从来没有想过类似的问题,所以懵掉 ...
- android开发之Bundle使用
android开发中,我们经常需要在两个activity之间传递数据,最常用的莫过于使用intent.putXXX(),可是很多时候我们也会这样: Bundle bundle = new Bundle ...
- Java Nio 笔记
网上的很多关于NIO的资料是不正确的,nio 支持阻塞和非阻塞模式 关于读写状态切换 在读写状态切换的情况下是不能使用regedit 方法注册,而应该使用以下方式进行 selectionKey.int ...
- 移动web前端小结(一)
这段时间做了几个移动项目的前端页面,姑且称之webapp.做这几个项目之前根本没接触过移动端的相关知识,以为和PC端页面没啥区别无非就是尺寸小一点罢了.上手以后发现问题颇多.下面从框架.相关知识点.遇 ...
- SQL删除重复行和查询所有大于某成绩的语句分析
有这样一个题,用一条SQL语句 查询出每门课都大于80分的学生姓名. 下面是表 分析,查询每门课程都大于80的学生.SELECT DISTINCT name FROM dbo.student WHER ...
- Linked Server for SQL Server 2012(x64) to Oracle Database 12c(x64)
因为把两台数据库装了同一台机机器上,所以没有安装oracle Client的部分,Oracle部分使用netca创建的Net Service Name,使用tnsping以及登入方式的确认用户权限的以 ...
- Centos6.5 install Python2.7 & django & mysql & apache
#! /bin/bash#su root#get python2.7wget https://www.python.org/ftp/python/2.7.9/Python-2.7.9.tgz #ins ...
- SQL使用存儲過程訪問不同服務器
用openrowset连接远程SQL或插入数据 --如果只是临时访问,可以直接用openrowset --查询示例 select * from openrowset('SQLOLEDB', 'sql服 ...