
Ubuntu 16.04 LAMP server tutorial with Apache 2.4, PHP 7 and MariaDB (instead of MySQL)
https://www.howtoforge.com/tutorial/install-apache-with-php-and-mysql-on-ubuntu-16-04-lamp/
This tutorial exists for these OS versions
- Ubuntu 16.04 (Xenial Xerus)
- Ubuntu 15.10 (Wily Werewolf)
- Ubuntu 15.04 (Vivid Vervet)
- Ubuntu 14.10 (Utopic Unicorn)
- Ubuntu 14.04 LTS (Trusty Tahr)
- Ubuntu 13.10 (Saucy Salamander)
On this page
LAMP is short for Linux, Apache, MySQL, PHP. This tutorial shows how you can install an Apache 2 web server on an Ubuntu 16.04 (Xenial Xerus) server with PHP 7 (mod_php) and MySQL support. Additionally, I will install PHPMyAdmin to make MySQL administration easier. A LAMP setup is the perfect basis for CMS systems like Joomla, Wordpress or Drupal.
Preliminary Note
In this tutorial, I will use the hostname server1.example.com with the IP address 192.168.1.100. These settings might differ for you, so you have to replace them where appropriate.
I recommend to use a minimal Ubuntu server setup as basis for the tutorial, that can be a virtual- or root server image with an Ubuntu 16.04 minimal install from a web hosting company or you use our minimal server tutorial to install a server from scratch.
I'm running all the steps in this tutorial with root privileges, so make sure you're logged in as root:
sudo su
Installing MariaDB as MySQL replacement
We will install MariaDB instead of MySQL. MariaDB is a MySQL fork maintained by the original MySQL developer Monty Widenius. MariaDB is compatible with MySQL and provides interesting new features and speed improvements when compared to MySQL. Run the following command to install MariaDB-server and client:
apt-get -y install mariadb-server mariadb-client
Now we set a root password for MariaDB.
mysql_secure_installation
You will be asked these questions:
Enter current password for root (enter for none): <-- press enter
Set root password? [Y/n] <-- y
New password: <-- Enter the new MariaDB root password here
Re-enter new password: <-- Repeat the password
Remove anonymous users? [Y/n] <-- y
Disallow root login remotely? [Y/n] <-- y
Reload privilege tables now? [Y/n] <-- y
Test the login to MariaDB with the "mysql command"
mysql -u root -p
and enter the MariaDB root password that you've set above. The result should be similar to the screenshot below:
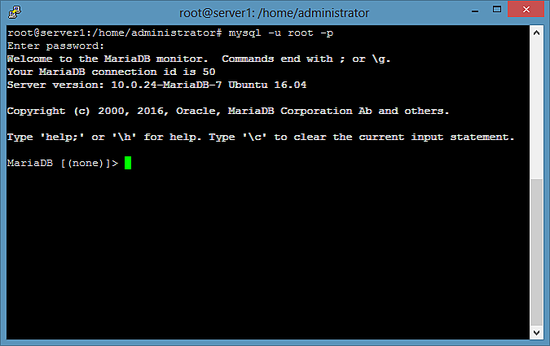
To leave the MariaDB shell, enter the command "quit" and press enter.
Install Apache 2.4
Apache 2 is available as an Ubuntu package, therefore we can install it like this:
apt-get -y install apache2
Now direct your browser to http://192.168.1.100, and you should see the Apache2 default page (It works!):
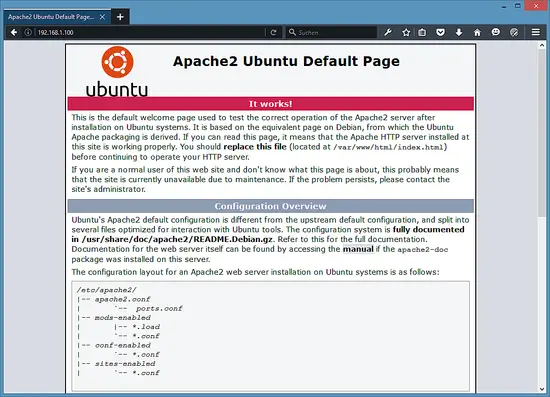
The document root of the apache default vhost is /var/www/html on Ubuntu and the main configuration file is /etc/apache2/apache2.conf. The configuration system is fully documented in /usr/share/doc/apache2/README.Debian.gz.
Install PHP 7
We can install PHP 7 and the Apache PHP module as follows:
apt-get -y install php7.0 libapache2-mod-php7.0
Then restart Apache:
systemctl restart apache2
Test PHP and get details about your PHP installation
The document root of the default web site is /var/www/html. We will now create a small PHP file (info.php) in that directory and call it in a browser. The file will display lots of useful details about our PHP installation, such as the installed PHP version.
nano /var/www/html/info.php
<?php
phpinfo();
?>
Then change the owner of the info.php file to the www-data user and group.
chown www-data:www-data /var/www/html/info.php
Now we call that file in a browser (e.g. http://192.168.1.100/info.php):
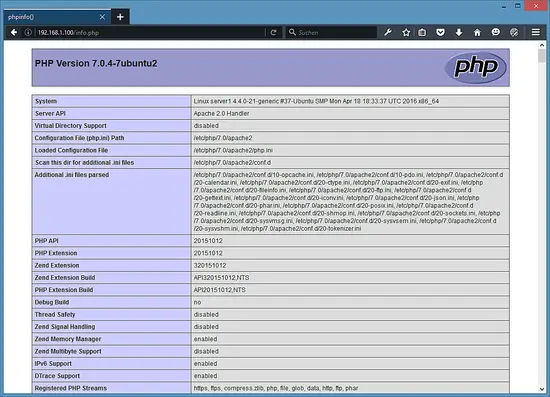
As you see, PHP 7.0 is working, and it's working through the Apache 2.0 Handler, as shown in the Server API line. If you scroll further down, you will see all modules that are already enabled in PHP5. MySQL is not listed there which means we don't have MySQL / MariaDB support in PHP yet.
Get MySQL / MariaDB support in PHP
To get MySQL support in PHP, we can install the php7.0-mysql package. It's a good idea to install some other PHP modules as well as you might need them for your applications. You can search for available PHP modules like this:
apt-cache search php7.0
Pick the ones you need and install them like this:
apt-get -y install php7.0-mysql php7.0-curl php7.0-gd php7.0-intl php-pear php-imagick php7.0-imap php7.0-mcrypt php-memcache php7.0-pspell php7.0-recode php7.0-sqlite3 php7.0-tidy php7.0-xmlrpc php7.0-xsl php7.0-mbstring php-gettext
Now restart Apache2:
systemctl restart apache2
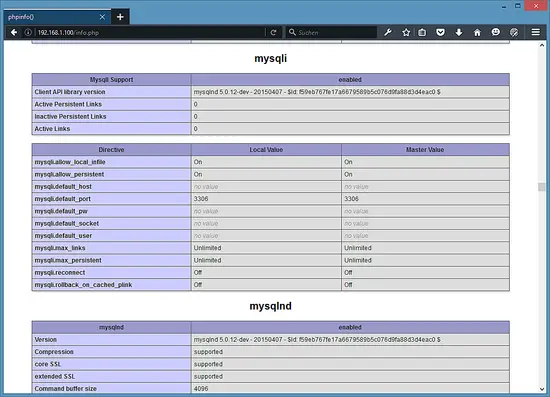
PHP 7 has now MySQL / MariaDB support as shown in phpinfo() above.
Install the APCu PHP cache to speed up PHP
APCu is a free PHP opcode cacher for caching and optimizing PHP intermediate code. It is strongly recommended to have an Opcache installed to speed up your PHP page.
APCu can be installed as follows:
apt-get -y install php-apcu
Now restart Apache:
systemctl restart apache2
Now reload http://192.168.1.100/info.php in your browser and scroll down to the modules section again. You should now find lots of new modules there:
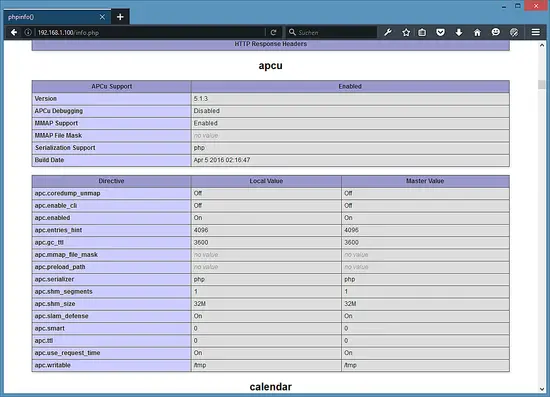
Please don't forget to delete the info.php file when you don't need it anymore as it provides sensitive details of your server. Run the following command to delete the file.
rm -f /var/www/html/info.php
Enable the SSL website in apache
SSL/ TLS is a security layer to encrypt the connection between the web browser and your server. Execute the following commands on your server to enable https:// support. Run:
a2enmod ssl
a2ensite default-ssl
which enables the ssl module and adds a symlink in the /etc/apache2/sites-enabled folder to the file /etc/apache2/sites-available/default-ssl.conf to include it into the active apache configuration. Then restart apache to enable the new configuration:
systemctl restart apache2
Now test the SSL connection by opening https://192.168.1.100 in a web browser.
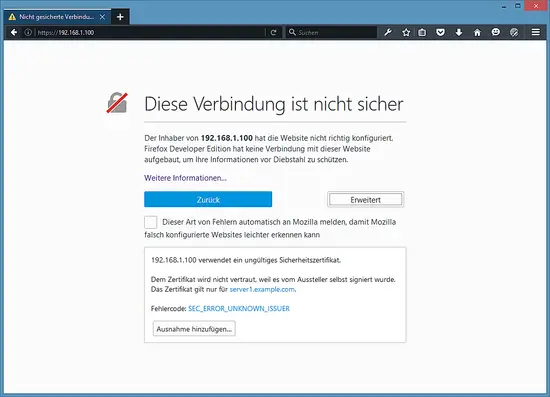
You will receive an SSL warning as the SSL certificate of the server is a "self-signed" SSL certificate, this means that the browser does not trust this certificate by default and you have to accept the security warning first. After accepting the warning, you will see the apache default page.
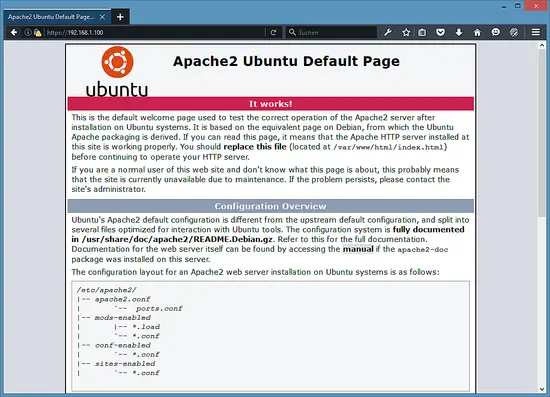
The closed "Green Lock" in front of the URL in the browser shows that the connection is encrypted. To get rid of the SSL warning, replace the self-signed SSL certificate /etc/ssl/certs/ssl-cert-snakeoil.pem with an officially signed SSL certificate from an SSL Authority.
Install phpMyAdmin
phpMyAdmin is a web interface through which you can manage your MySQL databases. It's a good idea to install it:
apt-get -y install phpmyadmin
You will see the following questions:
Web server to configure automatically: <-- Select the option: apache2
Configure database for phpmyadmin with dbconfig-common? <-- Yes
MySQL application password for phpmyadmin: <-- Press enter, apt will create a random password automatically.
MariaDB enables a plugin called "unix_socket" for the root user by default, this plugin prevents that the root user can log in to PHPMyAdmin and that TCP connections to MySQL are working for the root user. Therefore, I'll deactivate that plugin with the following command:
echo "update user set plugin='' where User='root'; flush privileges;" | mysql -u root -p mysql
Enter the MariaDB root password, when requested by the mysql command.
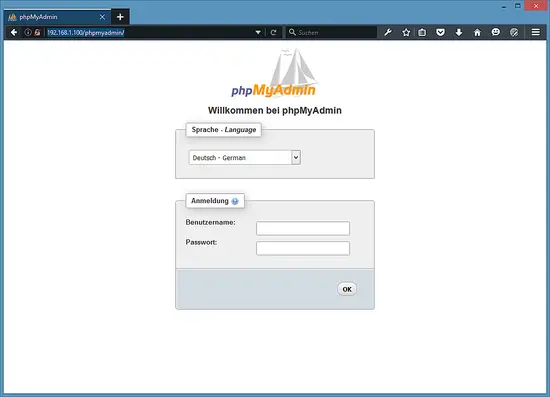
Afterward, you can access phpMyAdmin under http://192.168.1.100/phpmyadmin/:
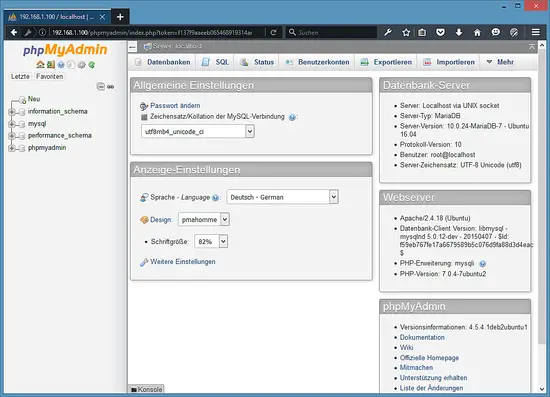
Links
- Apache: http://httpd.apache.org/
- PHP: http://www.php.net/
- MySQL: http://www.mysql.com/
- MariaDB: https://mariadb.com/
- Ubuntu: http://www.ubuntu.com/
- phpMyAdmin: http://www.phpmyadmin.net/

Ubuntu 16.04 LAMP server tutorial with Apache 2.4, PHP 7 and MariaDB (instead of MySQL)的更多相关文章
- Ubuntu 16.04 LAMP server 指南 - 配置 Apache2.4,PHP7,和MariaDB(而不是MySQL)
翻译自:https://www.howtoforge.com/tutorial/install-apache-with-php-and-mysql-on-ubuntu-16-04-lamp/ 昨天在虚 ...
- UBUNTU 16.04 LTS SERVER 手动升级 MariaDB 到最新版 10.2
UBUNTU 16.04 LTS SERVER 手动升级 MariaDB 到最新版 10.2 1. 起因 最近因为不同软件的数据问题本来只是一些小事弄着弄着就越弄越麻烦了,期间有这么个需求,没看到有中 ...
- Ubuntu 16.04.3 Server 版安装过程图文详解
Ubuntu 16.04.3 Server 版安装过程图文详解 首先,我们会进入系统安装的第一个界面,开始系统的安装操作.每一步的操作,左下角都会提示操作方式! 1.选择系统语言-English2.选 ...
- Ubuntu 16.04/CentOS 6.9安装Apache压力(并发)测试工具ab
说明: ab工具已经在Apache中包含,如果不想安装Apache,那么可以使用下面方法单独安装. 安装: Ubuntu: sudo apt-get install apache2-utils Cen ...
- ubuntu 16.04 vnc server
安装方法 https://help.ubuntu.com/community/VNC/Servers#vino 系统默认自带的,通过搜索Remote Desktop来找到它 配置好之后,设定一下密码 ...
- digitalocean --- How To Install Apache Tomcat 8 on Ubuntu 16.04
https://www.digitalocean.com/community/tutorials/how-to-install-apache-tomcat-8-on-ubuntu-16-04 Intr ...
- How To Install Java with Apt-Get on Ubuntu 16.04
Introduction Java and the JVM (Java's virtual machine) are widely used and required for many kinds o ...
- Install LAMP Stack On Ubuntu 16.04
原文:http://www.unixmen.com/how-to-install-lamp-stack-on-ubuntu-16-04/ LAMP is a combination of operat ...
- Install and Configure Apache Kafka on Ubuntu 16.04
https://devops.profitbricks.com/tutorials/install-and-configure-apache-kafka-on-ubuntu-1604-1/ by hi ...
随机推荐
- Spring7种事务传播行为类型--PROPAGATION_REQUIRED及其他6种事务传播行为种类
PROPAGATION_REQUIRED及其他6种事务传播行为种类,有需要的朋友可以参考下. Spring在TransactionDefinition接口中规定了7种类型的事务传播行为,它们规定了事务 ...
- Linux+Apache+PHP+MySQL服务器环境(CentOS篇)
1.前言 CentOS(Community ENTerprise Operating System)是Linux发行版之一,它是来自于Red Hat Enterprise Linux依照开放源代码规定 ...
- DbHelper.ttinclude 更新,查询视图和表
<#+ public class DbHelper { #region GetDbTables public static List<DbTable> GetDbTables(str ...
- python pip 更换国内安装源(windows)
1.点击此电脑,在最上面的的文件夹窗口输入 : %APPDATA% 2.按回车跳转到以下目录,新建pip文件夹 3.创建pip.ini文件 4.打开文件夹,输入以下内容,关闭即可(注意:源镜像可替换) ...
- iOS:根据系统类型加载不同的xib
1.将 xib 文件名手动更改为 xxx~iphone.xib 和 xxx~ipad.xib 2.初始化时使用 [[xxx alloc] init] 即可,系统会自动判断系统类型并加载对应的 xib ...
- Tomcat介绍 安装jdk 安装Tomcat
Tomcat介绍 Tomcat是Apache软件基金会(Apache Software Foundation)的Jakarta项目中的一个核心项目,由Apache.Sun和其他一些公司及个人共同开发而 ...
- 一则Gedit死机引起的错误之解决
一次,虚拟机中CentOS不明原因死机了,终端打开不能操作,SecureCRT和从SecureCRT中运行的托关于本机Windows下的Xming下的gedit也死掉了,无奈只能强制关机.重新启动后其 ...
- 通过tarball形式安装HBASE Cluster(CDH5.0.2)——HBASE 真分布式集群配置
一.应该先配置好zookeeper并成功启动,否则hbase无法启动 二.配置HBASE集群 1,配置hbase-env.sh,下面是最少配置项目 [hadoop@zk1 conf]$ vim hba ...
- 文件流方式 删除prefab空脚本
/// <summary> /// 删除一个Prefab上的空脚本 /// </summary> /// <param name="path"> ...
- Apache+php5
.下载回来的是解压文件,解压好放到要安装的位置.(我这里以D:\Acpache24为例) .打开Apache24\conf下httpd.conf 文件,用记事本打开即可. ()第37行ServerRo ...