
时序数据库timescaleDB安装
一:前言相关
环境:Red Hat 8.3.1-5
安装程序:PostgreSQL 14.1,TimescaleDB 2.5.1,cmake3.22.1
PostgreSQL编译安装需要cmake3.4以上的版本
TimescaleDB目前只支持PostgreSQL 9.6.3+,10.9+或11.4+
二、postgresql11部署
1、安装cmake


下载Cmake

安装gcc++ 后,再安装cmake

[root@TimescaleDB apps]# yum install -y gcc*

[root@TimescaleDB apps]# wget https://cmake.org/files/v3.22/cmake-3.22.1.tar.gz

[root@TimescaleDB cmake]# tar -zxvf cmake-3.22.1.tar.gz

编译安装cmake

[root@TimescaleDB cmake]# ./bootstrap && make && makeinstal

建立软连接

[root@TimescaleDB cmake-v3.8.2]# ln -s/usr/local/bin/cmake /usr/bin/cmake

查看版本

[root@TimescaleDB cmake-3.22.1]# cmake --version
安装cmake
2、安装postgresql
[root@TimescaleDB apps]#  wget https://ftp.postgresql.org/pub/source/v14.1/postgresql-14.1.tar.gz

[root@TimescaleDB apps]# tar -zxvf postgresql-14.1.tar.gz

安装依赖包

[root@TimescaleDB postgresql]# yum install -y zlib

[root@TimescaleDB postgresql]# ./configure --prefix=/usr/local/postgresql --with-readline --with-zlib

[root@TimescaleDB postgresql]# make && make install
1.安装postgresql
问题:安装postgreSQL出现configure:error:readline library not found
转自:https://www.cnblogs.com/shuaixf/archive/2011/11/29/2268292.html
要安装 readline, readline-dev开发包,要么使用 --without-readline选项关闭 readline 功能。

#yum install readline;

#yum install readline-dev;

readline 也就是命令行编辑,关闭的话,你直接用psql 就不能编辑命令行,如果输错指令,不能回滚命令历史记录,只能手工重新输入

例如:[root@TimescaleDB postgresql]#  yum -y install -y readline-devel
解决方法

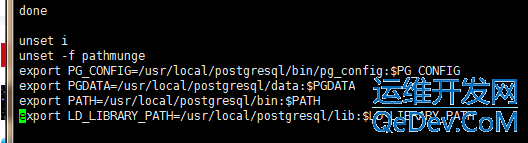
在/etc/profile最后,添加以下内容

这一步很关键,如果不设置的话,postgresql的安装命令就不能使用

[root@TimescaleDB postgresql]#vi/etc/profile

exportPG_CONFIG=/usr/local/postgresql/bin/pg_config:$PG_CONFIG

exportPGDATA=/usr/local/postgresql/data:$PGDATA

export PATH=/usr/local/postgresql/bin:$PATH

exportLD_LIBRARY_PATH=/usr/local/postgresql/lib:$LD_LIBRARY_PATH

[root@TimescaleDB postgresql]#source /etc/profile
2.设置环境变量并保存执行
[root@TimescaleDB postgresql]#  groupadd postgres

[root@TimescaleDB postgresql]#  useradd -g postgres postgres

[root@TimescaleDB postgresql]#  passwd postgres

[root@TimescaleDB postgresql]# mkdir /usr/local/postgresql/data

[root@TimescaleDB postgresql]# chown postgres /usr/local/postgresql/data

[root@TimescaleDB postgresql]# chgrp postgres /usr/local/postgresql/data
3.创建用户和用户组,创建数据库文件目录
4.初始化数据库并修改配置
切换用户,初始化数据库(如果不切换账户直接用root进行初始化,会报错)

[root@TimescaleDB postgresql]# su postgres

[postgres@TimescaleDB postgresql]$ /usr/local/postgresql/bin/initdb -D /usr/local/postgresql/data
4.1切换用户,初始化数据库
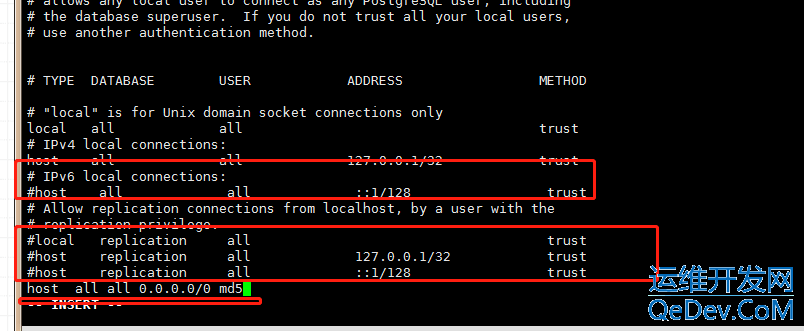
配置访问权限

[postgres@TimescaleDB postgresql]$ vi /usr/local/postgresql/data/pg_hba.conf

host all all 0.0.0.0/0 md5

配置监控地址,连接端口号

[postgres@TimescaleDB ~]$ vi /usr/local/postgresql/data/postgresql.conf

listen_addresses配置监听地址范围,改为*则为所有

listen_addresses = '*'

port = 5432                             # (change requires restart)
4.2配置访问权限、监听地址及端口

5.启动数据库
postgres@TimescaleDB ~]$/usr/local/postgresql/bin/pg_ctl -D /usr/local/postgresql/data -l /usr/local/postgresql/data/logfile start

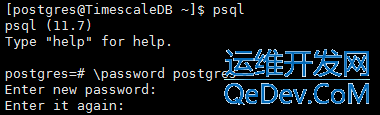
6.修改数据库密码
postgres@TimescaleDB ~]$ psql
postgres=# \password postgres
三、安装timescaledb(把postgres 改成 timescaledb时序库)
软件包链接https://codeload.github.com/timescale/timescaledb/zip/master
从源安装自托管 TimescaleDB(官网https://docs.timescale.com/install/latest/self-hosted/installation-source/#configuring-postgresql-after-installing-from-source)

git clone https://github.com/timescale/timescaledb.git

cd timescaledb

查看最新版本。您可以在我们的发布页面上找到最新的发布标签:https://github.com/timescale/timescaledb/releases

git checkout 2.5.1

引导构建系统:

./bootstrap -DUSE_OPENSSL=0 -DREGRESS_CHECKS=OFF

构建扩展:

cd build && make

安装 TimescaleDB:

make install
1、安装timescaledb


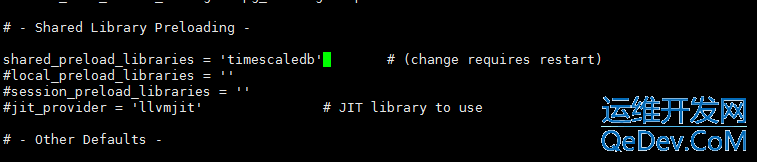
编辑postgresql.conf文件,添加timescaledb库

[root@TimescaleDB postgresql]# su postgres

[postgres@TimescaleDB postgresql]$ vim /usr/local/postgresql/data/postgresql.conf

shared_preload_libraries = 'timescaledb'        # (change requires restart)
2、配置timescaledb

3.重启postgresql数据库
postgres@TimescaleDB ~]$/usr/local/postgresql/bin/pg_ctl -D /usr/local/postgresql/data -l /usr/local/postgresql/data/logfile restart

4.添加timescaledb扩展
postgres@TimescaleDB ~]$ psql
postgres=# create extension timescaledb;
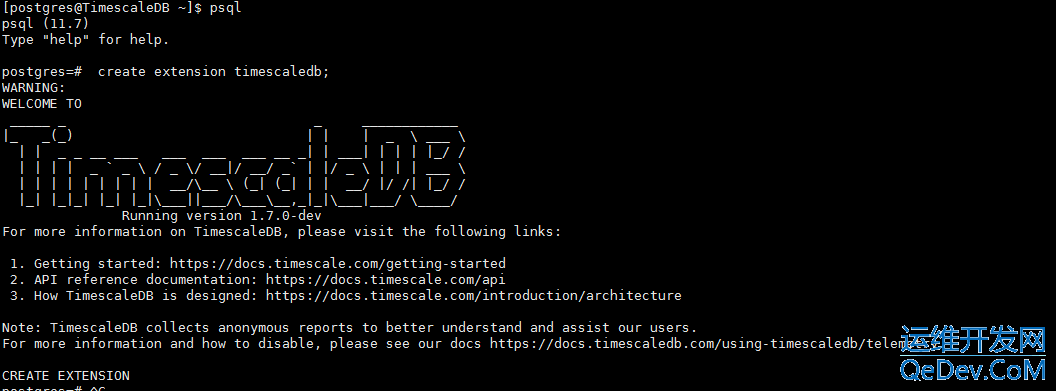
5、验证timescaleDB扩展安装完成

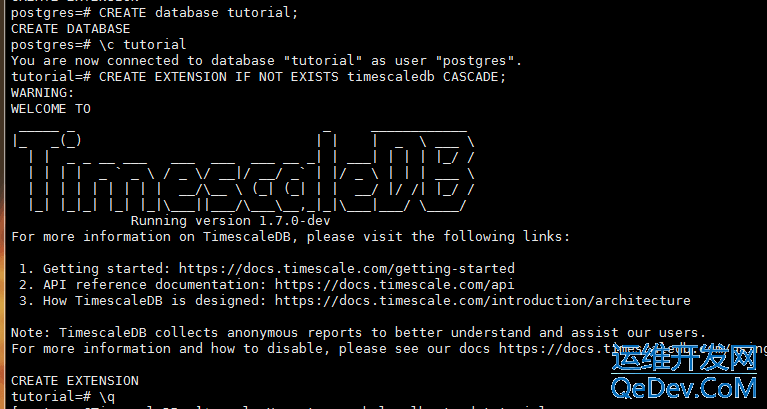
postgres@TimescaleDB ~]$ psql

postgres=# create database tutorial;

postgres=# \c tutorial

tutorial=# create extension if not exists timescaledb cascade;

验证完成,timescaleDB扩展安装成功
5、验证timescaleDB扩展安装完成
四、其他
1.查看版本号和系统类别:cat /etc/redhat-realease;

2.如果是redhat:(yum install)

a.yum 删除软件包:

rpm -qa | grep postgresql

yum remove postgresql*

b.删除相关目录文件:

rm -rf  /var/lib/pgsql

rm -rf  /usr/pgsql*

c.删除pg相关用户组/用户

userdel -r postgres groupdel postgres

如果是ubuntu /centos:(暂时没实践,做个笔记备用)(apt-get install)

如果在运行,默认的5432端口就能被监听到,请运行 sudo service postgresql stop 暂停服务。

在命令行输入sudo apt-get --purge remove postgresql

删除postgresql安装包,安装删除后还有删除对应的配置sudo rm -r /etc/postgresql/

sudo rm -r /etc/postgresql-common/

sudo rm -r /var/lib/postgresql/

sudo userdel -r postgres

sudo groupdel postgres

最后删除用户/用户组
1.完全删除postgres
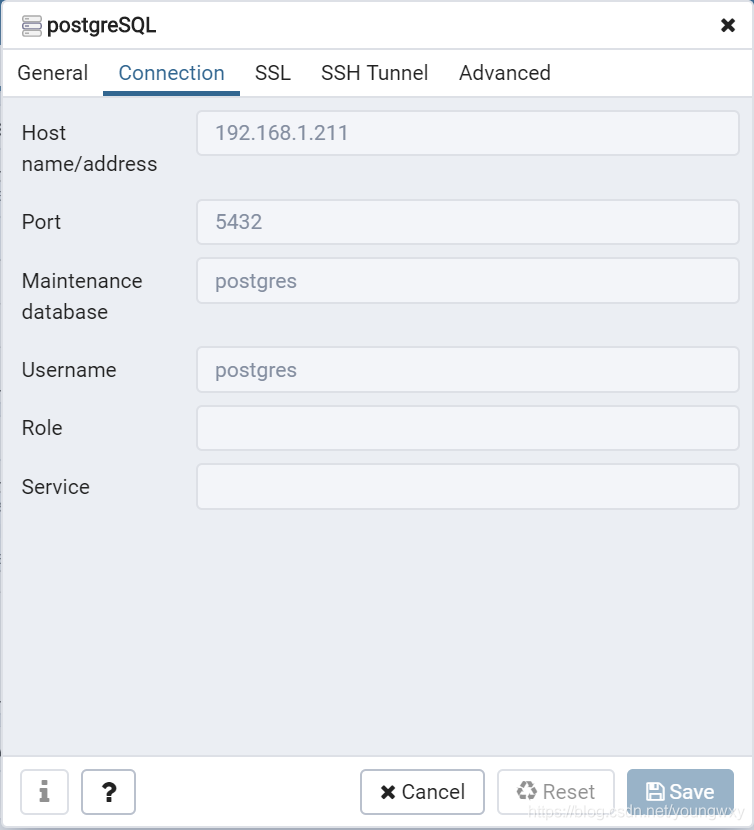
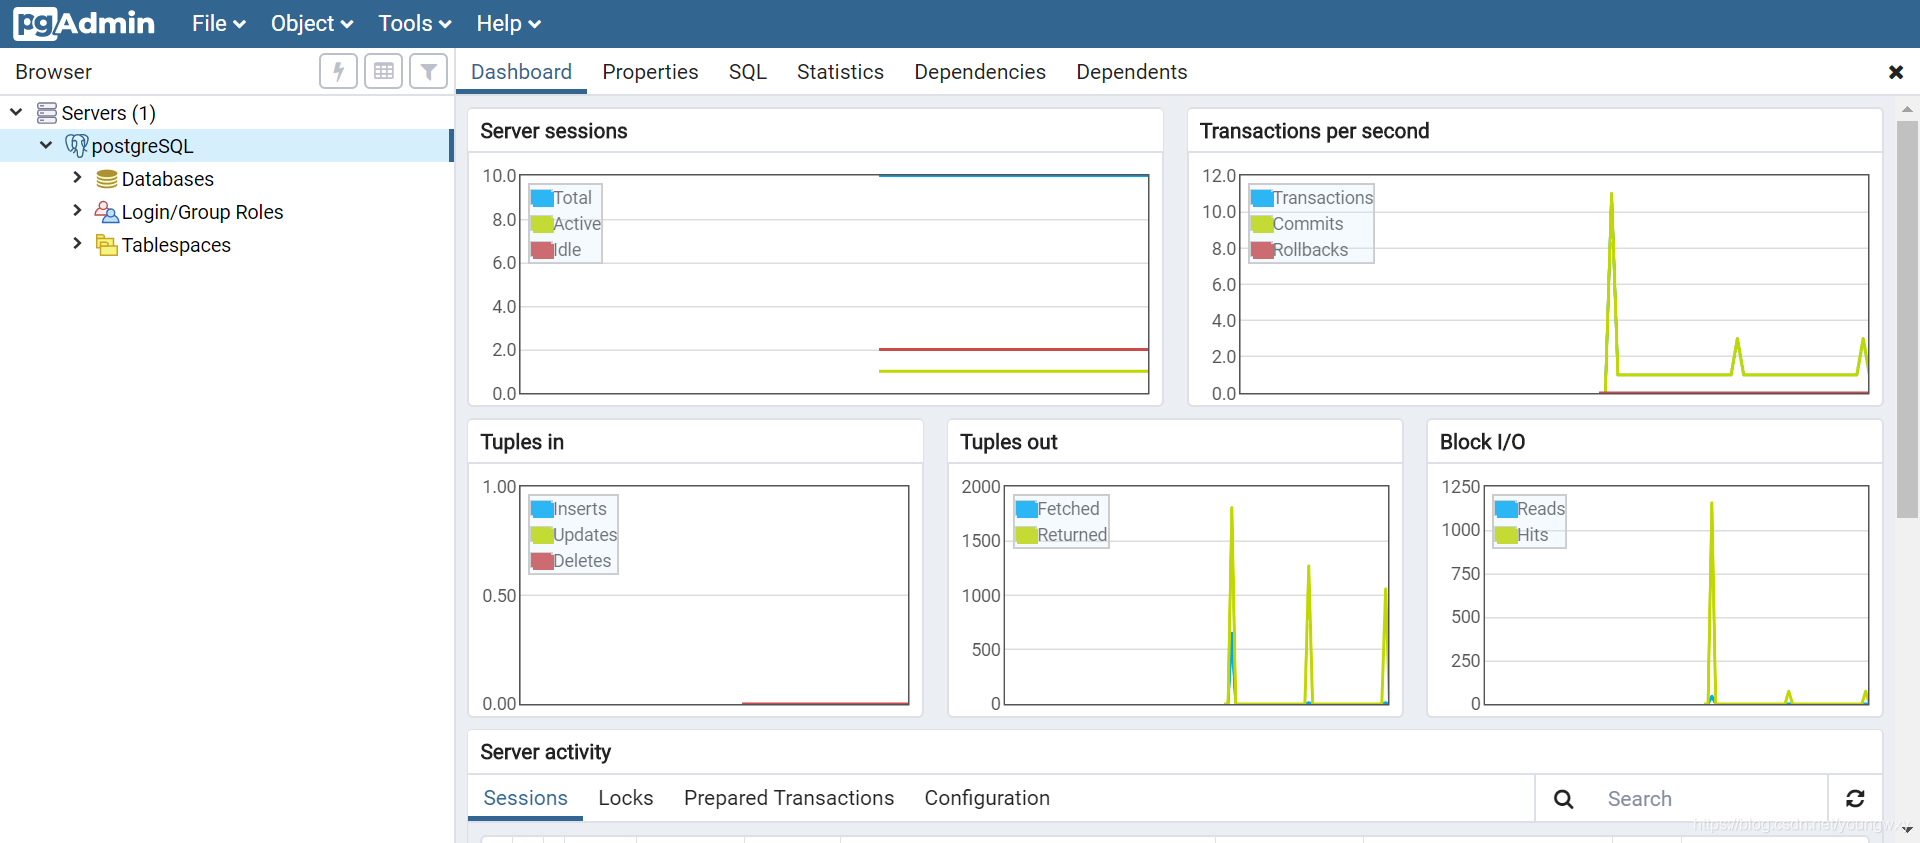
2.远程连接方式
2.1 navicat(这里不做说明)
2.2 pgAdmin
下载地址:https://www.pgadmin.org/download/pgadmin-4-windows/
总结:
1、安装cmake
2、安装postgresql
3、安装timescaledb(把postgres 改成 timescaledb时序库)
启动命令:
postgres@TimescaleDB ~]$/usr/local/postgresql/bin/pg_ctl -D /usr/local/postgresql/data -l /usr/local/postgresql/data/logfile restart
postgres@TimescaleDB ~]$/usr/local/postgresql/bin/pg_ctl -D /usr/local/postgresql/data -l /usr/local/postgresql/data/logfile start
postgres@TimescaleDB ~]$/usr/local/postgresql/bin/pg_ctl stop -D /usr/local/postgresql/data
转自:
https://www.qedev.com/linux/180450.html
https://docs.timescale.com/install/latest/self-hosted/installation-source/#configure-postgresql-after-installing-from-source
https://blog.csdn.net/yang_z_1/article/details/113560107
https://blog.csdn.net/youngwxy/article/details/100163822
https://www.cnblogs.com/june-/articles/14276416.html
https://blog.csdn.net/weixin_29228203/article/details/116691715
时序数据库timescaleDB安装的更多相关文章
- 时序数据库InfluxDB安装及使用
时序数据库InfluxDB安装及使用 1 安装配置 安装 wget https://dl.influxdata.com/influxdb/releases/influxdb-1.3.1.x86_64. ...
- Influxdb 时序数据库 windows 安装
Influxdb 是一款比较火爆的时序数据库,本文介绍如何在 windows 平台下安装. 1.场景: windows 平台的 influxdb 似乎只支持单机非windows 服务的安装方式 适用于 ...
- 国产时序数据库IotDB安装、与SpringBoot集成
一.简介: 本文将完成一个真实业务中的设备上报数据的一个例子,完整的展示后台服务接收到设备上报的数据后,将数据添加到时序数据库,并且将数据查询出来的一个例子.本文所有代码已经上传GitHub:http ...
- Influxdb 时序数据库 centos 安装
Influxdb 环境搭建 操作系统:CentOS 7 X64 SSH工具:PuTTY 操作系统安装,请参照官网文档进行:https://www.centos.org/ 使用PuTTY 通过ssh连接 ...
- TimescaleDB比拼InfluxDB:如何选择合适的时序数据库?
https://www.itcodemonkey.com/article/9339.html 时序数据已用于越来越多的应用中,包括物联网.DevOps.金融.零售.物流.石油天然气.制造业.汽车.太空 ...
- Influxdb时序数据库阅读笔记
时序数据库 2017年2月Facebook开源了beringei时序数据库:到了4月基于PostgreSQL打造的时序数据库TimeScaleDB也开源了,而早在2016年7月,百度云在其天工物联网平 ...
- 0160 十分钟看懂时序数据库(I)-存储
摘要:2017年时序数据库忽然火了起来.开年2月Facebook开源了beringei时序数据库:到了4月基于PostgreSQL打造的时序数据库TimeScaleDB也开源了,而早在2016年7月, ...
- [Go] 时序数据库influxdb的安装
日志类的数据时候存储在时序数据库中,下面就是时序数据库influxdb的安装 curl -sL https://repos.influxdata.com/influxdb.key | apt-key ...
- 时序数据库TDengine 详细安装+集成流程+问题解决
官方文档:https://docs.taosdata.com/get-started/package/ 点击进入 产品简介 TDengine 是一款高性能.分布式.支持 SQL 的时序数据库 (Dat ...
- 互联网级监控系统必备-时序数据库之Influxdb集群及踩过的坑
上篇博文中,我们介绍了做互联网级监控系统的必备-Influxdb的关键特性.数据读写.应用场景: 互联网级监控系统必备-时序数据库之Influxdb 本文中,我们介绍Influxdb数据库集群的搭建, ...
随机推荐
- [转帖]jemalloc 性能测试
https://wenfh2020.com/2020/07/30/jemalloc/ jemalloc 是一个优秀的内存分配器,通过与系统默认的内存分配器进行比较:jemalloc 内存分配性能比 ...
- Python处理Oracle数据库的学习过程
Python处理Oracle数据库的学习过程 背景 产品数据存在一些大小写敏感的数据迁移到不敏感的数据库时出现报错的情况. 基于此, 我这边跟帅男同学学习了下Python的使用. 因为这一块一直比较菜 ...
- [转帖]oracle如何删除datafile,误删除Oracle datafile 无法打开数据库
1.在Oracle open方式下,直接从OS上删除了datafile文件. rm /u02/rmants.dbf 2.数据库关闭后,无法打开数据库,只能到mount状态. SQL> alter ...
- pytest-assume插件-多重校验
自动化接口测试我们通常会对一条case设置多条断言,这样就会出现一个问题,如果前面一 个校验不通过,那么后面的校验就不会走到,如下图,可以看到校验走到assert False就不往 下走了,这个时候p ...
- RedisSyncer同步引擎的设计与实现
RedisSyncer一款通过replication协议模拟slave来获取源Redis节点数据并写入目标Redis从而实现数据同步的Redis同步中间件. 该项目主要包括以下子项目: redis 同 ...
- 【OpenAI】ChatGPT函数调用(Function Calling)实践
6月13日OpenAI在Chat Completions API中添加了新的函数调用(Function Calling)能力,帮助开发者通过API方式实现类似于ChatGPT插件的数据交互能力. 本文 ...
- js获取字符串最后几位字符数
截取字符串 为什要截取字符串呢??? 因为有些时候,我们需要判断某一个字符串中是不是,含有特定的字符 substring(a)从起始位置开始(包含a这个位置),一直到字符串的末尾(截取字符串最后6个) ...
- 大数据面试题集锦-Hadoop面试题(二)-HDFS
你准备好面试了吗?这里有一些面试中可能会问到的问题以及相对应的答案.如果你需要更多的面试经验和面试题,关注一下"张飞的猪大数据分享"吧,公众号会不定时的分享相关的知识和资料. 目录 ...
- 书写自动智慧文本分类器的开发与应用:支持多分类、多标签分类、多层级分类和Kmeans聚类
书写自动智慧文本分类器的开发与应用:支持多分类.多标签分类.多层级分类和Kmeans聚类 文本分类器,提供多种文本分类和聚类算法,支持句子和文档级的文本分类任务,支持二分类.多分类.多标签分类.多层级 ...
- Git 简单实用教程
相关链接: 码云(gitee)配置SSH密钥 码云gitee创建仓库并用git上传文件 git 上传错误This oplation equires one of the flowi vrsionsot ...