android中的简单animation(四)3D transition
animation_main_screen.xml:
 <?xml version="1.0" encoding="utf-8"?>

 <FrameLayout xmlns:android="http://schemas.android.com/apk/res/android"

     android:id="@+id/container"

     android:layout_width="match_parent"

     android:layout_height="match_parent">

     <ListView

         android:id="@android:id/list"

         android:persistentDrawingCache="animation|scrolling"

         android:layout_width="match_parent"

         android:layout_height="match_parent"

         android:layoutAnimation="@anim/layout_bottom_to_top_slide" />

     <ImageView

         android:id="@+id/picture"

         android:scaleType="fitCenter"

         android:layout_width="match_parent"

         android:layout_height="match_parent"

         android:visibility="gone" />

 </FrameLayout>
layout_bottom_to_top.xml:
 xml version="1.0" encoding="utf-8"?>

 <layoutAnimation xmlns:android="http://schemas.android.com/apk/res/android"

         android:delay="30%"

         android:animationOrder="reverse"

         android:animation="@anim/slide_right" />
slide_right.xml:
 <?xml version="1.0" encoding="utf-8"?>

 <set xmlns:android="http://schemas.android.com/apk/res/android"

     android:interpolator="@android:anim/accelerate_interpolator">

     <translate

         android:fromXDelta="-100%p"

         android:toXDelta="0"

         android:duration="@android:integer/config_shortAnimTime" />

 </set>
Transition3d.java:
package com.example.android.apis.animation; import com.example.android.apis.R; import android.app.Activity;
import android.os.Bundle;
import android.widget.ListView;
import android.widget.ArrayAdapter;
import android.widget.AdapterView;
import android.widget.ImageView;
import android.view.View;
import android.view.ViewGroup;
import android.view.animation.Animation;
import android.view.animation.AccelerateInterpolator;
import android.view.animation.DecelerateInterpolator; public class Transition3d extends Activity implements
AdapterView.OnItemClickListener, View.OnClickListener {
private ListView mPhotosList;
private ViewGroup mContainer;
private ImageView mImageView; // Names of the photos we show in the list
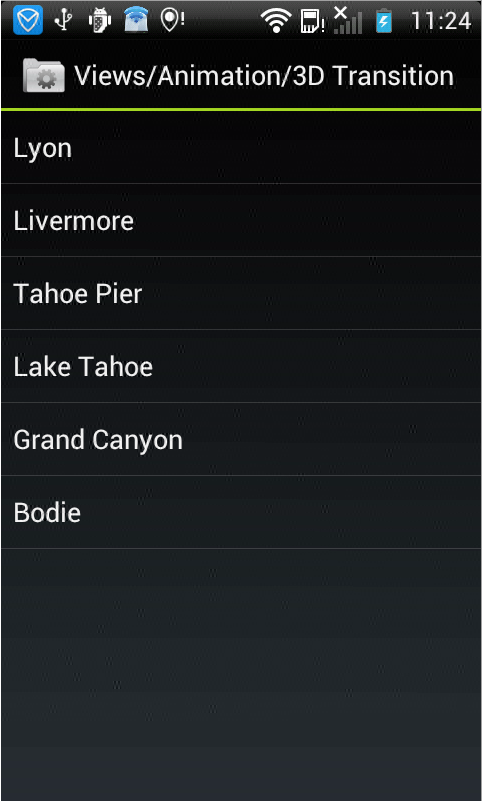
private static final String[] PHOTOS_NAMES = new String[] {
"Lyon",
"Livermore",
"Tahoe Pier",
"Lake Tahoe",
"Grand Canyon",
"Bodie"
}; // Resource identifiers for the photos we want to display
private static final int[] PHOTOS_RESOURCES = new int[] {
R.drawable.photo1,
R.drawable.photo2,
R.drawable.photo3,
R.drawable.photo4,
R.drawable.photo5,
R.drawable.photo6
}; @Override
protected void onCreate(Bundle savedInstanceState) {
super.onCreate(savedInstanceState); setContentView(R.layout.animations_main_screen); mPhotosList = (ListView) findViewById(android.R.id.list);
mImageView = (ImageView) findViewById(R.id.picture);
mContainer = (ViewGroup) findViewById(R.id.container); // Prepare the ListView
final ArrayAdapter<String> adapter = new ArrayAdapter<String>(this,
android.R.layout.simple_list_item_1, PHOTOS_NAMES); mPhotosList.setAdapter(adapter);
mPhotosList.setOnItemClickListener(this); // Prepare the ImageView
mImageView.setClickable(true);
mImageView.setFocusable(true);
mImageView.setOnClickListener(this); // Since we are caching large views, we want to keep their cache
// between each animation
mContainer.setPersistentDrawingCache(ViewGroup.PERSISTENT_ANIMATION_CACHE);
} /**
* Setup a new 3D rotation on the container view.
*
* @param position the item that was clicked to show a picture, or -1 to show the list
* @param start the start angle at which the rotation must begin
* @param end the end angle of the rotation
*/
private void applyRotation(int position, float start, float end) {
// Find the center of the container
final float centerX = mContainer.getWidth() / 2.0f;
final float centerY = mContainer.getHeight() / 2.0f; // Create a new 3D rotation with the supplied parameter
// The animation listener is used to trigger the next animation
final Rotate3dAnimation rotation =
new Rotate3dAnimation(start, end, centerX, centerY, 310.0f, true);
rotation.setDuration(500);
rotation.setFillAfter(true);
rotation.setInterpolator(new AccelerateInterpolator());
rotation.setAnimationListener(new DisplayNextView(position)); mContainer.startAnimation(rotation);
} public void onItemClick(AdapterView<?> parent, View v, int position, long id) {
// Pre-load the image then start the animation
mImageView.setImageResource(PHOTOS_RESOURCES[position]);
applyRotation(position, 0, 90);
} public void onClick(View v) {
applyRotation(-1, 180, 90);
} /**
* This class listens for the end of the first half of the animation.
* It then posts a new action that effectively swaps the views when the container
* is rotated 90 degrees and thus invisible.
*/
private final class DisplayNextView implements Animation.AnimationListener {
private final int mPosition; private DisplayNextView(int position) {
mPosition = position;
} public void onAnimationStart(Animation animation) {
} public void onAnimationEnd(Animation animation) {
mContainer.post(new SwapViews(mPosition));
} public void onAnimationRepeat(Animation animation) {
}
} /**
* This class is responsible for swapping the views and start the second
* half of the animation.
*/
private final class SwapViews implements Runnable {
private final int mPosition; public SwapViews(int position) {
mPosition = position;
} public void run() {
final float centerX = mContainer.getWidth() / 2.0f;
final float centerY = mContainer.getHeight() / 2.0f;
Rotate3dAnimation rotation; if (mPosition > -1) {
mPhotosList.setVisibility(View.GONE);
mImageView.setVisibility(View.VISIBLE);
mImageView.requestFocus(); rotation = new Rotate3dAnimation(90, 180, centerX, centerY, 310.0f, false);
} else {
mImageView.setVisibility(View.GONE);
mPhotosList.setVisibility(View.VISIBLE);
mPhotosList.requestFocus(); rotation = new Rotate3dAnimation(90, 0, centerX, centerY, 310.0f, false);
} rotation.setDuration(500);
rotation.setFillAfter(true);
rotation.setInterpolator(new DecelerateInterpolator()); mContainer.startAnimation(rotation);
}
} }
显示效果如下,点击某个选项之后,将会用3D的方式显示图片:

android中的简单animation(四)3D transition的更多相关文章
- android中的简单animation(三)accelerate(加速),decelerate(减速),anticipate,overshoot,bounce
animation_3.xml: <?xml version="1.0" encoding="utf-8"?> <LinearLayout x ...
- android中的简单animation(二)push up,push left,cross fade,hyperspace
animation_2.xml: <?xml version="1.0" encoding="utf-8"?> <LinearLayout x ...
- android中的简单animation(一)shake
1.shake animation_1.xml: <?xml version="1.0" encoding="utf-8"?> <Linear ...
- Android中xml设置Animation动画效果详解
在 Android 中, Animation 动画效果的实现可以通过两种方式进行实现,一种是 tweened animation 渐变动画,另一种是 frame by frame animation ...
- MVP架构在xamarin android中的简单使用
好几个月没写文章了,使用xamarin android也快接近两年,还有一个月职业生涯就到两个年了,从刚出来啥也不会了,到现在回头看这个项目,真jb操蛋(真辛苦了实施的人了,无数次吐槽怎么这么丑),怪 ...
- android中实现简单的聊天功能
这个例子只是简单的实现了单机版的聊天功能,自己跟自己聊,啦啦~~ 主要还是展示RecyclerView控件的使用吧~ 参考我之前写的文章: android中RecyclerView控件的使用 andr ...
- Gradle在Android中的简单使用
Gradle在Android中简单的使用 还望支持个人博客站:http://www.enjoytoday.cn Android Studio 使用gradle进行工程构建,为了更好的了解整个andro ...
- EventBus在Android中的简单使用
EventBus是一个方便与Android中各组件通信的开源框架,开源地址;https://github.com/greenrobot/EventBus.EventBus功能非常强大 ,今天在做一个功 ...
- Android中数据存储(四)——ContentProvider存储数据
目录(?)[+] 当一个应用程序在Android中安装后,我们在使用应用的过程中会产生很多的数据,应用都有自己的数据,那么我们应该如何存储数据呢? 数据存储方式 Android 的数据存储有5种方 ...
随机推荐
- springboot+mybatis多数据源
首先,既然是多数据源,那么我们就先看下数据源怎么配置的: javaconfig类似下面这样: MapperScan注解常用配置如下: basePackages:Base packages to sca ...
- 多数据库:SQLHelper
//=============================================================================== // This file is ba ...
- mysql MVCC 实现原理
MVCC( Multi-Version Concurrency Controll) 每一行都存储了事件发生时的系统版本号(System Version Number),用来替代事件实际发生的时间.每一 ...
- 【PAT甲级】1026 Table Tennis (30 分)(结构体排序,trick较多)
题意: 输入一个正整数N(<=10000),表示客户(对)的大小,接着输入N行数据,每行包括一对顾客到场的时间,想要玩的时间,以及是否是VIP客户.接下来输入两个正整数K,M(K<=100 ...
- 超参数 hyperparameters
转载:https://www.cnblogs.com/qamra/p/8721561.html 超参数的定义:在机器学习的上下文中,超参数是在开始学习过程之前设置值的参数,而不是通过训练得到的参数数据 ...
- Linux下安装Docker,报错docker: unrecognized service的两种解决方案
转自(方法1):https://www.cnblogs.com/ECJTUACM-873284962/p/9362840.html
- redis 之redis发布订阅
Redis 通过 PUBLISH . SUBSCRIBE 等命令实现了订阅与发布模式. 一个Publisher,多个Subscriber模型 如下图所示,可以作为消息队列或者消息通道 主要应用: 一个 ...
- Ubuntu 编译 LAMP
下载apache源码 http://httpd.apache.org/ 解压缩apache安装包,进入apache文件夹. 安装: apache2.2.9./configure --prefix=/u ...
- 如何在ubuntu14.04(64位)编译运行32位程序
sudo -i cd /etc/apt/sources.list.d echo "deb http://archive.ubuntu.com/ubuntu/ raring main rest ...
- C#中集合接口关系笔记
IEnumerable IEnumerable接口是所有集合类型的祖宗接口,其作用相当于Object类型之于其它类型.如果某个类型实现了IEnumerable接口,就意味着它可以被迭代访问,也就可以称 ...