
vue生态系统之vue-router
一、vue-router安装与使用
1、安装
进入项目目录中安装vue-router模块
E:\vueProject\webpackProject>cnpm install vue-router --save
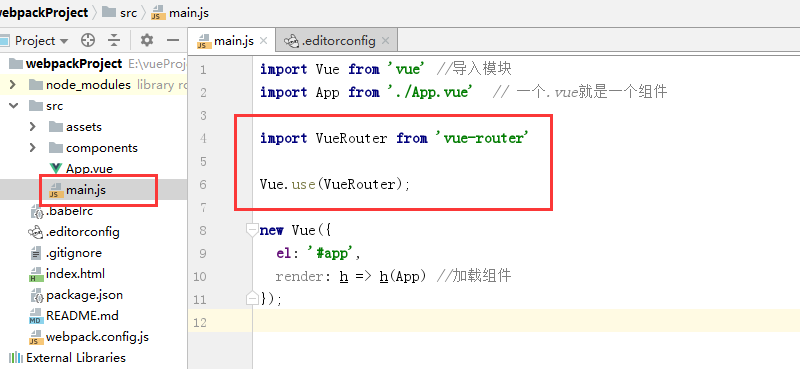
2、在项目main.js文件中导入模块
import VueRouter from 'vue-router'
3、让Vue知道你使用路由
Vue.use(VueRouter);
此时即完成了vue-router的安装配置:
2、使用路由
vue-router方便做单页面的应用,将组件 (components) 映射到路由 (routes),然后告诉 Vue Router 在哪里渲染它们。
为方便起见,先建一个头部的导航,这里使用ElementUI的使用中的导航,进行点击切换路由:
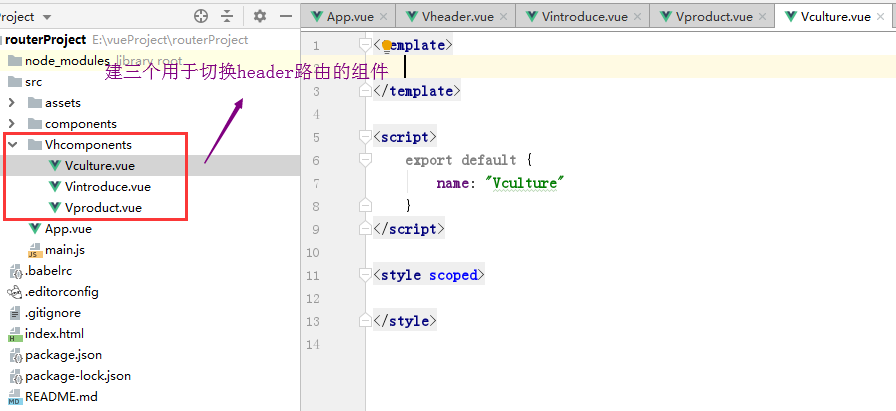
(1)建立组件
导航条中有几个选项,建立几个组件,用于切换路由:
(2)定义路由组件
在main.js文件中引入创建的组件,这里它们就是路由组件了
//定义路由组件

import Vintroduce from 'Vhcomponents/Vintroduce'

import Vproduct from 'Vhcomponents/Vproduct'

import Vculture from 'Vhcomponents/Vculture'
(3)创建 router 实例
在main.js文件中创建router 实例,并且将路由配置注入(一个路由对应一个路由组件)
// 创建 router 实例,然后传 `routes` 配置,也就是一个路由对应一个组件

const router = new VueRouter({

  routes:[

    { path: '/', component: Vintroduce },

    { path: '/product', component: Vproduct },

    { path: '/culture', component: Vculture },

  ]

});
(4)挂载路由实例
在main.js文件中挂载router 实例
//将路由router挂载到Vue根实例上,一个项目只有一个根实例

new Vue({

  el: '#app',

  router, //相当于router:router

  render: h => h(App) //加载组件

});
(5)在父组件中进行渲染也就是App.vue组件
<template>

  <!--页面结构-->

  <div id="app">

    <el-menu

      :default-active="activeIndex2"

      class="el-menu-demo"

      mode="horizontal"

      background-color="#545c64"

      text-color="#fff"

      active-text-color="#ffd04b">

      <el-menu-item index="1"> <router-link to="introduce">公司介绍</router-link></el-menu-item>

      <el-menu-item index="3" ><router-link to="product">产品管理</router-link></el-menu-item>

      <el-menu-item index="4"><router-link to="culture">公司文化</router-link></el-menu-item>

    </el-menu>

    <!-- 路由出口 -->

    <!-- 路由匹配到的组件将渲染在这里 -->

    <router-view></router-view>

  </div>

</template>
上述渲染的过程中router-link相当于a标签,to相当于href属性,<router-view></router-view>为路由出口,这样就完成了路由的切换。
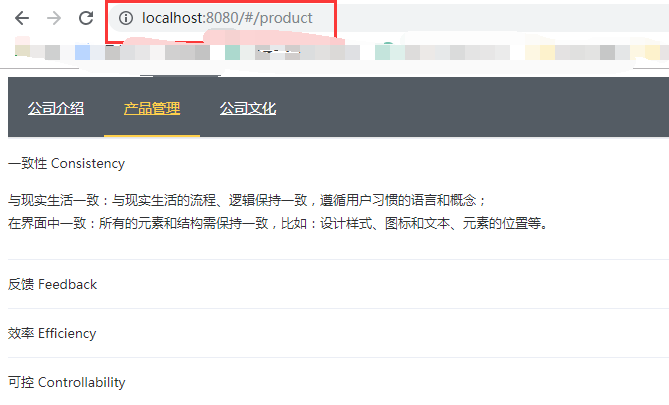
可以在main.js文件中:

// 加入mode:history参数

const router = new VueRouter({

  mode:'history',

  routes: [

        {path: '/introduce', component: Vintroduce},

        {path: '/product', component: Vproduct},

        {path: '/culture', component: Vculture},

  ]

});
去掉地址中的#
二、完整页面结构中使用
一般页面包含头部header、content、footer三部分,这三部分是三个组件,现在在主页面中App.vue中引入三个组件,而不是直接进行router-link
<template>

  <!--页面结构-->

  <div id="app">

    <!--使用组件-->

    <Vheader></Vheader>

    <Vcontent v-bind:departArray="depart" v-on:onclick="addOneDate"></Vcontent> <!--绑定自定义属性-->

    <Vfooter></Vfooter>

  </div>

</template>
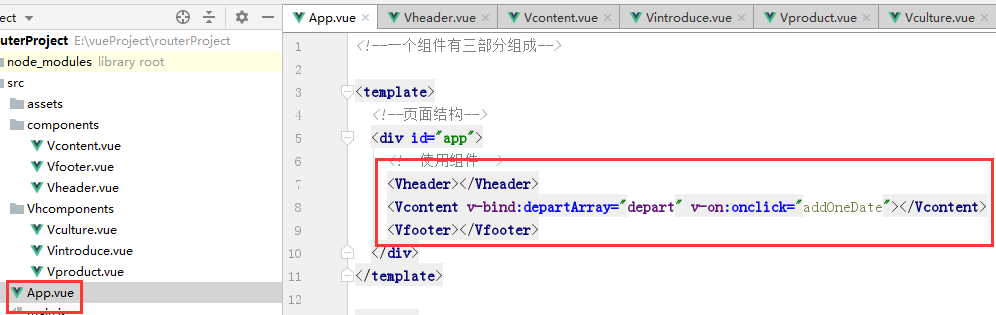
然后再Vheader中进行router-link

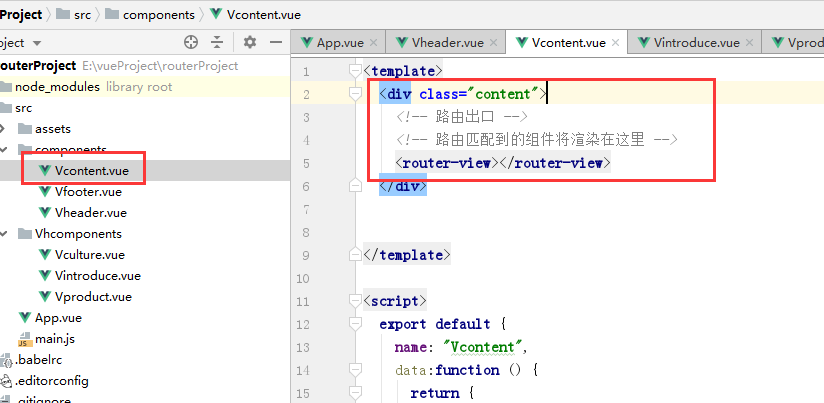
而在Vcontent组件中渲染各个页面的内容
vue生态系统之vue-router的更多相关文章
- Vue 2.0 + Vue Router + Vuex
用 Vue.js 2.x 与相配套的 Vue Router.Vuex 搭建了一个最基本的后台管理系统的骨架. 当然先要安装 node.js(包括了 npm).vue-cli 项目结构如图所示: ass ...
- vue教程3-05 vue组件数据传递、父子组件数据获取,slot,router路由
vue教程3-05 vue组件数据传递 一.vue默认情况下,子组件也没法访问父组件数据 <!DOCTYPE html> <html lang="en"> ...
- Vue04——vue自定义事件、Router、Vue-cli、发布上线
一.Vue的自定义事件 点击任何一个按钮,按钮本身计数累加,但是每点击三个按钮中的一个,totalCounter 都要累加. <body> <div id="app&quo ...
- vue生态系统之vuex
一.webpack生成项目 1.webpack 在需要建立项目的目录中进行初始化项目 E:\vueProject>vue init webpack vuexpj ? Project name v ...
- vue & this.$route & this.$router
vue & this.\(route & this.\)router const User = { template: '<div>User</div>' } ...
- Vue学习笔记-Vue.js-2.X 学习(七)===>脚手架Vue-CLI(路由Router)
脚手架Vue-CLI(路由Router) 一 按装(通过新创建脚手架按装),如果在原来的脚手架上按装直接进图型化界面vue ui的插件按装. 二 使用(上面按装下面步骤自动会生成) 第一步:导入路由对 ...
- [转]Vue生态系统中的库
Vue UI组件库 Vuex vux github ui demo:https://github.com/airyland/vux Mint UI 项目主页:http://mint-ui.github ...
- Vue学习笔记-Vue基础入门
此篇文章是本人在学习Vue是做的部分笔记的一个整理,内容不是很全面,希望能对阅读文章的同学有点帮助. 什么是Vue? Vue.js (读音 /vjuː/,类似于 view) 是一套构建用户界面的渐进式 ...
- 【Vue】转-Vue.js经典开源项目汇总
版权声明:本文为EnweiTech原创文章,未经博主允许不得转载. https://blog.csdn.net/English0523/article/details/88694219 Vue是什么? ...
- 浅谈 vue实例 和 vue组件
vue实例: import Vue from 'vue'; import app from './app'; import myRouter from './routers'; new Vue({ e ...
随机推荐
- LeetCode Array Easy 27. Remove Element 解题
Given an array nums and a value val, remove all instances of that value in-place and return the new ...
- WPF datagrid/gridcontrol 中选中多行,复制粘贴到excel或其他文本编辑器中
wpf中 data grid 开启自带的选中,然后复制,可以到excel中直接粘贴,在某些业务场景中很实用,方便.开启也很简单: SelectionMode="Row" 加上这个, ...
- linux中的read_link
readlink是linux系统中一个常用工具,主要用来找出符号链接所指向的位置. readlink 获取当前进程对应proc/self/exe]:shell中 readlink /proc/sel ...
- Python 调用自己编写的Class
假设自己写的 class 文件myPets.py放在当前目录的子目录/myClasses下,在myPets.py中定义了一个 class 叫Pet.现在要调用Pet这个 class : from my ...
- [HCTF 2018]WarmUp
靶场首页 打开靶场后,查看源码即可看到<!--source.php--> 打开source.php页面 代码如下 <?php highlight_file(__FILE__) ...
- read more阅读更多,文字超过三行字符后面添加省略号
var text;$('.blog-item').each(function (i) {text = $(this).find('.blog-excerpt').html();if (text.len ...
- Java——类之间的关系
3.7 类之间的关系 3.7.1 泛化关系 类和类之间的继承关系及接口与接口之间的继承关系. 3.7.2 实现关系 类对接口的实现. 3.7.3 关联关系 类与类之间的连接,一个类可以知道另一个类的属 ...
- CentOS 7.2 安装MySQL 5.7
CentOS 7之后的版本yum的默认源中使用MariaDB替代原先MySQL,因此安装方式较为以往有一些改变: 下载mysql的源 wget http://dev.mysql.com/get/mys ...
- 浅析阿里云API网关的产品架构和常见应用场景
自上世纪60年代计算机网络发展开始,API(Application Programming Interface )随之诞生,API即应用程序接口,是实现系统间衔接的桥梁.时至今日,API市场已经形成了 ...
- centos修改、保存文件的详细步骤
[一]修改文件 如果是使用普通用户登录的,需要先切换到管理员用户,打开终端,输入:su,接着按提示输入密码即可:然后使用命令进入需要修改文件的所在目录,常用的几个命令如下: ① cd + 目录名 ② ...