NodeMCU入门(5):Docker Image 构建固件,开启SmartConfig
准备工作
1.NodeMCU模块
2.ESP8266Flasher.exe
3.EspTouch.apk
3.docker toolbox(win7系统) 或 docker(win10以上),本教程是在win7系统上开发,Win7安装Docker
选择构建固件方式
在NodeMCU入门(2):在线构建、刷入固件,上传代码 中提到固件编译有三种方式,官方说明,当时我们选择了Cloud Build Service。
Tools
Cloud Build Service
NodeMCU "application developers" just need a ready-made firmware. There's a cloud build servicewith a nice UI and configuration options for them.
Docker Image
Occasional NodeMCU firmware hackers don't need full control over the complete tool chain. They might not want to setup a Linux VM with the build environment. Docker to the rescue. Give Docker NodeMCU build a try.
Linux Build Environment
NodeMCU firmware developers commit or contribute to the project on GitHub and might want to build their own full fledged build environment with the complete tool chain. There is a post in the esp8266.com Wiki that describes this.
做完NodeMCU入门(4):搭建Web服务器,配置网络连接之后想实现SmartConfig时,需要执行wifi.startsmart()方法。
wifi.setmode(wifi.STATION)

wifi.startsmart(,

    function(ssid, password)

        print(string.format("Success. SSID:%s ; PASSWORD:%s", ssid, password))

    end

)
执行报错:
NodeMCU custom build by frightanic.com
branch: master
commit: c8ac5cfb912ff206b03dd7c60ffbb2dafb83fe5e
SSL: true
modules: crypto,file,gpio,http,mqtt,net,node,pwm,sjson,tmr,uart,wifi,tls
build built on: 2017-06-10 01:42
powered by Lua 5.1.4 on SDK 2.1.0(116b762)
lua: init.lua:2: attempt to call field 'startsmart' (a nil value)
stack traceback:
init.lua:2: in main chunk
[C]: ?
这问题真的郁闷了半天,构建固件时选择了wifi模块为什么不能调用startsmart?!仔细看文档、仔细看文档、仔细看文档。。。
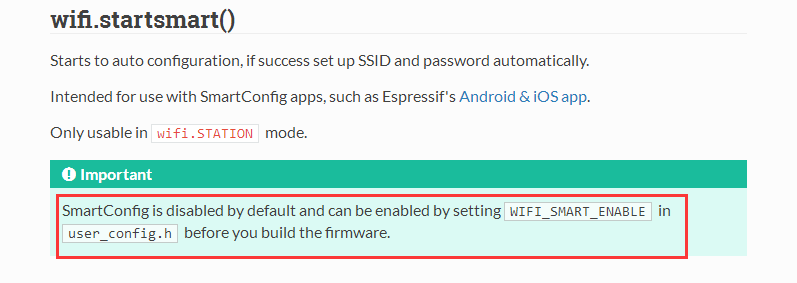
默认没有开启,这坑货啊,这么常用的功能竟然没开启,无奈之下智能自己动手丰衣足食了。
刚开始是想采用第三种方式Linux Build Environment,因为看到过有大神封装了一个visualbox的虚机提供下载(现在找不到链接了),也找到了中文的教程nodemcu固件编译方法(不是很懂),post in the esp8266.com Wiki 一大片英文字母(感觉有难度)。以前接触过docker,所以就选择Docker Image方式吧。
构建固件
1. 安装Docker
win7系统参考Win7安装Docker,其它系统参考 https://docs.docker.com/ → 'Get Started'
2.获取NodeMCU固件代码
git clone https://github.com/nodemcu/nodemcu-firmware.git
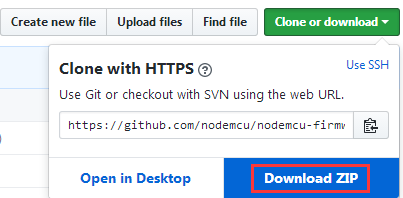
也可以在浏览器中打开 https://github.com/nodemcu/nodemcu-firmware.git,下载压缩包,然后解压到C:\Users\zhaobaolong(替换成你的账号名字)\nodemcu-firmware目录下。
3.运行nodemcu-build,编译固件
运行docker输入如下命令:
docker run --rm -it -v "//C/Users/zhaobaolong/nodemcu-firmware":/opt/nodemcu-firmware marcelstoer/nodemcu-build
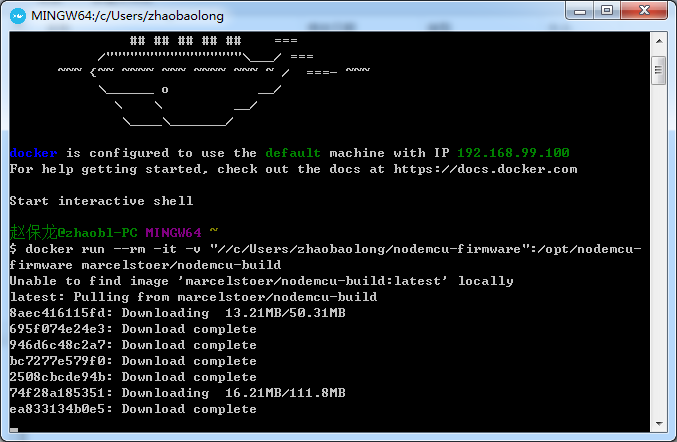
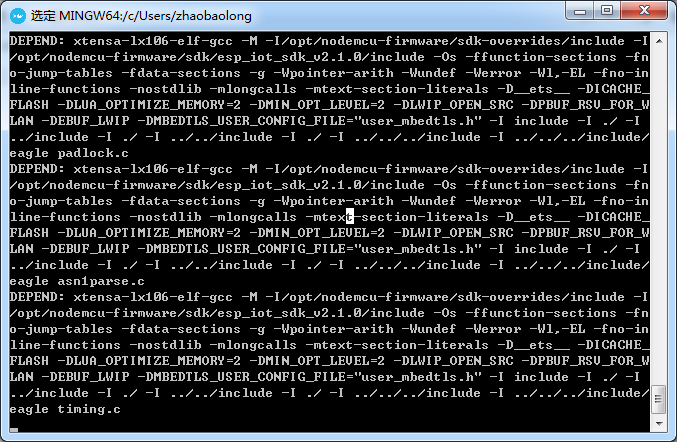
然后开始编译,这个过程要等很久,我这大约半个多小时。
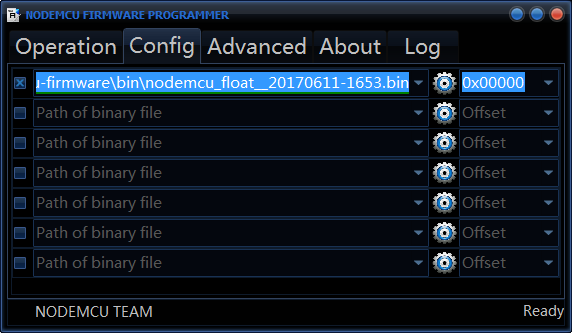
最后在C:\Users\zhaobaolong\nodemcu-firmware\bin目录下生成了固件文件

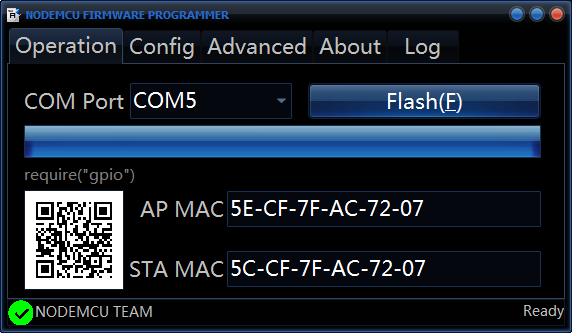
刷入固件到NodeMCU模块
没有了保护的模块信息以及版本信息,看着不爽哈,外国小朋友也提出来了,http://stackoverflow.com/questions/41102558/general-questions-about-docker-nodemcu-build
问题
Some general questions about the docker nodemcu-build process:
Is there a way to specify which modules are included in the build? (similar to the way the cloud build service works)
Is there a way to include a description that will appear when the resultant firmware is run?
Is SSL enabled?
The size of the bin file created by the docker nodemcu-build process (from dev branch source) is 405k. A recent build using the cloud service resulted in a bin file of size 444k. The cloud service build only included the following modules: cjson, file, gpio, http, net, node, tmr, uart, wifi, ssl. Why is the docker build bin file, that contains all modules(?), smaller than the cloud build bin file that only contains 10 modules? (i am concerned that my local docker build version is missing something - even though the build process was error free).
答案:
You specify the modules to be built by uncommenting them in the /app/include/user_modules.hfile in the source tree. The default build from the source tree is relatively minimal - not an "all modules" build.
The banner at connection is the "Version" field. The nodemcu-build.com builds change this out for custom text. It is defined in /app/include/user_version.h as the
USER_VERSIONdefine. You'll need to embed "\n" newlines in the string to get separate lines.Yes, the Net module can include limited SSL support (TLS 1.1 only) (TLS 1.2 in dev per Marcel's comment below). You need to enable it in /app/include/user_config.h by defining
CLIENT_SSL_ENABLE.The default module and config setup in
user_modules.h/user_config.his different than the defaults on nodemcu-build.com, so the builds are not likely to be the same out of the box.
修改固件重新编译,刷固件
1.修改\app\include\user_modules.h文件,把 crypto file gpio http mqtt net node pwm sjson tmr uart wifi都放开。有的默认就开了,没有放开的就把前面的注释去掉。
2.修改\app\include\user_config.h文件,把 //#define WIFI_SMART_ENABLE开头的注释去掉,//#define CLIENT_SSL_ENABLE 开头的注释也去掉
3.修改\app\include\user_version.h文件,修改 #define __USER_VERSION_H__ "NodeMCU custom build by zeroes QQ305744659"
4. 保存文件后重新编译,20多分钟完成
docker run --rm -it -v "//C/Users/zhaobaolong/nodemcu-firmware":/opt/nodemcu-firmware marcelstoer/nodemcu-build
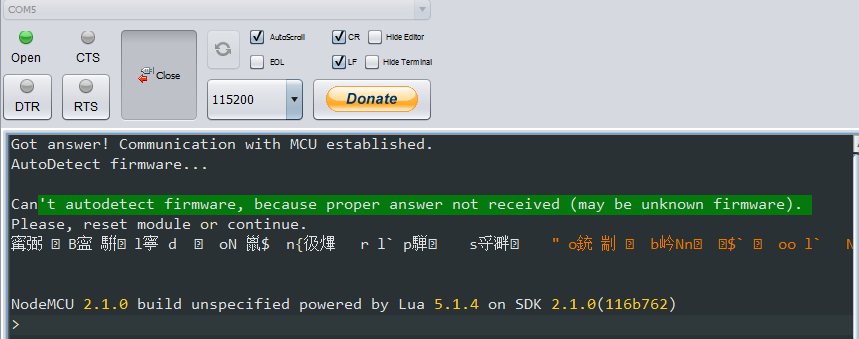
5.刷固件,重启模块,没有把预期的模块信息显示出来有点小失望。
wifi.setmode(wifi.STATION)

wifi.startsmart(,

    function(ssid, password)

        print(string.format("Success. SSID:%s ; PASSWORD:%s", ssid, password))

    end

)
上传代码,通过手机上的EspTouch测试SmartConfig功能。


完美,准备睡觉已经到两点半了。。。。。
参考链接
http://espressif.com/zh-hans/support/explore/get-started/esp8266/getting-started-guide
NodeMCU入门(5):Docker Image 构建固件,开启SmartConfig的更多相关文章
- NodeMCU入门(2):在线构建、刷入固件,上传代码
准备工作 1.NodeMCU模块 2.ESP8266Flasher.exe 3.ESPlorer v0.2.0-rc6 构建固件 Building the firmware提供了三种构建你自己固件的方 ...
- NodeMCU入门(4):搭建Web服务器,配置网络连接
准备工作 1.NodeMCU模块 2.ESPlorer v0.2.0-rc6 3.NodeMCU-HTTP-Server 搭建web服务器 下载https://github.com/wangzexi/ ...
- docker+mysql 构建数据库的主从复制
docker+mysql 构建数据库的主从复制 在最近的项目中,决定将项目改造成数据库读写分离的架构,后续会有博文详细讲述我的开发改造,本文主要记录我是如何一步步的构建数据库的主从复制. 为什么使用d ...
- 用前端姿势玩docker【四】基于docker快速构建webpack的开发与生产环境
目录 用前端姿势玩docker[一]Docker通俗理解常用功能汇总与操作埋坑 用前端姿势玩docker[二]dockerfile定制镜像初体验 用前端姿势玩docker[三]基于nvm的前端环境构建 ...
- IDEA使用Docker插件构建镜像
IDEA使用Docker插件构建镜像 记一次坑 第一次插件docker-maven-plugin的 配置文件中没写远程主机的地址 <dockerHost>http://192.168.1 ...
- Docker镜像构建的两种方式(六)--技术流ken
镜像构建介绍 在什么情况下我们需要自己构建镜像那? (1)当我们找不到现有的镜像,比如自己开发的应用程序 (2)需要在镜像中加入特定的功能 docker构建镜像有两种方式:docker commit命 ...
- docker学习构建镜像---第三章节
一.docker镜像使用 运行docker容器时,使用的镜像如果在本地不存在,docker会自动从docker镜像仓库中下载,默认是从docker hub公共镜像源下载 在这里,我们需要了解:管理和使 ...
- docker环境安装与开启远程访问
一,安装docker 1,服务器安装 docker yum install docker 直接yum安装版本太低 2,卸载:老版本的Docker在yum中名称为docker或docker-engine ...
- 老毛子 Padavan 路由器固件开启教育网 IPv6 并实现IPv6转发
老毛子 Padavan 路由器固件开启教育网 IPv6 并实现IPv6转发 文章目录[隐藏] 一.开启opt环境 二.开启 WAN 端 IPv6 三.安装并运行 6relayd 四.开机自动安装并配置 ...
随机推荐
- 【原创】bootstrap框架的学习 第八课 -[bootstrap表单]
Bootstrap 提供了下列类型的表单布局: 垂直表单(默认) 内联表单 水平表单 吹着表单或基本表单 向父 <form> 元素添加 role="form". 把标签 ...
- EverythingAboutJava
1 GC gabage collection 垃圾回收Java GC系列(1):Java垃圾回收简介 http://mp.weixin.qq.com/s?src=3×tamp=149 ...
- hibernate 使用 hibernate tool 生成配置文件和实体类
安装Hibernate插件 下载所需的Hibernatetools http://www.hibernate.org/6.html 将下载得到的文件解压得到的features和plugins文件夹, ...
- ASP.Net零碎
ASP.Net零碎 ServerPush 什么是ServerPush,服务器向客户端浏览器“推送”,其实就是“长连接”. 只有浏览器请求服务器端,服务器端才有给浏览器响应数据,不会主动向浏览器推送数据 ...
- python3.x元组打印错误 TypeError: unsupported operand type(s) for %: 'NoneType' and 'tuple'
原创by南山南北秋悲 欢迎引用!请注明原地址:http://www.cnblogs.com/hwd9654/p/5676746.html 谢谢! TypeError: unsupported ope ...
- ThinkPHP框架之空控制器
HOME代表的是模块 前台可以用Home 后台用Admin Model View Controller 统称为MVC Model 是数据模型 主要是和数据库打交道的 View代表显 ...
- Windows下主机名和IP映射设置
如果需要添加域名和IP的对应关系可以在以下地方进行修改. 打开系统目录:c:/windows/system32/drivers/etc找到hosts文件,打开hosts文件并在最后面添加一条记录 例如 ...
- 并发容器之CopyOnWriteArrayList(转载)
Copy-On-Write简称COW,是一种用于程序设计中的优化策略.其基本思路是,从一开始大家都在共享同一个内容,当某个人想要修改这 个内容的时候,才会真正把内容Copy出去形成一个新的内容然后再改 ...
- RabbitMQ学习-1补充
1.如果尝试声明一个已经存在的队列会发生什么? 只要参数完全匹配现存的队列的话,Rabbit什么也不做,并返回成功,就好像这个队列已经创建成功. 2.如何检测队列是否存在? 在创建队列的时候设置que ...
- centos6 安装 ansible_ui
安装过程其实并不复杂,只不过出现的问题,遇到的问题比较多,也主要参考网上https://github.com/alaxli/ansible_ui/issues/15 中提到的方法,只不过我遇到自己的问 ...