springBoot 集成swagger2.9.2
加依赖
        <!-- https://mvnrepository.com/artifact/io.springfox/springfox-swagger-ui -->

        <dependency>

            <groupId>io.springfox</groupId>

            <artifactId>springfox-swagger-ui</artifactId>

            <version>2.9.2</version>

        </dependency>

        <!-- https://mvnrepository.com/artifact/io.springfox/springfox-swagger2 -->

        <dependency>

            <groupId>io.springfox</groupId>

            <artifactId>springfox-swagger2</artifactId>

            <version>2.9.2</version>

        </dependency>
springBoot的application.java的同级目录下新建SwaggerConfiguration类
package com.example.demo; import org.springframework.context.annotation.Bean;
import org.springframework.context.annotation.Configuration;
import springfox.documentation.builders.ApiInfoBuilder;
import springfox.documentation.builders.PathSelectors;
import springfox.documentation.builders.RequestHandlerSelectors;
import springfox.documentation.service.ApiInfo;
import springfox.documentation.service.Contact;
import springfox.documentation.spi.DocumentationType;
import springfox.documentation.spring.web.plugins.Docket;
import springfox.documentation.swagger2.annotations.EnableSwagger2; @Configuration
@EnableSwagger2
public class SwaggerConfiguration {
@Bean
public Docket api() {
return new Docket(DocumentationType.SWAGGER_2)
.apiInfo(getApiInfo())
.select()
.apis(RequestHandlerSelectors.basePackage("com.example.demo.controller")) //过滤的接口
.paths(PathSelectors.any())
.build();
} private ApiInfo getApiInfo() {
// 定义联系人信息
Contact contact = new Contact("name","https://baidu.com", "test@test.com");
return new ApiInfoBuilder()
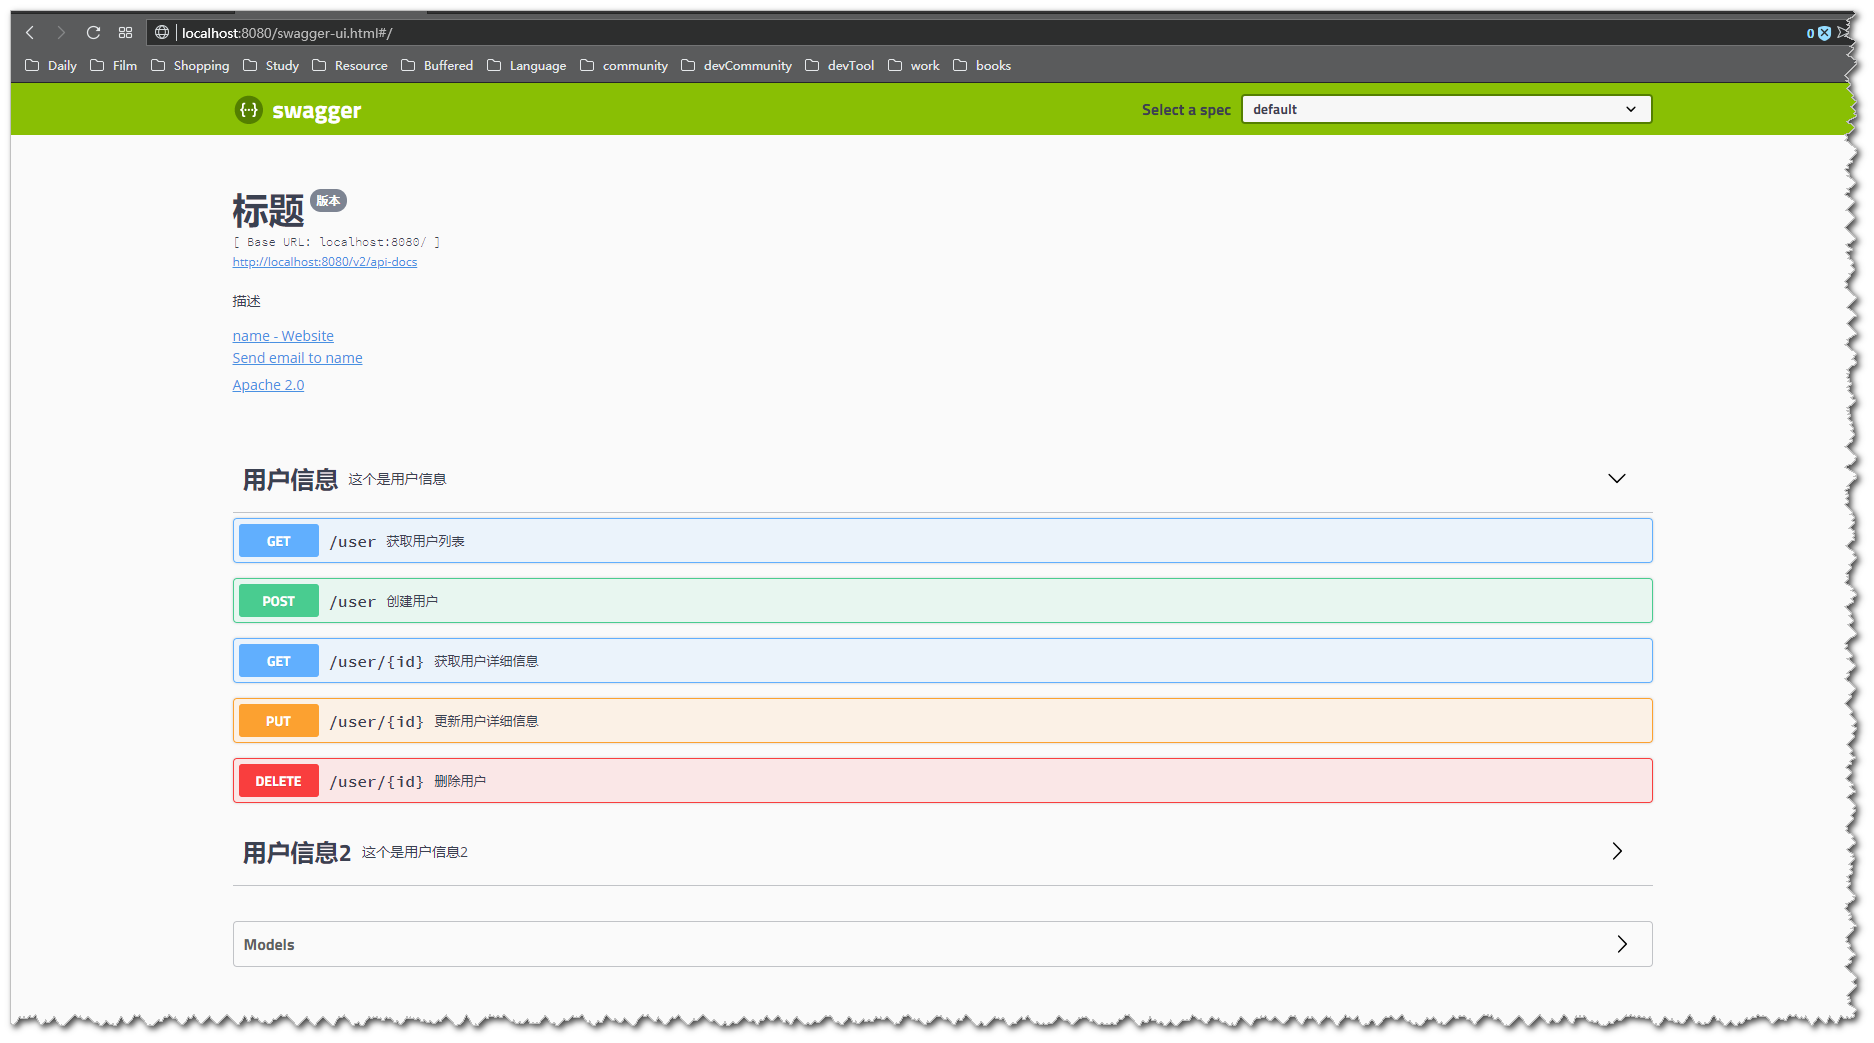
.title("标题")
.description("描述")
.version("版本")
.license("Apache 2.0")
.licenseUrl("http://www.apache.org/licenses/LICENSE-2.0")
.contact(contact)
.build();
}
}
controller类:
@RestController

@Api(value = "/user",description = "这个是用户信息 ",tags = "用户信息")

@RequestMapping("/user")

public class UserContrller {

    @ApiOperation(value="获取用户列表", notes="")

    @GetMapping("")

    public List<User> getUserList() {

        return null;

    }

    @ApiOperation(value="创建用户", notes="根据User对象创建用户")

    @PostMapping("")

    public String postUser(@RequestBody User user) {

        return "success";

    }
}
浏览器输入 http://localhost:8080/swagger-ui.html 访问
这样就完成了, 接下来就是去搜Swagger的常用注解怎么使用就ok了。 附上链接: https://github.com/swagger-api/swagger-core/wiki/annotations
——————————————————————————————————————
以下是我遇到的部分问题
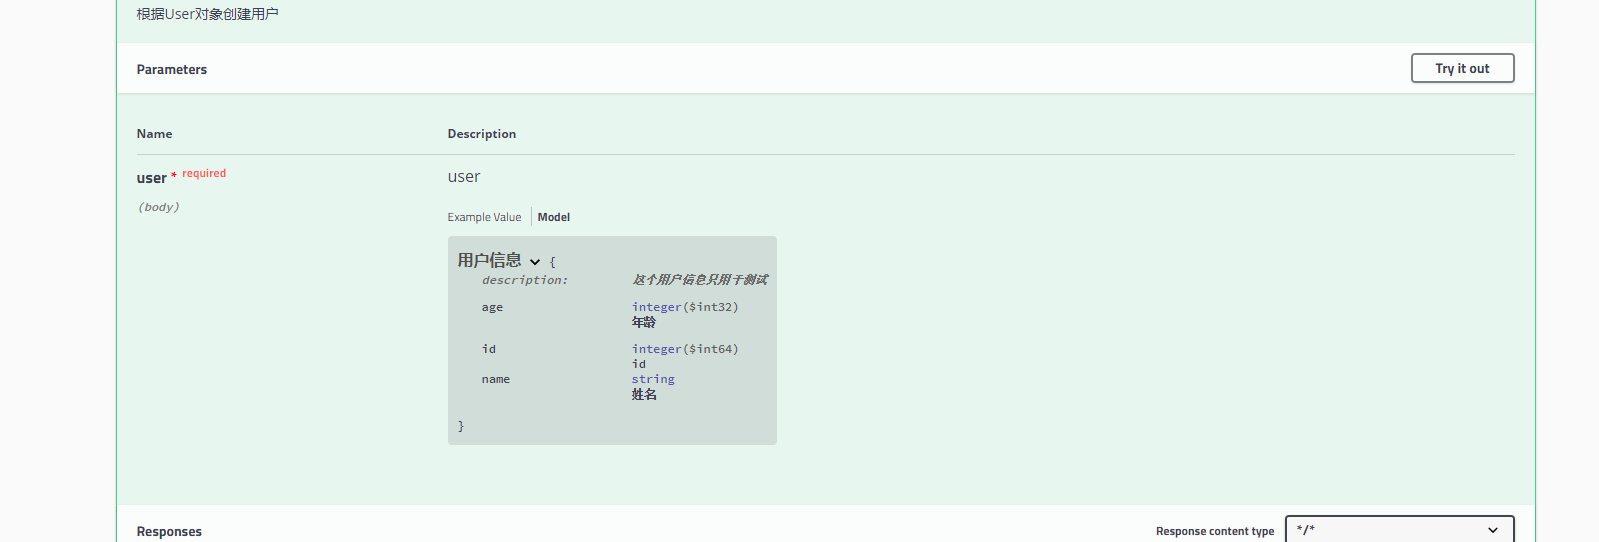
@ApiImplicitParam 注解: 如果参数是实体类并且实体类中被@ApiModel和@ApiModelProperty注解修饰过, @ApiImplicitParam注解就不要加了。
如果,没有实体类没有被@ApiModel和@ApiModelProperty注解修饰过, @ApiImplicitParam可加可不加, 另外在实体类参数之前加上@RequestBody 和不加@RequestBody,swagger的文档参数显示是不一样的
比如不加@RequestBody注解的代码:
@ApiOperation(value="创建用户", notes="根据User对象创建用户")
@PostMapping("")
public String postUser(User user) {
    users.put(user.getId(), user);
    return "success";
}
User实体:
package com.example.demo.model;

import io.swagger.annotations.ApiModel;

import io.swagger.annotations.ApiModelProperty;

import lombok.Data;

@ApiModel(value = "用户信息", description = "这个用户信息只用于测试")

@Data

public class User {

    @ApiModelProperty("id")

    private Long id;

    @ApiModelProperty(value="姓名",required=true)

    private String name;

    @ApiModelProperty("年龄")

    private Integer age;

}
swagger显示的参数是这样的

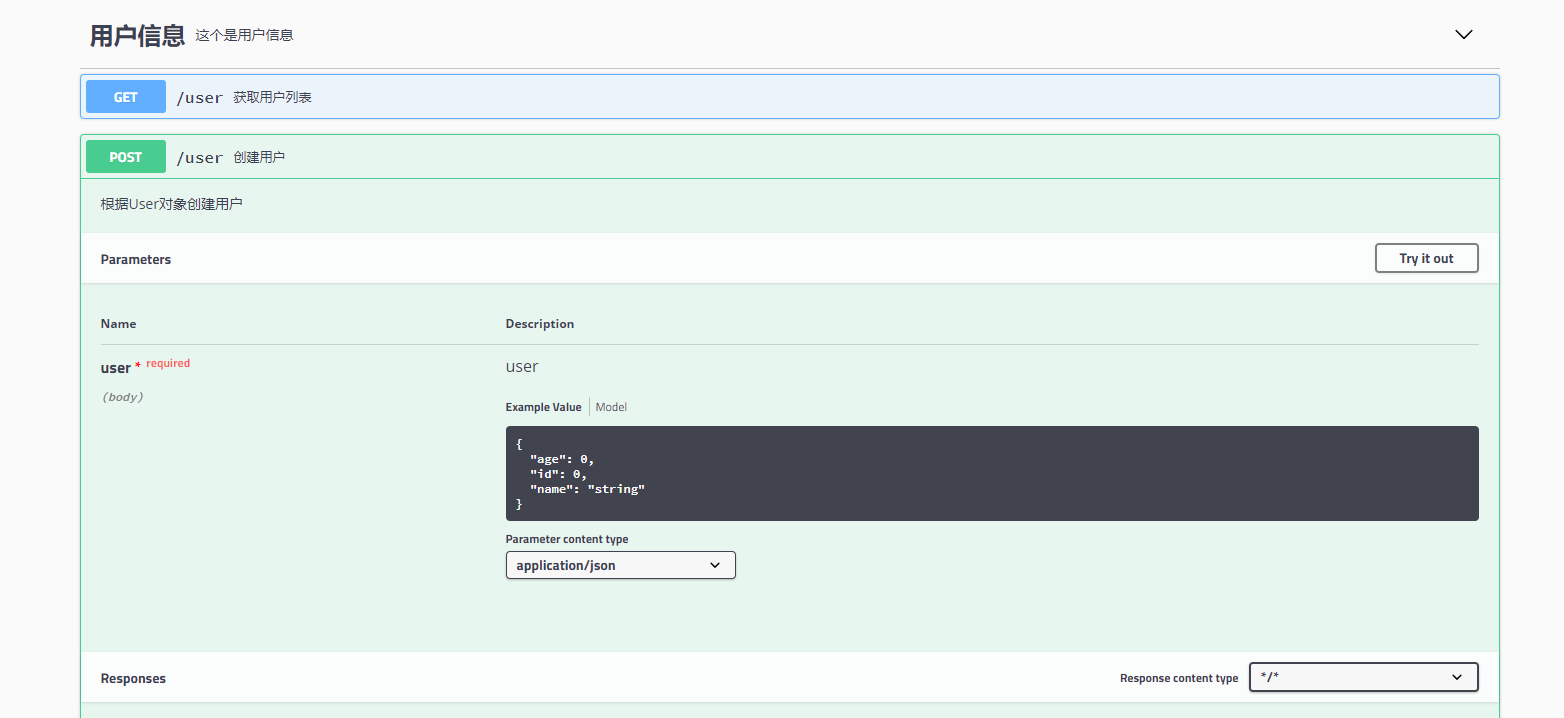
加了@RequestBody
    @ApiOperation(value="创建用户", notes="根据User对象创建用户")

    @PostMapping("")

    public String postUser(@RequestBody User user) {

        users.put(user.getId(), user);

        return "success";

    }
加了@RequestBody的swagger:
springBoot 集成swagger2.9.2的更多相关文章
- SpringBoot集成Swagger2实现Restful(类型转换错误解决办法)
1.pom.xml增加依赖包 <dependency> <groupId>io.springfox</groupId> <artifactId>spri ...
- springboot集成swagger2构建RESTful API文档
在开发过程中,有时候我们需要不停的测试接口,自测,或者交由测试测试接口,我们需要构建一个文档,都是单独写,太麻烦了,现在使用springboot集成swagger2来构建RESTful API文档,可 ...
- SpringBoot集成Swagger2在线文档
目录 SpringBoot集成Swagger2在线文档 前言 集成SpringBoot 登录接口文档示例 代码 效果 注解说明 总结 SpringBoot集成Swagger2在线文档 前言 不得不说, ...
- springboot 集成swagger2.x 后静态资源报404
package com.bgs360.configuration; import org.springframework.context.EnvironmentAware; import org.sp ...
- SpringBoot集成Swagger2并配置多个包路径扫描
1. 简介 随着现在主流的前后端分离模式开发越来越成熟,接口文档的编写和规范是一件非常重要的事.简单的项目来说,对应的controller在一个包路径下,因此在Swagger配置参数时只需要配置一 ...
- springboot集成swagger2报Illegal DefaultValue null for parameter type integer
springboot集成swagger2,实体类中有int类型,会报" Illegal DefaultValue null for parameter type integer"的 ...
- SpringBoot集成Swagger2 以及汉化 快速教程
(一) Swagger介绍 Swagger 是一款RESTFUL接口的文档在线自动生成+功能测试功能软件 (二)为什么使用Swagger 在现在的开发过程中还有很大一部分公司都是以口口相传的方式来进行 ...
- Springboot集成swagger2生成接口文档
[转载请注明]: 原文出处:https://www.cnblogs.com/jstarseven/p/11509884.html 作者:jstarseven 码字挺辛苦的..... 一 ...
- springboot 集成swagger2
使用Swagger 可以动态生成Api接口文档,在项目开发过程中可以帮助前端开发同事减少和后端同事的沟通成本,而是直接参照生成的API接口文档进行开发,提高了开发效率.这里以springboot(版本 ...
- [转] spring-boot集成swagger2
经测,spring-boot版本使用1.5.2+时需使用springfox-swagger2版本2.5+(spring-boot 1.2 + springfox-swagger2 2.2 在未扫描ja ...
随机推荐
- nutzboot 使用nacos替换zookeeper
先放一段从网上拷贝一段分布式CAP理论的概念 分布式领域中存在CAP理论,且该理论已被证明:任何分布式系统只可同时满足两点,无法三者兼顾. ①C:Consistency,一致性,数据一致更新,所有数据 ...
- K.河北美食
链接:https://ac.nowcoder.com/acm/contest/903/K 题意: icebound最喜欢吃河北菜,于是他想要大厨做一桌河北菜宴请宾客.icebound购买了一些食材,并 ...
- HDU-1498-50years,50colors(最大匹配, 枚举)
链接:https://vjudge.net/problem/HDU-1498#author=634579757 题意: 撞气球游戏,一个n*n的矩阵中,有不同颜色的气球,气球的颜色最多50种(从1到5 ...
- 湖南大学新生赛C,G,J题解
C: 思路:做几组数据就基本能发现规律,奇数为-1,偶数为1 代码: #include<cstdio> #include<iostream> #include<cstri ...
- js弹框怎么获得父页面的元素
js获取父页面的元素可以用$(window.parent.document).find("#customer_id").val();这里的customer_id表示父页面某一个元素 ...
- redis--StringRedisTemplate和RedisTemplate区别
StringRedisTemplate: 1).只能存储string类型的值,因此不能存储如对象 2).序列化为string,如: RedisTemplate: 1).可以存储任意类型,含对象. 2) ...
- windows 用VMware创建linux虚拟机,安装操作系统CentOS7.2
1.按照向导创建虚拟机 以下是安装虚拟机的步骤,没有写的直接下一步 [1]主页-创建新虚拟机 [2]选择 自定义(高级) [3]选择稍后安装操作系统 [4]给虚拟机命名并指定所在位置 [5]给处理器配 ...
- watir 的api在线文档
http://rubydoc.info/gems/watir-webdriver/frames http://rdoc.info/gems/watir-webdriver/frames http:// ...
- 有关在python中使用Redis(一)
python作为一种处理数据的脚本语言本身有许多方法函数供大家使用,有时候为了提升数据处理速度(如海量数据的访问或者海量数据的读取),涉及分布式管理架构,可能需要用到Redis,Redis是一个开源的 ...
- 织梦channel标签内调用子栏目内容
文件:include\taglib\channel.lib.php 把代码 SELECT id,typename,typedir,isdefault,ispart,defaultname,nameru ...