springboot+thymeleaf打war包在外部tomcat运行
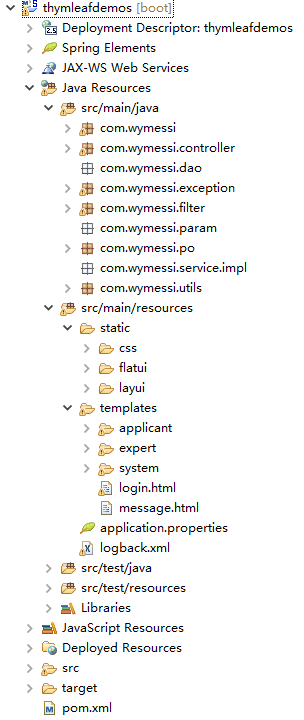
工程目录
pom文件注意点
<packaging>war</packaging>
<dependency>

          <groupId>org.springframework.boot</groupId>

          <artifactId>spring-boot-starter-tomcat</artifactId>

          <scope>provided</scope>

        </dependency>
<build>

        <finalName>prs</finalName>

        <plugins>

          <plugin>

            <groupId>org.apache.maven.plugins</groupId>

            <artifactId>maven-compiler-plugin</artifactId>

          </plugin>

        </plugins>

    </build>
配置文件application.properties
server.port=

server.session.timeout=

server.context-path=/prs

#thymelea模板配置

spring.thymeleaf.prefix=classpath:/templates/

spring.thymeleaf.suffix=.html

spring.thymeleaf.mode=HTML5

spring.thymeleaf.encoding=UTF-

spring.thymeleaf.content-type=text/html

spring.thymeleaf.cache=false

#spring.resources.chain.strategy.content.enabled=true

#spring.resources.chain.strategy.content.paths=/**

# 上传文件大小配置

spring.http.multipart.maxFileSize=10MB

spring.http.multipart.maxRequestSize=10MB

#spring.mvc.async.request-timeout=600000

#spring.http.multipart.max-request-size=200MB

#spring.aop.auto=true

#spring.aop.proxy-target-class=false

#server.tomcat.uri-encoding=UTF-8

#server.tomcat.max-threads=100

logging.config=classpath:logback.xml

#mybatis.configLocation=classpath:mybatis/mybatis-config.xml

#mybatis.mapperLocations=classpath:mybatis/mapper/*.xml

#spring.datasource.driverClassName = com.mysql.jdbc.Driver

#com.microsoft.sqlserver.jdbc.SQLServerDriver

#spring.datasource.url = jdbc:mysql://127.0.0.1:3306/test

#jdbc:sqlserver://104.15.202.101:1105;DatabaseName=tt

#spring.datasource.username = root

#spring.datasource.password = 123456

#spring.datasource.initialSize=2

#spring.datasource.minIdle=0

#spring.datasource.maxActive=5

#spring.datasource.maxWait=60000

#spring.datasource.validationQuery=select 1

#spring.datasource.timeBetweenEvictionRunsMillis=60000

#spring.datasource.testWhileIdle=true

#spring.datasource.testOnBorrow=true

#spring.datasource.testOnReturn=false

#spring.datasource.poolPreparedStatements=true

#spring.datasource.maxPoolPreparedStatementPerConnectionSize=20
server.context-path=/prs这里的路径名最好和上面pom里的finalName最好是一致的,因为当我们把打包好的war包放到tomcat的webapp里时,访问路径前缀就是这个finalName
启动类
@ComponentScan(basePackages= {"com.wymessi"})//扫描组件

@SpringBootApplication

@EnableAspectJAutoProxy

@EnableTransactionManagement(proxyTargetClass = true)

@EnableAutoConfiguration(exclude = { DataSourceAutoConfiguration.class})

public class SpringbootApplication extends SpringBootServletInitializer {

    public static void main(String[] args) {

        SpringApplication.run(SpringbootApplication.class, args);

    }

    @Override

    protected SpringApplicationBuilder configure(SpringApplicationBuilder builder) {

        // 注意这里要指向原先用main方法执行的Application启动类

        return builder.sources(SpringbootApplication.class);

    }

//    @Bean

//    public HttpMessageConverters fastJsonHttpMessageConverters() {

//        FastJsonHttpMessageConverter fastConverter = new FastJsonHttpMessageConverter();

//        FastJsonConfig fastJsonConfig = new FastJsonConfig();

//        // fastJsonConfig.setSerializerFeatures(SerializerFeature.BrowserCompatible);

//        // fastJsonConfig.setSerializerFeatures(SerializerFeature.BrowserSecure);

//        fastJsonConfig.setSerializerFeatures(SerializerFeature.DisableCircularReferenceDetect);

//        // fastJsonConfig.setSerializerFeatures(SerializerFeature.WriteMapNullValue);

//        SerializeConfig config = new SerializeConfig();

//        config.put(Date.class, new SimpleDateFormatSerializer("yyyy-MM-dd HH:mm:ss"));

//        fastJsonConfig.setSerializeConfig(config);

//        fastConverter.setFastJsonConfig(fastJsonConfig);

//        HttpMessageConverter<?> converter = fastConverter;

//        return new HttpMessageConverters(converter);

//    }

}
和打jar包的区别是继承了SpringBootServletInitializer这个类,然后重写了configure方法。
运行程序
eclipse里运行
右击项目名,run as - spring boot app。
浏览器里输入http://127.0.0.1:8013/prs
打包成war包在tomcat里运行
右击项目名,run as - maven - build,看到success就代表打包成功了。

把打包好的prs放到tomcat的webapp里,然后启动tomcat。
这里要注意,tomcat的访问端口要设置成和配置文件里的一样,不然用配置文件里的port是访问不到的。
打包的名称要和server.context-path=/prs的名称一致,不然也是访问不到的,这个上面已经说过了。
浏览器里输入http://127.0.0.1:8013/prs
springboot+thymeleaf打war包在外部tomcat运行的更多相关文章
- SpringBoot之打成war包部署到Tomcat
正常情况下SpringBoot项目是以jar包的形式,正常情况下SpringBoot项目是以jar包的形式,并且SpringBoot是内嵌Tomcat服务器,所以每次重新启动都是用的新的Tomcat服 ...
- springBoot项目打war包部署到tomcat上
1 首先得在本地跑通. 2 处理启动类Application @SpringBootApplication public class Application extends SpringBootSer ...
- IDEA下spring boot项目打包war包部署外部tomcat问题
第一步,修改配置pom.xml文件 <packaging>war</packaging> <dependency> <groupId>org.sprin ...
- SpringBoot webmvc项目导出war包并在外部tomcat运行产生的诸多问题以及解决方案
背景: 有需求要将原来的Spring(3.2.6) + Springmvc + Hibernate项目重构为Springboot(1.5.2)项目 描述: 记录重构过程,以及期间遇到的种种问题和对应的 ...
- Springboot项目打成jar包运行 和 打成war包 外部tomcat运行
Jar打包方式运行 类型为jar时 <packaging>jar</packaging> 1.使用命令mvn clean package 打包 2.使用java –jar 包 ...
- 基于springboot多模块项目使用maven命令打成war包放到服务器上运行的问题
首先,大家看到这个问题,可能并不陌生,而且脑子里第一映像就是使用mava中的clear package 或者 clear install进行打包,然后在项目中的target文件夹下面找到xxx.war ...
- SpringBoot打war包并部署到外部tomcat运行(jar工程改造为正war工程)
如果你的SpringBoot工程是一个jar工程,而想把它改造成war工程,并打成war包放到外部的tomcat下运行,该怎么修改配置呢?这里以Maven工程为例进行介绍. (1)将pom.xml中的 ...
- SpringBoot 项目打war包 tomcat部署
今天看了一下springboot的项目,个人习惯是接触新的语言或框架,首先要做的就是程序员届最常用的“Hello World”,然后进行项目部署,然今天部署却发现一直都是404,查看tomcat的we ...
- Springboot项目打成war包,部署到tomcat上,正常启动访问报错404
前言: 项目介绍,此项目是一个Maven多模块项目,模块项目:all(父模块):util (公用的工具类):dao(实体类.业务类.mapper.mapper.xml):business(业务serv ...
随机推荐
- linux基本优化
修改主机名 hostnamectl set-hostname <hostname> 修改终端命令行颜色 # vim /etc/profile 末尾添加 PS1='\[\e[31;40m\] ...
- Android技巧:查看当前界面对应的活动
常常接手别人的android代码,非常头疼不知道界面所对应的活动是哪一个.下面所说的方法可以完美解决. 新建一个BaseActivity类,继承自AppCompatActivity,并重写onCrea ...
- intellij idea 为JavaEE项目建立Servlet
建立Servlet的方法 顶部菜单栏 View > Tool Windows > Web. 然后互相web窗口 右键Web>new>Servlet 弹出窗口
- 【构造】Codeforces Round #397 by Kaspersky Lab and Barcelona Bootcamp (Div. 1 + Div. 2 combined) D. Artsem and Saunders
根据那两个式子 g(h(x))=x h(g(x))=f(x) 可以推出来两个新的式子 g(f(x))=g(x) h(x)=f(h(x)) 于是,我们先找到f(x)的所有不动点,有几个不动点,m就是多少 ...
- 【强联通分量缩点】【最短路】【spfa】bzoj1179 [Apio2009]Atm
缩点后转化成 DAG图上的单源最长路问题.spfa/dp随便. #include<cstdio> #include<queue> #include<algorithm&g ...
- Java高级架构师(一)第28节:Index、商品详细页和购物车
<%@ page language="java" contentType="text/html; charset=utf-8" pageEncoding= ...
- SSH学习——声明式事物管理(Spring)
1.什么是事物? 事务是一组操作的执行单元,相对于数据库操作来讲,事务管理的是一组SQL指令,比如增加,修改,删除等,事务的一致性,要求,这个事务内的操作必须全部执行成功,如果在此过程种出现了差错,比 ...
- Java架构师之路 Spring学习笔记(一) Spring介绍
前言 这是一篇原创的Spring学习笔记.主要记录我学习Spring4.0的过程.本人有四年的Java Web开发经验,最近在面试中遇到面试官总会问一些简单但我不会的Java问题,让我觉得有必要重新审 ...
- 【java】乱码处理+编码转化+判断字符串编码方式
之前有一篇是修改IDE的编码,服务器的编码等处理乱码,但是在所有环境因素上,保证了编码方式之后,也会有前台传递给后台[get方式提交]传递给后台的编码方式是非UTF-8的,也会有例如FTP服务器的编码 ...
- Array.apply 方法的使用
Array.apply(null, {length: 5}) length为特殊字段,意思是生成一个长度为5的数组,由于没赋值,所以都是undefined; 如果要赋值,可以这样 console.lo ...