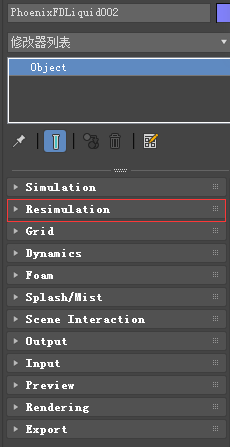
PhoenixFD插件流体模拟——UI布局【Resimulation】详解
Liquid Resimulation
流体再(重)渲染
本文主要讲解Resimulation折叠栏中的内容
主要内容
- Overview 综述
- Parameters 参数
综述
Liquid Resimulation uses an already simulated cache sequence and allows you to add, delete or modify the Splash, Mist, Foam or Wetmap particle systems.
Liquid Resimulation使用一个已经仿真好的缓存序列,让你可以添加、删除和修改泼溅、薄雾、泡沫和wetmap粒子系统。
It will preserve the Liquid and the particle systems you are happy with.它可以保存你喜欢的液体和粒子系统。
The particle resimulation will affect only the particle systems which are checked in this rollout. 粒子重新模拟将只影响在此折叠栏中检查的粒子系统。
If a particle system is not checked, it will remain unchanged.如果某个粒子系统未选中,则其保持不变。
The Liquid always remains unchanged. 流体保持不变。
While the Fire/Smoke Resimulation creates new cache files during the simulation process, the Liquid Resimulation overwrites the existing cache files.
Fire/Smoke Resimulation在仿真中产生的新数据将覆盖已有的缓存。
Using Resimulation to just modify a particle system is practical only in case you have a large number of secondary particles such as Foam, Splash, etc in relation to the number of Liquid particles. 当相对于液体粒子数量有大量的二次粒子,如泡沫,飞溅等,仅仅使用再模拟是非常实用的。
If you have mostly Liquid particles and very few other particles, it will be faster to just simulate again.而当流体粒子很多时,再次渲染就会快很多。
!The Affect Liquid parameter on the Splash and Mist rollout will be ignored when resimulating Splash, because the liquid is already simulated and cannot be changed without a full simulation.
在Splash和Mist折叠栏中,影响流体参数将会被自动忽略,因为流体粒子通道在再仿真时是不变的。
!You can resimulate over the resimulated caches and so on - it's not necessarily just 2 passes at most. 你可以一直再渲染,但是推荐最多不超过两次。
1 Workflow for modifying an existing particle system 修改一个已存在粒子系统的步骤


2 Workflow for adding a particle system that did not exist prior to resimulating 添加一个新的粒子系统的步骤

3 Working for deleting an existing particle system 删除一个粒子系统的步骤

UI Path: ||Select Liquid Simulator | LiquidSim object|| > Modify panel > Resimulation rollout
参数

Enable Particle Resimulation | resim_resimulate_particles – Enables the resimulation.
Splash and mist | resim _splash – Specifies that the splash and mist will be recalculated.
The Affect Liquid parameter on the Splash and Mist roll-out will be ignored when resimulating Splash, because the liquid is already simulated and cannot be changed without a full simulation.
Foam | resim _foam – Specifies that the foam will be recalculated.
Wetting | resim _wet – Specifies that a WetMap will be recalculated.
The Sticky Effect setting for Wetting in the Liquid rollout will be ignored when resimulating wetting. This is because the liquid is already simulated and cannot be changed without a full simulation.
? – Opens up the help documents for the Liquid Resimulation process.
PhoenixFD插件流体模拟——UI布局【Resimulation】详解的更多相关文章
- PhoenixFD插件流体模拟——UI布局【Output】详解
Liquid Output 流体输出 本文主要讲解Output折叠栏中的内容.原文地址:https://docs.chaosgroup.com/display/PHX3MAX/Liquid+Outp ...
- PhoenixFD插件流体模拟——UI布局【Simulation】详解
前言 之前使用RealFlow做流体模拟,但是总得和3ds导来导去,略显麻烦,特意学习PhoenixFD插件,直接在3ds中进行流体模拟.若读者有更好的流体模拟方法,欢迎在评论区交流. 原文地址:ht ...
- PhoenixFD插件流体模拟——UI布局【Rendering】详解
Liquid Rendering 流体渲染 本文主要讲解Rendering折叠栏中的内容.原文地址:https://docs.chaosgroup.com/display/PHX3MAX/Liqui ...
- PhoenixFD插件流体模拟——UI布局【Input】详解
Liquid Input 流体输入 本文主要讲解Input折叠栏中的内容.原文地址:https://docs.chaosgroup.com/display/PHX3MAX/Liquid+Input 主 ...
- PhoenixFD插件流体模拟——UI布局【Splash | Mist】详解
液体飞溅 | 水雾 本文主要讲解Splash | Mist折叠栏中的内容.原文地址:https://docs.chaosgroup.com/display/PHX3MAX/Liquid+Splash+ ...
- PhoenixFD插件流体模拟——UI布局【Foam】详解
流体泡沫 本文主要讲解Foam折叠栏中的内容.原文地址:https://docs.chaosgroup.com/display/PHX3MAX/Liquid+Foam 主要内容 Overview 综述 ...
- PhoenixFD插件流体模拟——UI布局【Export】详解
Liquid Export 流体导出 本文主要讲解Export折叠栏中的内容.原文地址:https://docs.chaosgroup.com/display/PHX3MAX/Liquid+Expor ...
- PhoenixFD插件流体模拟——UI布局【Preview】详解
Liquid Preview 流体预览 本文主要讲解Preview折叠栏中的内容.原文地址:https://docs.chaosgroup.com/display/PHX3MAX/Liquid+Pr ...
- PhoenixFD插件流体模拟——UI布局【Dynamics】详解
流体动力学 本文主要讲解Dynamics折叠栏中的内容.原文地址:https://docs.chaosgroup.com/display/PHX3MAX/Liquid+Dynamics 主要内容 Ov ...
随机推荐
- https原理及其中所包含的对称加密、非对称加密、数字证书、数字签名
声明:本文章已授权公众号Hollis转载,如需转载请标明转载自https://www.cnblogs.com/wutianqi/p/10654245.html(安静的boy) 一.为什么要使用http ...
- 全志A33 lichee 开发板 Linux中断编程原理说明
开发平台 * 芯灵思SinlinxA33开发板 淘宝店铺: https://sinlinx.taobao.com/ 嵌入式linux 开发板交流 QQ:641395230 本节实验目标实现按键触发中断 ...
- PythonStudy——函数嵌套定义 Function nesting definition
# 在一个函数内部定义另一个函数 # 函数对象(变量)与普通对象(变量)一样,在函数内部定义,随函数调用而产生, # 调用结束而销毁,所以只能在函数内部调用 def outer(): print('o ...
- tcp_timestamps和tcp_tw_recycle
不同时开启tcp_timestamps和tcp_tw_recycle的场景描述 FULL NAT下 FULL NAT 在client请求VIP 时,不仅替换了package 的dst ip,还替换了 ...
- C# 调用打印机 打印 Excel
打印 Excel 模板 大体思路,通过NPOI操作Excel文件,通过Spire将Excel转成图片,将图片传给系统打印. Spire是收费工具,在微软库中下载Free版本. #region 打印所用 ...
- ElasticSearch的lowlevelApi和低级别API
之前开发使用的其实都是lowLevel的api,所谓lowlevelapi就是操作ES的json字符串要自己去写:所谓highlevel的api就是指将查询的json字符串给对象化,创建一个Searc ...
- py-day3-2 python 函数递归
# 递归 def calc(n): print(n) if int(n/2) == 0: return n res = calc(int(n/2)) return res res = calc(10) ...
- 对象克隆(C# 快速高效率复制对象另一种方式 表达式树转)
1.需求 在代码中经常会遇到需要把对象复制一遍,或者把属性名相同的值复制一遍. 比如: public class Student { public int Id { get; set; } publi ...
- 利用STM32CubeMX来生成USB_HID_Mouse工程【添加ADC】(2)【非dma和中断方式】
上回讲到怎么采集一路的adc的数据,这次我们来采集两路的数据. 现在直接修改原先的代码 /* Private variables ----------------------------------- ...
- cookie.js插件
/*! cookiejs v1.0.23 | MIT (c) 2018 kenny wong | https://github.com/jaywcjlove/cookie.js */!function ...