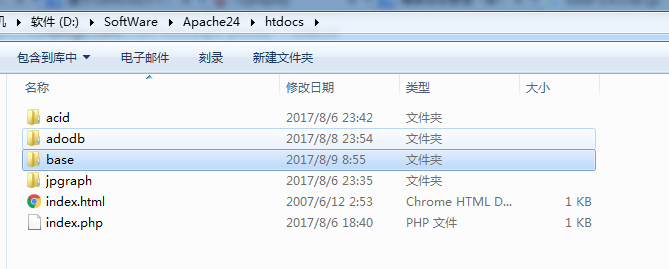
基于Windows7下snort+apache+php 7 + acid(或者base) + adodb + jpgraph的入侵检测系统的搭建(图文详解)(博主推荐)
为什么,要写这篇论文?
是因为,目前科研的我,正值研三,致力于网络安全、大数据、机器学习、人工智能、区域链研究领域!
论文方向的需要,同时不局限于真实物理环境机器实验室的攻防环境、也不局限于真实物理机器环境实验室的大数据集群平台。在此,为了需要的博友们,能在自己虚拟机里(我这里是CentOS6.5)来搭建部署snort+barnyard2+base的入侵检测系统。分享与交流是进步的阶梯!
同时,本人还尝试过在Ubuntu14.04里搭建这入侵检测系统的环境。同时,还尝试过在win7\win10里搭建这入侵检测系统的环境。
同时,也欢迎做报警数据方向的烟酒僧留言评论加好友交流。欢迎指正!谢谢。
基于CentOS6.5下snort+barnyard2+base的入侵检测系统的搭建(图文详解)(博主推荐)
我的系统情况是


base和acid的关系

在Ubuntu和CentOS里,用base居多。
在windows里,用acid居多。但是,我这篇博客,acid和base都演示。(反而我更喜欢用base)
Apache的安装
Windows 7操作系统下Apache的安装与配置(图文详解)
Mysql的安装
MySQL Server类型之MySQL客户端工具的下载、安装和使用(博主推荐)
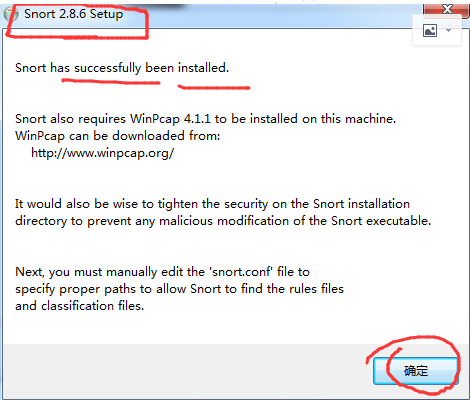
winpcap的安装
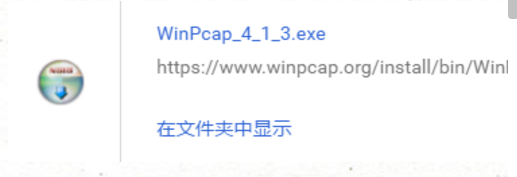

这里不多说,太简单了。
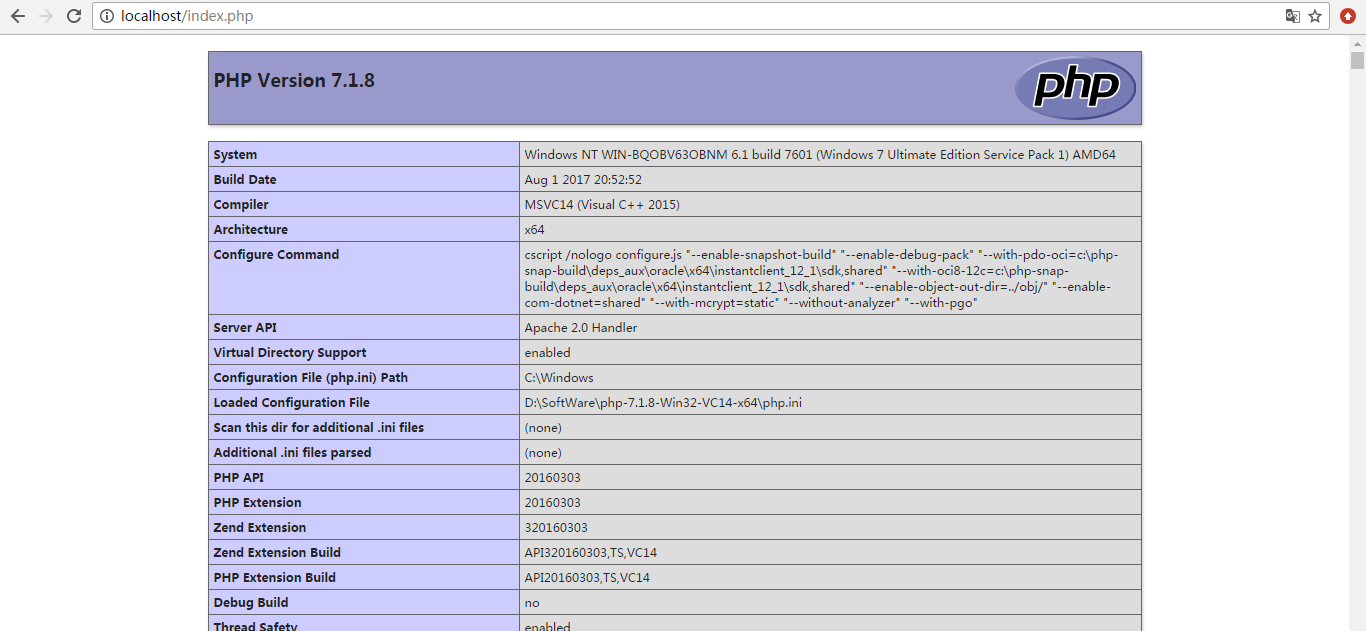
PHP的安装
Windows 7操作系统下PHP 7的安装与配置(图文详解)
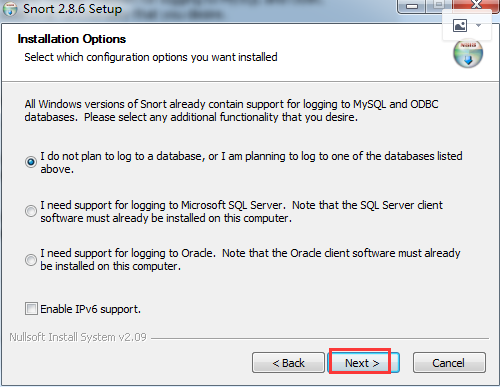
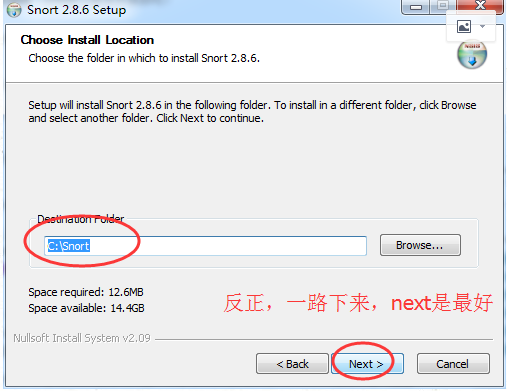
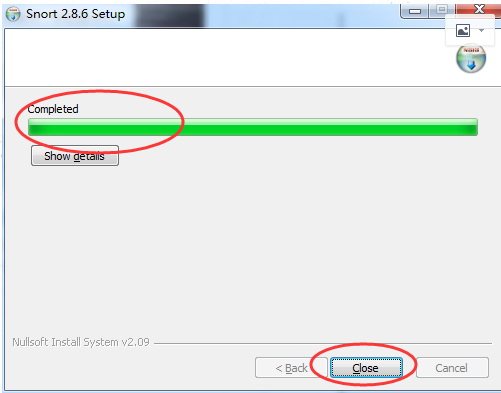
Snort的安装

下载下来,随便先放在哪里,因为,我们最后默认是安装在C:\Snort。
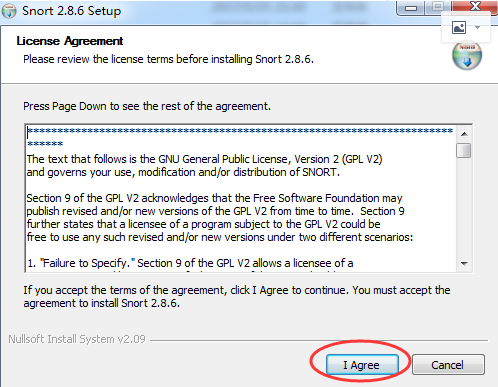


其实啊,Snort是个命令行软件,所以,不要感觉到畏惧。
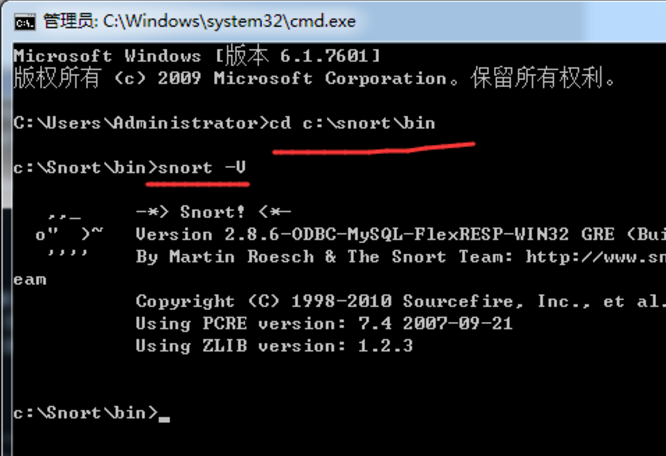
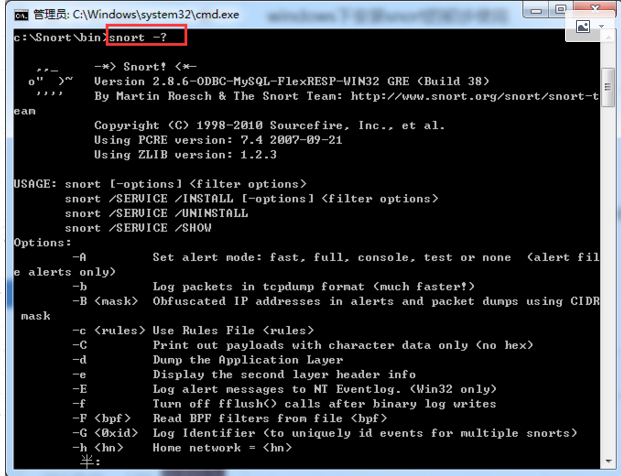
c:\Snort\bin>snort -?

   ,,_     -*> Snort! <*-

  o"  )~   Version 2.8.6-ODBC-MySQL-FlexRESP-WIN32 GRE (Build 38)

   ''''    By Martin Roesch & The Snort Team: http://www.snort.org/snort/snort-t

eam

           Copyright (C) - Sourcefire, Inc., et al.

           Using PCRE version: 7.4 --

           Using ZLIB version: 1.2.

USAGE: snort [-options] <filter options>

       snort /SERVICE /INSTALL [-options] <filter options>

       snort /SERVICE /UNINSTALL

       snort /SERVICE /SHOW

Options:

        -A         Set alert mode: fast, full, console, test or none  (alert file alerts only)

        -b         Log packets in tcpdump format (much faster!)

        -B <mask>  Obfuscated IP addresses in alerts and packet dumps using CIDR  mask

        -c <rules> Use Rules File <rules>

        -C         Print out payloads with character data only (no hex)

        -d         Dump the Application Layer

        -e         Display the second layer header info

        -E         Log alert messages to NT Eventlog. (Win32 only)

        -f         Turn off fflush() calls after binary log writes

        -F <bpf>   Read BPF filters from file <bpf>

        -G <0xid>  Log Identifier (to uniquely id events for multiple snorts)

        -h <hn>    Home network = <hn>

        -H         Make hash tables deterministic.

        -i <if>    Listen on interface <if>

        -I         Add Interface name to alert output

        -k <mode>  Checksum mode (all,noip,notcp,noudp,noicmp,none)

        -K <mode>  Logging mode (pcap[default],ascii,none)

        -l <ld>    Log to directory <ld>

        -L <file>  Log to this tcpdump file

        -n <cnt>   Exit after receiving <cnt> packets

        -N         Turn off logging (alerts still work)

        -O         Obfuscate the logged IP addresses

        -p         Disable promiscuous mode sniffing

        -P <snap>  Set explicit snaplen of packet (default: )

        -q         Quiet. Don't show banner and status report

        -r <tf>    Read and process tcpdump file <tf>

        -R <id>    Include 'id' in snort_intf<id>.pid file name

        -s         Log alert messages to syslog

        -S <n=v>   Set rules file variable n equal to value v

        -T         Test and report on the current Snort configuration

        -U         Use UTC for timestamps

        -v         Be verbose

        -V         Show version number

        -W         Lists available interfaces. (Win32 only)

        -X         Dump the raw packet data starting at the link layer

        -x         Exit if Snort configuration problems occur

        -y         Include year in timestamp in the alert and log files

        -Z <file>  Set the performonitor preprocessor file path and name

        -?         Show this information

<Filter Options> are standard BPF options, as seen in TCPDump

Longname options and their corresponding single char version

   --logid <0xid>                  Same as -G (即snort -G)

   --perfmon-file <file>           Same as -Z   (即snort -Z)

   --pid-path <dir>                Specify the directory for the Snort PID file

   --snaplen <snap>                Same as -P   (即snort -P)

   --help                          Same as -?   (即snort -?)

   --version                       Same as -V  (即snort -V)

   --alert-before-pass             Process alert, drop, sdrop, or reject before pass, default is pass before alert, drop,...

   --treat-drop-as-alert           Converts drop, sdrop, and reject rules into alert rules during startup

   --process-all-events            Process all queued events (drop, alert,...),default stops after 1st action group

   --dynamic-engine-lib <file>     Load a dynamic detection engine

   --dynamic-engine-lib-dir <path> Load all dynamic engines from directory

   --dynamic-detection-lib <file>  Load a dynamic rules library

   --dynamic-detection-lib-dir <path> Load all dynamic rules libraries from directory

   --dump-dynamic-rules <path>     Creates stub rule files of all loaded rules l

ibraries

   --dynamic-preprocessor-lib <file>  Load a dynamic preprocessor library

   --dynamic-preprocessor-lib-dir <path> Load all dynamic preprocessor libraries from directory

   --pcap-single <tf>              Same as -r.   (即snort -r)

   --pcap-file <file>              file that contains a list of pcaps to read -read mode is implied.

   --pcap-list "<list>"            a space separated list of pcaps to read - read mode is implied.

   --pcap-loop <count>             this option will read the pcaps specified on command line continuously.

                                   for <count> times.  A value of  will read until Snort is terminated.

   --pcap-reset                    if reading multiple pcaps, reset snort to post-configuration state before reading next pcap.

   --pcap-show                     print a line saying what pcap is currently being read.

   --exit-check <count>            Signal termination after <count> callbacks from pcap_dispatch(), showing the time it

                                   takes from signaling until pcap_close() is called.

   --conf-error-out                Same as -x  (即snort -x)

   --enable-mpls-multicast         Allow multicast MPLS

   --enable-mpls-overlapping-ip    Handle overlapping IPs within MPLS clouds

   --max-mpls-labelchain-len       Specify the max MPLS label chain

   --mpls-payload-type             Specify the protocol (ipv4, ipv6, ethernet) that is encapsulated by MPLS

   --require-rule-sid              Require that all snort rules have SID specified.

c:\Snort\bin>
snort所需mysql的配置

C:\Users\Administrator>mysql -uroot -p

Enter password: ****

Welcome to the MySQL monitor.  Commands end with ; or \g.

Your MySQL connection id is  to server version: 5.0.-community-nt

Type 'help;' or '\h' for help. Type '\c' to clear the buffer.

mysql> create database snort;

Query OK,  row affected (0.00 sec)

mysql> create database snort_archive;

Query OK,  row affected (0.04 sec)

mysql>

CREATE TABLE signature ( sig_id       INT          UNSIGNED NOT NULL AUTO_INCREMENT,

                         sig_name     VARCHAR() NOT NULL,

                         sig_class_id INT          UNSIGNED NOT NULL,

                         sig_priority INT          UNSIGNED,

                         sig_rev      INT          UNSIGNED,

                         sig_sid      INT          UNSIGNED,

                         sig_gid      INT          UNSIGNED,

                         PRIMARY KEY (sig_id),

                         INDEX   sign_idx (sig_name()),

                         INDEX   sig_class_id_idx (sig_class_id));
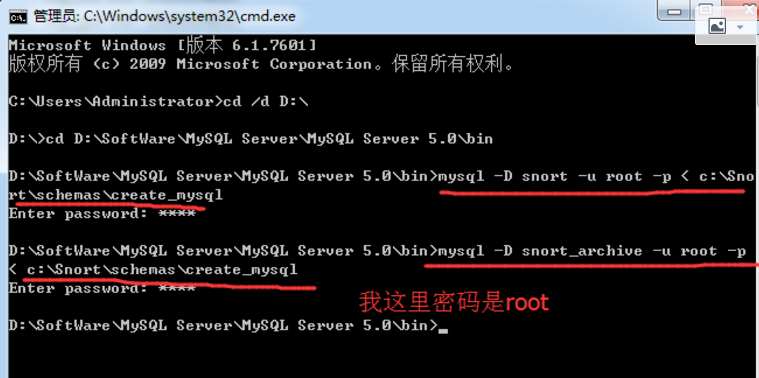
C:\Users\Administrator>cd /d D:\

D:\>cd D:\SoftWare\MySQL Server\MySQL Server 5.0\bin

D:\SoftWare\MySQL Server\MySQL Server 5.0\bin>mysql -D snort -u root -p < c:\Snort\schemas\create_mysql

Enter password: ****

D:\SoftWare\MySQL Server\MySQL Server 5.0\bin>mysql -D snort_archive -u root -p < c:\Snort\schemas\create_mysql

Enter password: ****

D:\SoftWare\MySQL Server\MySQL Server 5.0\bin>

D:\SoftWare\MySQL Server\MySQL Server 5.0\bin>mysql -u root -p
Enter password: ****
Welcome to the MySQL monitor. Commands end with ; or \g.
Your MySQL connection id is to server version: 5.0.-community-nt Type 'help;' or '\h' for help. Type '\c' to clear the buffer. mysql> show databases;
+-----------------------+
| Database |
+-----------------------+
| information_schema |
| elsa_web |
| mysql |
| securityonion_db |
| snort |
| snort_archive |
| syslog |
| test |
| weka |
| wholedatabasesanddata |
+-----------------------+
rows in set (0.00 sec) mysql> use snort;
Database changed
mysql> show tables;
+------------------+
| Tables_in_snort |
+------------------+
| data |
| detail |
| encoding |
| event |
| icmphdr |
| iphdr |
| opt |
| reference |
| reference_system |
| schema |
| sensor |
| sig_class |
| sig_reference |
| signature |
| tcphdr |
| udphdr |
+------------------+
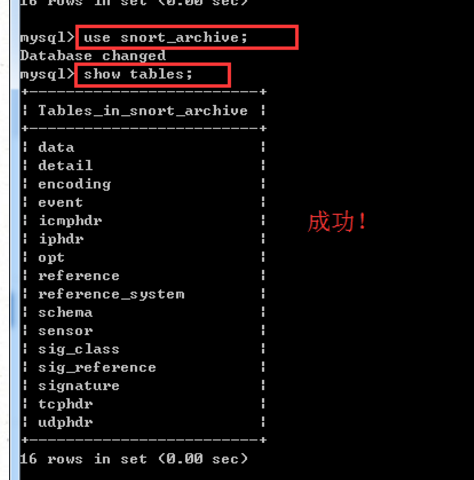
rows in set (0.00 sec) mysql> use snort_archive;
Database changed
mysql> show tables;
+-------------------------+
| Tables_in_snort_archive |
+-------------------------+
| data |
| detail |
| encoding |
| event |
| icmphdr |
| iphdr |
| opt |
| reference |
| reference_system |
| schema |
| sensor |
| sig_class |
| sig_reference |
| signature |
| tcphdr |
| udphdr |
+-------------------------+
rows in set (0.00 sec) mysql>

mysql> grant usage on *.* to "acid"@"localhost" identified by "acid";

Query OK,  rows affected (0.01 sec)

mysql> grant usage on *.* to "snort"@"localhost" identified by "snort";

Query OK,  rows affected (0.00 sec)

mysql> grant select,insert,update,delete,create,alter on snort .* to "snort"@"localhost";

Query OK,  rows affected (0.00 sec)

mysql> grant select,insert,update,delete,create,alter on snort .* to "acid"@"localhost";

Query OK,  rows affected (0.00 sec)

mysql> grant select,insert,update,delete,create,alter on snort_archive .* to "acid"@"localhost";

Query OK,  rows affected (0.00 sec)

mysql> grant select,insert,update,delete,create,alter on snort_archive .* to "snort"@"localhost";

Query OK,  rows affected (0.00 sec)

mysql>
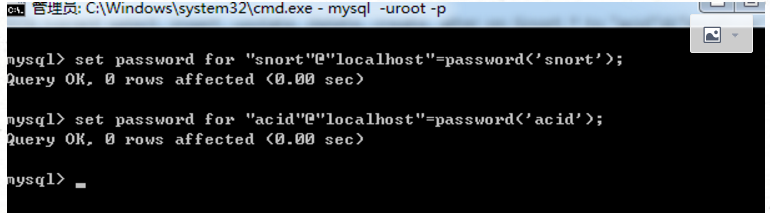
mysql> set password for "snort"@"localhost"=password('snort');

Query OK,  rows affected (0.00 sec)

mysql> set password for "acid"@"localhost"=password('acid');

Query OK,  rows affected (0.00 sec)

mysql>
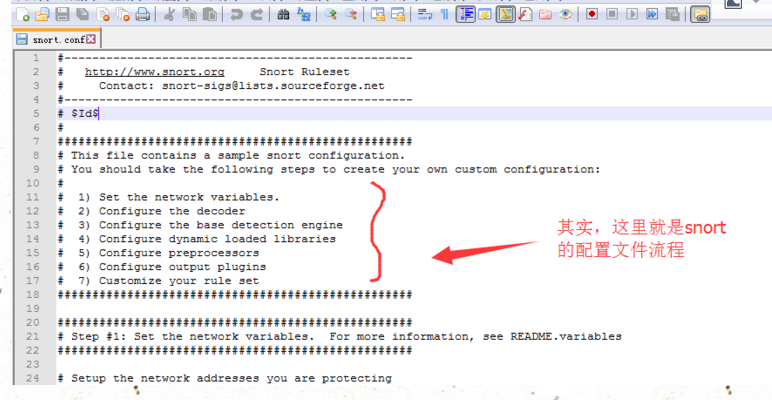
snort配置文件snort.conf的配置


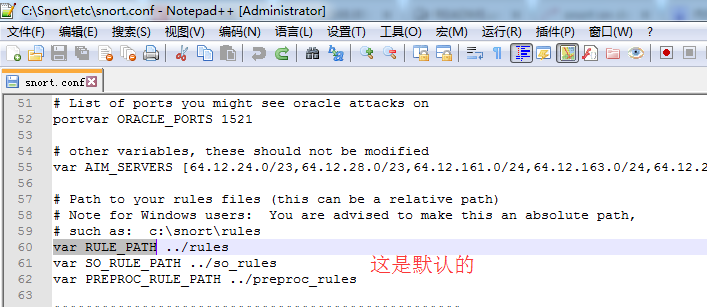
改为
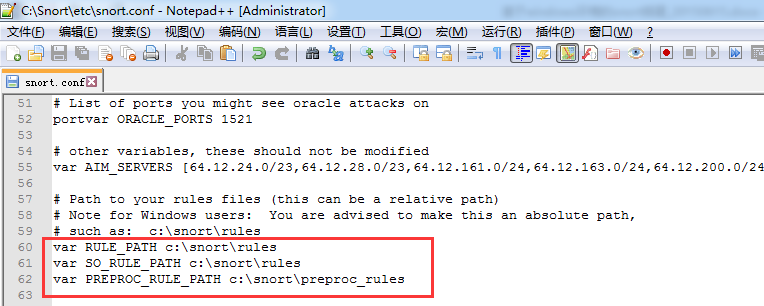
然后,这个保持默认就好

然后,

改为
preprocessor http_inspect: global iis_unicode_map C:\Snort\etc\unicode.map compress_depth decompress_depth

因为在windows下unicode.map这个文件在etc文件夹下。
配置好后,保存。
Snort下的snort2860规则库包的安装和配置
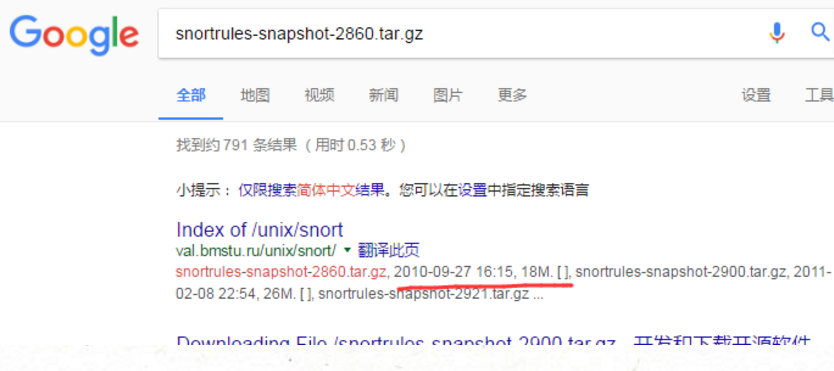
别问能科学上网,这个大家自行去解决。又不难。
http://val.bmstu.ru/unix/snort/
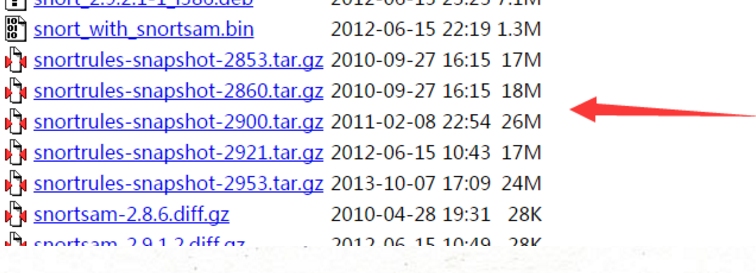
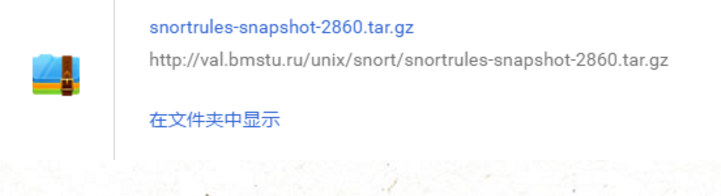
这是因为windows下安装好snort后默认是没有规则库,需要自己下载。
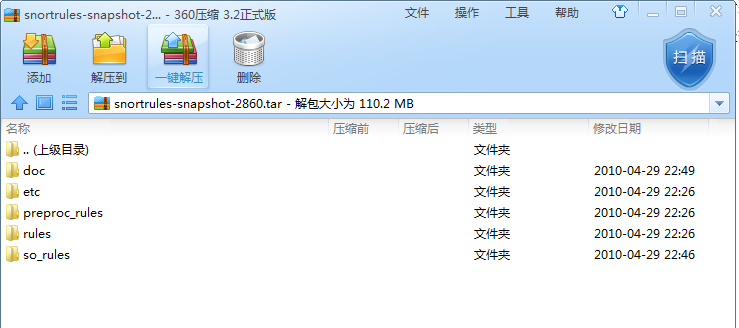
复制里面的doc、rules、so_rules到c:\Snort下
这里有些资料说,如http://www.cnblogs.com/kathmi/archive/2010/08/09/1795405.html
- snortrules-snapshot-2860.tar.gz(规则库,解压到Snort的安装目录,如果提示重复文件,可以选择不覆盖)
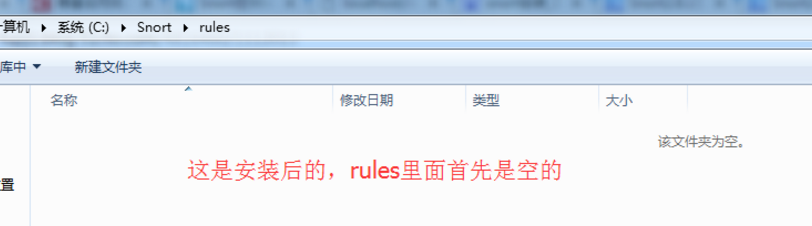
其实,我觉得,就只需要将snortrules-snapshot-2860.tar.gz里的doc、rules、so_rules到c:\Snort下即可。
为什么呢。首先rules本来是空的,so_rules是没有的,至于嘛,doc更别提了。
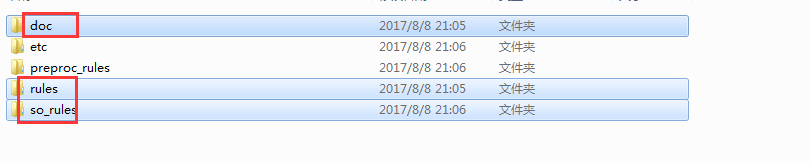
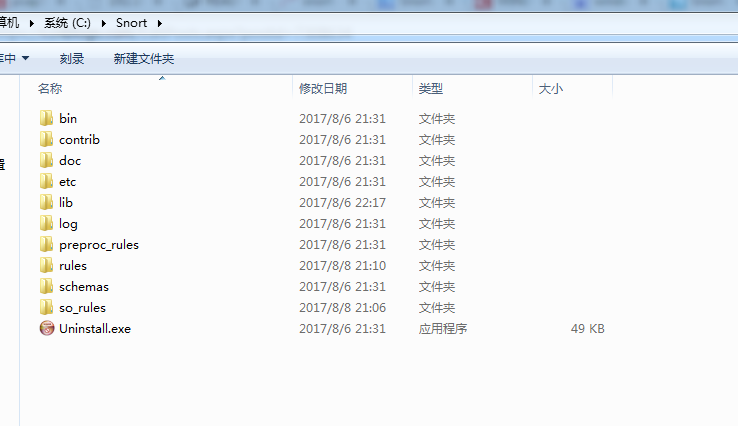
最后目录结构为
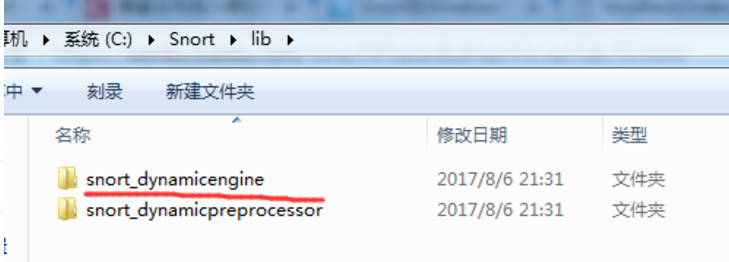
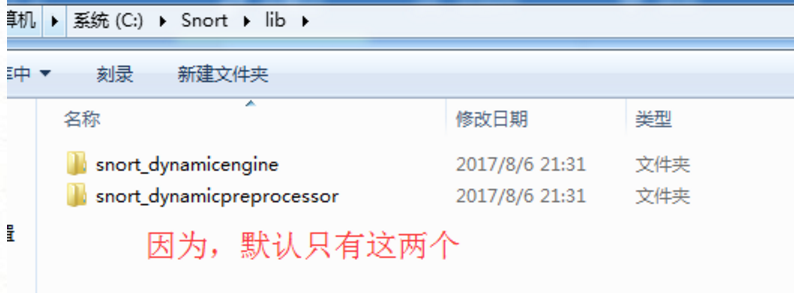
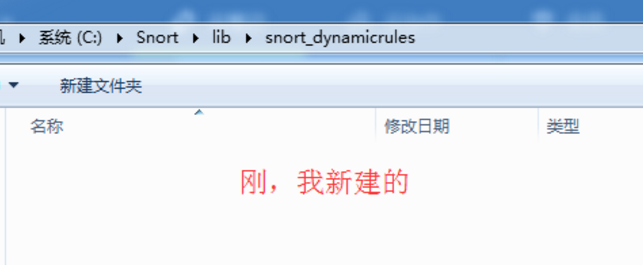
配置动态规则


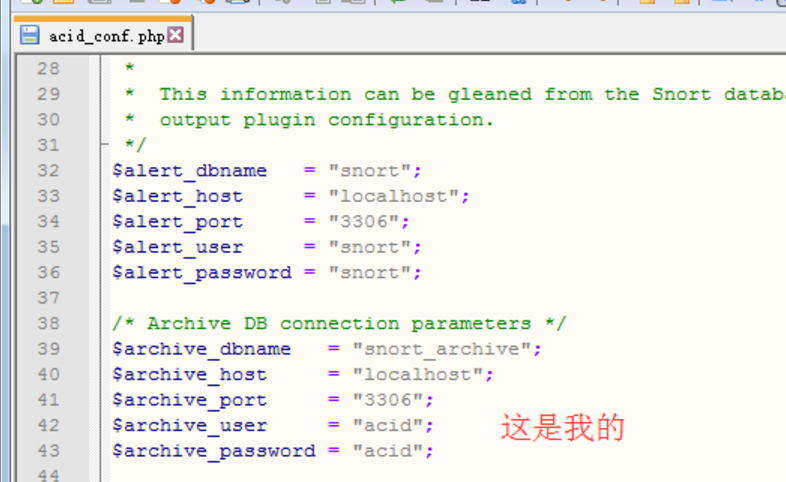

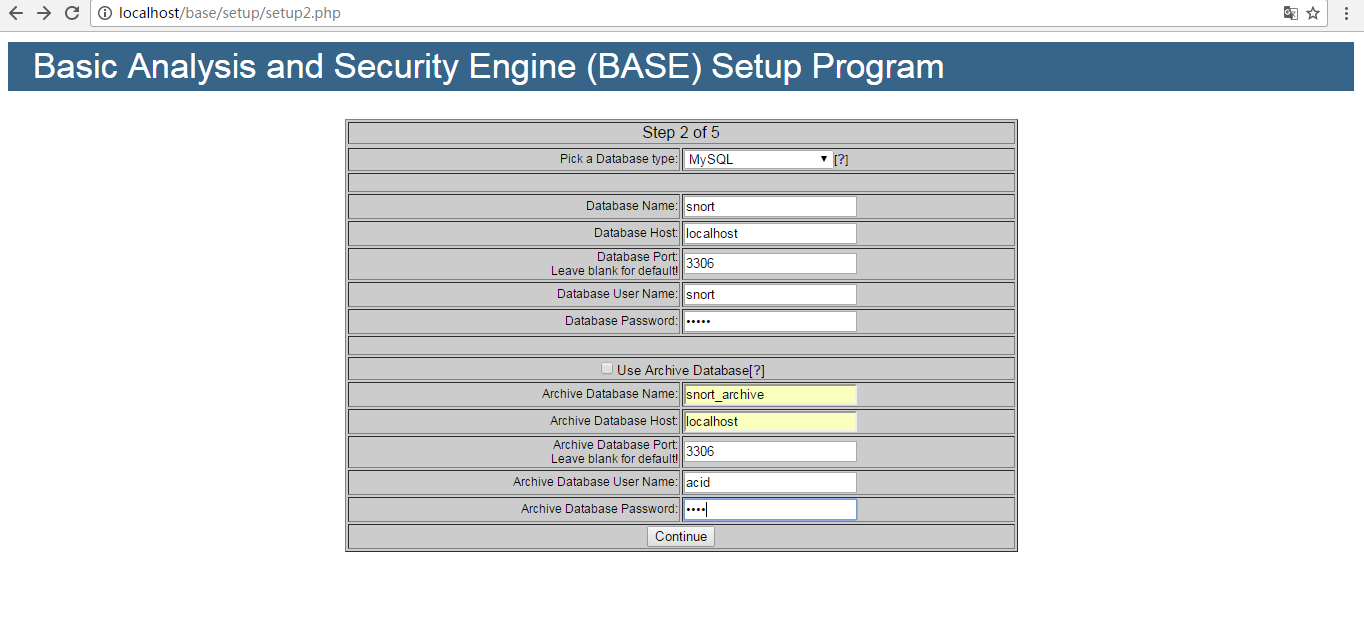
$alert_dbname   = "snort";

$alert_host     = "localhost";

$alert_port     = "";

$alert_user     = "snort";

$alert_password = "snort";

$archive_dbname   = "snort_archive";

$archive_host     = "localhost";

$archive_port     = "";

$archive_user     = "acid";

$archive_password = "acid";

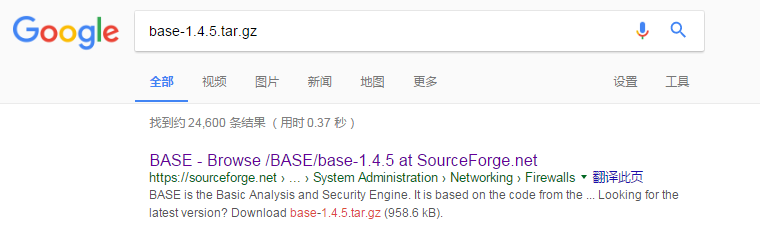
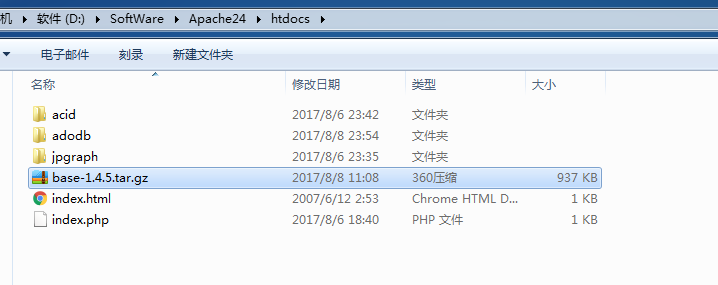

进行重命名,改为base-1.4.5,为base。
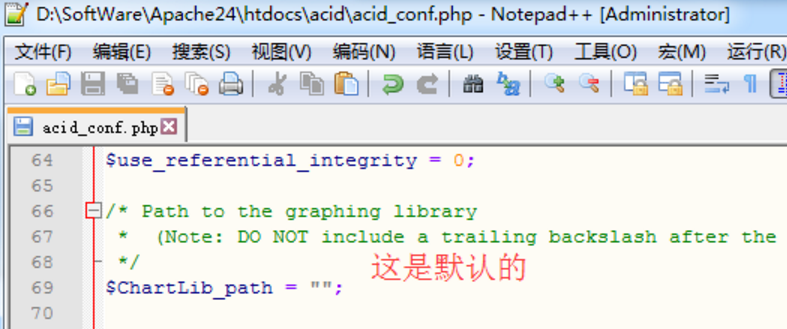
大家,然后,这里也可以跟acid一样,手动去这个配置文件里去修改配置。(但是呢。我这里界面化来配置,更加的形象)
1、用windows里的谷歌浏览器或者火狐浏览器或者IE浏览器都行。,打开http://localhost/base/setup/index.php

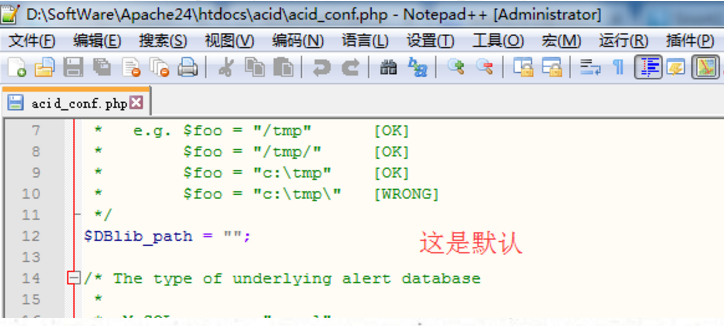
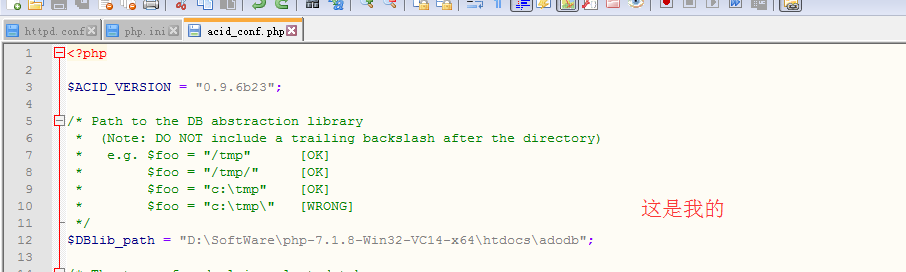
2.选择显示语言,设置adodb路径
3.配置数据库

4.设置admin用户和密码(这里应该是设置admin的用户和密码,我这里是admin)

5.点击“Createe BASE AG”
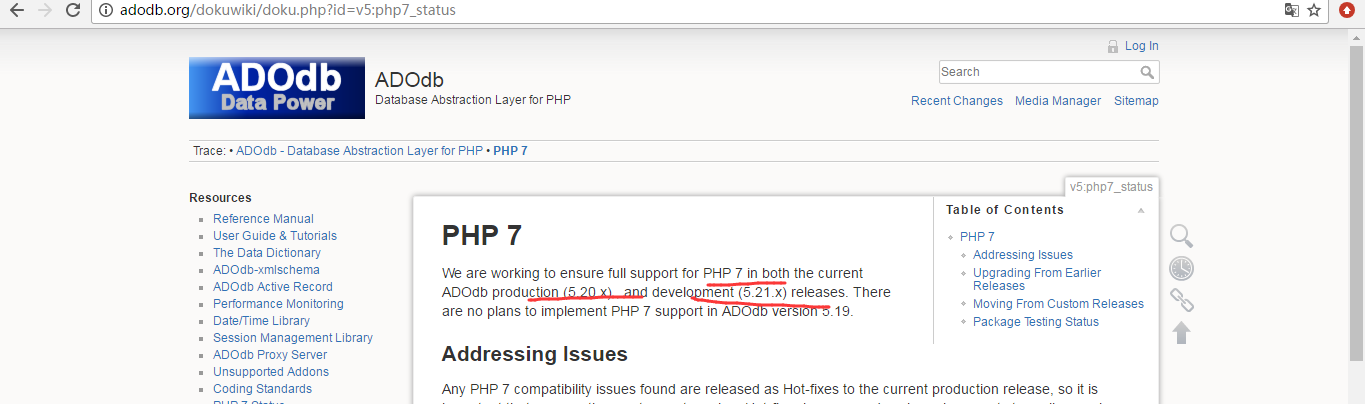
http://adodb.org/dokuwiki/doku.php?id=v5:php7_status


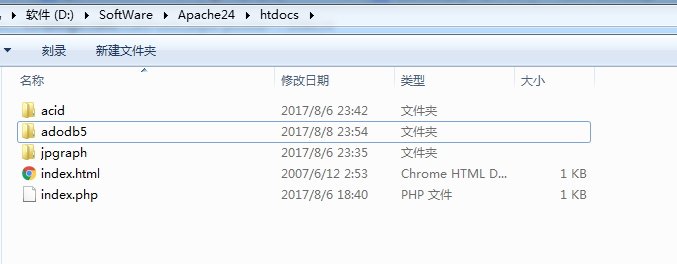
我这里为了方便,进行改名,将adodb5重新命名为adodb。

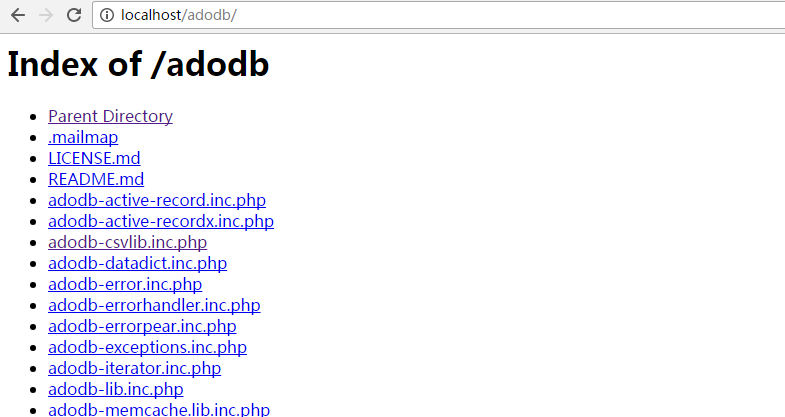
证明,能读取到。

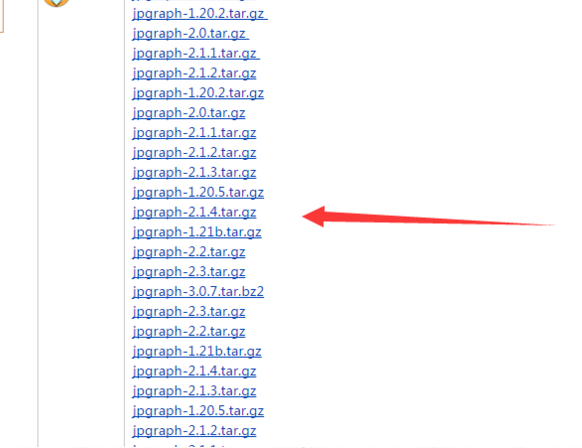
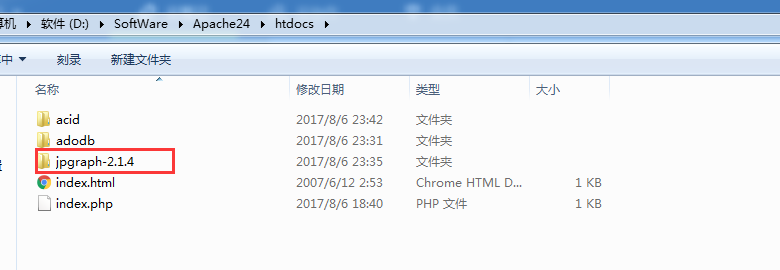
我这里,为了方便,改名,将jpgraph-2.1.4重命名为
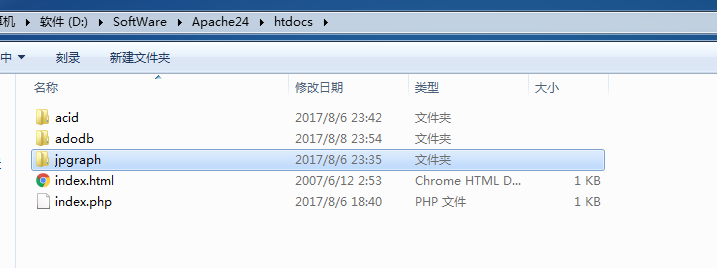
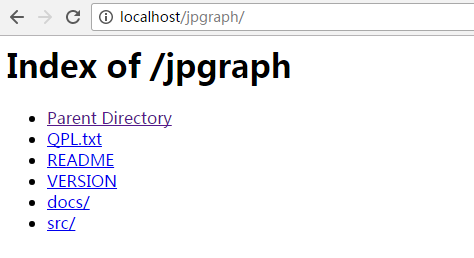
证明,能读取到。

这里,大家也可以去看一些质量比较好的论文,如
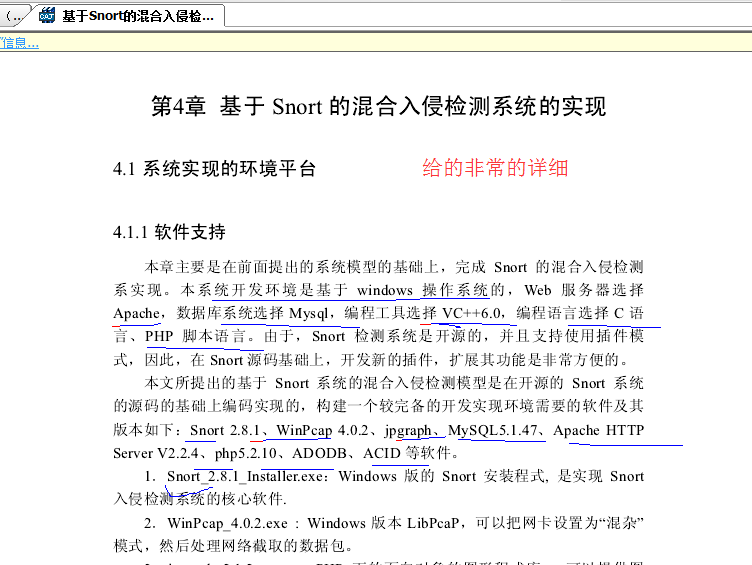
基于Snort的混合入侵检测系统的研究与实现_李文龙(2011年)
同时,大家可以关注我的个人博客:
http://www.cnblogs.com/zlslch/ 和 http://www.cnblogs.com/lchzls/ http://www.cnblogs.com/sunnyDream/
详情请见:http://www.cnblogs.com/zlslch/p/7473861.html
人生苦短,我愿分享。本公众号将秉持活到老学到老学习无休止的交流分享开源精神,汇聚于互联网和个人学习工作的精华干货知识,一切来于互联网,反馈回互联网。
目前研究领域:大数据、机器学习、深度学习、人工智能、数据挖掘、数据分析。 语言涉及:Java、Scala、Python、Shell、Linux等 。同时还涉及平常所使用的手机、电脑和互联网上的使用技巧、问题和实用软件。 只要你一直关注和呆在群里,每天必须有收获
对应本平台的讨论和答疑QQ群:大数据和人工智能躺过的坑(总群)(161156071)![]()
![]()
![]()
![]()
![]()


基于Windows7下snort+apache+php 7 + acid(或者base) + adodb + jpgraph的入侵检测系统的搭建(图文详解)(博主推荐)的更多相关文章
- Snort里如何将一个tcpdump格式的二进制文件读取打印到屏幕上(图文详解)
不多说,直接上干货! 关于tcpdump二进制格式,这个基本概念不说. 支持tcpdump二进制格式的嗅探器工具,这里我说两个:tcpdump或者ethereal. [root@datatest Se ...
- 全网最详细的基于Ubuntu14.04/16.04 + Anaconda2 / Anaconda3 + Python2.7/3.4/3.5/3.6安装Tensorflow详细步骤(图文)(博主推荐)
不多说,直接上干货! 前言 建议参照最新的tensorflow安装步骤(Linux,官方网站经常访问不是很稳定,所以给了一个github的地址): https://github.com ...
- 基于CentOS6.5下snort+barnyard2+base的入侵检测系统的搭建(图文详解)(博主推荐)
为什么,要写这篇论文? 是因为,目前科研的我,正值研三,致力于网络安全.大数据.机器学习研究领域! 论文方向的需要,同时不局限于真实物理环境机器实验室的攻防环境.也不局限于真实物理机器环境实验室的大数 ...
- Ubuntu16.04下安装Tensorflow GPU版本(图文详解)
不多说,直接上干货! 推荐 全网最详细的基于Ubuntu14.04/16.04 + Anaconda2 / Anaconda3 + Python2.7/3.4/3.5/3.6安装Tensorflow详 ...
- Ubuntu16.04下安装Tensorflow CPU版本(图文详解)
不多说,直接上干货! 推荐 全网最详细的基于Ubuntu14.04/16.04 + Anaconda2 / Anaconda3 + Python2.7/3.4/3.5/3.6安装Tensorflow详 ...
- centos平台基于snort、barnyard2以及base的IDS(入侵检测系统)的搭建与测试及所遇问题汇总
centos平台基于snort.barnyard2以及base的IDS(入侵检测系统)的搭建与测试及所遇问题汇总 原创 2016年12月19日 01:20:03 标签: centos / snort ...
- 基于CentOS6.5或Ubuntu14.04下Suricata里搭配安装 ELK (elasticsearch, logstash, kibana)(图文详解)
前期博客 基于CentOS6.5下Suricata(一款高性能的网络IDS.IPS和网络安全监控引擎)的搭建(图文详解)(博主推荐) 基于Ubuntu14.04下Suricata(一款高性能的网络ID ...
- 基于CentOS6.5下Suricata(一款高性能的网络IDS、IPS和网络安全监控引擎)的搭建(图文详解)(博主推荐)
不多说,直接上干货! 为什么,要写这篇论文? 是因为,目前科研的我,正值研三,致力于网络安全.大数据.机器学习研究领域! 论文方向的需要,同时不局限于真实物理环境机器实验室的攻防环境.也不局限于真实物 ...
- 基于CentOS6.5下如何正确安装和使用Tcpreplay来重放数据(图文详解)
前期博客 基于CentOS6.5下snort+barnyard2+base的入侵检测系统的搭建(图文详解)(博主推荐) tcpreplay是什么? 简单的说, tcpreplay是一种pcap包的重放 ...
随机推荐
- 【求建议】毕业之声——信院IT类毕业学子经验分享交流会
一:缘由 在和非常多学子交流,及上课的经历中,发现一个非常普遍的现象:部分大一学生即失去了对学习.对专业的兴趣.有人在迷茫之后奋起直追.从而珍惜利用不多的大学时光努力提高自己.有人在迷茫中沉沦,沉迷于 ...
- iOS 开发者中的个人账号与组织账号之间区别
苹果对开发者主要分为3类:个人.组织(公司.企业).教育机构.即: 1.个人(Individual) 2.组织(Organizations) 组织类又分为2个小类: (1)公司(Company) (2 ...
- IOS开发基础之—MD5加密算法【转】
原文地址:http://blog.csdn.net/pjk1129/article/details/6855024 #import <CommonCrypto/CommonDigest.h> ...
- 内存溢出-jvisualvm排查问题
先来一段能够内存溢出的程序 public static void main(String[] args) { List<Object> list = new ArrayList<&g ...
- 创建cordova项目
PhoneGap是一套能让你使用HTML5轻松调用本地API接口和发布应用到商店的应用开发平台.官方说有低成本,低开发周期,轻量化等优点,这些咱暂时也没法证明,略过不表.但是有一条跨平台,却是很明显的 ...
- ACTION 的跳转与参数传递
openmodifychildsysfunmenu <td width="54%"><a href="#" style="float ...
- c语言和oc对比
1)源文件对比 思考&实现1: 1)在C语言中,我们遇到不同后缀的文件有哪些? .c .o .out .h 2.基本语法对比 1)数据类型对比学习 2)变量的定义对比 3)流程控制语句对比 1 ...
- HEOI2016 树
传送门 这道题还是很简单的,可以树剖,然后还有看大佬暴力模拟AC的????!! 我们就执行俩操作,一个是单点修改,这个随便修,然后就是查询一个点,离他最近的被打过标记过的祖先.这个可以这么想,我们先q ...
- [九省联考2018]一双木棋chess——搜索+哈希
题目:bzoj5248 https://www.lydsy.com/JudgeOnline/problem.php?id=5248 洛谷P4363 https://www.luogu.org/prob ...
- HDU 5945 Fxx and game (DP+单调队列)
题意:给定一个 x, k, t,你有两种操作,一种是 x - i (0 <= i <= t),另一种是 x / k (x % k == 0).问你把x变成1需要的最少操作. 析:这肯定是 ...