Linux使用nexus搭建maven私服
一、准备工作
二、安装Nexus
1.解压nexus文件
|
1
|
[root@centos6 var]# tar -zvxf nexus-2.12.0-01-bundle.tar.gz |

nexus-2.12.0-01: 是nexus的核心文件
sonatype-work :maven下载jar存放地址
2.启动Nexus
|
1
2
3
4
5
6
|
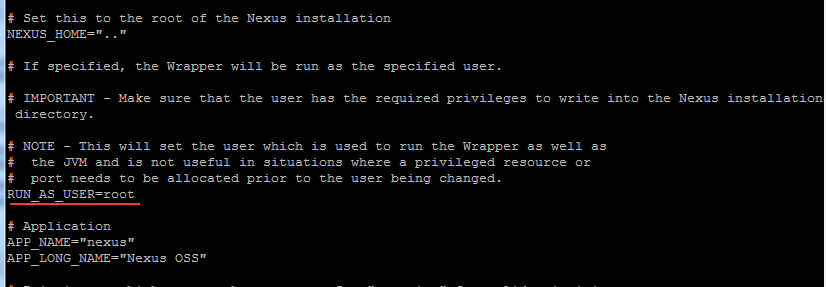
[root@centos6 nexus-2.12.0-01]# ./bin/nexus start- ****************************************WARNING - NOT RECOMMENDED TO RUN AS ROOT****************************************If you insist running as root, then set the environment variable RUN_AS_USER=root before running this script. |
默认情况下,不建议以root用户运行Nexus,可以修改bin/nexus中的配置跳过警告(修改RUN_AS_USER=root)
|
1
|
[root@centos6 nexus-2.12.0-01]# vi bin/nexus |
重新启动Nexus
|
1
2
3
4
5
6
7
|
[root@centos6 nexus-2.12.0-01]# ./bin/nexus start- ****************************************WARNING - NOT RECOMMENDED TO RUN AS ROOT****************************************Starting Nexus OSS...Started Nexus OSS. |
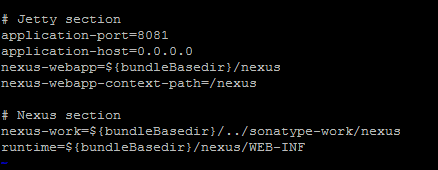
注:Nexus默认端口8081,如果想修改端口。修改/conf/nexus.properties文件
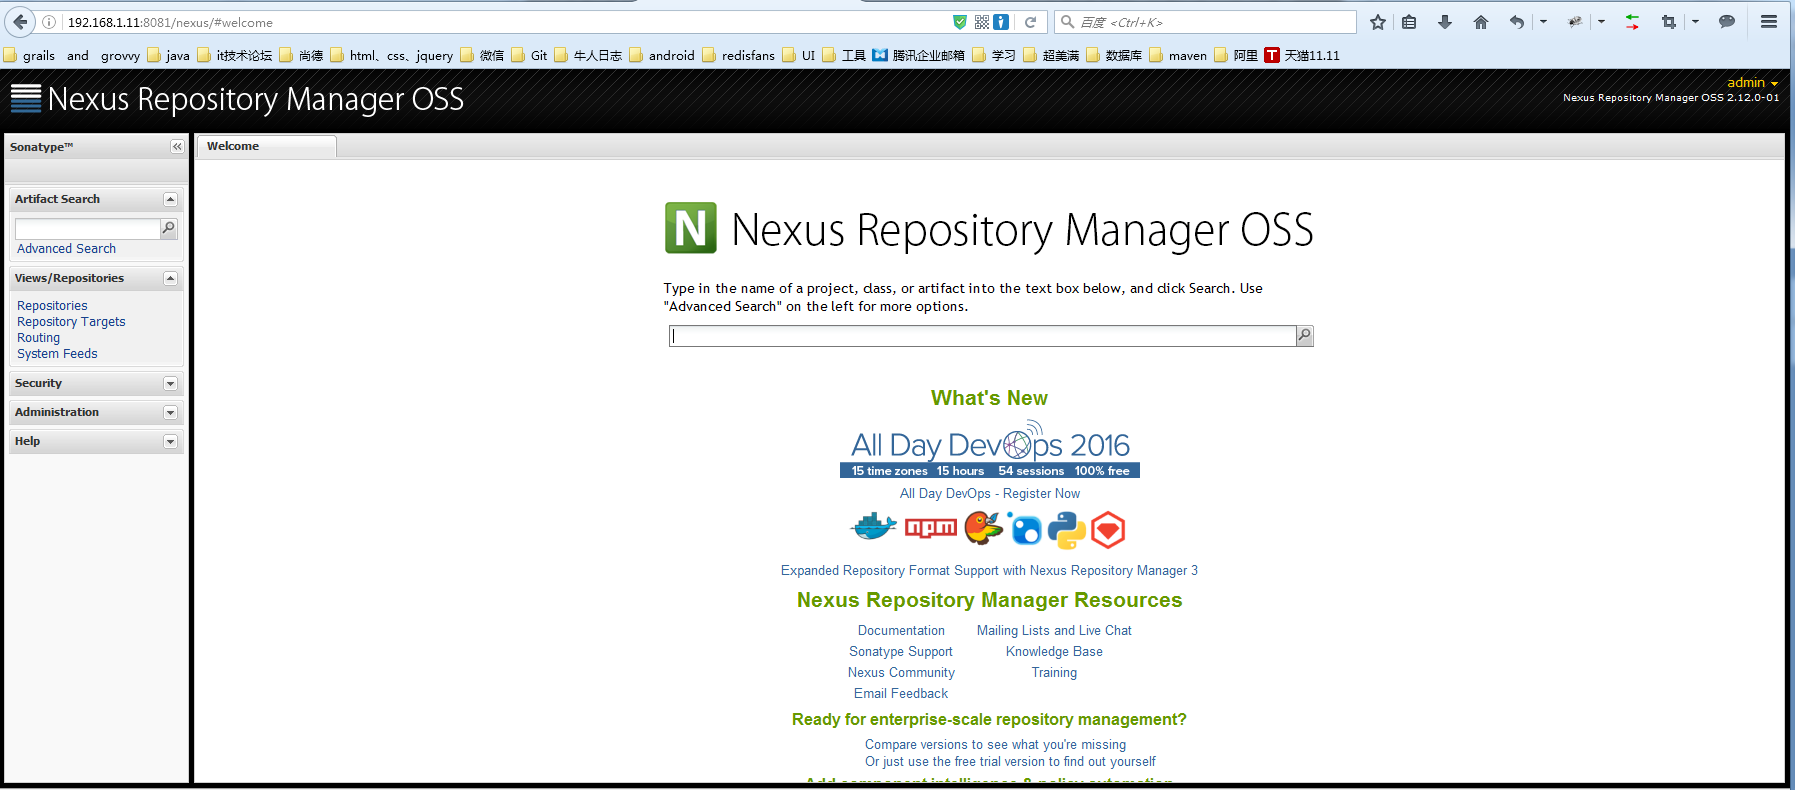
访问网址:http://192.168.1.11:8081/nexus/#welcome

点击右上角的 Log In 按钮即可登陆了。默认登录账号/密码为: admin/admin123 ,登陆成功后的界面
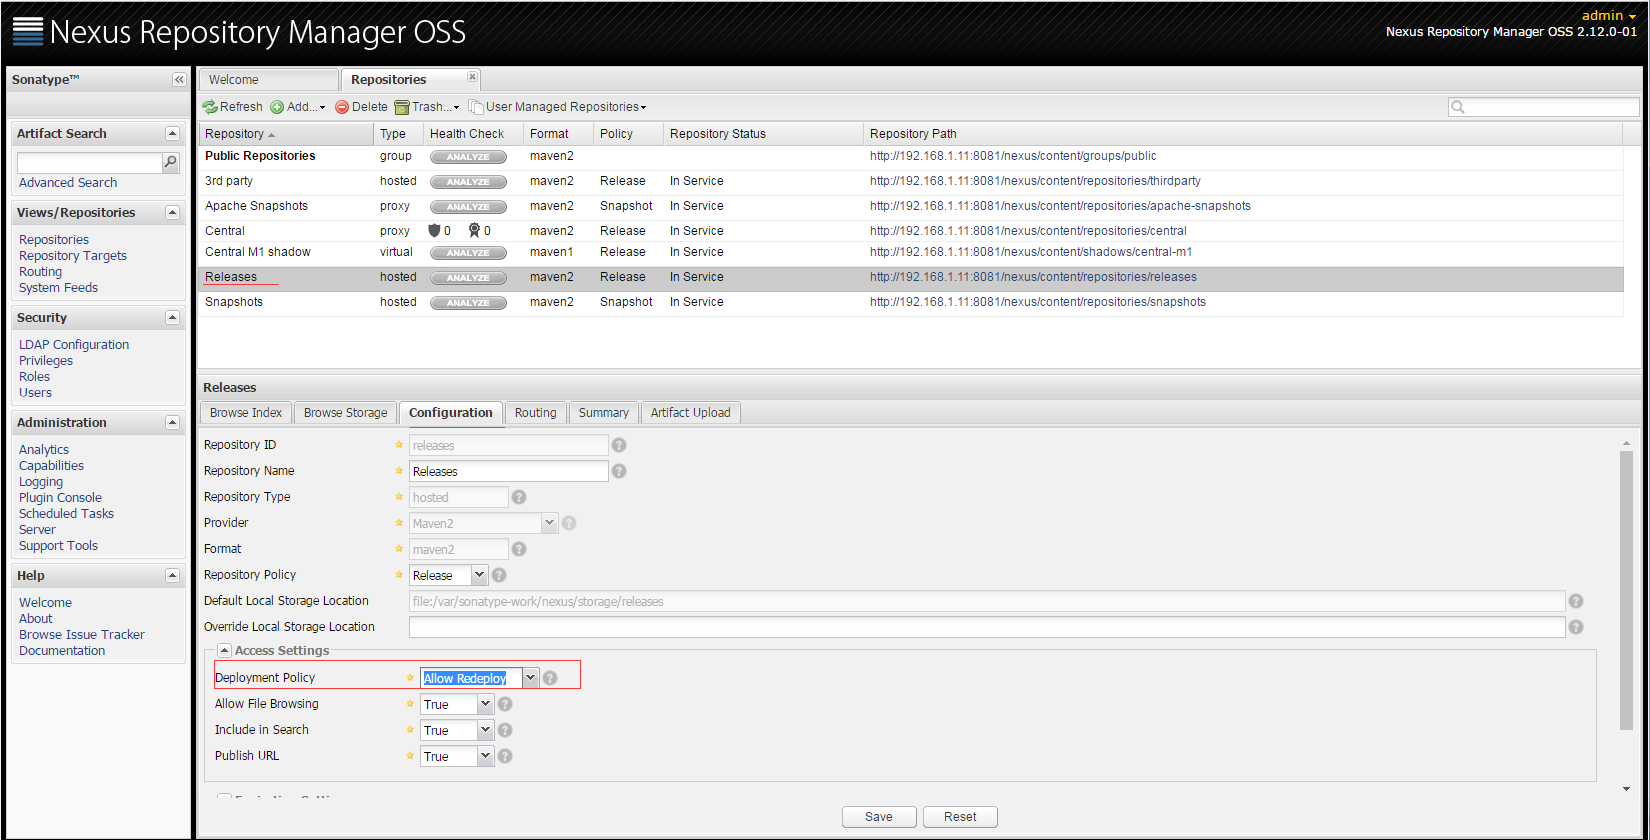
点击Repositories,将列表中所有Type为proxy 的项目的 Configuration 中的 Download Remote Indexes 设置为True

将Releases仓库的Deployment Policy设置为 Allow ReDeploy
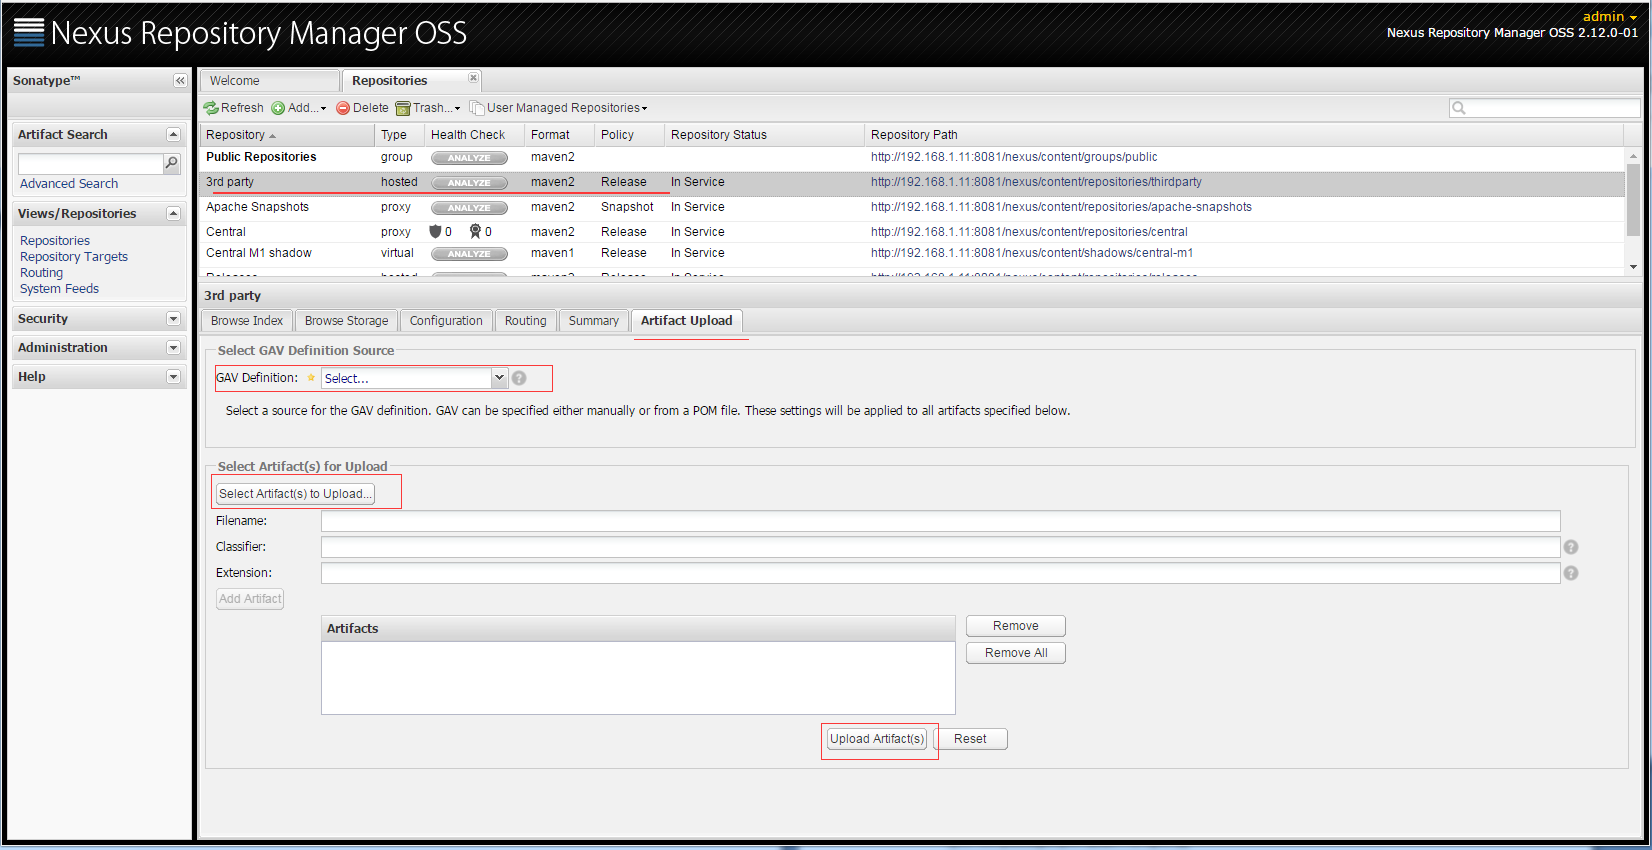
填写完必选字段,点击Upload Artifact(s)按钮即可。
3.配置本地项目引用私服
自动发布构件到远程仓库,在工程pom.xml中添加
|
1
2
3
4
5
6
7
8
9
10
|
<distributionManagement> <repository> <id>releases</id><!--这个ID需要与你的release仓库的Repository ID一致--> <url>http://192.168.1.11:8081/nexus/content/repositories/releases</url> </repository> <snapshotRepository> <id>snapshots</id><!--这个ID需要与你的snapshots仓库的Repository ID一致--> <url>http://192.168.1.11:8081/nexus/content/repositories/snapshots</url> </snapshotRepository></distributionManagement> |
修改本地$MAVEN_HOME\conf目录下的settings.xml配置文件,添加如下配置
|
1
2
3
4
5
6
7
8
9
10
11
12
|
<servers> <server> <id>releases</id> <username>admin</username> <password>admin123</password> </server> <server> <id>snapshots</id> <username>admin</username> <password>admin123</password> </server></servers> |
在本地工程目录下执行:
|
1
|
mvn deploy |
所部署的包就自动上传到了nexus安装目录下的

4.配置Maven从Nexus下载构件
在POM中配置Nexus私服,这样的配置只对当前的Maven项目有效。
|
1
2
3
4
5
6
7
8
9
10
11
12
13
14
15
16
17
18
19
20
21
22
23
24
25
26
27
28
29
|
<!--指定Nexus的构件仓库--><repositories> <repository> <id>public</id> <name>Team Maven Repository</name> <url>http://192.168.1.11:8081/nexus/content/groups/public/</url> <releases> <enabled>true</enabled> </releases> <snapshots> <enabled>true</enabled> </snapshots> </repository></repositories><!--指定Nexus的插件仓库--><pluginRepositories> <pluginRepository> <id>public</id> <name>Team Maven Repository</name> <url>http://192.168.1.11:8081/nexus/content/groups/public/</url> <releases> <enabled>true</enabled> </releases> <snapshots> <enabled>true</enabled> </snapshots> </pluginRepository></pluginRepositories> |
在settings.xml中配置profile元素,这样就能让本机所有的Maven项目都使用自己的Maven私服。
|
1
2
3
4
5
6
7
8
9
10
11
12
13
|
<properties> <repository> <id>public</id> <name>Team Maven Repository</name> <url>http://192.168.1.11:8081/nexus/content/groups/public/</url> <releases> <enabled>true</enabled> </releases> <layout>default</layout> <snapshots> <enabled>true</enabled> </snapshots> </repository><br></properties> |
Linux使用nexus搭建maven私服的更多相关文章
- Linux 使用nexus搭建maven私服
系统:LINUX JDK:已安装 Maven:已安装 Nexus Nexus是一个强大的Maven仓库管理器,它极大地简化了自己内部仓库的维 ...
- Maven-004-使用 Nexus 搭建 maven 私服
从去年至今,自己一直在学习自动化测试工具,想利用自动化工具尽可能的将重复的.关键的.耗时耗力的工作实现自动化,减轻日常测试工作,提升测试效率.在学习的过程中,将 maven 作为了项目开发管理工具,进 ...
- Maven使用笔记(五)Sonatype Nexus 搭建Maven 私服
1. 为什么使用Nexus 如果没有私服,我们所需的所有构件都需要通过maven的中央仓库和第三方的Maven仓库下载到本地, 而一个团队中的所有人都重复的从maven仓库下载构件无疑加大了仓库的负载 ...
- Maven——使用Nexus搭建Maven私服
原文:http://www.cnblogs.com/xdp-gacl/p/4068967.html Maven学习总结(九)--使用Nexus搭建Maven私服 一.搭建nexus私服的目的 为什么要 ...
- (转)Maven学习总结(九)——使用Nexus搭建Maven私服
孤傲苍狼只为成功找方法,不为失败找借口! Maven学习总结(九)——使用Nexus搭建Maven私服 一.搭建nexus私服的目的 为什么要搭建nexus私服,原因很简单,有些公司都不提供外网给项目 ...
- Maven学习二:使用Nexus搭建Maven私服及相关配置
处于安全等原因的考虑,一些企业内部网络是不允许访问外部网络的,但是项目内部搭建的项目又是Maven架构,这样就需要企业在内部网络中搭建自己的Maven仓库服务,再者一些大型企业或者内部模块化组件化划分 ...
- 使用Nexus搭建Maven私服问题总结
#业务场景 最近项目要交付给客户了,之前项目开发和测试一直都是使用公司内部的一套环境,项目交付后客户购置了大量服务器,也要将整套测试环境迁移至客户的服务器上,后续的需求变更以及新需求的开发都会在客户服 ...
- nexus搭建maven私服及私服jar包上传和下载
nexus搭建maven私服及私服jar包上传和下载 标签: nexus管理maven库snapshot 2017-06-28 13:02 844人阅读 评论(0) 收藏 举报 分类: Maven(1 ...
- nexus 搭建 maven 私服
nexus 搭建 maven 私服 本机环境 Win 8 JDK 7 Maven 3.2 Nexus 2.11 版本选择 http://www.sonatype.org/nexus/archivedn ...
随机推荐
- extra过滤
extra extra(select=None, where=None, params=None, tables=None, order_by=None, select_params=None) 有些 ...
- ubuntu 调整分辨率
修改 /etc/X11/xorg.conf配置文件即可
- Linux编程学习笔记(一)
Linux的发展趋势势在必行,国内的服务器的操作系统Linux占到主导地位,不光是操作系统,还有嵌入式系统. 1. 今天就Linux的其中一个版本做一介绍,如下是Centos的版本之间的区别. ins ...
- bzoj 4816
这题是莫比乌斯反演的典型题也是很有趣的题. 题意:求,其中f为为斐波那契数列 那么首先观察一下指数,发现是我们熟悉的形式,可以转化成这样的形式: 令T=kd,且假设n<m,有: 令 则原式= 这 ...
- PyCharm+SVN
首先电脑安装svn,并且确svn/bin下面有svn.exe文件 没有bin/svn.exe解决方法: 重新打开TortoiseSVN安装文件-Modify-Next后在command line cl ...
- AI-认证
AI-认证 做登录验证 #models.py class Users(models.Model): user=models.CharField(max_length=32) pwd=models.Ch ...
- ORACLE EHCC(exadata hybrid columnar compression)
目录: 1. 简介 2. 压缩方式及压缩比 3. 压缩哪些数据 4. 可能有用的脚本 一.简介 EHCC(Exadata Hybrid Columnar Compression),是Oralce 数据 ...
- Spring.Net 简单实例-01(IOC)
1.话不多说看操作.新建"Windows窗体应用程序" 2:通过配置文件创建IOC容器 首先引入安装包 3:定义一个接口(更好的体现封装性,当然也可以直接使用类) 定义一个类,实现 ...
- HDU 1166 敌兵布阵(线段树/树状数组模板题)
敌兵布阵 Time Limit: 2000/1000 MS (Java/Others) Memory Limit: 65536/32768 K (Java/Others) Total Submi ...
- python字符串之split
函数:split() Python中有split()和os.path.split()两个函数,具体作用如下:split():拆分字符串.通过指定分隔符对字符串进行切片,并返回分割后的字符串列表(lis ...