android自定义控件(五) 自定义组合控件
转自http://www.cnblogs.com/hdjjun/archive/2011/10/12/2209467.html 代码为自己编写
目标:实现textview和ImageButton组合,可以通过Xml设置自定义控件的属性。
通过代码或者通过xml设置自定义控件的属性
1.控件布局:以Linearlayout为根布局,一个TextView,一个ImageButton。
- < ?xml version="1.0" encoding="utf-8"?>
- < LinearLayout xmlns:Android="http://schemas.android.com/apk/res/android"
- android:layout_width="fill_parent" android:layout_height="fill_parent"
- android:gravity="center_vertical">
- < TextView android:layout_height="wrap_content" android:id="@+id/text1"
- android:layout_width="wrap_content">< /TextView>
- < ImageButton android:layout_width="wrap_content"
- android:layout_height="wrap_content" android:id="@+id/btn1">< /ImageButton>
- < /LinearLayout>
2.自定义控件代码,从LinearLayout继承:
- public class ImageBtnWithText extends LinearLayout {
- }
- public ImageBtnWithText(Context context) {
- this(context, null);
- }
- public ImageBtnWithText(Context context, AttributeSet attrs) {
- super(context, attrs);
- //在构造函数中将Xml中定义的布局解析出来。
- LayoutInflater.from(context).inflate(R.layout.imagebtn_with_text, this, true);
- }
- }
3.在主界面布局xml中使用自定义控件:
- < com.demo.widget2.ImageBtnWithText
- android:id="@+id/widget"
- android:layout_width="fill_parent"
- android:layout_height="fill_parent" />
即使用完整的自定义控件类路径:com.demo.widget2.ImageBtnWithText定义一个元素。
运行可以看到控件已经能够被加载到界面上。
4.给按钮设置图片和文本
如果图片是固定不变的,那么直接在控件布局中设置ImageButton的src属性即可。
4.1通过Java代码设置,在控件代码中提供函数接口:
- public void setButtonImageResource(int resId) {
- mBtn.setImageResource(resId);
- }
- public void setTextViewText(String text) {
- mTv.setText(text);
- }
然后再在主界面的onCreate()通过函数调用设置即可。
4.2通过Xml设置属性
4.2.1首先定义Xml可以设置的属性集合,在values下创建attrs.xml,文件名可随意,一般都叫attrs.xml
- < ?xml version="1.0" encoding="utf-8"?>
- < resources>
- < declare-styleable name="ImageBtnWithText">
- < attr name="android:text"/>
- < attr name="android:src"/>
- < /declare-styleable>
- < /resources>
属性集合名字:ImageBtnWithText,自己可根据实际来定义;
集合中包含的属性列表,每行一个属性。
4.2.2修改自定义控件实现代码,以获取xml中定义的属性
- TypedArray a = context.obtainStyledAttributes(attrs, R.styleable.ImageBtnWithText);
- CharSequence text = a.getText(R.styleable.ImageBtnWithText_android_text);
- if(text != null) mTv.setText(text);
- Drawable drawable = a.getDrawable(R.styleable.ImageBtnWithText_android_src);
- if(drawable != null) mBtn.setImageDrawable(drawable);
- a.recycle();
首先通过context.obtainStyledAttributes获得所有属性数组;
然后通过TypedArray类的getXXXX()系列接口获得相应的值。
4.2.3在主界面布局中设置自定义控件的属
android:text="ABC" android:src="@drawable/icon
4.3自定义名称属性:
在4.2中使用的属性名是Android系统命名空间的,都以android开头,比如android:text等。
实际开发中会自定义一些属性名,这些属性名仍然定义在4.2.1提到的attrs.xml中:
4.3.1定义属性名
- < attr name="appendText" format="string"/>
和直接使用系统的attr不同的是要增加一个format属性,说明此属性是什么格式的。format可选项可参见注1
4.3.2使用自定义属性
- < ?xml version="1.0" encoding="utf-8"?>
- < LinearLayout xmlns:android="http://schemas.android.com/apk/res/android"
- xmlns:myspace="http://schemas.android.com/apk/res/com.demo.customwidget"
- android:orientation="vertical" android:layout_width="fill_parent"
- android:layout_height="fill_parent">
- < com.demo.widget2.ImageBtnWithText
- android:text="ABC" android:src="@drawable/icon" android:id="@+id/widget"
- android:layout_width="fill_parent" android:layout_gravity="center"
- android:layout_height="fill_parent" myspace:appendText="123456">
- < /com.demo.widget2.ImageBtnWithText>
- < /LinearLayout>
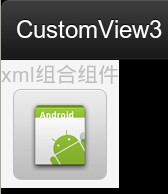
效果图
android自定义控件(五) 自定义组合控件的更多相关文章
- Android自定义控件之自定义组合控件
前言: 前两篇介绍了自定义控件的基础原理Android自定义控件之基本原理(一).自定义属性Android自定义控件之自定义属性(二).今天重点介绍一下如何通过自定义组合控件来提高布局的复用,降低开发 ...
- Android自定义控件之自定义组合控件(三)
前言: 前两篇介绍了自定义控件的基础原理Android自定义控件之基本原理(一).自定义属性Android自定义控件之自定义属性(二).今天重点介绍一下如何通过自定义组合控件来提高布局的复用,降低开发 ...
- Android 手机卫士--自定义组合控件构件布局结构
由于设置中心条目中的布局都很类似,所以可以考虑使用自定义组合控件来简化实现 本文地址:http://www.cnblogs.com/wuyudong/p/5909043.html,转载请注明源地址. ...
- Android开发之自定义组合控件
自定义组合控件的步骤1.自定义一个View,继承ViewGroup,比如RelativeLayout2.编写组合控件的布局文件,在自定义的view中加载(使用View.inflate())3.自定义属 ...
- [android] 手机卫士自定义组合控件
设置中心 新建SettingActivity 设置GridView条目的点击事件 调用GridView对象的setOnItemClickListenner()方法,参数:OnItemClickList ...
- Android自定义组合控件详细示例 (附完整源码)
在我们平时的Android开发中,有时候原生的控件无法满足我们的需求,或者经常用到几个控件组合在一起来使用.这个时候,我们就可以根据自己的需求创建自定义的控件了,一般通过继承View或其子类来实现. ...
- Android开发学习笔记-自定义组合控件的过程
自定义组合控件的过程 1.自定义一个View 一般来说,继承相对布局,或者线性布局 ViewGroup:2.实现父类的构造方法.一般来说,需要在构造方法里初始化自定义的布局文件:3.根据一些需要或者需 ...
- Android中自定义组合控件
Android中自定义控件的情况非常多,一般自定义控件可以分为两种:继承控件及组合控件.前者是通过继承View或其子类,重写方法实现自定义的显示及事件处理方式:后者是通过组合已有的控件,来实现结构的简 ...
- Android View体系(十)自定义组合控件
相关文章 Android View体系(一)视图坐标系 Android View体系(二)实现View滑动的六种方法 Android View体系(三)属性动画 Android View体系(四)从源 ...
随机推荐
- git是一种分布式代码管理工具,git通过树的形式记录文件的更改历史,比如: base'<--base<--A<--A' ^ | --- B<--B' 小米工程师常常需要寻找两个分支最近的分割点,即base.假设git 树是多叉树,请实现一个算法,计算git树上任意两点的最近分割点。 (假设git树节点数为n,用邻接矩阵的形式表示git树:字符串数组matrix包含n个字符串,每个字符串由字符'0
// ConsoleApplication10.cpp : 定义控制台应用程序的入口点. // #include "stdafx.h" #include <iostream& ...
- HDFS源码分析之UnderReplicatedBlocks(二)
UnderReplicatedBlocks还提供了一个数据块迭代器BlockIterator,用于遍历其中的数据块.它是UnderReplicatedBlocks的内部类,有三个成员变量,如下: // ...
- LINUX线程初探
LINUX程序设计最重要的当然是进程与线程.本文主要以uart程序结合键盘输入控制uart的传输. 硬件平台:树莓派B+ 软件平台:raspberry 须要工具:USB转TTL(PL2303)+ ...
- 01 http协议概念及工作流程
一:HTTP协议 重要性: 无论是以后用webserverice ,还是用rest做大型架构,都离不开对HTTP协议的认识. 甚至可以简化的说: webservice = http协议+XML Res ...
- TP框架---thinkphp模型
1.获取系统常量信息的方法:在控制器DengLuController里面下写入下面的方法,然后调用该方法. public function test() { //echo "这是测试的&qu ...
- Angular入门(二) 服务
目的:为了不再把相同的代码复制一遍又一遍,我们要创建一个单一的可复用的数据服务,并且把它注入到需要它的那些组件中. ※ 文件命名约定:服务名称的小写形式(基本名),加上.service后缀,如果服务 ...
- android菜鸟学习笔记10----Intent及<intent-filter>
关于Bundle: 注意到Activity的onCreate()方法的签名是protected void onCreate(Bundle savedInstanceState),其参数是一个Bundl ...
- TCP/UDP server
Simple: Sample TCP/UDP server https://msdn.microsoft.com/en-us/library/aa231754(v=vs.60).aspx Simple ...
- OEM7GRUB 0.4.4 2009-11-18
windows7电脑重装系统后, 启动不了, 提示这个错误: Error: OEM7GRUB 0.4.4 2009-11-18...... 解决办法: 用PE系统进入后, 运行DiskGenius软件 ...
- linux c编程:gdb的使用
首先用一个简单的打印字符的程序来做下示例 #include<stdio.h>#include<string.h>void main(){ int i=0; char ...