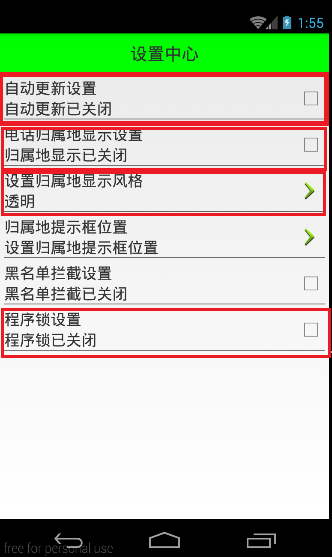
Android 手机卫士--自定义组合控件构件布局结构
由于设置中心条目中的布局都很类似,所以可以考虑使用自定义组合控件来简化实现
本文地址:http://www.cnblogs.com/wuyudong/p/5909043.html,转载请注明源地址。
自定义组合控件
1.将已经编写好的布局文件,抽取到一个类中去做管理,下次还需要使用此布局结构的时候,直接使用组合控件对应的对象.
2.将组合控件的布局,抽取到单独的一个xml中
新建布局文件:setting_item_view.xml,将上篇文章中布局文件中的代码放进去
<?xml version="1.0" encoding="utf-8"?>

<RelativeLayout xmlns:android="http://schemas.android.com/apk/res/android"

    android:layout_width="match_parent"

    android:layout_height="wrap_content" >

    <RelativeLayout

        android:layout_width="match_parent"

        android:layout_height="wrap_content"

        android:padding="5dp" >

        <TextView

            android:id="@+id/tv_title"

            android:layout_width="wrap_content"

            android:layout_height="wrap_content"

            android:text="自动更新设置"

            android:textColor="#000"

            android:textSize="18sp" />

        <TextView

            android:id="@+id/tv_des"

            android:layout_width="wrap_content"

            android:layout_height="wrap_content"

            android:layout_below="@id/tv_title"

            android:text="自动更新已关闭"

            android:textColor="#000"

            android:textSize="18sp" />

        <CheckBox

            android:id="@+id/cb_box"

            android:layout_width="wrap_content"

            android:layout_height="wrap_content"

            android:layout_alignParentRight="true"

            android:layout_centerVertical="true" />

        <View

            android:layout_width="match_parent"

            android:layout_height="1dp"

            android:layout_below="@id/tv_des"

            android:background="#000" />

    </RelativeLayout>

</RelativeLayout>
3.通过一个单独的类SettingItemView.java,去加载此段布局文件.
package com.wuyudong.mobilesafe.view;

import com.wuyudong.mobilesafe.R;

import android.content.Context;

import android.util.AttributeSet;

import android.view.View;

import android.widget.CheckBox;

import android.widget.RelativeLayout;

import android.widget.TextView;

public class SettingItemView extends RelativeLayout {

    private TextView tv_des;

    private CheckBox cb_box;

    public SettingItemView(Context context) {

        this(context, null);

    }

    public SettingItemView(Context context, AttributeSet attrs) {

        this(context, attrs, 0);

    }

    public SettingItemView(Context context, AttributeSet attrs, int defStyle) {

        super(context, attrs, defStyle);

        // xml-->view 将设置界面的条目转换成view对象

        View.inflate(context, R.layout.setting_item_view, this);

        // 等同于以下两行代码

        /*

         * View view = View.inflate(context, R.layout.setting_item_view, null);

         * this.addView(view);

         */

        //自定义组合控件中的标题描述

        TextView tv_title = (TextView) findViewById(R.id.tv_title);

        tv_des = (TextView) findViewById(R.id.tv_des);

        cb_box = (CheckBox) findViewById(R.id.cb_box);

    }

}
这样只需要简单的几行代码就可以完成布局文件的调用
<?xml version="1.0" encoding="utf-8"?>

<LinearLayout xmlns:android="http://schemas.android.com/apk/res/android"

    android:layout_width="match_parent"

    android:layout_height="match_parent"

    android:orientation="vertical" >

    <TextView

        style="@style/TitleStyle"

        android:text="设置中心" />

    <!--

    <RelativeLayout

        android:layout_width="match_parent"

        android:layout_height="wrap_content"

        android:padding="5dp" >

        <TextView

            android:id="@+id/tv_title"

            android:layout_width="wrap_content"

            android:layout_height="wrap_content"

            android:text="自动更新设置"

            android:textColor="#000"

            android:textSize="18sp" />

        <TextView

            android:id="@+id/tv_des"

            android:layout_width="wrap_content"

            android:layout_height="wrap_content"

            android:layout_below="@id/tv_title"

            android:text="自动更新已关闭"

            android:textColor="#000"

            android:textSize="18sp" />

        <CheckBox

            android:id="@+id/cb_box"

            android:layout_alignParentRight="true"

            android:layout_centerVertical="true"

            android:layout_width="wrap_content"

            android:layout_height="wrap_content" />

        <View

            android:layout_below="@id/tv_des"

            android:background="#000"

            android:layout_width="match_parent"

            android:layout_height="1dp"

            />

    </RelativeLayout>

    -->

    <com.wuyudong.mobilesafe.view.SettingItemView

        android:layout_width="match_parent"

        android:layout_height="wrap_content" >

    </com.wuyudong.mobilesafe.view.SettingItemView>

</LinearLayout>
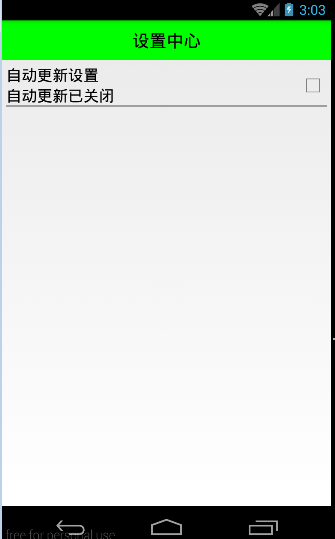
运行项目后,有如下效果:
Android 手机卫士--自定义组合控件构件布局结构的更多相关文章
- [android] 手机卫士自定义组合控件
设置中心 新建SettingActivity 设置GridView条目的点击事件 调用GridView对象的setOnItemClickListenner()方法,参数:OnItemClickList ...
- [android] 手机卫士自定义滚动控件
TextView控件设置单行显示 android:singleLine=”true” 设置TextView开始的位置显示省略号,android:ellipsize=”start” 设置滚动属性,and ...
- Android自定义控件之自定义组合控件
前言: 前两篇介绍了自定义控件的基础原理Android自定义控件之基本原理(一).自定义属性Android自定义控件之自定义属性(二).今天重点介绍一下如何通过自定义组合控件来提高布局的复用,降低开发 ...
- Android开发之自定义组合控件
自定义组合控件的步骤1.自定义一个View,继承ViewGroup,比如RelativeLayout2.编写组合控件的布局文件,在自定义的view中加载(使用View.inflate())3.自定义属 ...
- Android自定义控件之自定义组合控件(三)
前言: 前两篇介绍了自定义控件的基础原理Android自定义控件之基本原理(一).自定义属性Android自定义控件之自定义属性(二).今天重点介绍一下如何通过自定义组合控件来提高布局的复用,降低开发 ...
- android自定义控件(五) 自定义组合控件
转自http://www.cnblogs.com/hdjjun/archive/2011/10/12/2209467.html 代码为自己编写 目标:实现textview和ImageButton组合, ...
- Android Studio自定义组合控件
在Android的开发中,为了能够服用代码,会把有一定共有特点的控件组合在一起定义成一个自定义组合控件. 本文就详细讲述这一过程.虽然这样的View的组合有一个粒度的问题.粒度太大了无法复用,粒度太小 ...
- Android自定义组合控件详细示例 (附完整源码)
在我们平时的Android开发中,有时候原生的控件无法满足我们的需求,或者经常用到几个控件组合在一起来使用.这个时候,我们就可以根据自己的需求创建自定义的控件了,一般通过继承View或其子类来实现. ...
- Android开发学习笔记-自定义组合控件的过程
自定义组合控件的过程 1.自定义一个View 一般来说,继承相对布局,或者线性布局 ViewGroup:2.实现父类的构造方法.一般来说,需要在构造方法里初始化自定义的布局文件:3.根据一些需要或者需 ...
随机推荐
- 矢量Chart图表嵌入HTML5网络拓扑图的应用
使用 HT for Web (以下简称 HT)开发HTML5网络拓扑图的开发者有 Chart 需求的项目的时候,感觉很痛苦,HT 集成的 Chart 组件中,并不包含有坐标,在展现方面不是很直观,但是 ...
- 大话ASP.NET开发(第一章 html5+css3+解耦问题的探讨)
一.拉近我们的距离 我想,很多人会问,如今IE6还占据颇多份额的中国,html5.css3是否还很遥远?我会很直接告诉他们:其实就在你的眼前.我们来看两个图: ...
- MVC _ aspx视图引擎登录及状态保持
MVC - M(Model模型层) V(View视图层) C(Control控制层) 数据访问层 界面层 业务逻辑层 WebForm 是请求访问哪一个页面,返回的是一 ...
- C# 字典 Dictionary 转 JSON 格式遍历
键值对 直接 遍历就行 var str = "{\"22222\":\"DL00019\",\"123\":\"DL00 ...
- 一些sql二
1.说明:复制表(只复制结构,源表名:a 新表名:b) (Access可用)法一:select * into b from a where 1<>1(仅用于SQlServer)法二:sel ...
- 15天玩转redis —— 第三篇 无敌的列表类型
据说60%的人使用redis看重的是redis中的list类型,那这个list有什么用呢???不用我说大家都明白,做队列使用呗,为什么用它呢,很简单呗, 因为有了它我就不需要专门的MQ产品啦,比如说 ...
- Java NIO:NIO概述
Java NIO:NIO概述 在上一篇博文中讲述了几种IO模型,现在我们开始进入Java NIO编程主题.NIO是Java 4里面提供的新的API,目的是用来解决传统IO的问题.本文下面分别从Java ...
- 孙鑫MFC学习笔记18:ActiveX
18 1.容器和服务器程序 2.InvalidateControl重绘控件 3. 4.GetBackColor获取背景色 5.GetForeColor获取前景色 6.TranslateColor进行颜 ...
- java.lang.NullPointerException org.apache.struts2.impl.StrutsActionProxy.getErrorMessage(StrutsActionProxy.java:69)
采用SSH框架时出现了 java.lang.NullPointerException org.apache.struts2.impl.StrutsActionProxy.getErrorMessage ...
- Hack语言特性之类型化
Hack最基础的特性就是类型标注.PHP5已经开始支持对象的类型化,PHP7也提供了标量类型化声明.Hack提供了全面的类型标注支持,与其typecher配合使用,还可以实现快速.前置静态类型验证. ...