SpringBoot整合定时任务和异步任务处理 3节课
1、SpringBoot定时任务schedule讲解
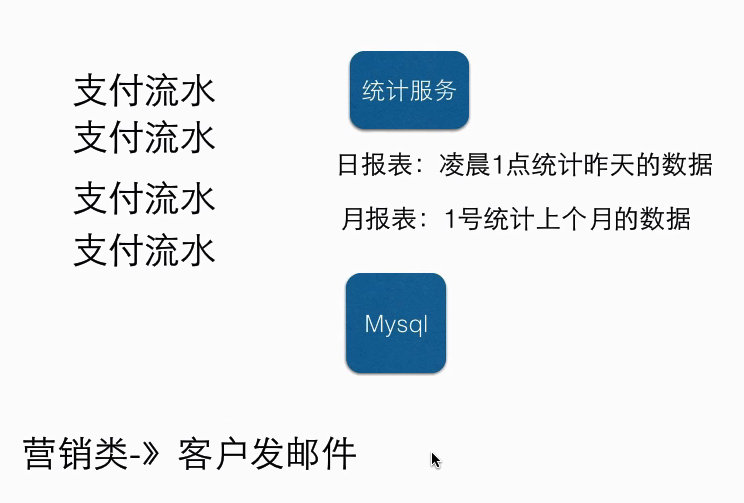
定时任务应用场景:
简介:讲解什么是定时任务和常见定时任务区别
1、常见定时任务 Java自带的java.util.Timer类
timer:配置比较麻烦,时间延后问题
timertask:不推荐
2、Quartz框架
配置更简单
xml或者注解
3、SpringBoot使用注解方式开启定时任务
1)启动类里面 @EnableScheduling开启定时任务,自动扫描
2)定时任务业务类 加注解 @Component被容器扫描
3)定时执行的方法加上注解 @Scheduled(fixedRate=2000) 定期执行一次 单位:ms
代码示例:
XdclassApplication.java启动类:
 package net.xdclass.base_project;

 import org.springframework.boot.SpringApplication;

 import org.springframework.boot.autoconfigure.SpringBootApplication;

 import org.springframework.scheduling.annotation.EnableScheduling;

 @SpringBootApplication //一个注解顶下面3个

 @EnableScheduling    //开启定时任务

 public class XdclassApplication {

     public static void main(String[] args) {

         SpringApplication.run(XdclassApplication.class, args);

     }

 }
TestTask.java:
package net.xdclass.base_project.task; import java.util.Date; import org.springframework.scheduling.annotation.Scheduled;
import org.springframework.stereotype.Component; @Component
public class TestTask { @Scheduled(fixedRate=2000) //两秒执行一次
public void sum(){
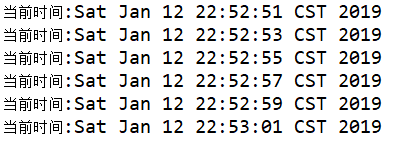
System.out.println("当前时间:"+new Date());
} }
控制台输出:
2、SpringBoot常用定时任务配置实战
简介:SpringBoot常用定时任务表达式配置和在线生成器
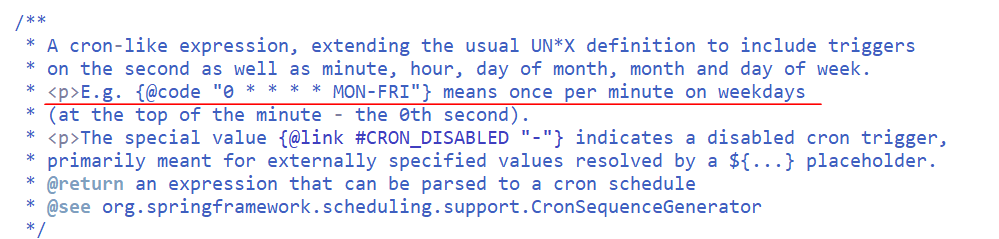
1、cron 定时任务表达式 @Scheduled(cron="*/1 * * * * *") 表示每秒
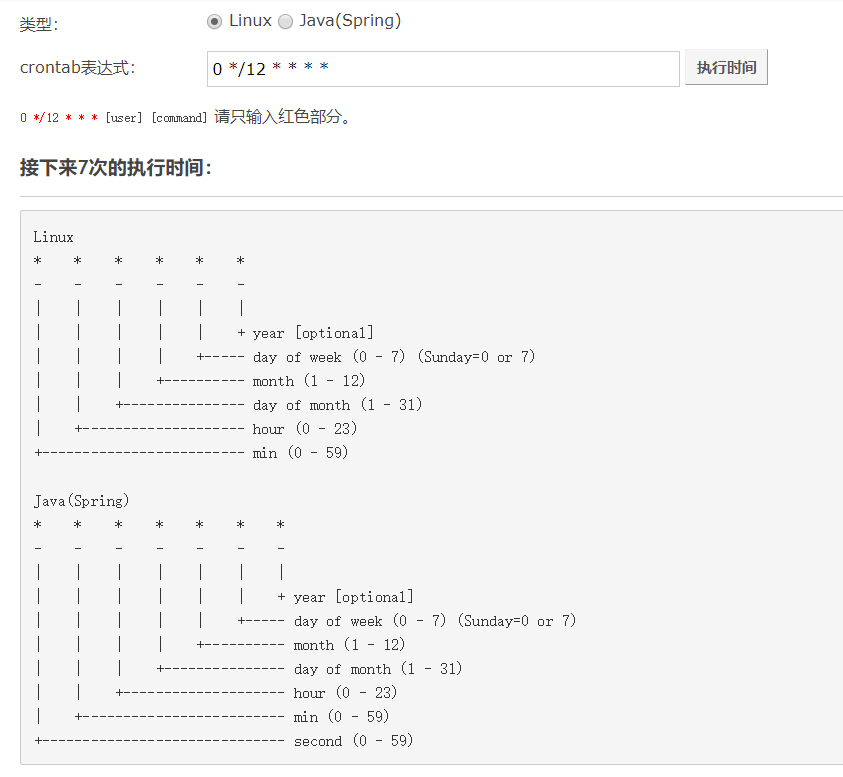
1)crontab 工具 https://tool.lu/crontab/
代码示例:(每2s执行一次)
 @Scheduled(cron="*/2 * * * * *")

 public void sum(){

     System.out.println("当前时间:"+new Date());

 }
2、fixedRate: 定时多久执行一次(上一次开始执行时间点后xx秒再次执行;)
3、fixedDelay: 上一次执行结束时间点后xx秒再次执行
4、fixedDelayString: 字符串形式,可以通过配置文件指定
3、SpringBoot2.x异步任务实战(核心知识)
简介:讲解什么是异步任务,和使用SpringBoot2.x开发异步任务实战
1、什么是异步任务和使用场景:适用于处理log、发送邮件、短信……等
下单接口->查库存 100
余额校验 150
风控用户100
....
2、启动类里面使用@EnableAsync注解开启功能,自动扫描
3、定义异步任务类并使用@Component标记组件被容器扫描,异步方法加上@Async
注意点:
1)要把异步任务封装到类里面,不能直接写到Controller
2)增加Future<String> 返回结果 AsyncResult<String>("task执行完成");
3)如果需要拿到结果 需要判断全部的 task.isDone()
4、通过注入方式,注入到controller里面,如果测试前后区别则改为同步则把Async注释掉
代码示例:
XdclassApplication.java:
 package net.xdclass.base_project;

 import org.springframework.boot.SpringApplication;

 import org.springframework.boot.autoconfigure.SpringBootApplication;

 import org.springframework.scheduling.annotation.EnableAsync;

 import org.springframework.scheduling.annotation.EnableScheduling;

 @SpringBootApplication //一个注解顶下面3个

 @EnableScheduling    //开启定时任务

 @EnableAsync //开启异步任务

 public class XdclassApplication {

     public static void main(String[] args) {

         SpringApplication.run(XdclassApplication.class, args);

     }

 }
AsyncTask.java:
 package net.xdclass.base_project.task;

 import java.util.concurrent.Future;

 import org.springframework.scheduling.annotation.Async;

 import org.springframework.scheduling.annotation.AsyncResult;

 import org.springframework.stereotype.Component;

 @Component

 @Async //异步方法,该方法注掉后为同步

 public class AsyncTask {

     public void task1() throws InterruptedException{

         long begin = System.currentTimeMillis();

         Thread.sleep(1000L);

         long end = System.currentTimeMillis();

         System.out.println("任务1耗时="+(end-begin));

     }

     public void task2() throws InterruptedException{

         long begin = System.currentTimeMillis();

         Thread.sleep(2000L);

         long end = System.currentTimeMillis();

         System.out.println("任务2耗时="+(end-begin));

     }

     public void task3() throws InterruptedException{

         long begin = System.currentTimeMillis();

         Thread.sleep(3000L);

         long end = System.currentTimeMillis();

         System.out.println("任务3耗时="+(end-begin));

     }

     //获取异步结果

     public Future<String> task4() throws InterruptedException{

         long begin = System.currentTimeMillis();

         Thread.sleep(2000L);

         long end = System.currentTimeMillis();

         System.out.println("任务4耗时="+(end-begin));

         return new AsyncResult<String>("任务4");

     }

     public Future<String> task5() throws InterruptedException{

         long begin = System.currentTimeMillis();

         Thread.sleep(3000L);

         long end = System.currentTimeMillis();

         System.out.println("任务5耗时="+(end-begin));

         return new AsyncResult<String>("任务5");

     }

     public Future<String> task6() throws InterruptedException{

         long begin = System.currentTimeMillis();

         Thread.sleep(1000L);

         long end = System.currentTimeMillis();

         System.out.println("任务6耗时="+(end-begin));

         return new AsyncResult<String>("任务6");

     }

 }
UserController.java测试:
 package net.xdclass.base_project.controller;

 import net.xdclass.base_project.domain.JsonData;

 import net.xdclass.base_project.task.AsyncTask;

 import java.util.concurrent.Future;

 import org.springframework.beans.factory.annotation.Autowired;

 import org.springframework.web.bind.annotation.GetMapping;

 import org.springframework.web.bind.annotation.RequestMapping;

 import org.springframework.web.bind.annotation.RestController;

 @RestController

 @RequestMapping("/api/v1")

 public class UserController {

     @Autowired

     private AsyncTask task;

     @GetMapping("async_task")

     public JsonData exeTask() throws InterruptedException{

         long begin = System.currentTimeMillis();

 //        task.task1();

 //        task.task2();

 //        task.task3();

         Future<String> task4 = task.task4();

         Future<String> task5 = task.task5();

         Future<String> task6 = task.task6();

         //需要返回结果可以使用该方法

         for(;;){

             if(task4.isDone() && task5.isDone() && task6.isDone()){

                 break;

             }

         }

         long end = System.currentTimeMillis();

         long total = end - begin;

         System.out.println("执行总耗时=" + total);

         return JsonData.buildSuccess(total);

     }

 }
同步/异步执行时间对比:
同步:

异步:

由此可见,同步与异步,它们的执行效率是不同的,应根据需求进行选择使用。
SpringBoot整合定时任务和异步任务处理 3节课的更多相关文章
- SpringBoot整合定时任务和异步任务处理
SpringBoot定时任务schedule讲解 简介:讲解什么是定时任务和常见定时任务区别 1.常见定时任务 Java自带的java.util.Timer类 timer:配置比较麻烦,时间延后问题, ...
- 小D课堂 - 零基础入门SpringBoot2.X到实战_第10节 SpringBoot整合定时任务和异步任务处理_41、SpringBoot定时任务schedule讲解
笔记 1.SpringBoot定时任务schedule讲解 简介:讲解什么是定时任务和常见定时任务区别 1.常见定时任务 Java自带的java.util.Timer类 ...
- 【SpringBoot】SpringBoot2.x整合定时任务和异步任务处理
SpringBoot2.x整合定时任务和异步任务处理 一.项目环境 springboot2.x本身已经集成了定时任务模块和异步任务,可以直接使用 二.springboot常用定时任务配置 1.在启动类 ...
- SpringBoot2.x整合定时任务和异步任务处理
SpringBoot2.x整合定时任务和异步任务处理 一.项目环境 springboot2.x本身已经集成了定时任务模块和异步任务,可以直接使用 二.springboot常用定时任务配置 1.在启动类 ...
- 【SpringBoot】整合定时任务和异步任务
========================10.SpringBoot整合定时任务和异步任务处理 =============================== 1.SpringBoot定时任务s ...
- SpringBoot整合定时任务----Scheduled注解实现(一个注解全解决)
一.使用场景 定时任务在开发中还是比较常见的,比如:定时发送邮件,定时发送信息,定时更新资源,定时更新数据等等... 二.准备工作 在Spring Boot程序中不需要引入其他Maven依赖 (因为s ...
- SpringBoot整合全局异常处理&SpringBoot整合定时任务Task&SpringBoot整合异步任务
============整合全局异常=========== 1.整合web访问的全局异常 如果不做全局异常处理直接访问如果报错,页面会报错500错误,对于界面的显示非常不友好,因此需要做处理. 全局异 ...
- 数据库操作之整合Mybaties和事务讲解 5节课
1.SpringBoot2.x持久化数据方式介绍 简介:介绍近几年常用的访问数据库的方式和优缺点 1.原始java访问数据库 开发流程麻烦 ...
- SpringBoot整合定时任务异步任务
1.定时任务 1.开启定时任务 @SpringBootApplication //开启定时任务 @EnableScheduling public class SpringBootDemoApplica ...
随机推荐
- MT【26】ln(1+x)的对数平均放缩
评:1.某种程度上$ln(1+x)\ge \frac{2x}{2+x}$是最佳放缩. 2.这里涉及到分母为幂函数型的放缩技巧,但是不够强,做不了这题.
- jasperReport和Ireport
<!-- groovy --> <dependency> <groupId>org.codehaus.groovy</groupId> <arti ...
- 【BZOJ3193】[JLOI2013]地形生成(动态规划)
[BZOJ3193][JLOI2013]地形生成(动态规划) 题面 BZOJ 洛谷 题解 第一问不难,首先按照山的高度从大往小排序,这样子只需要抉择前面有几座山就好了.然而有高度相同的山.其实也不麻烦 ...
- emwin 之变量定义位置
@2018-08-13 小记 本意是想在回调函数中定义一变量暂存下拉框操作前的的设定值,与后期更改的设定值作比较后更新操作,但结果失败了 分析后,此变量定义为局部变量,emwin回调函数又是事件触发型 ...
- 前端学习 -- Html&Css -- 层级和透明度
层级 如果定位元素的层级是一样,则下边的元素会盖住上边的. 通过z-index属性可以用来设置元素的层级,可以为z-index指定一个正整数作为值,该值将会作为当前元素的层级,层级越高,越优先显示. ...
- linux 自定义信号
从来没试过linux自定义信号,查了下,说是系统只提供了SIGUSR1和SIGUSR2两个,就两个够吗?更要命的是如果要自定义信号如#define SIG_MYSIG ....的话要改内核才行,哥 ...
- 外显子分析报错解决方案bin field of BAM record does not equal value computed based on alignment start and end, and length of sequence to which read is aligned
以下链接给出了解决方案:https://gatkforums.broadinstitute.org/gatk/discussion/4290/sam-bin-field-error-for-the-g ...
- Java使用SFTP和FTP两种连接方式实现对服务器的上传下载 【我改】
[]如何区分是需要使用SFTP还是FTP? []我觉得: 1.看是否已知私钥. SFTP 和 FTP 最主要的区别就是 SFTP 有私钥,也就是在创建连接对象时,SFTP 除了用户名和密码外还需要知道 ...
- KindEditor 4.1.2版本,在上传图片的时候 设置为绝对路径
被这个问题困扰了很久,最终搞定,竟然是如此之简单. 方法如下: 1.打开编辑器目录下的:kindeditor.js 2.修改:urlType : ”, 为:urlType : ‘domain’, ...
- Nginx使用Location匹配URL进行伪静态
基础知识 Nginx location 配置语法 1. location [ = | ~ | ~* | ^~ ] uri { ... } 2. location @name { ... } locat ...