Windows安装Linux子系统--安装GUI界面
前段时间发现Windows可以安装Linux子系统了,恰逢电脑换了固态,还没装Linux,不如趁机体验一番!
1、准备工作
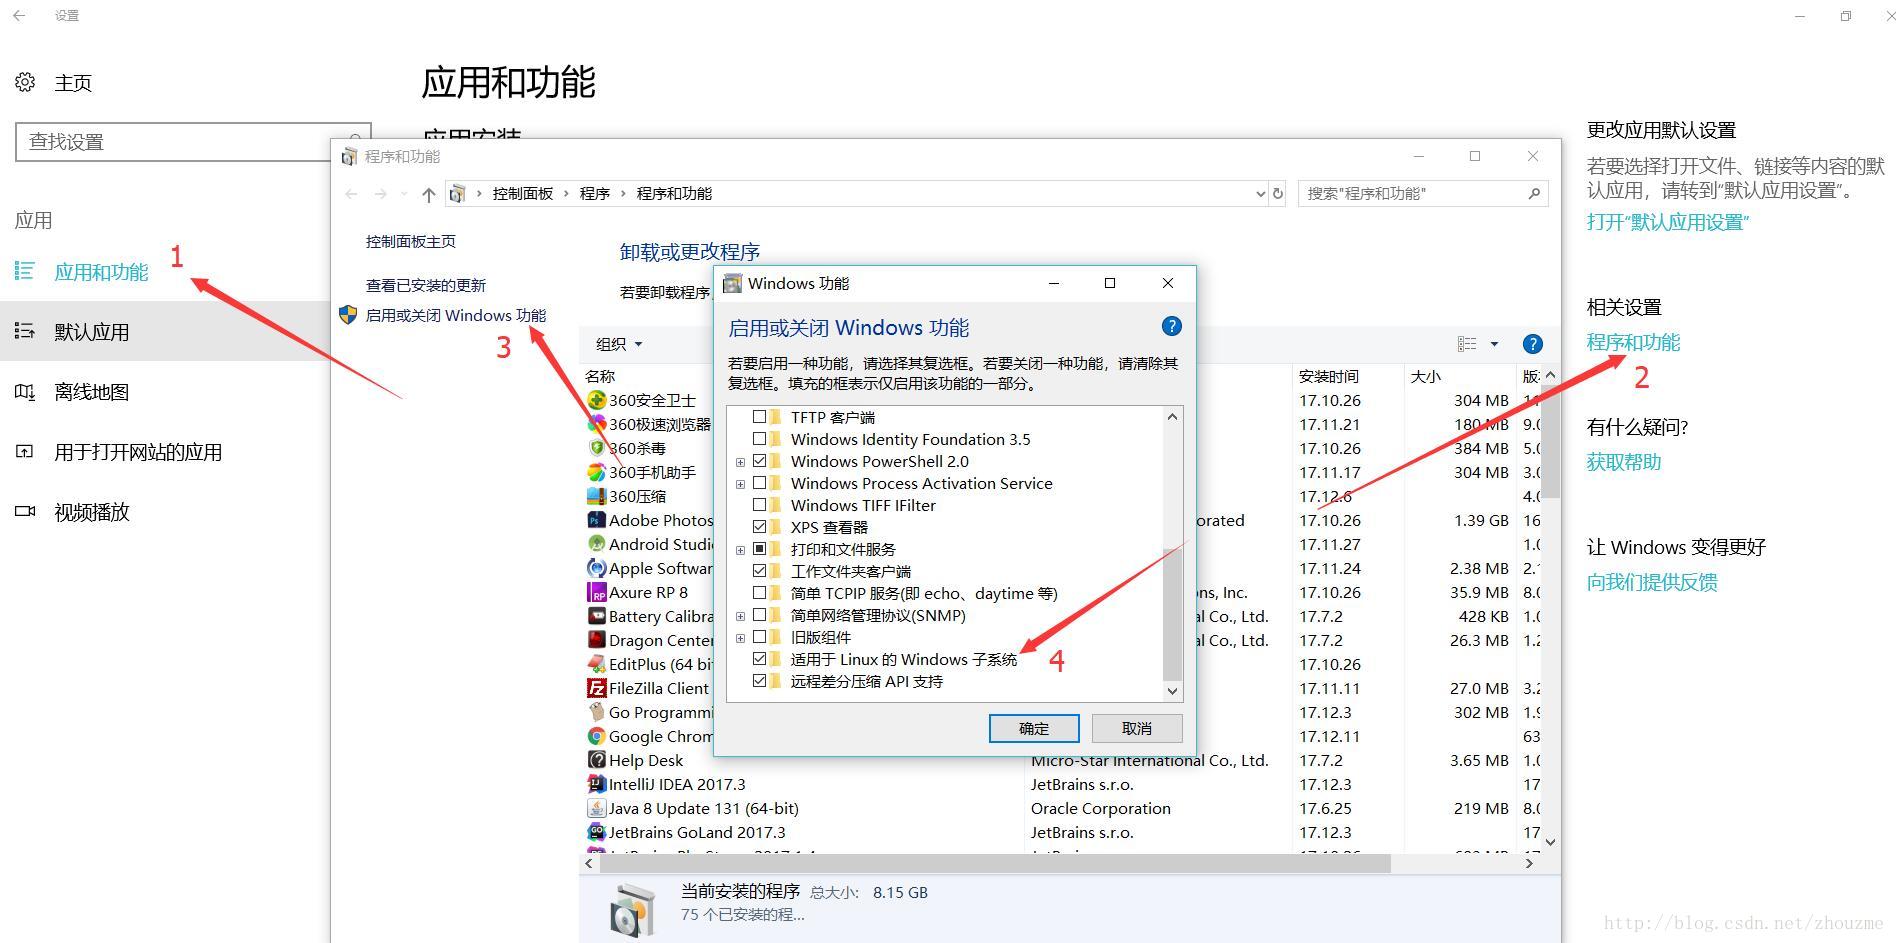
1.1、打开Windows的子系统功能
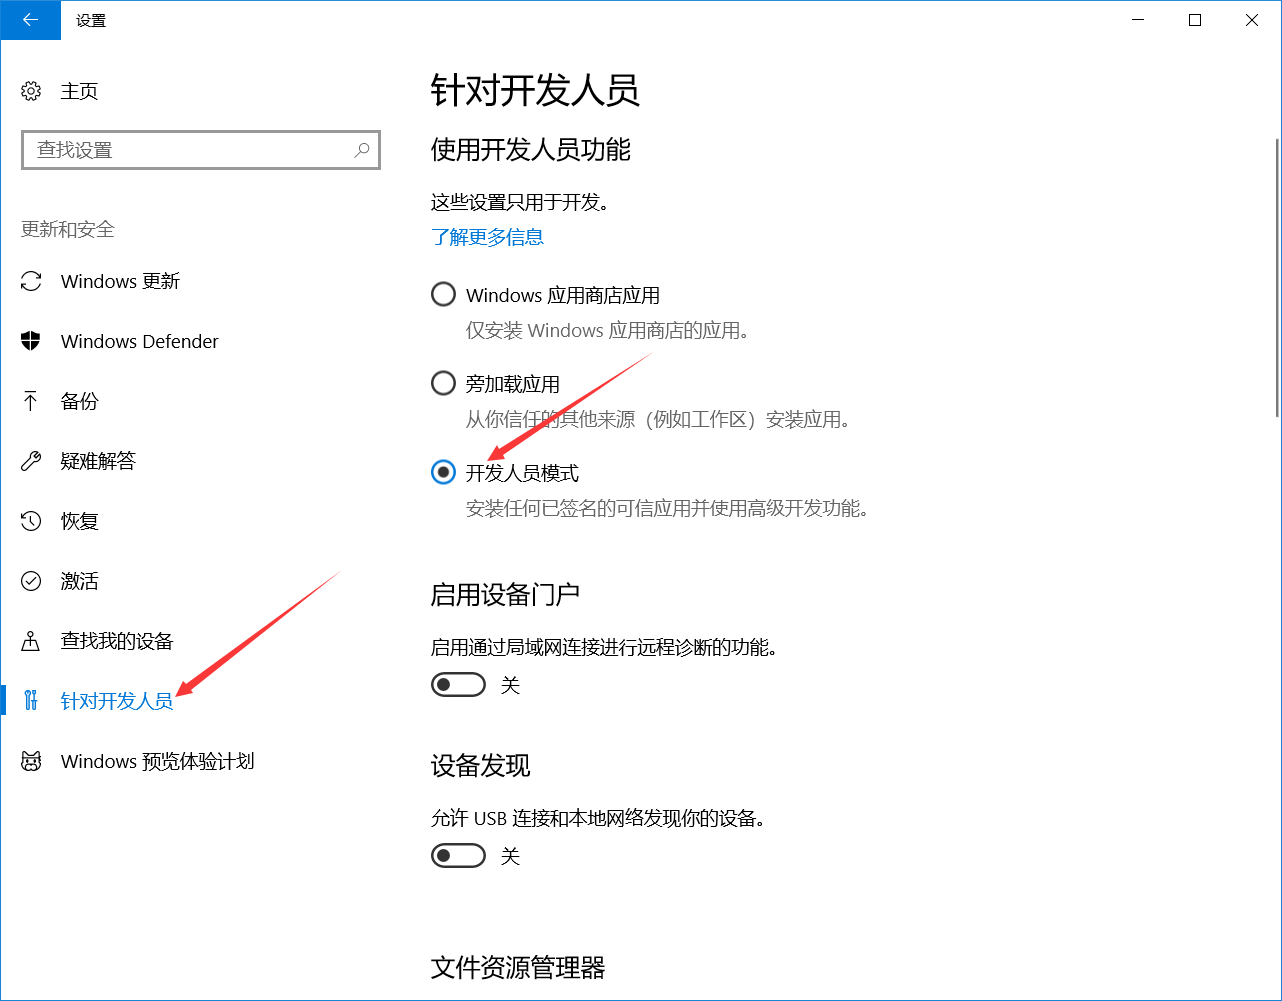
1.2、打开Windows开发人员模式
打开设置–>更新和安全–>针对开发人员,选择开发人员模式–>确定
确认后,重启电脑,系统更新配置。
2、安装Linux子系统
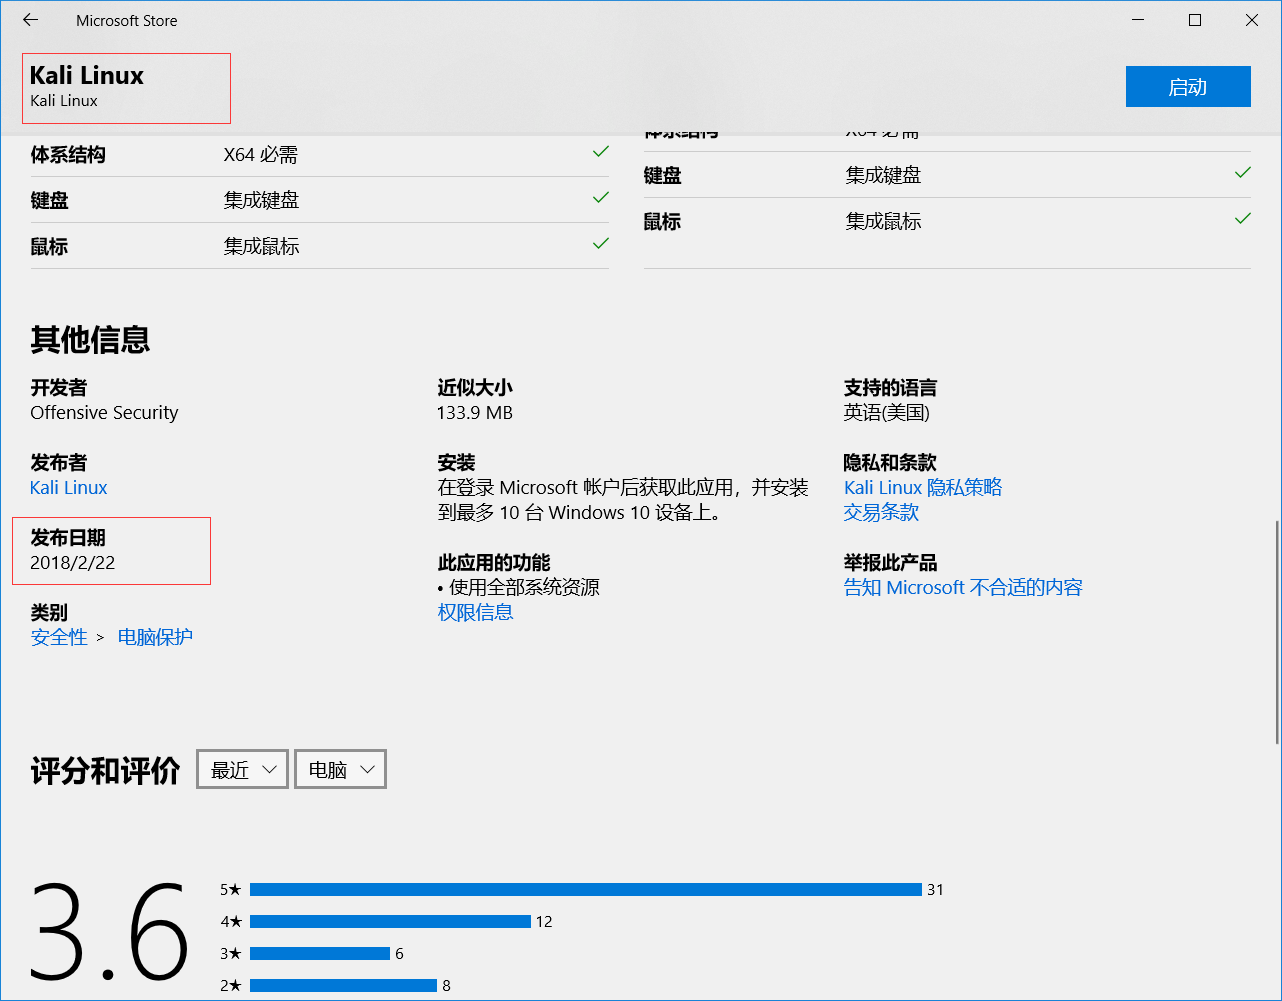
2.1、在Windows商店搜索安装Linux子系统
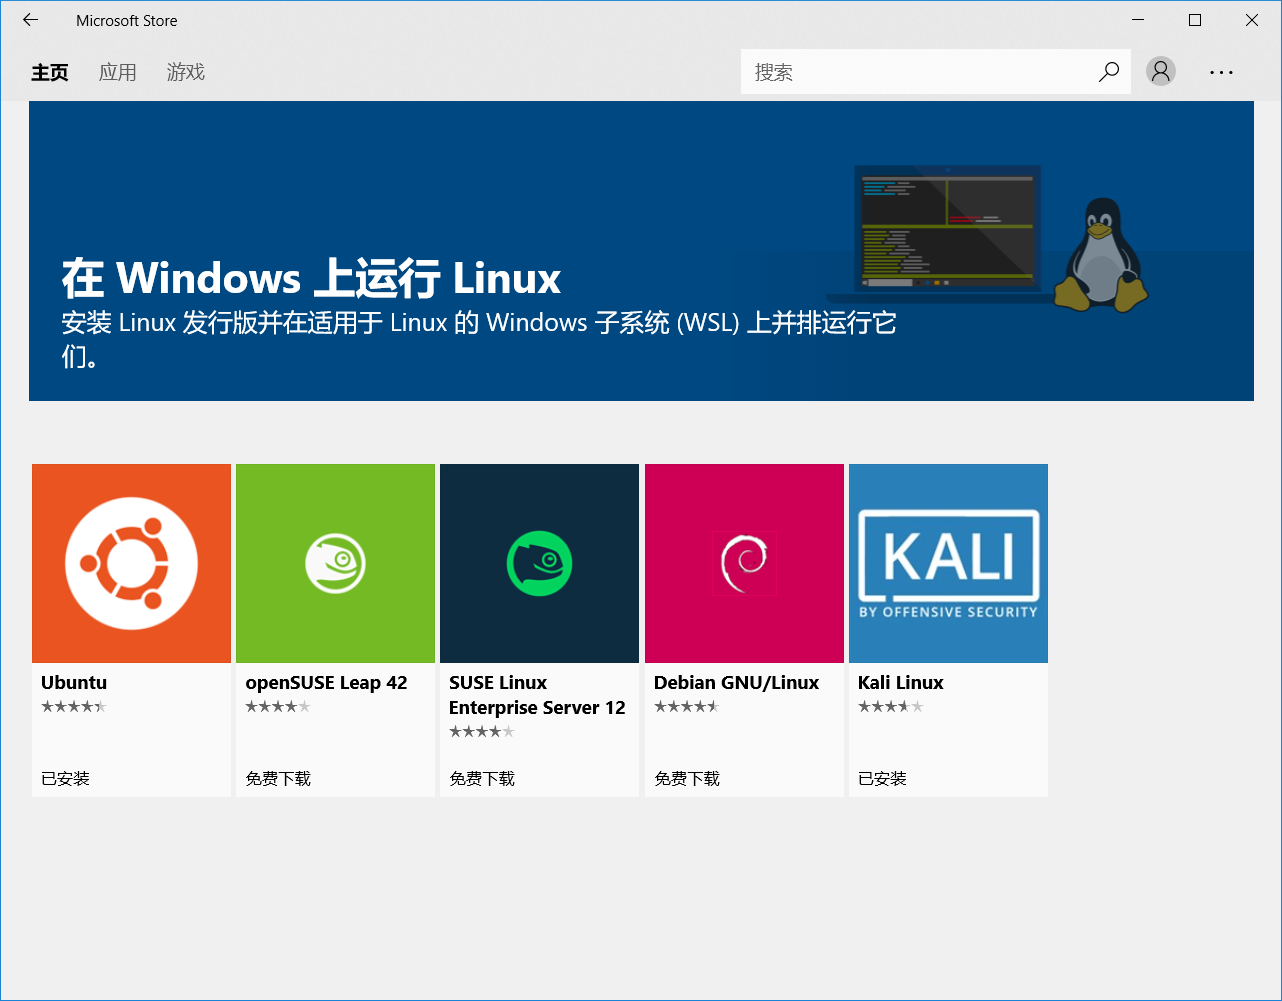
这里以安装Ubuntu为例
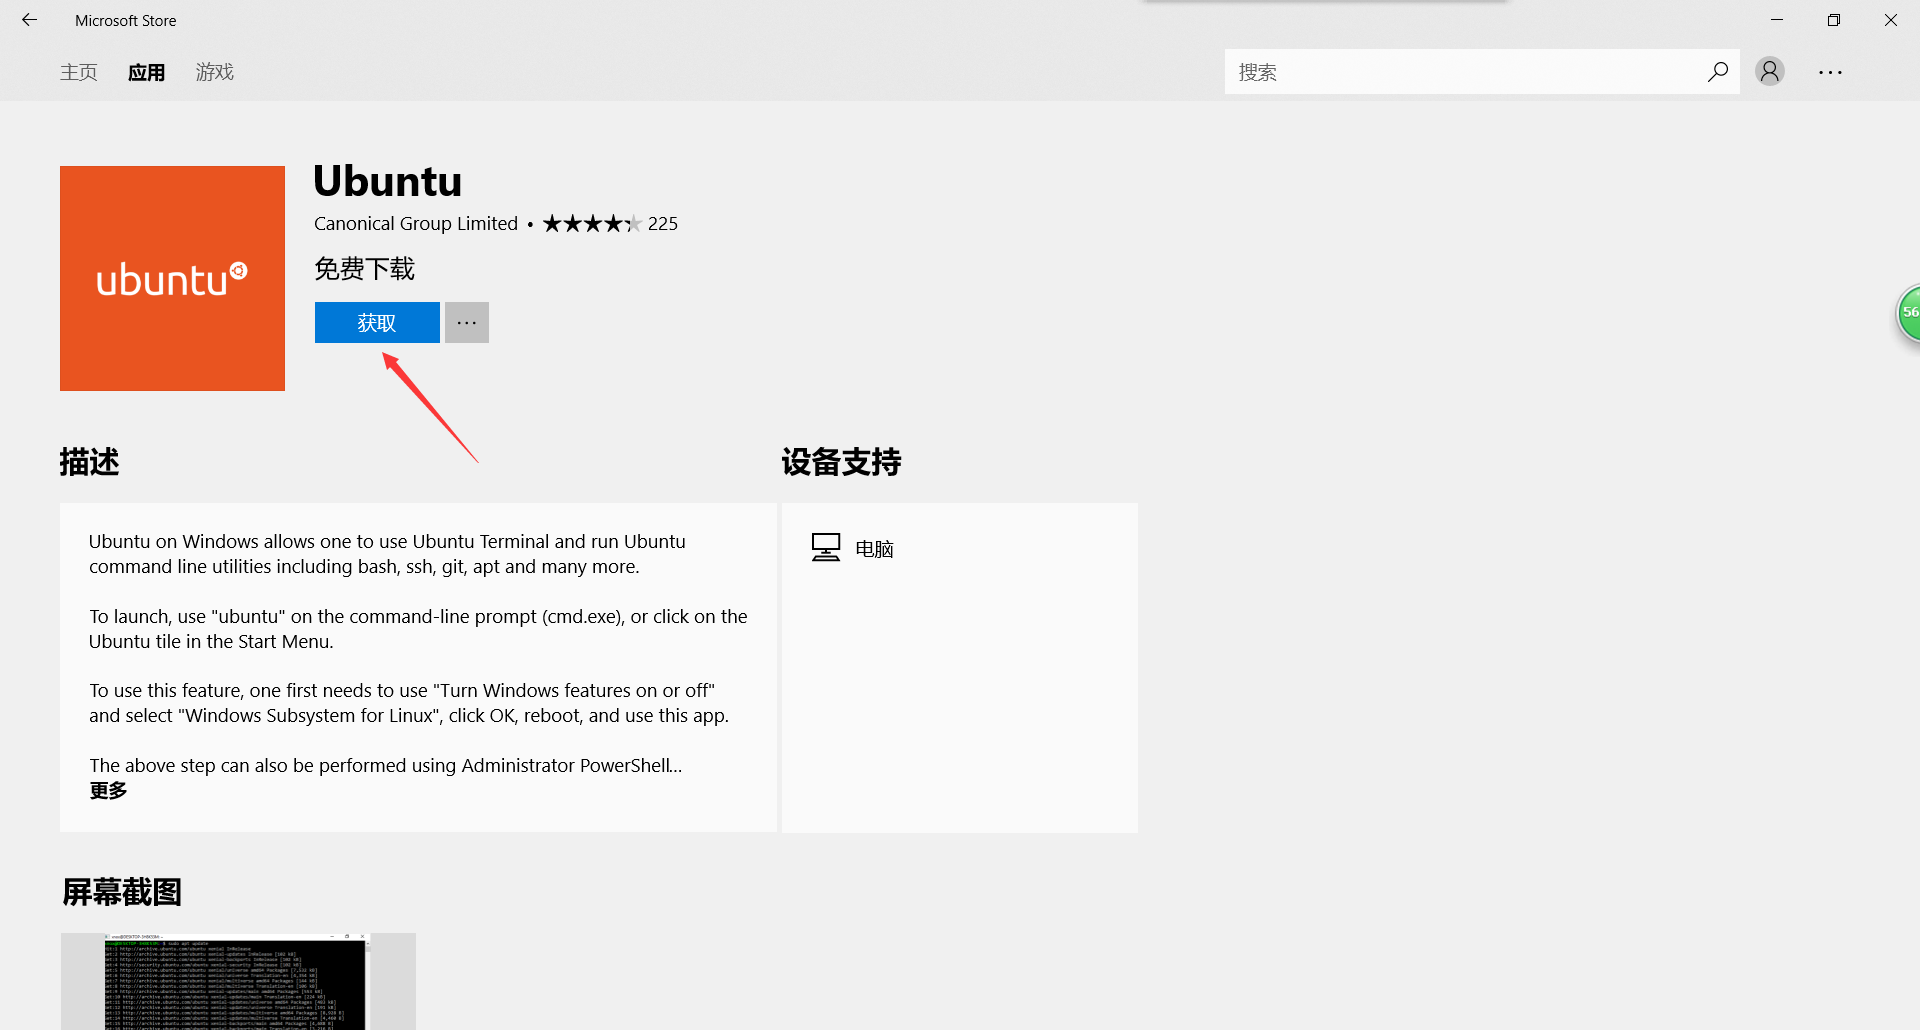
安装完成后,会像普通软件一样显示在开始界面
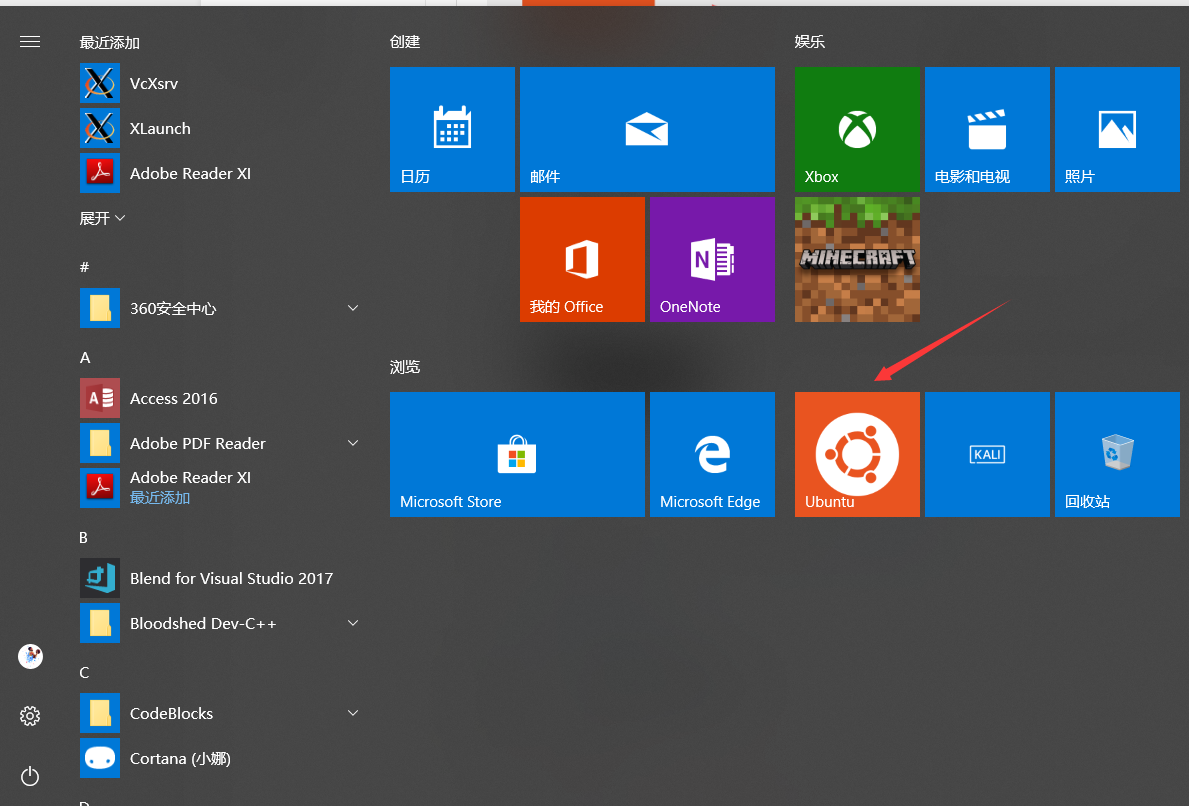
运行后需创建账户,设置密码,以后系统默认以此账户登陆。
2.2、换源,更新
自带的源安装软件时实在是慢的忍不了,这里推荐更换为阿里云的源。
建议先使用sudo -s命令更换为root用户
进入目录
1 sudo cp /etc/apt/sources.list /etc/apt/sources.list.bak #备份

2 sudo vim /etc/apt/sources.list #修改
将阿里云的源复制进去
deb http://mirrors.aliyun.com/ubuntu/ trusty main restricted universe multiverse

deb http://mirrors.aliyun.com/ubuntu/ trusty-security main restricted universe multiverse

deb http://mirrors.aliyun.com/ubuntu/ trusty-updates main restricted universe multiverse

deb http://mirrors.aliyun.com/ubuntu/ trusty-proposed main restricted universe multiverse

deb http://mirrors.aliyun.com/ubuntu/ trusty-backports main restricted universe multiverse

deb-src http://mirrors.aliyun.com/ubuntu/ trusty main restricted universe multiverse

deb-src http://mirrors.aliyun.com/ubuntu/ trusty-security main restricted universe multiverse

deb-src http://mirrors.aliyun.com/ubuntu/ trusty-updates main restricted universe multiverse

deb-src http://mirrors.aliyun.com/ubuntu/ trusty-proposed main restricted universe multiverse

deb-src http://mirrors.aliyun.com/ubuntu/ trusty-backports main restricted universe multiverse
更新列表
sudo apt-get update 3、安装GUI
3.1 安装VcXsrv
下载地址 https://sourceforge.net/projects/vcxsrv/
安装以后会有两个程序,分别是XLaunch和VcXsrv,它们可以用来远程访问linux。所以其实在这里就是利用它们来访问命令行内的linux。
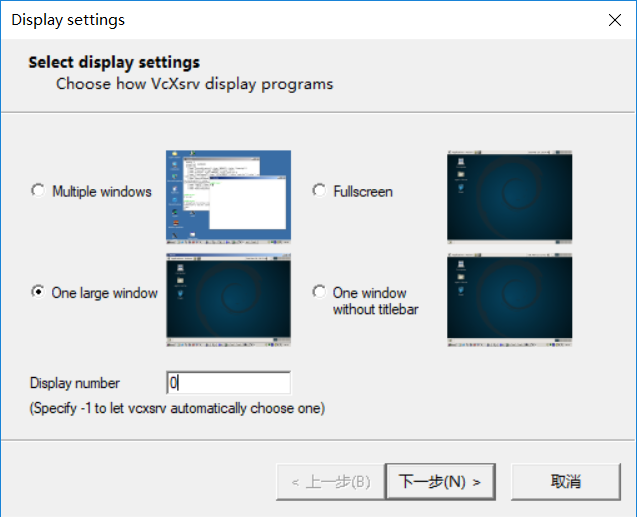
启动XLaunch,
选择:“one large window”,Display number设置成0,其它默认即可:
3.2 Ubuntu内安装桌面环境
建议使用root用户操作(使用sudo -s命令更换为root用户)
sudo apt-get install ubuntu-desktop

sudo apt-get install unity

sudo apt-get install compizconfig-settings-manager
亲测安装特别慢,耐心等待吧!
接着配置显示方式
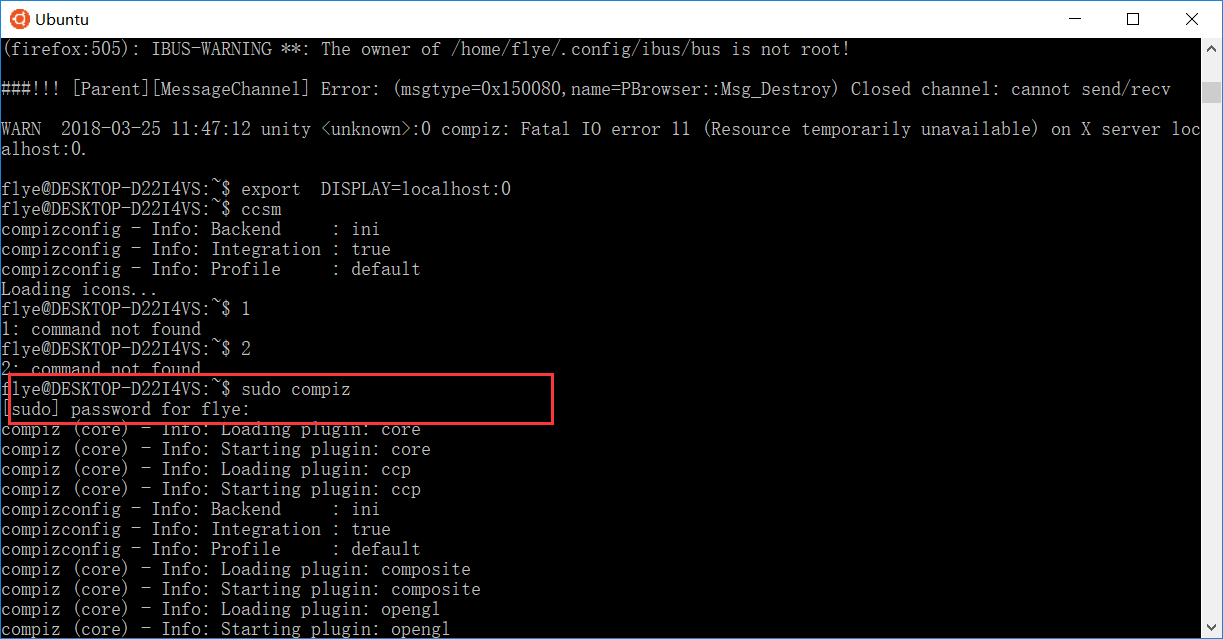
export  DISPLAY=localhost:0

ccsm
在X-windows中,即会弹出ccsm的配置界面
按照下图配置即可
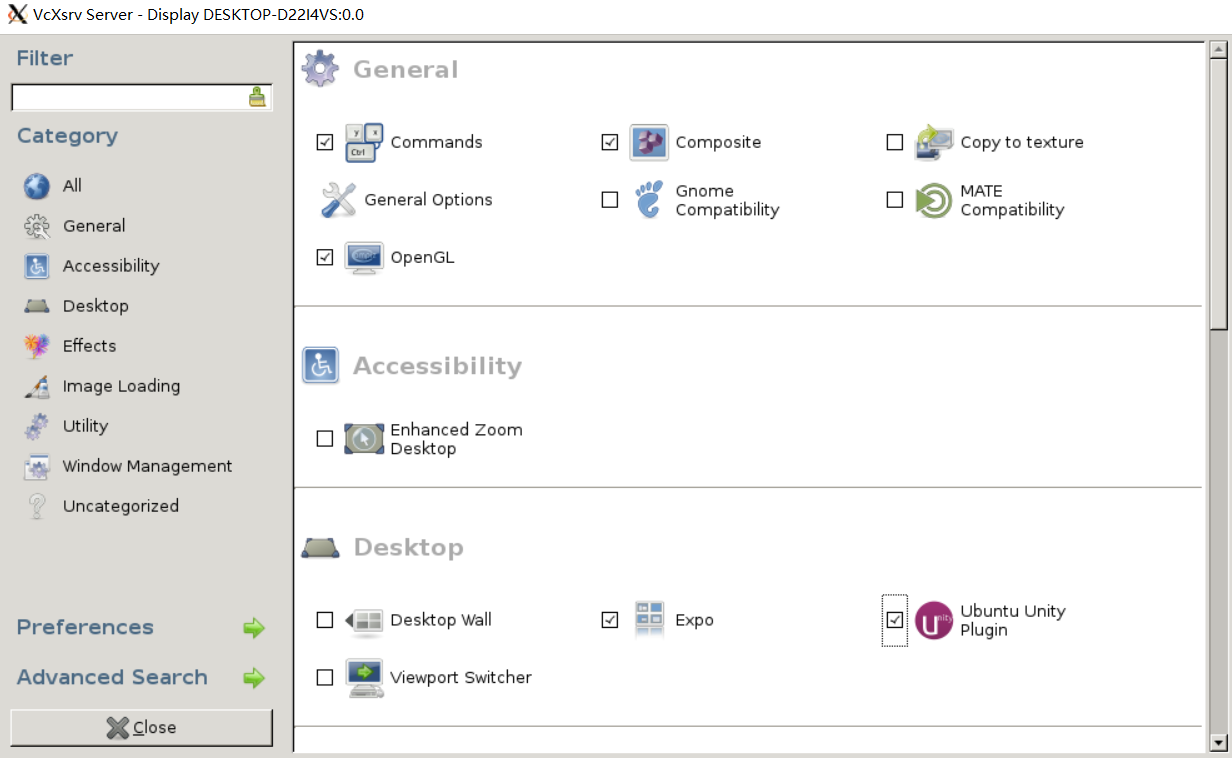
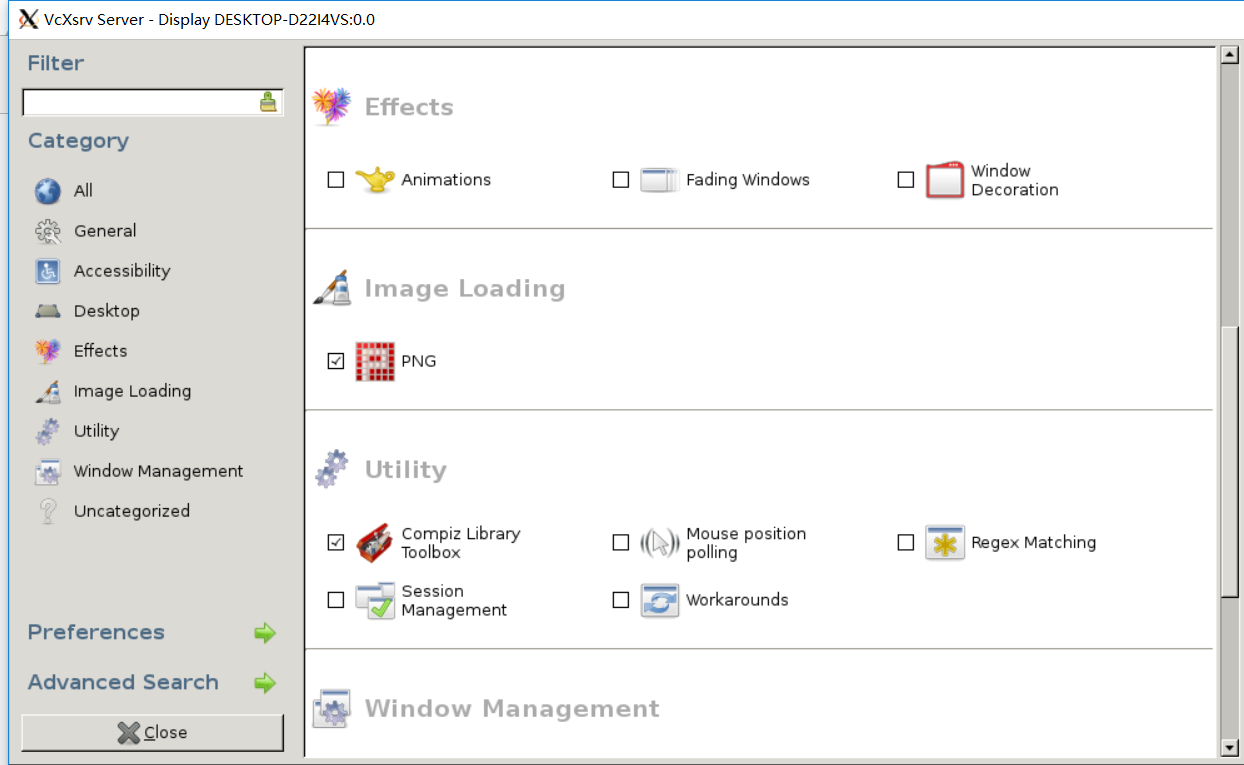
完成后点close即可
3.3 开启桌面
使用suod compiz命令 即可在XLaunch上看到界面了!
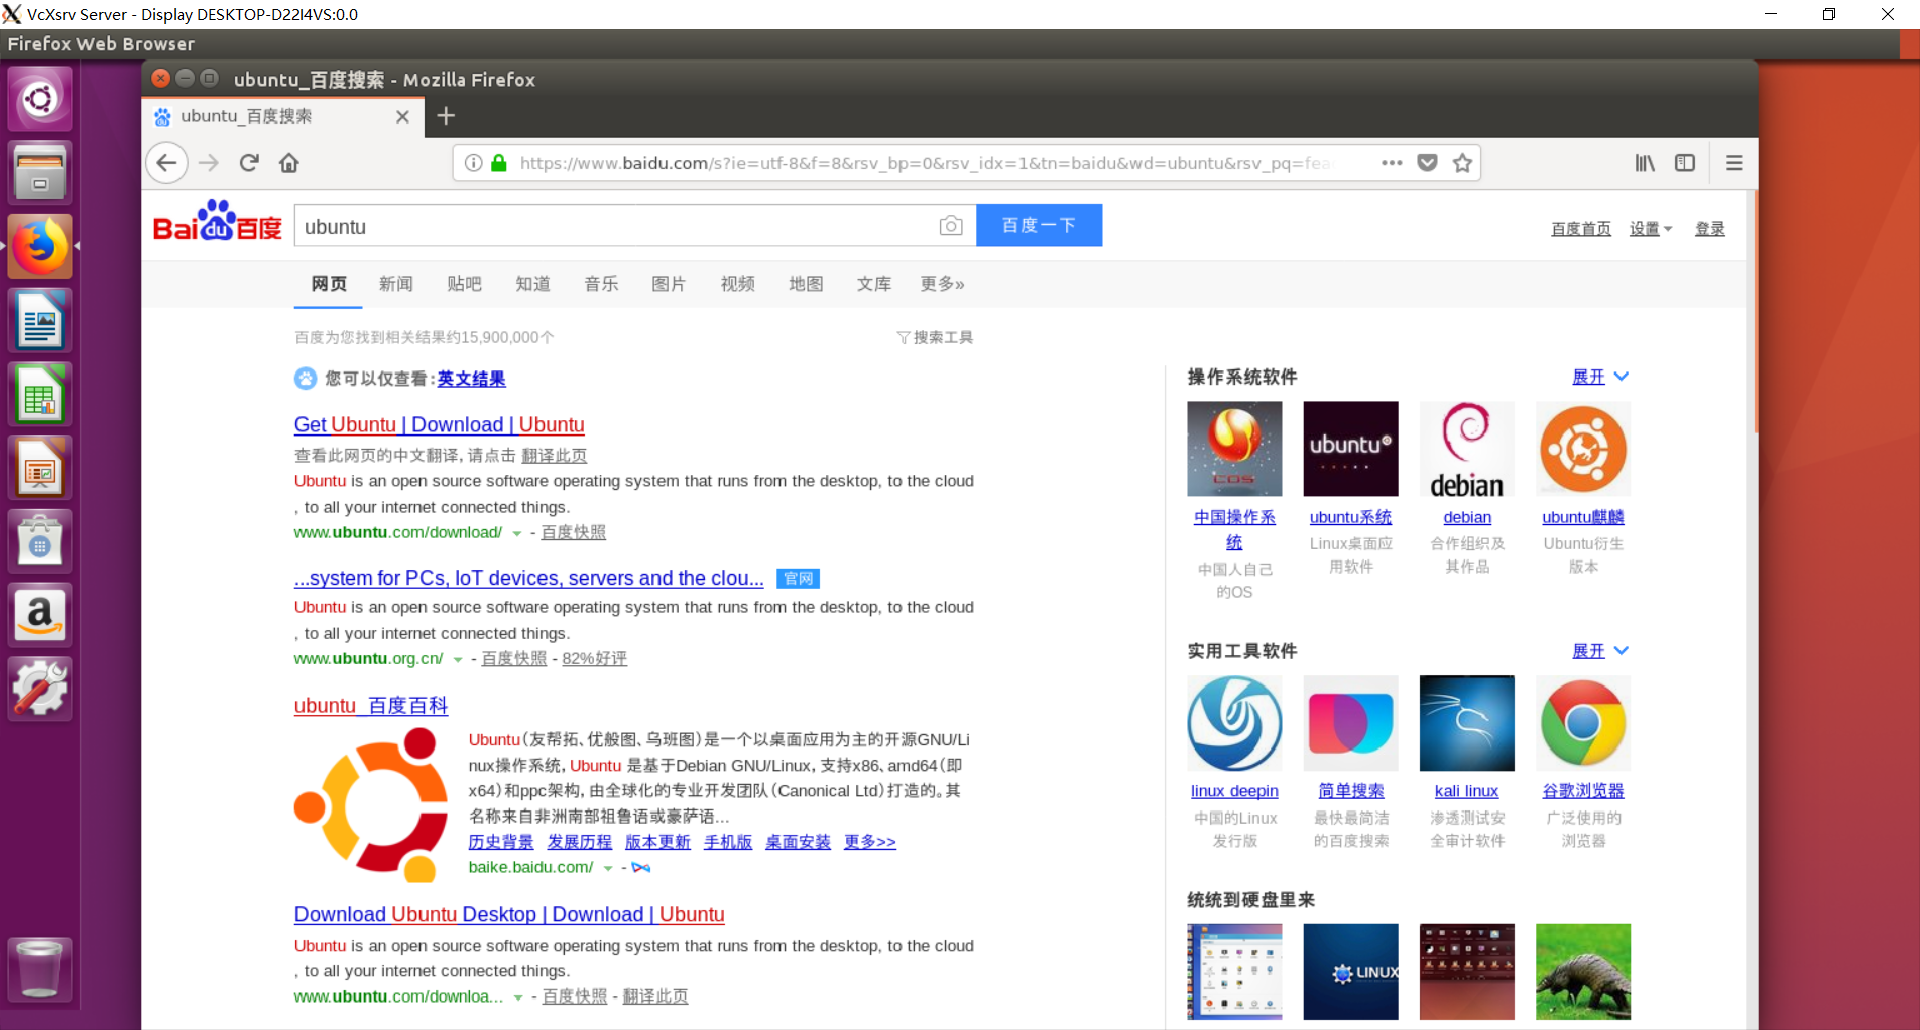
大功告成,可以体验Linux了!
祝大家都能折腾成功!
Windows安装Linux子系统--安装GUI界面的更多相关文章
- windows下linux子系统安装
1.打开Windows功能中的使用于linux的Windows子系统 2.应用商店中下载需要的linux 3.下载完成后运行等待安装并输入用户名密码 4.查看系统信息 先后 sudo apt-get ...
- WIN10下安装Linux子系统并安装xface4界面
WIN10下安装Linux子系统并安装xface4界面,使用win10自带的远程桌面工具登陆成功. 成功截图: 安装步骤 1.安装[适用于Linux的Windows子系统]组件 2.win10应用商店 ...
- Windows下的Linux子系统安装,WSL 2下配置docker
Windows下的Linux子系统安装,WSL 2下配置docker 前提条件: 安装WSL 2需要Windows 10版本是Build 18917或更高,首先先确认系统版本已升级. 在“启用或关闭W ...
- Windows中安装Linux子系统的详细步骤
早就听说Windows中可以安装Linux子系统,体验了一下,感觉还是不错的,下面直接开始安装和配置步骤吧! 开启Windows中的配置 首先开启开发者模式 打开"所有设置"进入& ...
- Win10 安装 Linux 子系统
Win10 安装 Linux 子系统 因为最近要使用Linux搭服务器,但是用远程的话延迟很烦,用双系统切换很麻烦,用虚拟机又会有点卡,刚好Windows10最近更新了正式版的WSL(windows下 ...
- win10安装linux子系统(wsl)
win10安装linux子系统(wsl) 1.打开Microsoft Store 方式一:在电脑左下角打开 方式二:在电脑左下角的搜索里里输入Microsoft Store 打开Microsoft S ...
- 如何在win10系统上安装linux子系统
对于软件开发人员来说,linux基本上是一个绕不过去的槛. 因为工作经常要用到linux,电脑用纯linux还是windows + 虚拟机装linux,我一直纠结. 如果装个纯linux,则一些win ...
- WINDOWS和Linux上安装php7 alpha 并安装 yaf
WINDOWS和Linux上安装php7 alpha 并安装 yaf PHP技术 widuu 2个月前 (06-15) 126浏览 0评论 windows 1.windows上安装 php7 ...
- Windows10上安装Linux子系统(WSL2,Ubuntu),配合Windows Terminal使用
Linux 的 Windows 子系统可让开发人员按原样运行 GNU/Linux 环境 - 包括大多数命令行工具.实用工具和应用程序 - 且不会产生传统虚拟机或双启动设置开销. WSL 说白了安装Li ...
随机推荐
- ImageView的圆角半径
// 设置imageview的圆角半径 UIImageView *imageView = (UIImageView *)[cell viewWithTag:tag]; imageView.layer. ...
- opencv播放不了AVI视频的问题
有些avi视频的编码可能不是Cinepak Codec by Radius编码格式的,需要转换成这种格式. 我用的是swf转avi视频,在转变换时----->设置---->AVI视频设置- ...
- Effective C++ 条款28
避免返回handles指向对象内部成分 本节作者讲述的知识核心是对于一个类来说,应该避免类返回自己内部的私有数据. 例如以下: class Point{ public: Point(int x, in ...
- angular表单的使用实例
原文 https://www.jianshu.com/p/da1fd5396798 大纲 1.模板驱动表单的创建 2.响应式表单的创建 3.模板驱动型表单的自定义指令 4.响应式表单的自定义指令 5. ...
- iOS开发NSOperation 三:操作依赖和监听以及线程间通信
一:操作依赖和监听 #import "ViewController.h" @interface ViewController () @end @implementation Vie ...
- MySQL搜索:WHERE
MySQL指定搜索条件进行搜索能够使用where条件. 在SELECT语句中.数据依据WHERE子语句中指定的条件进行过滤,WHERE子语句在表名之后给出. product表例如以下: a 查找价格等 ...
- [Angular] NgRx/effect, why to use it?
See the current implementaion of code, we have a smart component, and inside the smart component we ...
- [Ramda] Change Object Properties with Ramda Lenses
In this lesson we'll learn the basics of using lenses in Ramda and see how they enable you to focus ...
- [Django] Get started with Django -- Install python and virtualenv
Install python3 on MacOS: brew install python3 Come alone with python3, there are also some other to ...
- Qt Roadmap for 2018(对3D有很多改进)
When it comes to new features, we have many things ongoing related to graphics, so I’ll start with t ...