Web Service——CXF+Spring 整合
结合spring框架来实现CXF发布SOAP协议的服务,步骤基本相同,所不同的是的多了一些配置项,步骤如下
1. 服务端
第一步:创建web项目(引入jar包)
第二步:创建SEI接口
import javax.jws.WebService;

import javax.xml.ws.BindingType;

import javax.xml.ws.soap.SOAPBinding;

@WebService

@BindingType(SOAPBinding.SOAP12HTTP_BINDING)

public interface WeatherInterface {

    public String QueryWeather(String cityName);

}
第三步:创建SEI实现类
public class WeatherInterfaceImpl implements WeatherInterface {

    @Override

    public String QueryWeather(String cityName) {

        System.out.println("from client..." + cityName);

        if ("北京".equals(cityName)) {

            return "晴转多云";

        } else {

            return "雨转小雪";

        }

    }

}
第四步:配置spring配置文件,applicationContext.xml,用<jaxws:server>标签发布服务,设置1.服务地址;2.设置服务接口;3.设置服务实现类
<?xml version="1.0" encoding="UTF-8"?>

<beans xmlns="http://www.springframework.org/schema/beans"

    xmlns:xsi="http://www.w3.org/2001/XMLSchema-instance" xmlns:jaxws="http://cxf.apache.org/jaxws"

    xmlns:jaxrs="http://cxf.apache.org/jaxrs" xmlns:cxf="http://cxf.apache.org/core"

    xsi:schemaLocation="http://www.springframework.org/schema/beans

                            http://www.springframework.org/schema/beans/spring-beans.xsd

                            http://cxf.apache.org/jaxrs http://cxf.apache.org/schemas/jaxrs.xsd

                            http://cxf.apache.org/jaxws http://cxf.apache.org/schemas/jaxws.xsd

                            http://cxf.apache.org/core http://cxf.apache.org/schemas/core.xsd">

    <!-- <jaxws:server发布SOAP协议的服务 ,对JaxWsServerFactoryBean类封装-->

    <jaxws:server address="/weather" serviceClass="com.zang.ws.cxf.server.WeatherInterface">

        <jaxws:serviceBean>

            <ref bean="weatherInterface"/>

        </jaxws:serviceBean>

        <!-- 配置拦截器 -->

        <jaxws:inInterceptors>

            <ref bean="inIntercepter"/>

        </jaxws:inInterceptors>

        <jaxws:outInterceptors>

            <ref bean="outIntercepter"/>

        </jaxws:outInterceptors>

    </jaxws:server>

    <!-- 配置拦截器的bean -->

    <bean name="inIntercepter" class="org.apache.cxf.interceptor.LoggingInInterceptor"/>

    <bean name="outIntercepter" class="org.apache.cxf.interceptor.LoggingOutInterceptor"/>

    <!-- 配置服务实现类 -->

    <bean name="weatherInterface" class="com.zang.ws.cxf.server.WeatherInterfaceImpl"/>

</beans>
第五步:配置web.xml,配置spring配置文件地址和加载的listener,配置CXF的servlet。
<?xml version="1.0" encoding="UTF-8"?>

<web-app xmlns:xsi="http://www.w3.org/2001/XMLSchema-instance"

    xmlns="http://xmlns.jcp.org/xml/ns/javaee"

    xsi:schemaLocation="http://xmlns.jcp.org/xml/ns/javaee http://xmlns.jcp.org/xml/ns/javaee/web-app_3_1.xsd"

    id="WebApp_ID" version="3.1">

    <display-name>ws_cxf_spring_server</display-name>

    <!-- 设置spring的环境 -->

    <context-param>

        <!--contextConfigLocation是不能修改的 -->

        <param-name>contextConfigLocation</param-name>

        <param-value>classpath:applicationContext.xml</param-value>

    </context-param>

    <listener>

        <listener-class>org.springframework.web.context.ContextLoaderListener</listener-class>

    </listener>

    <!-- 配置CXF的Servlet -->

    <servlet>

        <servlet-name>CXF</servlet-name>

        <servlet-class>org.apache.cxf.transport.servlet.CXFServlet</servlet-class>

    </servlet>

    <servlet-mapping>

        <servlet-name>CXF</servlet-name>

        <url-pattern>/ws/*</url-pattern>

    </servlet-mapping>

    <welcome-file-list>

        <welcome-file>index.jsp</welcome-file>

    </welcome-file-list>

</web-app>
第六步:部署到tomcat下,启动tomcat
第七步:测试服务,阅读使用说明书 地址: http://localhost:8089/ws_cxf_spring_server/ws/weather?wsdl
如果直接创建实现类,可以使用Endpoint标签发布服务。步骤如下
创建实现类
@WebService

public class HelloWorld {

    public String sayHello(String name){

        return "hello,"+name;

    }

}
之前通过创建SEI接口实现时,applicationContext.xml中是用<jaxws:server>标签来发布服务;而直接通过创建类来实现时,applicationContext.xml中应使用<jaxws:endpoint>标签来发布服务。
<!-- <jaxws:endpoint发布SOAP协议的服务 ,对Endpoint类封装-->

<jaxws:endpoint address="/hello" implementor="com.zang.ws.cxf.server.HelloWorld"/>
重启tomcat,访问说明书 http://localhost:8089/ws_cxf_spring_server/ws/hello?wsdl
项目结构

2. 客户端
第一步:引入jar包
第二步:生成客户端代码 wsdl2java命令,详见客户端实现
第三步:配置spring配置文件,applicationContent.xml
<?xml version="1.0" encoding="UTF-8"?>

<beans xmlns="http://www.springframework.org/schema/beans"

    xmlns:xsi="http://www.w3.org/2001/XMLSchema-instance" xmlns:jaxws="http://cxf.apache.org/jaxws"

    xmlns:jaxrs="http://cxf.apache.org/jaxrs" xmlns:cxf="http://cxf.apache.org/core"

    xsi:schemaLocation="http://www.springframework.org/schema/beans

                            http://www.springframework.org/schema/beans/spring-beans.xsd

                            http://cxf.apache.org/jaxrs http://cxf.apache.org/schemas/jaxrs.xsd

                            http://cxf.apache.org/jaxws http://cxf.apache.org/schemas/jaxws.xsd

                            http://cxf.apache.org/core http://cxf.apache.org/schemas/core.xsd">

    <!-- <jaxws:client实现客户端 ,对JaxWsProxyFactoryBean类封装 -->

    <jaxws:client id="weatherClient"

        address="http://127.0.0.1:8089/ws_cxf_spring_server/ws/weather"

        serviceClass="com.zang.cxf.weather.WeatherInterface" />

</beans>
第四步:从spring上下文件获取服务实现类,调用查询方法,打印
import org.springframework.context.ApplicationContext;

import org.springframework.context.support.ClassPathXmlApplicationContext;

import com.zang.cxf.weather.WeatherInterface;

public class WeatheClient {

    public static void main(String[] args) {

        // 初始化spring的上下文

        ApplicationContext context = new ClassPathXmlApplicationContext("classpath:applicationContext.xml");

     // 调用查询方法

        WeatherInterface weatherInterface = (WeatherInterface) context.getBean("weatherClient");

        String weather = weatherInterface.queryWeather("济南");

        System.out.println(weather);

    }

}
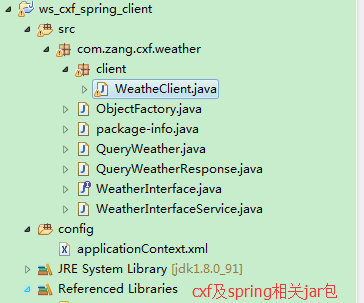
项目结构
Web Service——CXF+Spring 整合的更多相关文章
- Web Service——CXF发布REST服务
1. 什么是REST REST,英文representational state transfer(表象性状态转变)或者表述性状态转移,REST是web服务的一种架构风格,使用HTTP.URI.XML ...
- Building a RESTful Web Service Using Spring Boot In Eclipse
一.构建restful web service 创建Maven的java web工程,maven的pom文件加入依赖包 创建包hello Greeting.java package hello; pu ...
- Web Service CXF的工作流程
我们一起走进系统的内部,跟随每一个调用,去透视系统的每一个层面. 一.我们定义整个目录都在CXFServlet的监控之下 <servlet> <servlet-name>CXF ...
- Web Service——CXF
1. 什么是CXF Apache CXF = Celtix + Xfire,开始叫 Apache CeltiXfire,后来更名为 Apache CXF 了,以下简称为 CXF.Apache CXF ...
- 翻译-使用Spring调用SOAP Web Service
原文链接: http://spring.io/guides/gs/consuming-web-service/ 调用SOAP web service 本指南将指导你使用Spring调用一个基于SOAP ...
- java框架之Spring(4)-Spring整合Hibernate和Struts2
准备 导包 Struts2 导入 Struts2 zip 包解压目录下 'apps/struts-blank.war' 中所有 jar 包,如下: asm-3.3.jar asm-commons-3. ...
- [C#]動態叫用Web Service
http://www.dotblogs.com.tw/jimmyyu/archive/2009/04/22/8139.aspx 摘要 Web Service對大家來說想必都不陌生,也大都了解Web S ...
- Building a RESTful Web Service(转)
Building a RESTful Web Service This guide walks you through the process of creating a "hello wo ...
- 【转】Building a RESTful Web Service
目标 构建一个service,接收如下HTTP GET请求: [plain] view plain copy http://localhost:8080/greeting 并返回如下JSON格式的 ...
随机推荐
- Selenium2+python自动化37-爬页面源码(page_source)
前言 有时候通过元素的属性的查找页面上的某个元素,可能不太好找,这时候可以从源码中爬出想要的信息.selenium的page_source方法可以获取到页面源码. selenium的page_sour ...
- jquery 根据name获取元素的问题
我要获取name属性为test的元素 但是这个test是赋值给变量的 如var name='test'; 即要获取name属性为变量name的元素 请问jquery怎么写? $("input ...
- 【BZOJ】【3489】A simple rmq problem
KD-Tree(乱搞) Orz zyf教给蒟蒻做法 蒟蒻并不会这题正解……(可持久化树套树?...Orz 对于每个点,我们可以求出pre[i],nex[i],那么询问的答案就是:求max (a[i]) ...
- 定义和使用EL函数
EL为表达式语言,在EL中,允许定义和使用函数.下面将介绍如何定义和使用EL的函数. 1. 定义和使用函数 函数的定义和使用分为以下3个步骤: (1)编写一个Java类,并在该类中编写公用的静态方法, ...
- uva 10160 Servicing Stations(DFS+剪枝)
Servicing stations A company offers personal computers for sale in N towns (3 <= N <= 35). The ...
- Search in Rotated Sorted Array II leetcode java
题目: Follow up for "Search in Rotated Sorted Array": What if duplicates are allowed? Would ...
- Search for a Range leetcode java
题目: Given a sorted array of integers, find the starting and ending position of a given target value. ...
- 解决 WIn7 启动时“你有等待写入光盘的文件”
这几天启动时Win7总是要提示“您有等待写入光盘的文件”,启动时间也变慢. 可能是前几日通过资源管理器刻录光盘的时候留下的垃圾. 在C:\Users\ibm\AppData\Local\Microso ...
- Android -- SDcard文件读取和保存
背景 一些东西可以 ...
- Netdata Linux下性能实时监测工具
导读 本文将介绍一款非常好用的工具——Netdata,这是一款Linux性能实时监测工具,为一款开源工具,我对其英文文档进行了翻译,水平有限,有翻译错误的地方欢迎大家指出,希望本文对大家有所帮助,谢谢 ...