
Unity最新版打包AssetBundle和加载的方法
一、设置assetBundleName
二、构建AssetBundle包
三、上传AssetBundle到服务器
四、把AssetBundle放到本地
五、操作AssetBundle
六、完整例子
七、AssetBundle Manager管理工具
八、备注知识
一、设置assetBundleName
如果没有设置AssetBundleName,会打包所有的Assets下的资源,如果设置,就只打包设置了名字的资源
1、在unity编辑器界面手动设置
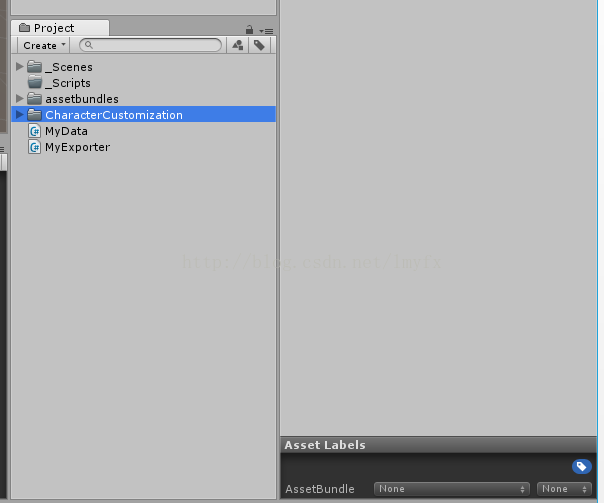
输入所需的AssetBundle名称。请注意,AssetBundle名称确实支持一种类型的文件夹结构,这取决于您键入的内容。要添加子文件夹,将文件夹名称以“/”分隔。例如:AssetBundle名称“environment/ forest”将在environment子文件夹下创建一个名为forest的包
2、遍历所有要打包的资源,通过代码修改assetBundleName
第一步:先获取你要打包的资源的完整目录
方法1:
先用Selection.objects返回场景中所有的对象,
然后用AssetDatabase.GetAssetPath(selected)获取对象完整目录
方法2:
用AssetPostprocessor的OnPostprocessAllAssets方法
方法3:
用IO流的DirectoryInfo.GetFileSystemInfos()
和FileInfonfo获取完整目录(这种方法要注意:获取到的目录如果是”\”或者”//”要替换为“/”)
第二步:用AssetImporter asset= AssetImporter.GetAtPath(path);方法获取AssetImporter
第三步:用asset.assetBundleName=“text”设置AssetBundleName
有以下三种获取目录然后设置assetBundleName的方法
- //Selection.objects返回场景中所有的对象
- Object[] selects = Selection.objects;
- foreach (Object selected in selects)
- {
- //返回所有对象相对于工程目录的存储路径如Assets/_Scenes/Main.unity
- string path = AssetDatabase.GetAssetPath(selected);
- //把一个目录的对象检索为AssetImporter
- AssetImporter asset = AssetImporter.GetAtPath(path);
- asset.assetBundleName = selected.name; //设置Bundle文件的名称
- asset.assetBundleVariant = "unity3d";//设置Bundle文件的扩展名
- asset.SaveAndReimport();
- }
- AssetDatabase.Refresh();
- using UnityEngine;
- using System.Collections;
- using UnityEditor;
- //文件描述:自动设置Assetbundle名字为文件夹名_文件名.unity3d;
- public class AutoSetTextureUISprite : AssetPostprocessor
- {
- static void OnPostprocessAllAssets(string[] importedAssets, string[] deletedAssets, string[] movedAssets, string[] movedFromAssetPaths)
- {
- foreach (var str in importedAssets)
- {
- if (!str.EndsWith(".cs"))
- {
- AssetImporter importer = AssetImporter.GetAtPath(str);
- importer.assetBundleName = str;
- }
- }
- foreach (var str in deletedAssets)
- {
- if (!str.EndsWith(".cs"))
- {
- AssetImporter importer = AssetImporter.GetAtPath(str);
- importer.assetBundleName = str;
- }
- }
- for (var i = 0; i < movedAssets.Length; i++)
- {
- //Debug.Log("Moved Asset: " + movedAssets[i] + " from: " + movedFromAssetPaths[i]);
- }
- }
- }
- using UnityEngine;
- using System.Collections;
- using UnityEditor;
- using System.IO;
- /// <summary>
- /// 把Resource下的资源打包成.unity3d 到StreamingAssets目录下
- /// </summary>
- public class Builder : Editor
- {
- public static string sourcePath = Application.dataPath + "/Resources";
- const string AssetBundlesOutputPath = "Assets/StreamingAssets";
- //[MenuItem("Tools/AssetBundle/Build")]
- public static void BuildAssetBundle()
- {
- ClearAssetBundlesName();
- Pack(sourcePath);
- string outputPath = Path.Combine(AssetBundlesOutputPath, Platform.GetPlatformFolder(EditorUserBuildSettings.activeBuildTarget));
- if (!Directory.Exists(outputPath))
- {
- Directory.CreateDirectory(outputPath);
- }
- //根据BuildSetting里面所激活的平台进行打包
- BuildPipeline.BuildAssetBundles(outputPath, 0, EditorUserBuildSettings.activeBuildTarget);
- AssetDatabase.Refresh();
- Debug.Log("打包完成");
- }
- /// <summary>
- /// 清除之前设置过的AssetBundleName,避免产生不必要的资源也打包
- /// 之前说过,只要设置了AssetBundleName的,都会进行打包,不论在什么目录下
- /// </summary>
- static void ClearAssetBundlesName()
- {
- int length = AssetDatabase.GetAllAssetBundleNames().Length;
- Debug.Log(length);
- string[] oldAssetBundleNames = new string[length];
- for (int i = 0; i < length; i++)
- {
- oldAssetBundleNames[i] = AssetDatabase.GetAllAssetBundleNames()[i];
- }
- for (int j = 0; j < oldAssetBundleNames.Length; j++)
- {
- AssetDatabase.RemoveAssetBundleName(oldAssetBundleNames[j], true);
- }
- length = AssetDatabase.GetAllAssetBundleNames().Length;
- Debug.Log(length);
- }
- static void Pack(string source)
- {
- DirectoryInfo folder = new DirectoryInfo(source);
- FileSystemInfo[] files = folder.GetFileSystemInfos();
- int length = files.Length;
- for (int i = 0; i < length; i++)
- {
- if (files[i] is DirectoryInfo)
- {
- Pack(files[i].FullName);
- }
- else
- {
- if (!files[i].Name.EndsWith(".meta"))
- {
- file(files[i].FullName);
- }
- }
- }
- }
- static void file(string source)
- {
- string _source = Replace(source);
- string _assetPath = "Assets" + _source.Substring(Application.dataPath.Length);
- string _assetPath2 = _source.Substring(Application.dataPath.Length + 1);
- //Debug.Log (_assetPath);
- //在代码中给资源设置AssetBundleName
- AssetImporter assetImporter = AssetImporter.GetAtPath(_assetPath);
- string assetName = _assetPath2.Substring(_assetPath2.IndexOf("/") + 1);
- assetName = assetName.Replace(Path.GetExtension(assetName), ".unity3d");
- //Debug.Log (assetName);
- assetImporter.assetBundleName = assetName;
- }
- static string Replace(string s)
- {
- return s.Replace("\\", "/");
- }
- }
- public class Platform
- {
- public static string GetPlatformFolder(BuildTarget target)
- {
- switch (target)
- {
- case BuildTarget.Android:
- return "Android";
- case BuildTarget.iOS:
- return "IOS";
- case BuildTarget.WebPlayer:
- return "WebPlayer";
- case BuildTarget.StandaloneWindows:
- case BuildTarget.StandaloneWindows64:
- return "Windows";
- case BuildTarget.StandaloneOSXIntel:
- case BuildTarget.StandaloneOSXIntel64:
- case BuildTarget.StandaloneOSXUniversal:
- return "OSX";
- default:
- return null;
- }
- }
- }
二、构建AssetBundle
1、在Assets中创建一个名为Editor的文件夹,并将一个脚本放在文件夹中
2、类要继承Editor,引用命名空间using UnityEditor;
3、创建菜单目录:[MenuItem("Assets/Build AssetBundles")]
4、调用打包方法
①用AssetBundleBuild类的方法
BuildAssetBundles(string outputPath, BuildAssetBundleOptionsassetBundleOptions, BuildTargettargetPlatform);
或者
BuildAssetBundles(string outputPath,AssetBundleBuild[] builds,BuildAssetBundleOptions assetBundleOptions, BuildTarget targetPlatform);
②参数说明:
outputPath:打包Bundle后存储的目录,如:Assets/AssetBundles,这个文件夹不会自动创建,如果它不存在的话,函数将会失败,Directory.Exists(string path)判断目录是否存在,Directory.CreateDirectory(stringpath)创建目录
BuildAssetBundleOptions:Bundle打包方式,none没有任何特殊选项,UncompressedAssetBundle在构建Bundle时不要压缩数据等等
BuildTarget:构建平台,如iphone,windows,android等
AssetBundleBuild[]:看备注知识5
③返回值:AssetBundleManifest,看备注知识6
5、备注知识:AssetBundleBuild
这个类与BuildAssetBundles一起使用。指定一个Bundle包的名称assetBundleName和它将包含的资源(如多张图片、音频等)的名称。
被传递给函数的AssetBundleBuild[]元素数组被称为“构建映射”,并作为指定编辑器包内容的替代方法。
变量:
addressableNames:返回所有的addressableName数组
assetBundleName:AssetBundle的名字
assetBundleVariant:AssetBundle的扩展名如.unity
AssetBundle:指定属于一个addressableName名字的所有资源名字,是一个数组,也就是一个addressableName名字下包含的所有资源名字
例子:在后面
6、备注知识AssetBundleManifest
包含所有创建Bundle包信息
⑴公开方法
GetAllAssetBundles返回所有的assetbundlenames,是一个string[]数组
GetAllAssetBundlesWithVariant返回所有使用给定扩展名的assetbundlenames,是一个string[]数组
GetAllDependencies(string assetBundleName);:获取所有与指定AssetBundle包存在依赖关系的AssetBundless。也就是给一个assetBundleName,获取所有与他有关系的assetBundleName,返回一个string[]数组
GetDirectDependencies(string assetBundleName):获取所有与指定AssetBundle包存在直接联系的AssetBundless。也就是给一个assetBundleName,获取所有与他有直接关系的assetBundleName,返回一个string[]数组
⑵当找到这个对象后就可以对它进行操作
7、例子
第一个方法
- // 创建一个Windows AssetBundle包
- using UnityEngine;
- using UnityEditor;
- using System.IO;
- public class BuildAssetBundlesExample : MonoBehaviour
- {
- //创建编辑器菜单目录
- [MenuItem("Example/Build Asset Bundles")]
- static void BuildABs()
- {
- //将这些资源包放在一个名为ABs的目录下
- string assetBundleDirectory = "Assets/ABs";
- //如果目录不存在,就创建一个目录
- if (!Directory.Exists(assetBundleDirectory))
- {
- Directory.CreateDirectory(assetBundleDirectory);
- }
- BuildPipeline.BuildAssetBundles(assetBundleDirectory, BuildAssetBundleOptions.None, BuildTarget.StandaloneWindows);
- }
- }
第二个方法
- using UnityEngine;
- using UnityEditor;
- using System.IO;
- public class BuildAssetBundlesBuildMapExample : MonoBehaviour
- {
- [MenuItem("Example/Build Asset Bundles Using BuildMap")]
- static void BuildMapABs()
- {
- // 创建映射数组
- AssetBundleBuild[] buildMap = new AssetBundleBuild[2];
- //修改assetBundleName第一个
- buildMap[0].assetBundleName = "enemybundle";
- //assetBundleName = "enemybundle"下的所有资源名称数组
- string[] enemyAssets = new string[2];
- enemyAssets[0] = "Assets/Textures/char_enemy_alienShip.jpg";
- enemyAssets[1] = "Assets/Textures/char_enemy_alienShip-damaged.jpg";
- buildMap[0].assetNames = enemyAssets;
- //修改assetBundleName第二个
- buildMap[1].assetBundleName = "herobundle";
- //assetBundleName = "herobundle"下的所有资源名称数组
- string[] heroAssets = new string[1];
- heroAssets[0] = "char_hero_beanMan";
- buildMap[1].assetNames = heroAssets;
- //创建Bundle包
- //将这些资源包放在一个名为ABs的目录下
- string assetBundleDirectory = "Assets/ABs";
- //如果目录不存在,就创建一个目录
- if (!Directory.Exists(assetBundleDirectory))
- {
- Directory.CreateDirectory(assetBundleDirectory);
- }
- BuildPipeline.BuildAssetBundles(assetBundleDirectory, BuildAssetBundleOptions.None, BuildTarget.StandaloneWindows);
- }
- }
三、上传AssetBundle到服务器
四、把AssetBundle放到本地
五、操作AssetBundle
1、从磁盘目录加载AssetBundle包
⑴AssetBundle放在本地
public static AssetBundle LoadFromFile(string path uint crc = 0, ulong offset= 0);
说明:从path目录同步加载AssetBundle,返回类型
AssetBundle(LoadFromFileAsync是异步加载)
参数:path读取AssetBundle的目录
crc 校验用参数
offset这个值指定从哪里开始读取AssetBundle,
通常为0
⑵ AssetBundle放在网络
引用using UnityEngine.Networking;命名空间
UnityWebRequest.GetAssetBundle()方法看后面的详细介绍
2、加载AssetBundle包之后,加载包内资源
注意:加载要用协程,否则你不知道是否加载完毕
⑴加载一个资源
AssetBundle类
public Object LoadAsset(string name);
从AssetBundle包中加载名字为name的资源,返回object
public Object LoadAsset(string name, Type type);
加载一个包内名字为name,类型为type的资源
public T LoadAsset(string name);
搞不懂,也是加载名字为name类型为T的资源
⑵加载包内的多个资源
AssetBundle类
public Object[] LoadAllAssets(Type type);
加载包内所有类型为type的资源
public Object[] LoadAllAssets();
加载包内的所有资源
public T[] LoadAllAssets();
搞不懂,也是加载类型为T的资源
⑶备注,上面的方法是同步加载,还有异步加载方法
LoadAllAssetsAsync,LoadAssetAsync
3、从包内加载资源以后,可以对这个对象进行各种操作了
4、备注知识点
⑴Path.Combine(string, string) 连接两个字符串
⑵ Application 访问应用程序运行时数据
Application.streamingAssetsPath输出
E:/UnityProject/ARVR/Workspace/MyCharacter/Assets/StreamingAssets
Application.dataPath输出
E:/UnityProject/ARVR/Workspace/MyCharacter/Assets
值得注意的是如果在PC上使用时需要在每个文件夹前加入斜杠,如:
string uri = "file:///" + Application.dataPath + "/AssetBundles/" + assetBundleName;例子:注意:加载要用协程,否则你不知道是否加载完毕
- using UnityEngine;
- using System.Collections;
- using System.IO;
- public class LoadFromFileExample : MonoBehaviour
- {
- void Start()
- {
- //从文件夹里加载包
- var myLoadedAssetBundle = AssetBundle.LoadFromFile(Path.Combine(Application.streamingAssetsPath, "myassetBundle"));
- if (myLoadedAssetBundle == null)
- {
- Debug.Log("Failed to load AssetBundle!");
- return;
- }
- //从Bundle包中加载名字为:MyObject的资源,加载为GameObject
- var prefab = myLoadedAssetBundle.LoadAsset<GameObject>("MyObject");
- //实例化
- Instantiate(prefab);
- //卸载包中资源的内存
- myLoadedAssetBundle.Unload(false);
- }
- }
5、AssetBundle放在网络
⑴创建一个UnityWebRequest,通过HTTP GET下载一个Unity资产包
引用using UnityEngine.Networking;命名空间
UnityWebRequest.GetAssetBundle()方法
- public static UnityWebRequest GetAssetBundle(string uri, uint crc);
- public static UnityWebRequest GetAssetBundle(string uri, uint version, uint crc);
- public static UnityWebRequest GetAssetBundle(string uri, Hash128 hash, uint crc);
- public static UnityWebRequest GetAssetBundle(string uri, CachedAssetBundle cachedAssetBundle, uint crc);
返回值:UnityWebRequest
参数:
uri:AssetsBundle包的网络地址:(可以是本地file:)
crc:0,如果不为0,将会进行校验
version:一个整数版本号
hash:一个版本散列
cachedAssetBundle:用于将给定版本的AssetBundle下载到自定义缓存路径的结构
⑵处理上一步的UnityWebRequest
用DownloadHandlerAssetBundle.GetContent()方法
public static AssetBundle GetContent(Networking.UnityWebRequest www);
www:就是上一步处理的UnityWebRequest
AssetBundle:返回值类型
例子
- IEnumerator InstantiateObject()
- {
- string uri = "file:///" + Application.dataPath + "/AssetBundles/" + assetBundleName;
- UnityEngine.Networking.UnityWebRequest request = UnityEngine.Networking.UnityWebRequest.GetAssetBundle(uri, 0);
- yield return request.Send();
- AssetBundle bundle = DownloadHandlerAssetBundle.GetContent(request);
- GameObject cube = bundle.LoadAsset<GameObject>("Cube");
- GameObject sprite = bundle.LoadAsset<GameObject>("Sprite");
- Instantiate(cube);
- Instantiate(sprite);
- }
六、完整例子
- using System.Collections;
- using System.Collections.Generic;
- using UnityEngine;
- using System.IO;
- using UnityEngine.UI;
- using UnityEngine.Networking;
- public class NewBehaviourScript : MonoBehaviour {
- Image image1;
- Image Image2;
- void Start () {
- image1 = GameObject.Find("Image (1)").GetComponent<Image>();
- Image2 = GameObject.Find("Image (2)").GetComponent<Image>();
- StartCoroutine(InstantiateObject());
- StartCoroutine(InstantiateObjects());
- }
- //一个包有多个资源
- IEnumerator InstantiateObjects()
- {
- //texture是一个文件夹,里面放了多张图片
- string uri = "file:///" + Application.dataPath + "/AssetsBundles/texture";
- UnityWebRequest request = UnityWebRequest.GetAssetBundle(uri, 0);
- yield return request.Send();
- AssetBundle bundle = DownloadHandlerAssetBundle.GetContent(request);
- Object[] obj = bundle.LoadAllAssets(typeof(Sprite));
- Sprite[] sprite = new Sprite[obj.Length];
- for (int i = 0; i < obj.Length; i++)
- {
- sprite[i] = obj[i] as Sprite;
- }
- this.gameObject.GetComponent<Image>().sprite = sprite[0];
- image1.sprite = sprite[1];
- //string path = Application.dataPath + "/AssetsBundles/texture";
- //AssetBundle assetbundle = AssetBundle.LoadFromFile(path, 0, 0);
- //yield return assetbundle;
- //if (assetbundle == null)
- //{
- // print("加载Bundle为空");
- //}
- //加载类型为sprite的图片,否则一张图片会加载成两个
- //Object[] obj =assetbundle.LoadAllAssets(typeof(Sprite));
- //Sprite[] sprite = new Sprite[obj.Length];
- //for (int i = 0; i < obj.Length; i++)
- //{
- // sprite[i] = obj[i] as Sprite;
- //}
- //this.gameObject.GetComponent<Image>().sprite = sprite[0];
- //image1.sprite = sprite[1];
- }
- //一个包有一个资源
- IEnumerator InstantiateObject()
- {
- //用UnityWebRequest读取
- //string uri = "file:///" + Application.dataPath + "/AssetsBundles/gress";
- //UnityWebRequest request = UnityWebRequest.GetAssetBundle(uri, 0);
- //yield return request.Send();
- //AssetBundle bundle = DownloadHandlerAssetBundle.GetContent(request);
- //GameObject cube = bundle.LoadAsset<GameObject>("gress");
- //Sprite sprite = bundle.LoadAsset<Sprite>("gress");
- //this.gameObject.GetComponent<Image>().sprite = sprite;
- //用AssetBundle读取
- string path = Application.dataPath + "/AssetsBundles/gress";
- AssetBundle assetbundle = AssetBundle.LoadFromFile(path, 0, 0);
- yield return assetbundle;
- if (assetbundle == null)
- {
- print("加载Bundle为空");
- }
- Sprite sprite = assetbundle.LoadAsset<Sprite>("gress");
- Image2.sprite = sprite;
- }
- // Update is called once per frame
- void Update () {
- }
- }
七、AssetBundle Manager管理工具
AssetBundle Manage是一个管理AssetBundle的工具,在官方资源商店寻找
文档说明
https://docs.unity3d.com/Manual/AssetBundles-Manager.html
下载地址
https://www.assetstore.unity3d.com/en/#!/content/45836
AssetBundle Manager是一个由Unity制作的工具,它可以使AssetBundle更加高效。
下载并导入AssetBundle Manager包不仅增加了加载和使用AssetBundle的新API,而且还添加了一些编辑器功能来简化工作流。这个功能可以在Assets菜单选项下找到。
八、备注
1、基于平台的加载AssetBundle方法
AssetBundle.LoadFromMemoryAsync
AssetBundle.LoadFromFile
WWW.LoadfromCacheOrDownload
UnityWebRequest DownloadHandlerAssetBundle(Unity 5.3 or newer)
方法:https://docs.unity3d.com/Manual/AssetBundles-Native.html
2、一些知识点网址
Unity5.X新版AssetBundle使用方案及策略
http://www.cnblogs.com/jiangshuai52511/p/6437239.html
Unity5新的AssetBundle系统使用心得
http://blog.csdn.net/langresser_king/article/details/44208585
[Unity热更新]unity5中的assetbundle
http://blog.csdn.net/lyh916/article/details/49815871
3、下面的方法未经过测试,先记录下来,待以后查询
(1)、为需要打包到AssetBundle中的资源设置其assetBundleName,有两种方式可以实现这个功能:一是手动在编辑界面对资源一一进行手动设置;二是遍历需要设置的资源目录,通过代码动态设置。显然第二个办法更加方便,具体的步骤如下:
a.遍历要打包的资源目录,找到需要打包的预设或者资源;
b.设置资源的assetBundleName属性;
c.通过AssetDatabase.GetDependencies(stringpath)方法逐个找到资源的依赖资源路径;
d.使用AssetDatabase.AssetPathToGUID(stringpath)计算出每个资源的唯一ID,然后将此ID当做assetBundleName赋予每个依赖资源;
e.调用BuildPipeline.BuildAssetBundles(stringoutputPath)打包到指定位置。
(2).资源加载:
由于依赖关系存在于manifest中,所以加载资源之前,需要先加载manifest文件。
Unity最新版打包AssetBundle和加载的方法的更多相关文章
- Unity 打AssetBundle和加载方案
一.如何组织assetBundle: unity5以前,打包需要自己去找依赖,然后需要按照拓扑图顺序压入AB栈,这样在最后打AB时才能有效利用依赖(栈内已有的AB才能作为依赖). unity5.x后, ...
- [Unity] unity5.3 assetbundle打包及加载
Unity5.3更新了assetbundle的打包和加载api,下面简单介绍使用方法及示例代码. 在Unity中选中一个prefab查看Inspector窗口,有两个位置可以进行assetbundle ...
- Unity -- AssetBundle(本地资源加载和加载依赖关系)
1.本地资源加载 1).建立Editor文件夹 2).建立StreamingAssets文件夹和其Windows的子文件夹 将下方第一个脚本放入Editor 里面 脚本一 资源打包AssetBund ...
- AssetBundle资源打包与加载
AssetBundle资源打包 1.AssetLabels资源标签 文件名:资源打包成AssetBundle后的文件名,类似于压缩包的名字 后缀:自定义 文件名和后缀名都是小写格式(大写会自动转为小 ...
- Demo示例——Bundle打包和加载
Unity游戏里面的场景.模型.图片等资源,是如何管理和加载的? 这就是本文要讲的资源管理方式--bundle打包和加载. 图片 Unity游戏资源管理有很多方式: (1)简单游戏比如demo,可以直 ...
- Unity3d 5.x AssetBundle打包与加载
1.AssetBundle打包 unity 5.x版本AssetBundle打包,只需要设置好AssetBundle的名称后,unity会自动将其打包,无需处理其他,唯独需要做的是设置好个AssetB ...
- Unity3D AssetBundle的打包与加载
在Unity项目开发过程中,当要做热更新时常常使用一个叫做AssetBundle的东西,这里做一点个人的学习记录 步骤1: 设置打包标签:具体步骤----进入Unity,选择某一资源然后看右下角,在那 ...
- 实力封装:Unity打包AssetBundle(一)
说明:这是一系列循序渐进的教程,今天先介绍最简单的AssetBundle打包方式. 这是一个由在Unity中需要加载模型而引发出来的一系列坑,为了填坑花了不少时间,如果有需要在Unity中自定义菜单, ...
- AssetBundle压缩/内部结构/下载和加载
一.AssetBundle的压缩方式 Unity支持三种AssetBundle打包的压缩方式:LZMA, LZ4, 以及不压缩. 1.LZMA压缩方式 是一种默认的压缩形式,这种标准压缩格 ...
随机推荐
- BAT 大规模Hadoop集群实践
百度高级架构师马如悦:我的Hadoop 2.0 http://www.csdn.net/article/2011-04-28/296869 腾讯大规模Hadoop集群实践 腾讯 hadoop 基线版本 ...
- Spring Boot 针对 Java 开发人员的安装指南
Spring Boot 可以使用经典的开发工具或者使用安装的命令行工具.不管使用何种方式,你都需要确定你的 Java 版本为 Java SDK v1.8 或者更高的版本.在你开始安装之前,你需要确定你 ...
- 《剑指offer》总结一
目录 1.二维数组中的查找(223ms) 2.替换空格(24ms) 3.从尾到头打印链表(22ms) 4.重建二叉树(37ms) 5.用两个栈实现队列 1.二维数组中的查找(223ms) 题目描述: ...
- 模拟spring的IoC
1.新建一个web项目,jdk版本为1.8.0_111,使用 Jsp + Servlet + Model 实现MVC模式,并使用BeanFactory工厂 + xml配置文件 + 反射 来解耦合 整个 ...
- stl集合算法
accumulate() 累加 accumulate: 对指定范围内的元素求和,然后结果再加上一个由val指定的初始值. #include<numeric> vector<i ...
- 使用LVM方式安装Ubuntu 16.04
--- By 小甘丶 注: 这里只讲解如何配置LVM,其他不再陈述! 这个方法,通用的!只要操作系统支持LVM即可!(个人推测,尚未证实) 配置好虚拟机后,开始安装,先进入Ubuntu使用界面,对磁盘 ...
- 回收站(recyclebin)及回滚
1. alter table table_name enable row movement; flashback table table_name to timestamp to_timestam ...
- 函数使用十一:FTP
网上很多FTP说明的文档,也很详细,写这玩意是备份一下: 注:有的系统需要配置FTP地址和端口,有的好像没有... SM30->SAPFTP_SERVERS_V,默认端口21. 在做之前可以做个 ...
- Linux下使用mail发送邮件
邮件常常是Linux下监控报警手段之一.Linux下的mail命令可以方便,快速的完成发送邮件.下面以CentOS为例 1.安装 [root@vm8028 ~]# mail -bash: mail: ...
- Echarts 简单报表系列二:折线图
<!DOCTYPE html> <html lang="en"> <head> <meta charset="UTF-8&quo ...