Cesium热力图实现
转自原文 Cesium热力图实现
var _getColorPalette = function(config) {
var gradientConfig = config.gradient || config.defaultGradient;
var paletteCanvas = document.createElement('canvas');
var paletteCtx = paletteCanvas.getContext('2d');
paletteCanvas.width = 256;
paletteCanvas.height = 1;
var gradient = paletteCtx.createLinearGradient(0, 0, 256, 1);
for (var key in gradientConfig) {
gradient.addColorStop(key, gradientConfig[key]);
}
paletteCtx.fillStyle = gradient;
paletteCtx.fillRect(0, 0, 256, 1);
return paletteCtx.getImageData(0, 0, 256, 1).data;
};
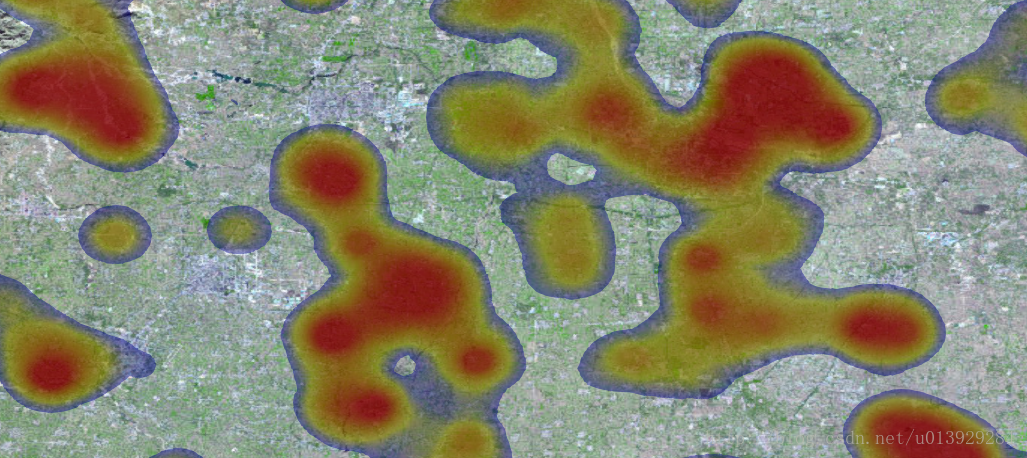
对于输入的点数据,会根据点坐标生成一个黑色圆阴影效果。
//生成一个阴影模板
var _getPointTemplate = function(radius, blurFactor) {
var tplCanvas = document.createElement('canvas');
var tplCtx = tplCanvas.getContext('2d');
var x = radius;
var y = radius;
tplCanvas.width = tplCanvas.height = radius*2;
if (blurFactor == 1) {
tplCtx.beginPath();
tplCtx.arc(x, y, radius, 0, 2 * Math.PI, false);
tplCtx.fillStyle = 'rgba(0,0,0,1)';
tplCtx.fill();
} else {
var gradient = tplCtx.createRadialGradient(x, y, radius*blurFactor, x, y, radius);
gradient.addColorStop(0, 'rgba(0,0,0,1)');
gradient.addColorStop(1, 'rgba(0,0,0,0)');
tplCtx.fillStyle = gradient;
tplCtx.fillRect(0, 0, 2*radius, 2*radius);
}
var tpl;
if (!this._templates[radius]) {
this._templates[radius] = tpl = _getPointTemplate(radius, blur);
} else {
tpl = this._templates[radius];
}
// value from minimum / value range
// => [0, 1]
//根据value值设置阴影的alpha通道,后面可以通过alpha值获取value值
var templateAlpha = (value-min)/(max-min);
// this fixes #176: small values are not visible because globalAlpha < .01 cannot be read from imageData
shadowCtx.globalAlpha = templateAlpha < .01 ? .01 : templateAlpha;
shadowCtx.drawImage(tpl, rectX, rectY);
// update renderBoundaries
if (rectX < this._renderBoundaries[0]) {
this._renderBoundaries[0] = rectX;
}
if (rectY < this._renderBoundaries[1]) {
this._renderBoundaries[1] = rectY;
}
if (rectX + 2*radius > this._renderBoundaries[2]) {
this._renderBoundaries[2] = rectX + 2*radius;
}
if (rectY + 2*radius > this._renderBoundaries[3]) {
this._renderBoundaries[3] = rectY + 2*radius;
}
}
首先呢,阴影是黑色的,所以接下来heatmap会进行一个像素点重新着色的过程,根据每个点的alpha值*4(rgba步长)得出一个offset,然后从调色板上取颜色。因为上面设置了阴影透明度效果是递减的,所以在获取颜色的时候,就能获得一个平滑的渐变效果。这样就得到了热力图。
_colorize: function() {

  var x = this._renderBoundaries[0];

  var y = this._renderBoundaries[1];

  var width = this._renderBoundaries[2] - x;

  var height = this._renderBoundaries[3] - y;

  var maxWidth = this._width;

  var maxHeight = this._height;

  var opacity = this._opacity;

  var maxOpacity = this._maxOpacity;

  var minOpacity = this._minOpacity;

  var useGradientOpacity = this._useGradientOpacity;

  if (x < 0) {

    x = 0;

  }

  if (y < 0) {

    y = 0;

  }

  if (x + width > maxWidth) {

    width = maxWidth - x;

  }

  if (y + height > maxHeight) {

    height = maxHeight - y;

  }

  var img = this.shadowCtx.getImageData(x, y, width, height);

  var imgData = img.data;

  var len = imgData.length;

  var palette = this._palette;

  for (var i = 3; i < len; i+= 4) {

    var alpha = imgData[i];

    var offset = alpha * 4;

    if (!offset) {

      continue;

    }

    var finalAlpha;

    if (opacity > 0) {

      finalAlpha = opacity;

    } else {

      if (alpha < maxOpacity) {

        if (alpha < minOpacity) {

          finalAlpha = minOpacity;

        } else {

          finalAlpha = alpha;

        }

      } else {

        finalAlpha = maxOpacity;

      }

    }

    imgData[i-3] = palette[offset];

    imgData[i-2] = palette[offset + 1];

    imgData[i-1] = palette[offset + 2];

    imgData[i] = useGradientOpacity ? palette[offset + 3] : finalAlpha;

  }

  img.data = imgData;

  this.ctx.putImageData(img, x, y);

  this._renderBoundaries = [1000, 1000, 0, 0];

},
'if(heightValue.r<1.0/255.0) heightValue.a= 0.0; ' +
在Openlayer中实现热力图起始是很方便的。具体可参考下面的几篇文章。

进一步学习的参考资料
至于绘制的过程和原理、及完整代码,可以参考
http://www.wangshaoxing.com/blog/how-to-draw-a-heatmap.html
code
https://github.com/wshxbqq/WebGL-HeatMap
Cesium热力图实现的更多相关文章
- cesium 热力图
- Cesium专栏-热力图(附源码下载)
Cesium Cesium 是一款面向三维地球和地图的,世界级的JavaScript开源产品.它提供了基于JavaScript语言的开发包,方便用户快速搭建一款零插件的虚拟地球Web应用,并在性能,精 ...
- cesium 水面、淹没 效果
水面效果 参考: http://cesiumcn.org/topic/158.html http://api.rivermap.cn/cesium/rivermap/map.html https:// ...
- Cesium学习系列汇总
内容比较多,完整看完需要大概10分钟,废话不多说,撸起袖子,加油干!!! 1.前言 按照套路,先介绍一下什么是Cesium. Cesium ['siːzɪəm]是JavaScript开源库,通过Ces ...
- 将Cesium Tools用于更好的构建管理
Cesium中文网:http://cesiumcn.org/ | 国内快速访问:http://cesium.coinidea.com/ Cesium技术正在给建筑业带来革命性的变化.我们与 partn ...
- cesium自定义气泡窗口infoWindow
一.自定义气泡窗口与cesium默认窗口效果对比: 1.cesium点击弹出气泡窗口显示的位置固定在地图的右上角,默认效果: 2.对于习惯arcgis或者openlayer气泡窗口样式的giser来说 ...
- cesium核心类Viewer简介
1.简单描述Viewer Viewer类是cesium的核心类,是地图可视化展示的主窗口,cesium程序应用的切入口,扮演必不可少的核心角色. 官网的英文解析如下: A base widget fo ...
- Cesium简介以及离线部署运行
Cesium简介 cesium是国外一个基于JavaScript编写的使用WebGL的地图引擎,一款开源3DGIS的js库.cesium支持3D,2D,2.5D形式的地图展示,可以自行绘制图形,高亮区 ...
- 基于开源项目SharpMap的热力图(HeatLayer)实现。
当前公司需要一个用时较少的热力图呈现方案,在避免较底层的GDI开发和比较了多家GIS产品的实际效果之后,团队决定用sharpMap的API来实现,由于之前框架采用的是另外一个开源项目GMap.net, ...
随机推荐
- 奇数结点升序偶数结点降序的单链表排序(Python实现)
题目 一个链表,奇数结点升序,偶数结点降序,要求变成一个全升序的链表. 例如:1->8->2->7->3->6->4->5,变为1->2->3-& ...
- (转)JVM各种内存溢出是否产生dump
对于java的内存溢出,如果配置-XX:+HeapDumpOnOutOfMemoryError,很明确的知道堆内存溢出时会生成dump文件.但永久代内存溢出不明确是否会生成,今天来做一个实验: 永久代 ...
- 《鸟哥的Linux私房菜》学习笔记(3)——根文件系统
一.Linux目录结构 rootfs:根文件系统,根是"/". 1./boot 系统启动相关的文件,如内核.intrd.以及grub(bootloader) root@hao:~# ...
- loj2021 「HNOI2017」大佬
there #include <algorithm> #include <iostream> #include <cstring> #include <cst ...
- loj2020 「HNOI2017」礼物
所有的下标从 \(0\) 开始. 考虑枚举 \(C\) (第一个加上负的等于第二个加上其绝对值)和第二个手链的偏移量 \(p\).答案就是 \[\sum_{i=0}^{n-1}(x_i+C-y_{(i ...
- Leetcode23--->Merge K sorted Lists(合并k个排序的单链表)
题目: 合并k个排序将k个已排序的链表合并为一个排好序的链表,并分析其时间复杂度 . 解题思路: 类似于归并排序的思想,lists中存放的是多个单链表,将lists的头和尾两个链表合并,放在头,头向后 ...
- python week08 并发编程之多进程--实践部分
一 multiprocessing模块介绍 python中的多线程无法利用多核优势,如果想要充分地使用多核CPU的资源(os.cpu_count()查看),在python中大部分情况需要使用多进程.P ...
- 洛谷9月月赛II 赛后瞎写
看错比赛时间了....结果发现的时候已经开始了半个小时,并且当时正准备睡午觉qwq 于是就水了个t1就 去睡 跑了 T2 写着写着然后看了一发评讲被辣鸡思路给绕了进去最后发现自己宛若一个智障 类似桶的 ...
- TOJ4483: Common Digit Pairs
4483: Common Digit Pairs Time Limit(Common/Java):3000MS/9000MS Memory Limit:65536KByteTotal Sub ...
- NuGet之控制台管理程序包
NuGet作为VS的扩展程序,已经做好了UI,我们可以通过Manage NuGet Packages 的对话框.这里我们主要说说如何通过控制台进行包管理.使用命令行的方式,其实也是有其好处,对 ...