mysql_linux(centos7 mysql 5.7.19)
- centos7 mysql 5.7.19安装
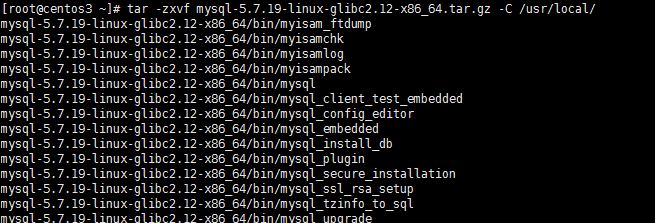
1.解压文件
[root@centos3 ~]# tar -zxvf mysql-5.7.19-linux-glibc2.12-x86_64.tar.gz -C /usr/local/
2.重命名
[root@centos3 ~]# cd /usr/local/
[root@centos3 local]# mv mysql-5.7.19-linux-glibc2.12-x86_64/ mysql

3.配置环境变量
[root@centos3 local]# vi + /etc/profile
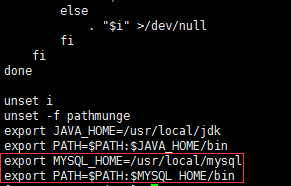
[root@centos3 local]# source /etc/profile
4.创建组和用户并授权
[root@centos3 local]# groupadd mysql
[root@centos3 local]# useradd -r -g mysql -s /bin/false mysql
[root@centos3 local]# chown -R mysql mysql/
[root@centos3 local]# chgrp -R mysql mysql/

5.初始化并记住最后的12位密码
[root@centos3 local]# /usr/local/mysql/bin/mysqld --initialize --user=mysql --basedir=/usr/local/mysql/ --datadir=/usr/local/mysql/data/ --lc_messages_dir=/usr/local/mysql/share --lc_messages=zh_CN

如果报以下错误
报错还提示找不到libaio.so.1
error while loading shared libraries: libaio.so.1: cannot open shared object file: No such file or directory
Warning
MySQL has a dependency on the libaio library. Data directory initialization and subsequent server startup steps will fail if this library is not installed locally. If necessary, install it using the appropriate package manager. For example, on
Yum-based systems:
shell> yum search libaio  # search for info

shell> yum install libaio # install library- 1
- 2
Or, on APT-based systems:
shell> apt-cache search libaio # search for info

shell> apt-get install libaio1 # install library- 1
- 2
Mysql 对 libaio library有依赖关系。
安装好libaio后
root@Fan:/data# /usr/local/mysql/bin/mysqld --initialize --defaults-file=/data/mysqldata/3306/my.cnf --datadir=/data/mysqldata/3306/data --basedir=/usr/local/mysql --user=mysql

2015-12-04T13:22:01.848446Z 0 [Warning] TIMESTAMP with implicit DEFAULT value is deprecated. Please use --explicit_defaults_for_timestamp server option (see documentation for more details).

2015-12-04T13:22:03.639997Z 0 [Warning] InnoDB: New log files created, LSN=45790

2015-12-04T13:22:04.002719Z 0 [Warning] InnoDB: Creating foreign key constraint system tables.

2015-12-04T13:22:04.167369Z 0 [ERROR] unknown variable 'defaults-file=/data/mysqldata/3306/my.cnf'

2015-12-04T13:22:04.167408Z 0 [ERROR] Aborting
6.修改mysql.server.文件并复制到 /etc/init.d/目录下
[root@centos3 local]# cd /usr/local/mysql/support-files/
[root@centos3 support-files]# vi mysql.server
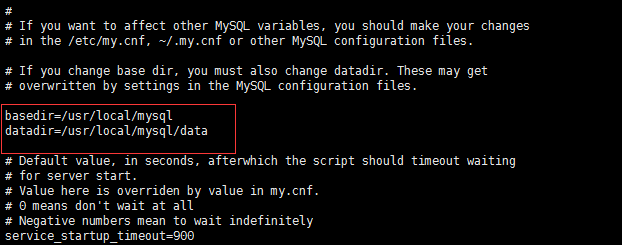
[root@centos3 support-files]# cp mysql.server /etc/init.d/mysqld
7.重命名my.cnf
[root@centos3 support-files]# mv /etc/my.cnf /etc/my_default.cnf
8.设置开机启动
[root@centos3 support-files]# chmod +x /etc/init.d/mysqld
[root@centos3 support-files]# chkconfig --add mysqld
[root@centos3 support-files]# chkconfig mysqld on
//查看开机启动是否成功
[root@centos3 support-files]# chkconfig --list mysqld

9.启动服务
[root@centos3 support-files]# /etc/init.d/mysqld start
[root@centos3 support-files]# service mysql start

如果 service mysql start
mysql: unrecognized service错误的
解决方案如下
[root@ctohome.com ~]# service mysql start
mysql: unrecognized service
[root@ctohome.com ~]# service mysql restart
mysql: unrecognized service
[root@ctohome.com ~]# rpm -q mysql 查询发现mysql已经正常安装
mysql-5.1.52-jason.1
rpm -q mysql 有可能查看不到,不急用 rpm -qa| grep mysql
rpm -q 服务名 的确可以查看已经安装的 mysql服务,但是服务名必须是全称才可以查到。
rpm -qa| grep mysql 查看一下系统是否已经安装了mysql,在使用rpm -q mysql-community-server-5.7.17-1.el7.x86_64 查看是否启动。
[root@ctohome.com ~]# /etc/rc.d/init.d/mysqld start 直接启动没问题
Starting mysqld: [ OK ]
[root@ctohome.com ~]# ls /etc/rc.d/init.d/mysqld -l
-rwxr-xr-x 1 root root 5509 Dec 18 02:31 /etc/rc.d/init.d/mysqld
[root@ctohome.com ~]# chkconfig mysqld on 设置mysql开机启动
[root@ctohome.com ~]# chmod 755 /etc/rc.d/init.d/mysqld 修改mysqld执行权限
[root@ctohome.com ~]# service mysqld start 搞定
Starting mysqld: [ OK ]
[root@ctohome.com ~]# service mysqld start
Starting mysqld: [ OK ]
[root@ctohome.com ~]# service mysqld status
mysqld (pid 9487) is running...
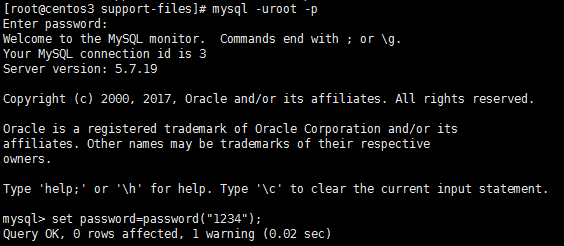
10.登录修改密码,密码就是第5步系统生成的
[root@centos3 support-files]# mysql -uroot -p
mysql> set password=password("1234");
mysql_linux(centos7 mysql 5.7.19)的更多相关文章
- Centos7 Mysql主从双机热备的实战记录
操作系统:centos7 服务器:主:172.19.242.69 从:172.19.242.70 1. 服务器 由于Mysql不同版本之间的(二进制日志)binlog格式可能会不太一样,因此最好的 ...
- WordPress 4.8 安装配置教程 (基于 centos 7.3, php 7.0, mysql 5.7.19, nginx 1.12.1)
最近想要整个 blog,记录自己工作.学习中的点滴.Wordpress 自然是首选,因为内容才是关键,所以也就不怕别人说太 low.网上大部份都是讲 wordpress 配合 apache 的安装教程 ...
- centos7安装mysql5.7.19及配置远程连接
centos7安装mysql5.7.19及配置远程连接------https://blog.csdn.net/Lh19931122/article/details/77996213
- 搭建 MySQL 5.7.19 主从复制,以及复制实现细节分析
主从复制可以使MySQL数据库主服务器的主数据库,复制到一个或多个MySQL从服务器从数据库,默认情况下,复制异步; 根据配置,可以复制数据库中的所有数据库,选定的数据库或甚至选定的表. Mysql ...
- MySQL学习之路 一 : MySQL 5.7.19 源码安装
MySQL 5.7.19 源码安装 查看系统: # cat /etc/redhat-release CentOS Linux release 7.3.1611 (Core) 安装依赖包 # yum - ...
- mysql 8.0.19 win10快速安装教程
本文教程为大家分享了mysql 8.0.19安装教程,供大家参考,具体内容如下 1.下载.zip安装文件 2.根目录存放my.ini,文件路径用“/”分割,例如: [mysqld] port=3306 ...
- linux下Mysql 8.0.19 编译安装
1 前言 linux下安装MySQL的方式有很多种,包括以仓库的方式安装(yum,apt,zypper),以包的方式安装(rpm,deb),以docker方式安装,从压缩包解压安装,从源码编译安装,这 ...
- MySQL 5.7.19 简易安装、卸载教程
前言:传统的 exe 文件安装的MySQL,安装后特别难卸载,而且一旦处理不好,就容易出错,想再安装别的版本也不容易.因为这种方式的安装,虽然是不断的下一步,但是卸载的时候需要处理很多,在本文最后,有 ...
- centos7 mysql数据库的安装与使用
一:数据库的安装 第一步 下载数据库到主机,, 第二步 通过xshell将数据库压缩包上传至centos7虚拟主机(#注意:服务器主机需下载上传工具lrzsz 命令:yun -y install ...
随机推荐
- spark on yarn 集群部署
概述 hadoop2.7.1 spark 1.5.1 192.168.31.62 resourcemanager, namenode, master 192.168.31.63 nodeman ...
- WPF自定义控件(三)の扩展控件
扩展控件,顾名思义就是对已有的控件进行扩展,一般继承于已有的原生控件,不排除继承于自定义的控件,不过这样做意义不大,因为既然都自定义了,为什么不一步到位呢,有些不同的需求也可以通过此来完成,不过类似于 ...
- CentOS 7 上安装vim(默认未安装)
今天使用CentOS 7,发现未安装vim,所以重新安装 执行命令: yum -y install vim* 然后就可以使用了
- [Algorithm] 如何正确撸<算法导论>CLRS
其实算法本身不难,第一遍可以只看伪代码和算法思路.如果想进一步理解的话,第三章那些标记法是非常重要的,就算要花费大量时间才能理解,也不要马马虎虎略过.因为以后的每一章,讲完算法就是这样的分析,精通的话 ...
- Python框架学习之Flask中的视图及路由
在前面一讲中我们学习如何创建一个简单的Flask项目,并做了一些简单的分析.接下来在这一节中就主要来讲讲Flask中最核心的内容之一:Werkzeug工具箱.Werkzeug是一个遵循WSGI协议的P ...
- jupyter notebook中No module named 'tensorflow'
当我们在jupyter notebook中运行时可能会遇见没有某个包的情况,如下: ---------------------------------------------------------- ...
- apache反向代理出现502调整
1.问题描述:项目上线后,会在接口调用时客户端出现502异常,而服务端则对该此请求作出处理. 2.问题原因:经过排查后得知是由于请求并发量大,造成超过请求超时间,但是apache中队列已经加载到请求信 ...
- ORA-4031 错误故障排除与诊断[视频] (Doc ID 2016002.1)
Copyright (c) 2019, Oracle. All rights reserved. Oracle Confidential. ORA-4031 错误故障排除与诊断[视频] (Do ...
- Python 中的浅拷贝和深拷贝
1. 列表和字典,直接赋值,都是浅拷贝,即赋值双方指向同一地址,因为 Python 对可变对象按引用传递. >>> a = [1, 2, 3] >>> b = a ...
- Spring Security(七):2.4 Getting Spring Security
You can get hold of Spring Security in several ways. You can download a packaged distribution from t ...