调用API修改Ocelot的配置文件
Ocelot是一个基于.net core的开源webapi服务网关开源项目,功能比较强大,Github项目地址为:https://github.com/ThreeMammals/Ocelot,关于Ocelot的学习资料可以看看张善友的网站:http://www.csharpkit.com/apigateway.html。
Ocelot的路由设置是基于配置文件的,同样在Ocelot中使用Consul做服务发现时,也是基于配置文件,当我们修改路由或者需要往Consul中添加ServiceName的时候,需要修改配置文件,网关服务也需要重启,这当然不是我们想要的。
在张善友的帮助下,得知可以通过调用api的方式来修改Ocelot的配置文件,官方文档:https://ocelot.readthedocs.io/en/latest/features/administration.html,本文以示例的方式来介绍怎样通过调用api的方式修改Ocelot的配置文件。
环境
- .net core:2.1.4
- Ocelot:6.0
- IdentityServer4:2.2.0
准备
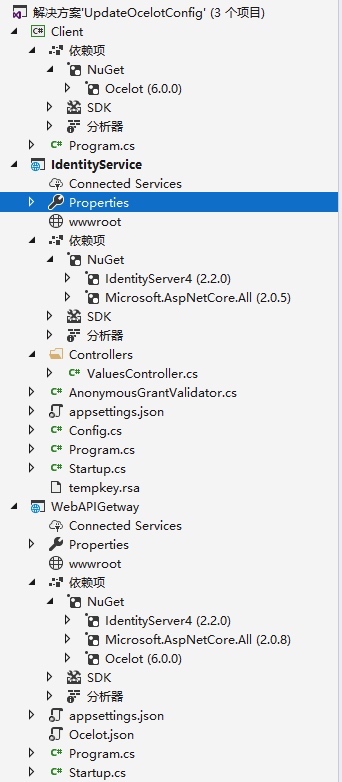
使用VS2017创建解决方案UpdateOcelotConfig,并添加三个项目:
Client
- 控制台项目
- 添加Ocelot包引用
IdentityService
- WebAPI项目
- 添加IdentityServer4包引用
WebAPIGetway
- WebAPI项目
- 添加IdentityServer4包引用
- 添加Ocelot包引用
项目创建完成后如下图:
IdentityService
该项目使用IdentityService4实现一个认证服务,因为在调用Ocelot的api接口时需要用到认证。
1、首先添加对IdentityService4的NuGet包引用;
2、添加Config.cs类,代码如下:
public class Config
{
public static IEnumerable<ApiResource> GetApiResources()
{
return new List<ApiResource>
{
new ApiResource("s2api", "My API")
};
}
public static IEnumerable<Client> GetClients()
{
return new List<Client>
{
new Client
{
ClientId = "client",
AllowedGrantTypes =GrantTypes.ClientCredentials,
ClientSecrets =
{
new Secret("secret".Sha256())
},
AllowedScopes = { "s2api" }
}
};
}
}
3、Startup类修改,代码如下:
public void ConfigureServices(IServiceCollection services)
{
services.AddIdentityServer()
.AddDeveloperSigningCredential()
.AddInMemoryApiResources(Config.GetApiResources())
.AddInMemoryClients(Config.GetClients());
}
public void Configure(IApplicationBuilder app, IHostingEnvironment env)
{
if (env.IsDevelopment())
{
app.UseDeveloperExceptionPage();
}
app.UseIdentityServer();
}
4、修改项目的启动端口为9500。
WebAPIGetWay
该项目是使用Ocelot的网关服务,具体实现步骤如下:
1、添加Ocelot和IdentityService4的NuGet包引用;
2、添加Ocelot.json配置文件,内容如下:
{
"ReRoutes": [
{
"DownstreamPathTemplate": "/api/values",
"DownstreamScheme": "http",
"DownstreamHostAndPorts": [
{
"Host": "localhost",
"Port": 10001
}
],
"UpstreamPathTemplate": "/a/api/values",
"UpstreamHttpMethod": [ "Get" ]
}
],
"GlobalConfiguration": {
"BaseUrl": "http://localhost:10000/"
}
}
3、修改Program.cs类,添加对Ocelot.json文件的引用
public static IWebHost BuildWebHost(string[] args) =>
WebHost.CreateDefaultBuilder(args)
//add ocelot json config file
.ConfigureAppConfiguration((hostingContext, builder) => {
builder
.SetBasePath(hostingContext.HostingEnvironment.ContentRootPath)
.AddJsonFile("Ocelot.json")
.AddEnvironmentVariables();
})
.UseStartup<Startup>()
.UseUrls("http://*:10000")
.Build();
4、Startup类修改,代码如下:
public void ConfigureServices(IServiceCollection services)
{
Action<IdentityServerAuthenticationOptions> options = o =>
{
//IdentityService认证服务的地址
o.Authority = "http://localhost:9500";
//IdentityService项目中Config类中定义的ApiName
o.ApiName = "s2api";
o.RequireHttpsMetadata = false;
o.SupportedTokens = SupportedTokens.Both;
//IdentityService项目中Config类中定义的Secret
o.ApiSecret = "secret";
};
services.AddOcelot()
.AddAdministration("/admin", options);
}
public void Configure(IApplicationBuilder app, IHostingEnvironment env)
{
if (env.IsDevelopment())
{
app.UseDeveloperExceptionPage();
}
app.UseOcelot().Wait();
}
5、修改项目的启动端口为10000.
使用Postman测试下WebAPIGetway和IdentityService
1、设置解决方案的属性,同时启动两个项目
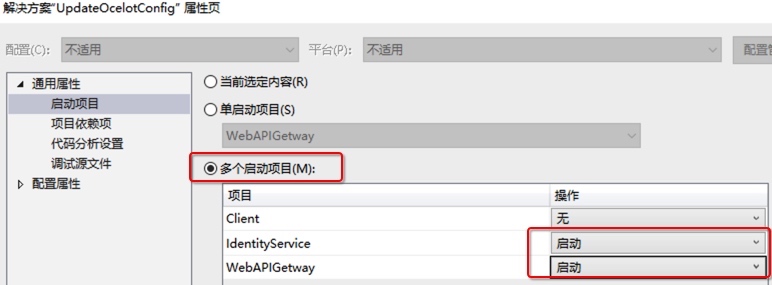
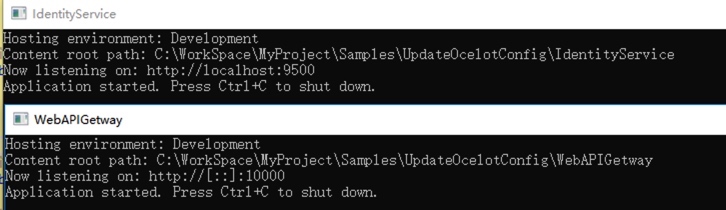
启动后如下图:
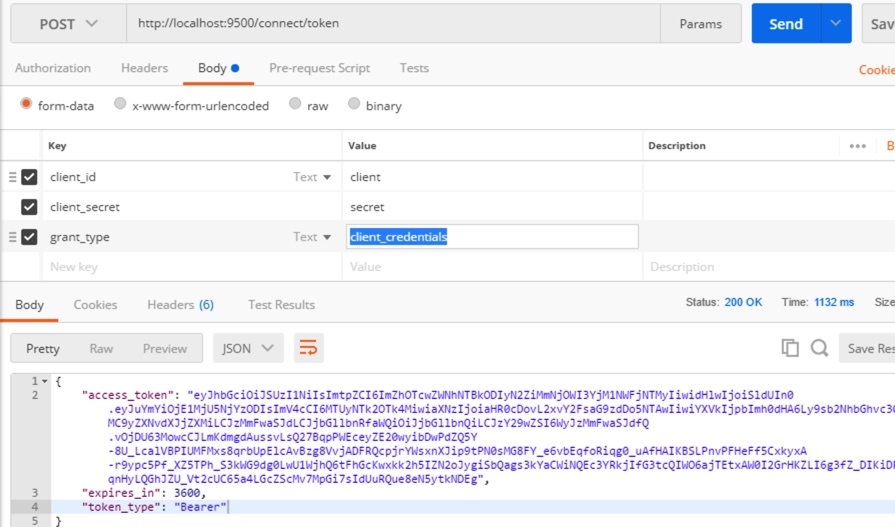
2、在Postman中调用 http://localhost:9500/connect/token,获取token,调用方式为Post,form-data传三个参数:
- client_id:client
- client_secret:secret
- grant_type:client_credentials
调用成功后如下图:
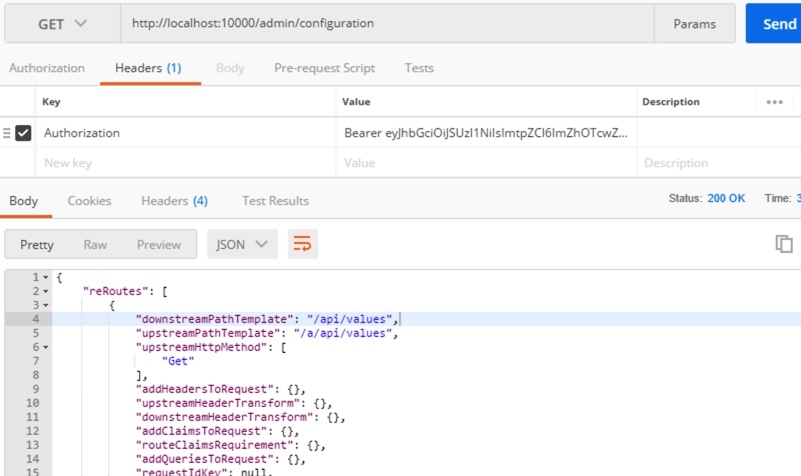
3、在Postman中调用接口 http://localhost:10000/admin/configuration 获取Ocelot的配置,接口路径中的admin是在WebAPIGetway项目中的Startup类中定义的
services.AddOcelot().AddAdministration("/admin", options);
|
该接口请求为Get请求,需要在Headers中设置上面获取的token,格式为:
Authorization:Bearer token |
请求成功如下图:
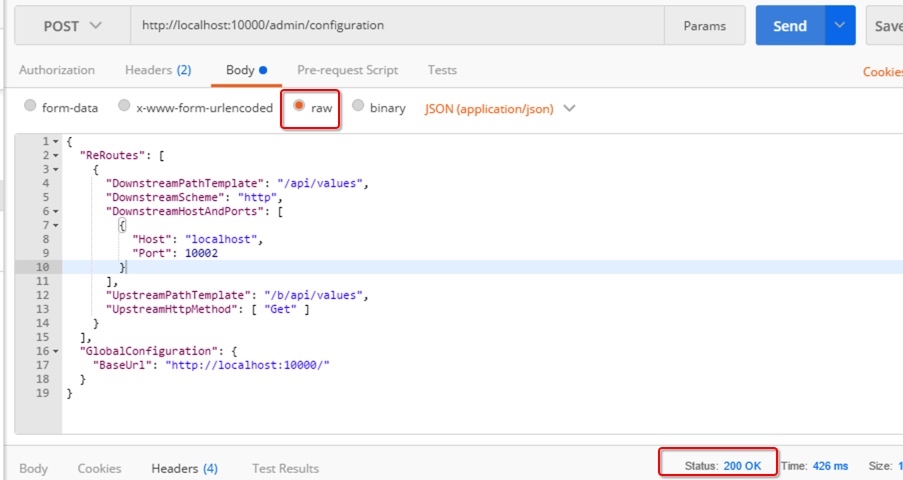
4、在Postman中通过接口 http://localhost:10000/admin/configuration 修改配置,修改和获取配置的接口地址一致,修改时请求为Post,同样在Headers中需要添加token,另外还需要设置Content-Type,格式如下:
Authorization:Bearer tokenContent-Type:application/json |
请求的body就是调整后的json数据,调用成功回返回200,如下图:
5、在WebAPIGetway项目的运行目录中打开Ocelot的配置文件,验证是否修改成功。
使用代码方式来修改配置文件
通过Postman来进行测试如果能够验证通过,说明WebAPIGetway和IdentityService都运行正常,下面在Client项目中用代码的方式来进行配置文件的修改。Client代码如下:
namespace Client
{
class Program
{
static void Main(string[] args) => MainAsync().GetAwaiter().GetResult();
private static async Task MainAsync()
{
//需要修改的配置
var configuration = new FileConfiguration
{
ReRoutes = new List<FileReRoute>
{
new FileReRoute
{
DownstreamPathTemplate = "/api/values",
DownstreamHostAndPorts = new List<FileHostAndPort>
{
new FileHostAndPort
{
Host ="localhost",
Port = 10001,
},
new FileHostAndPort
{
Host ="localhost",
Port = 10002,
}
},
DownstreamScheme = "http",
UpstreamPathTemplate = "/c/api/values",
UpstreamHttpMethod = new List<string> { "Get","Post" }
}
},
GlobalConfiguration = new FileGlobalConfiguration
{
BaseUrl = "http://localhost:10000/"
}
};
// 从元数据中发现客户端
var disco = await DiscoveryClient.GetAsync("http://localhost:9500");
// 请求令牌
var tokenClient = new TokenClient(disco.TokenEndpoint, "client", "secret");
var tokenResponse = await tokenClient.RequestClientCredentialsAsync("s2api");
if (tokenResponse.IsError)
{
Console.WriteLine(tokenResponse.Error);
return;
}
var client = new HttpClient();
client.SetBearerToken(tokenResponse.AccessToken);
HttpContent content = new StringContent(JsonConvert.SerializeObject(configuration));
content.Headers.ContentType = new MediaTypeHeaderValue("application/json");
var response = await client.PostAsync("http://localhost:10000/admin/configuration", content);
Console.ReadLine();
}
}
}
思考
1、Ocelot文档中介绍可以使用外部的IdentityService服务,也可以用内置的,各有什么优缺点?
2、上面例子中是直接将json数据去做更新,有没有什么弊端?是否应该先获取配置,做修改后再更新?
示例代码
本文的示例代码已经放到Github上:https://github.com/oec2003/StudySamples/tree/master/UpdateOcelotConfig
原文地址: http://fwhyy.com/2018/05/Call-API-to-modify-the-configuration-file-of-the-Ocelot/
调用API修改Ocelot的配置文件的更多相关文章
- WPF 调用API修改窗体风格实现真正的无边框窗体
原文:WPF 调用API修改窗体风格实现真正的无边框窗体 WPF中设置无边框窗体似乎是要将WindowStyle设置为None,AllowTransparency=true,这样才能达到WinForm ...
- 【转】【WPF】 WPF 调用API修改窗体风格实现真正的无边框窗体
WPF中设置无边框窗体似乎是要将WindowStyle设置为None,AllowTransparency=true,这样才能达到WinForm中无边框窗体的样式.但是AllowTransparency ...
- ambari rest api (修改集群配置文件)
1.找到你需要修改的配置的最新版本 curl -u admin:admin -H "X-Requested-By: ambari" -X GET http://AMBARI_SER ...
- .NET Core 微服务—API网关(Ocelot) 教程 [四]
前言: 上一篇 介绍了Ocelot网关和认证服务的结合使用,本篇继续介绍Ocelot相关请求聚合和Ocelot限流 一.请求聚合 Ocelot允许声明聚合路由,这样可以把多个正常的Routes打包并映 ...
- .NET Core 微服务—API网关(Ocelot) 教程 [二]
上篇文章(.NET Core 微服务—API网关(Ocelot) 教程 [一])介绍了Ocelot 的相关介绍. 接下来就一起来看如何使用,让它运行起来. 环境准备 为了验证Ocelot 网关效果,我 ...
- .NET Core 微服务—API网关(Ocelot) 教程 [三]
前言: 前一篇文章<.NET Core 微服务—API网关(Ocelot) 教程 [二]>已经让Ocelot和目录api(Api.Catalog).订单api(Api.Ordering)通 ...
- [Hei-Ocelot-Gateway ].Net Core Api网关Ocelot的开箱即用版本
写在前面 很多neter都有在用Ocelot做Api网关,但是Ocelot又不像kong或者其他网关一样,开箱即用.它需要你单独开一个web项目来部署,这样很多同学都在做重复的事了. 这里[Hei.O ...
- .NET5 API 网关Ocelot+Consul服务注册
1|0网关介绍 网关其实就是将我们写好的API全部放在一个统一的地址暴露在公网,提供访问的一个入口.在 .NET Core下可以使用Ocelot来帮助我们很方便的接入API 网关.与之类似的库还有Pr ...
- 32位汇编第四讲,干货分享,汇编注入的实现,以及快速定位调用API的数量(OD查看)
32位汇编第四讲,干货分享,汇编注入的实现,以及快速定位调用API的数量(OD查看) 昨天,大家可能都看了代码了,不知道昨天有没有在汇编代码的基础上,实现注入计算器. 如果没有,今天则会讲解,不过建议 ...
随机推荐
- electron中引入jquery
<!-- Insert this line above script imports --> <script>if (typeof module === 'object') { ...
- jquery仿排列顺序,变换颜色更换class
ps:箭头是字体图标,需要的可以去阿里字体下载,也可自己替换图片 点击之后的 代码部分 <ul class="Ep_sxxz"> <span class=&quo ...
- Elasticsearch 索引文档的增删改查
利用Elasticsearch-head可以在界面上(http://127.0.0.1:9100/)对索引进行增删改查 1.RESTful接口使用方法 为了方便直观我们使用Head插件提供的接口进行演 ...
- Elasticsearch环境搭建和介绍(Windows)
一.Elasticsearch介绍和安装 1.1 介绍 Elastic Elastic官网:https://www.elastic.co/cn/ Elastic有一条完整的产品线:Elasticse ...
- Hello 2019题解
Hello 2019题解 题解 CF1097A [Gennady and a Card Game] map大法好qwq 枚举每一个的第\(1,2\)位判是否与给定的重复即可 # include < ...
- infiniband RDMA对比
- mvn ssm 异常 org.springframework.beans.factory.BeanCreationException:Error creating bean with name 'multipartResolver'
解决方案: 添加 commons-fileupload-1.2.jar <!-- https://mvnrepository.com/artifact/commons-fileupload/co ...
- python学习:模块(第一节)
1.什么是模块? 如果你从 Python 解释器退出再进入,那么你定义的所有的方法和变量就都消失了.为此 Python 提供了一个办法,把这些定义存放在文件中,为一些脚本或者交互式的解释器实例使用,这 ...
- docker笔记--如何批量删掉已经停止的容器
(以下操作都是在root用户) 方法如下: (1)显示所有容器,过滤出状态为Exited的容器id,然后删除. # for i in `docker ps -a |grep Exited |awk ...
- 配置BeautifulSoup4+lxml+html5lib
序 Beautiful Soup 是一个可以从HTML或XML文件中提取数据的Python库.它能够通过你喜欢的转换器实现惯用的文档导航,查找,修改文档的方式.Beautiful Soup会帮你节省数 ...