
JSP页面验证码实现
首先在JSP页面加上生成图片的链接
<img type="image" src="auth/authCode" id="codeImage" name="codeImage" style="cursor:pointer;"/>,src需要我们自己实现,实现逻辑如下
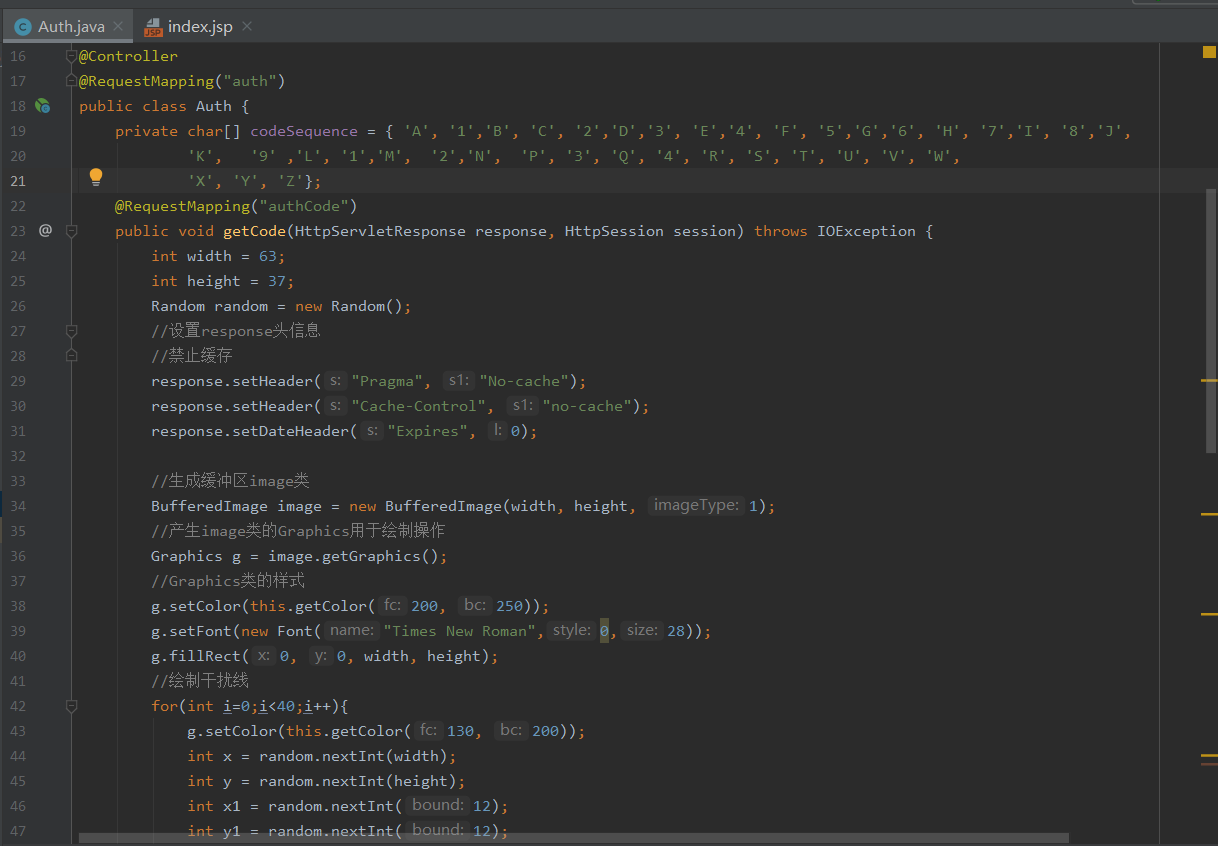
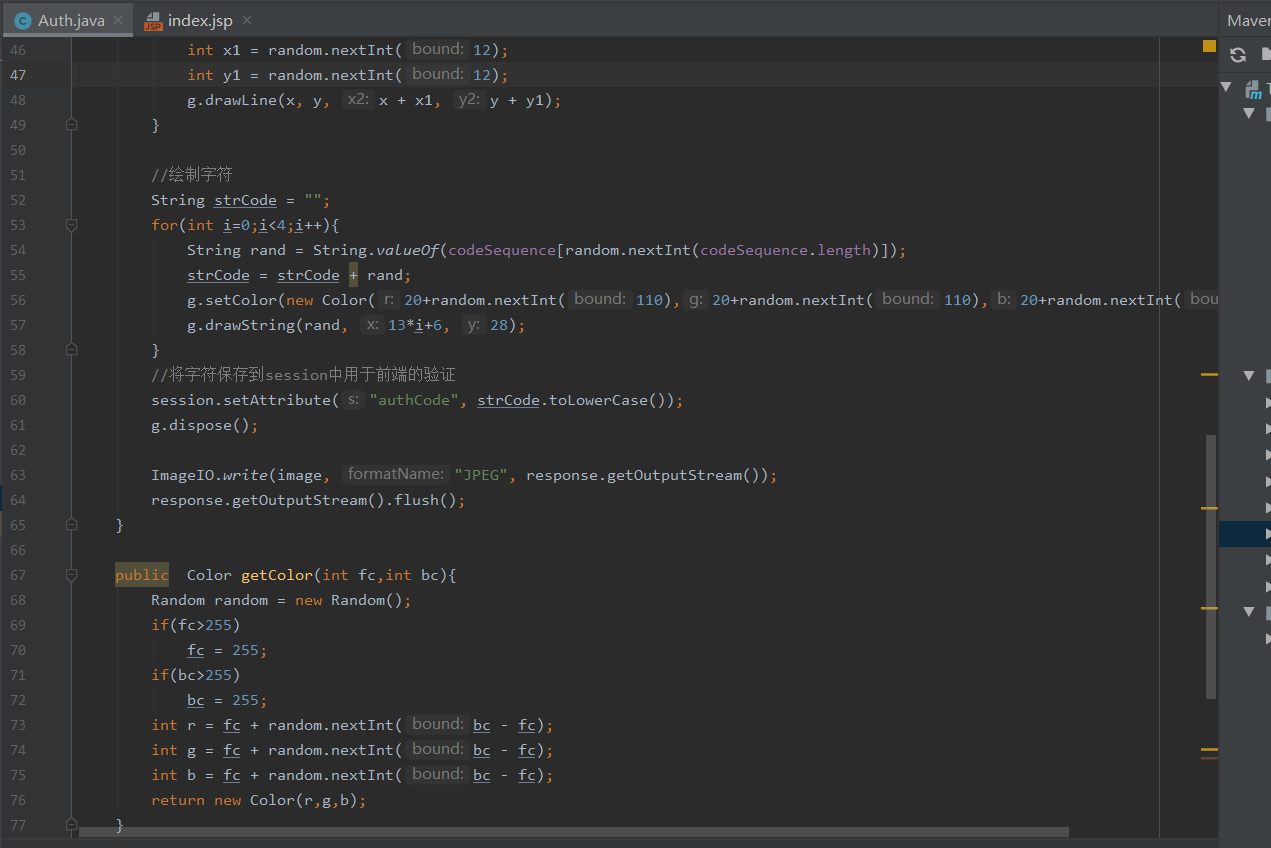
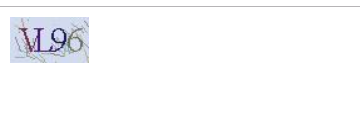
运行后,jsp页面会发出"auth/code"请求生成验证码,并将验证码放置于session中用于验证,运行效果如下
我们在jsp页面上加上输入验证码的输入框及提交按钮,点击按钮后进行验证码判断

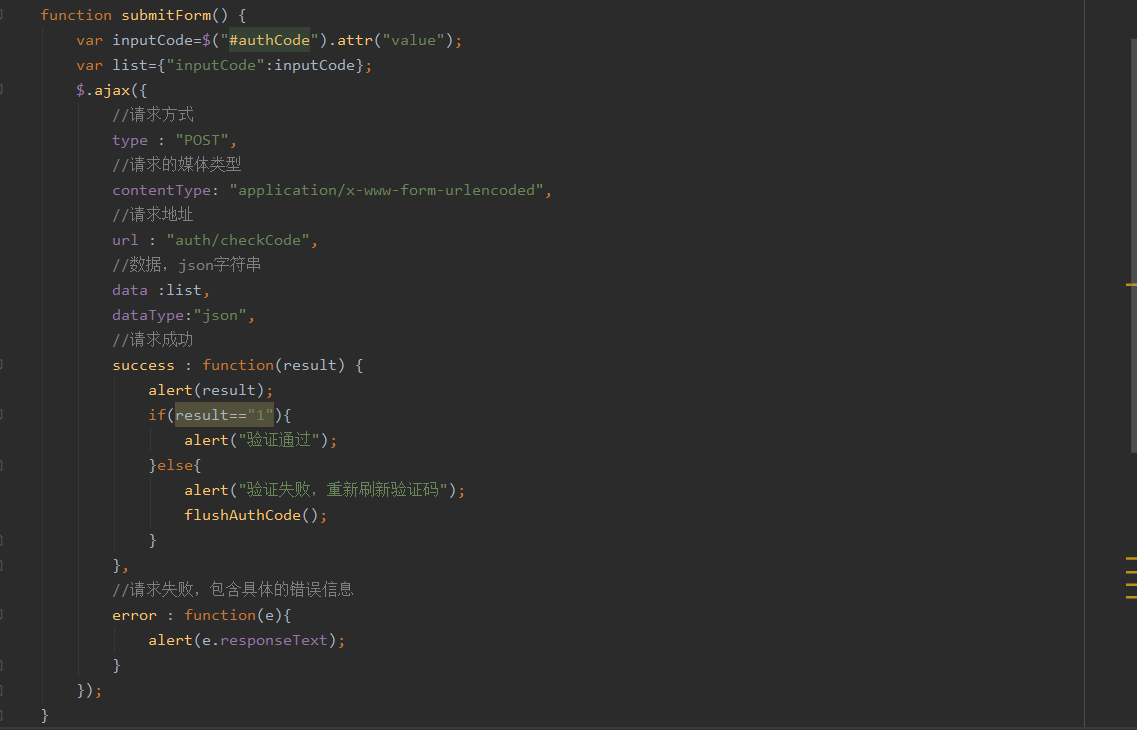
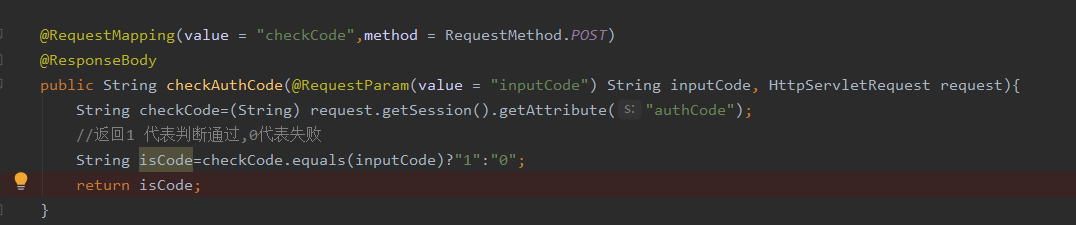
后台会比将收入的验证码与放置于session中的验证码进行比对,并输出结果给JSP页面进行相应处理,当判断为失败,则刷新验证码

最后,相对完整的页面和逻辑都已实现,代码如下
JSP页面代码
<%@ page contentType="text/html;charset=UTF-8" language="java" isELIgnored="false" %>
<%@ page import="java.util.*" %>
<html>
<head>
    <title>Title</title>
</head>
<%--<script src="js/jquery.min.js"></script>--%>
<script src="https://libs.baidu.com/jquery/1.8.3/jquery.js"></script>
<script type="text/javascript">
    function submitForm() {
        var inputCode=$("#authCode").attr("value");
        var list={"inputCode":inputCode};
        $.ajax({
            //请求方式
            type : "POST",
            //请求的媒体类型
            contentType: "application/x-www-form-urlencoded",
            //请求地址
            url : "auth/checkCode",
            //数据,json字符串
            data :list,
            dataType:"json",
            //请求成功
            success : function(result) {
                alert(result);
                if(result=="1"){
                    alert("验证通过");
                }else{
                    alert("验证失败,重新刷新验证码");
                    flushAuthCode();
                }
            },
            //请求失败,包含具体的错误信息
            error : function(e){
                alert(e.responseText);
            }
        });
    }
    function flushAuthCode() {
        //重新刷新验证码
        $("#codeImage").attr("src","auth/authCode?abc="+Math.random());
    }

</script>
<body>

    <form id="authForm" action="checkCode">
        <input type="text" id="authCode" name="authCode">
        <img type="image" src="auth/authCode" id="codeImage" name="codeImage" style="cursor:pointer;"/>
        <button type="button" id="submitBtn" name="submitBtn" value="提交" onclick="submitForm()"/>
    </form>
</body>
</html>

后台代码
package com.founderit.controller;

import org.springframework.stereotype.Controller;
import org.springframework.web.bind.annotation.*;

import javax.imageio.ImageIO;
import javax.servlet.http.HttpServletRequest;
import javax.servlet.http.HttpServletResponse;
import javax.servlet.http.HttpSession;
import java.awt.*;
import java.awt.image.BufferedImage;
import java.io.IOException;
import java.util.Random;

@Controller
@RequestMapping("auth")
public class Auth {
    private char[] codeSequence = { 'A', '1','B', 'C', '2','D','3', 'E','4', 'F', '5','G','6', 'H', '7','I', '8','J',
            'K',   '9' ,'L', '1','M',  '2','N',  'P', '3', 'Q', '4', 'R', 'S', 'T', 'U', 'V', 'W',
            'X', 'Y', 'Z'};
    @RequestMapping("authCode")
    public void getCode(HttpServletResponse response, HttpSession session) throws IOException {
        int width = 63;
        int height = 37;
        Random random = new Random();
        //设置response头信息
        //禁止缓存
        response.setHeader("Pragma", "No-cache");
        response.setHeader("Cache-Control", "no-cache");
        response.setDateHeader("Expires", 0);

        //生成缓冲区image类
        BufferedImage image = new BufferedImage(width, height, 1);
        //产生image类的Graphics用于绘制操作
        Graphics g = image.getGraphics();
        //Graphics类的样式
        g.setColor(this.getColor(200, 250));
        g.setFont(new Font("Times New Roman",0,28));
        g.fillRect(0, 0, width, height);
        //绘制干扰线
        for(int i=0;i<40;i++){
            g.setColor(this.getColor(130, 200));
            int x = random.nextInt(width);
            int y = random.nextInt(height);
            int x1 = random.nextInt(12);
            int y1 = random.nextInt(12);
            g.drawLine(x, y, x + x1, y + y1);
        }

        //绘制字符
        String strCode = "";
        for(int i=0;i<4;i++){
            String rand = String.valueOf(codeSequence[random.nextInt(codeSequence.length)]);
            strCode = strCode + rand;
            g.setColor(new Color(20+random.nextInt(110),20+random.nextInt(110),20+random.nextInt(110)));
            g.drawString(rand, 13*i+6, 28);
        }
        //将字符保存到session中用于前端的验证
        session.setAttribute("authCode", strCode.toLowerCase());
        g.dispose();

        ImageIO.write(image, "JPEG", response.getOutputStream());
        response.getOutputStream().flush();
    }

    public  Color getColor(int fc,int bc){
        Random random = new Random();
        if(fc>255)
            fc = 255;
        if(bc>255)
            bc = 255;
        int r = fc + random.nextInt(bc - fc);
        int g = fc + random.nextInt(bc - fc);
        int b = fc + random.nextInt(bc - fc);
        return new Color(r,g,b);
    }

    @RequestMapping(value = "checkCode",method = RequestMethod.POST)
    @ResponseBody
    public String checkAuthCode(@RequestParam(value = "inputCode") String inputCode, HttpServletRequest request){
        String checkCode=(String) request.getSession().getAttribute("authCode");
        //返回1 代表判断通过,0代表失败
        String isCode=checkCode.equals(inputCode)?"1":"0";
        return isCode;
    }
}
JSP页面验证码实现的更多相关文章
- jsp页面验证码(完整实例)
项目结构如下,MyEclipse中新建一个Web Project,取名servlet 1.src下new一个servlet类 package com.servlet; import java.awt. ...
- jsp页面简单的验证码实现
前段时间赶着结束毕业设计任务,现在完成了.回来补一下设计毕业设计的过程中遇到的问题和解决方案. 为了使小系统更有模有样,这里尝试在登录页面实现验证码功能.现描述一下我的解决方案. 首先看一下实现后的界 ...
- JSP页面生成验证码功能
<%@ page language="java" contentType="text/html; charset=UTF-8" import=" ...
- JSP页面中验证码的调用方法
步骤: 1.首先是要生成验证码 2.对验证码类进行调用:主要 实现的是 将验证码图片 输出到response.getOutputStream()这个输出流中 调用时,可以在页面调用,也可以在serv ...
- 使用jsp生成验证码
在开发中验证码是比较常用到有效防止这种问题对某一个特定注册用户用特定程序暴力破解方式进行不断的登陆尝试的方式. 此演示程序包括三个文件: 1.index.jsp:登录页面 2.image.jsp:生成 ...
- Jsp制作验证码
验证码 验证码(CAPTCHA)是"Completely Automated Public Turing test to tell Computers and Humans Apart&qu ...
- web页面 验证码 生成
web页面 验证码 生成 kaptcha 是一个非常实用的验证码生成工具.有了它,你可以生成各种样式的验证码,因为它是可配置的.kaptcha工作的原理是调用 com.google.code.kapt ...
- jsp页面has already been called for this response错误解决方法。
创建验证码的jsp页面提示错误:has already been called for this response <%@ page contentType="image/jpeg&q ...
- jsp 生成验证码代码
调用方法:在jsp页面用图像标签便可以直接调用如下是标签代码<img border=0 src="image.jsp">,只需要把该代码发在验证码要显示的区域就可以了) ...
随机推荐
- NVIDIA vGPU License服务器搭建详解
当配置有vGPU虚拟机发起License授权请求,授权服务器会根据License中所包含的GRID License版本,加载不同的vGPU驱动(普通驱动和专业Quodra卡驱动).目前vPC和vApp ...
- 机器学习---逻辑回归(二)(Machine Learning Logistic Regression II)
在<机器学习---逻辑回归(一)(Machine Learning Logistic Regression I)>一文中,我们讨论了如何用逻辑回归解决二分类问题以及逻辑回归算法的本质.现在 ...
- 第10组 Alpha冲刺(4/6)
链接部分 队名:女生都队 组长博客: 博客链接 作业博客:博客链接 小组内容 恩泽(组长) 过去两天完成了哪些任务 描述 学习调用中国天气网API,接近实现天气推送功能 对天气推送的形式进行讨论及重确 ...
- 关于Django中的数据库操作API之distinct去重的一个误传
转载自http://www.360doc.com/content/18/0731/18/58287567_774731201.shtml django提供的数据库操作API中的distinct()函数 ...
- linux学习(1):linux命令大全
Linux命令 目录 1 文件管理... 5 1.1 basename. 5 1.2 cat 5 1.3 cd. 5 1.4 ...
- MySql通过数据库文件恢复数据库
以表”Table”为例: 如类型是MyISAM, 数据文件则以”Table.frm””Table.MYD””Table.MYI””三个文件存储于”/data/$databasename/”目录中. 如 ...
- Cache busting
Cache busting https://www.keycdn.com/support/what-is-cache-busting https://curtistimson.co.uk/post/f ...
- Android: 判断当前手机品牌(转)
参考资料 Android判断手机ROM 正文 有时候需要判断手机系统的ROM,检测ROM是MIUI.EMUI还是Flyme,可以使用getprop命令,去系统build.prop文件查找是否有对应属性 ...
- maven引入CDH依赖包
1. POM文件加入仓库 注意:id要和仓库配置中的id一致. <repositories> <repository> <id>cloudera</id> ...
- PLSQL Developer连接远程oracle配置(详细解读)
转自:https://blog.csdn.net/zhige_j/article/details/80832654 一.安装Instant Client 1. 下载Instant Client(轻量级 ...