SpringMVC环境搭建——HelloWorld
1、新建Maven Web 工程;
2、添加相关的依赖包(Spring MVC、tomcat插件等),具体的pom.xml文件如下
<project xmlns="http://maven.apache.org/POM/4.0.0" xmlns:xsi="http://www.w3.org/2001/XMLSchema-instance"

  xsi:schemaLocation="http://maven.apache.org/POM/4.0.0 http://maven.apache.org/maven-v4_0_0.xsd">

  <modelVersion>4.0.0</modelVersion>

  <groupId>com.cvicse.ump</groupId>

  <artifactId>scgs</artifactId>

  <packaging>war</packaging>

  <version>0.0.1-SNAPSHOT</version>

  <name>scgs Maven Webapp</name>

  <url>http://maven.apache.org</url>

  <!-- 全局变量定义处 -->

  <properties>

    <version.spring>4.3.0.RELEASE</version.spring>

  </properties>

  <!-- 项目依赖包 -->

  <dependencies>

      <!-- 单元测试依赖包 -->

    <dependency>

      <groupId>junit</groupId>

      <artifactId>junit</artifactId>

      <version>3.8.1</version>

      <scope>test</scope>

    </dependency>

    <!-- servlet接口包-运行环境包 -->

    <dependency>

        <groupId>javax.servlet</groupId>

        <artifactId>javax.servlet-api</artifactId>

        <version>3.1.0</version>

        <scope>provided</scope>

    </dependency>

     <!-- Spring MVC相关依赖包 -->

     <dependency>

      <groupId>org.springframework</groupId>

      <artifactId>spring-webmvc</artifactId>

      <version>${version.spring}</version>

    </dependency>

    <dependency>

      <groupId>org.springframework</groupId>

      <artifactId>spring-context-support</artifactId>

      <version>${version.spring}</version>

    </dependency>

    <dependency>

      <groupId>org.springframework</groupId>

      <artifactId>spring-jdbc</artifactId>

      <version>${version.spring}</version>

    </dependency>

  </dependencies>

  <build>

    <plugins>

          <!-- 配置java7位编译环境 -->

          <plugin>

                <groupId>org.apache.maven.plugins</groupId>

                <artifactId>maven-compiler-plugin</artifactId>

                <version>2.3.2</version>

                <configuration>

                    <source>1.7</source>

                    <target>1.7</target>

                </configuration>

            </plugin>

            <!-- 添加Tomcat插件 -->

            <plugin>

                <groupId>org.apache.tomcat.maven</groupId>

                <artifactId>tomcat7-maven-plugin</artifactId>

                <version>2.2</version>

                <!-- Config: contextPath and Port (Default - /HelloSpringMVC : 8080) -->

                <!-- <configuration> <path>/</path> <port>8899</port> </configuration> -->

            </plugin>

      </plugins>

    <finalName>scgs</finalName>

  </build>

</project>
3、修改web.xml文件,添加springMVC的servlet,如下
<?xml version="1.0" encoding="UTF-8"?>

<web-app xmlns="http://xmlns.jcp.org/xml/ns/javaee"

         xmlns:xsi="http://www.w3.org/2001/XMLSchema-instance"

         xsi:schemaLocation="http://xmlns.jcp.org/xml/ns/javaee http://xmlns.jcp.org/xml/ns/javaee/web-app_3_1.xsd"

         version="3.1">

  <!-- 当前项目名 -->

  <display-name>Archetype Created Web Application</display-name>

  <servlet>

      <servlet-name>springMVC-dispatcher</servlet-name>

      <servlet-class>org.springframework.web.servlet.DispatcherServlet</servlet-class>

      <init-param>

          <param-name>contextConfigLocation</param-name>

          <param-value>classpath:springmvc/spring-servlet.xml</param-value>

      </init-param>

      <load-on-startup>1</load-on-startup>

  </servlet>

  <servlet-mapping>

      <servlet-name>springMVC-dispatcher</servlet-name>

      <url-pattern>/</url-pattern>

  </servlet-mapping>

</web-app>
4、新建SpringMVC相关的配置,spring-servlet.xml
<?xml version="1.0" encoding="UTF-8"?>

<beans xmlns="http://www.springframework.org/schema/beans"

    xmlns:xsi="http://www.w3.org/2001/XMLSchema-instance" xmlns:context="http://www.springframework.org/schema/context"

    xmlns:mvc="http://www.springframework.org/schema/mvc"

    xsi:schemaLocation="http://www.springframework.org/schema/mvc http://www.springframework.org/schema/mvc/spring-mvc-4.0.xsd

        http://www.springframework.org/schema/beans http://www.springframework.org/schema/beans/spring-beans-4.0.xsd

        http://www.springframework.org/schema/context http://www.springframework.org/schema/context/spring-context-4.0.xsd">

    <!-- 配置自动扫描的包 -->

    <context:component-scan base-package="com.cvicse.ump.scgs.controller"></context:component-scan>

    <!-- 加载静态资源 -->

    <mvc:annotation-driven></mvc:annotation-driven>

    <mvc:default-servlet-handler />

    <!-- 配置视图解析器 -->

    <bean class="org.springframework.web.servlet.view.InternalResourceViewResolver">

        <property name="prefix" value="/WEB-INF/result/"></property>

        <property name="suffix" value=".jsp"></property>

    </bean>

</beans>
5、新建结果展示的界面,hello.jsp
<%@ page language="java" contentType="text/html; charset=UTF-8"
pageEncoding="UTF-8"%>
<!DOCTYPE html PUBLIC "-//W3C//DTD HTML 4.01 Transitional//EN" "http://www.w3.org/TR/html4/loose.dtd">
<html>
<head>
<meta http-equiv="Content-Type" content="text/html; charset=UTF-8">
<title>Result Page</title>
</head>
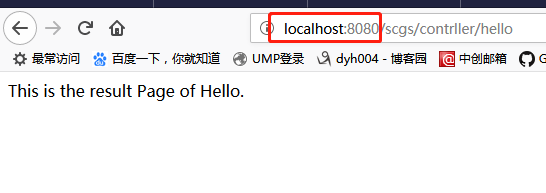
<body> This is the result Page of Hello. </body>
</html>
6、新建控制器,HelloController.java
package com.cvicse.ump.scgs.controller;

import org.springframework.stereotype.Controller;

import org.springframework.web.bind.annotation.RequestMapping;

@Controller("helloController")

@RequestMapping("/contrller")

public class HelloController {

    @RequestMapping("hello")

    public String hello(){

        System.out.println("hello is called..");

        return "hello";

    }

}
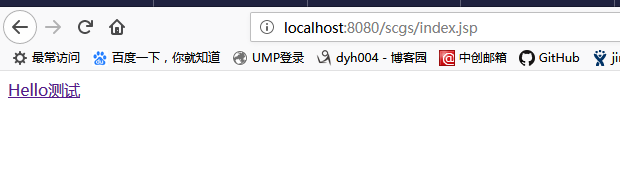
7、新建导航页,index.jsp
<%@ page language="java" contentType="text/html; charset=UTF-8"

    pageEncoding="UTF-8"%>

<!DOCTYPE html PUBLIC "-//W3C//DTD HTML 4.01 Transitional//EN" "http://www.w3.org/TR/html4/loose.dtd">

<html>

<head>

<meta http-equiv="Content-Type" content="text/html; charset=UTF-8">

<title>SpringMVC导航页</title>

</head>

<body>

<a href="contrller/hello">Hello测试</a><br><br>

</body>

</html>
运行效果:
点击超链接,跳转至页面
SpringMVC环境搭建——HelloWorld的更多相关文章
- SpringMVC环境搭建和详解
1.Spring容器和SpringMVC容器是父子容器 1.1 SpringMVC容器可以调用Spring容器中的所有内容 1.2 图示 2.SpringMVC环境搭建 1.导入jar包 2.在web ...
- springmvc环境搭建及实例
一. 软件环境 eclipse-jee-mars-R-win32-x86_64 jdk1.7.0_79 apache-tomcat-7.0.52 spring-framework-3.2.0.RELE ...
- springmvc环境搭建以及常见问题解决
1.新建maven工程 a) 打开eclipse,file->new->project->Maven->Maven Project b) 下一步 c) 选择创建的工程为 ...
- Cordova环境搭建 & HelloWorld
目前的手机APP有三类:原生APP,WebAPP,HybridApp:HybridApp结合了前两类APP各自的优点,越来越流行. Cordova就是一个中间件,让我们把WebAPP打包成Hybrid ...
- spring入门(五)【springMVC环境搭建】
springMVC作为spring的一个WEB组件,是一个MVC的思想,减少了WEB开发的难度,现介绍springMVC环境的搭建,具体的原理放在后面介绍.用过框架的朋友都知道要在WEB项目中使用一个 ...
- jni 入门 android的C编程之旅 --->环境搭建&&helloworld
需要进行jni的开发有一下几个条件: 1:能初步使用C/C++如果不会,请参读 谭浩强的 C编程语言 2:android应用开发已经基本入门,如果没有,请先行学习 这两个条件基本满足后,我们开始了: ...
- SpringMvc环境搭建(配置文件)
在上面的随笔里已经把搭建springmvc环境的基本需要的包都下下来了,拉下来就是写配置文件了. 下面左图是总的结构,右图是增加包 一.最开始当然是web.xml文件了,这是一个总的宏观配置 < ...
- SpringMVC 环境搭建
SpringMVC 框架环境搭建操作步骤如下: 创建动态 Web 项目 配置 Tomcat 服务器 配置 SpringMVC 前端控制器 <?xml version="1.0" ...
- eclipse的springMVC环境搭建并输出HelloWorld
spring简单介绍:https://www.cnblogs.com/package-java/p/10368672.html 1.创建一个Maven Project项目 点击下一步 点击下一步 2. ...
随机推荐
- DMA与cache一致性的问题
Cache和DMA本身似乎是两个毫不相关的事物.Cache被用作CPU针对内存的缓存利用程序的空间局部性和时间局部性原理,达到较高的命中率,从而避免CPU每次都必须要与相对慢速的内存交互数据来提高数据 ...
- 【hexo】03config文件配置详解
YAML 是专门用来写配置文件的语言,非常简洁和强大,我们的配置文件就是这种格式.需要了解的只有: # 我是文配置件的注释 重要提示,例如:"theme: landspace"中冒 ...
- 19LaTeX学习系列之---LaTeX的总结
目录 目录 前言 (一)本系列的章节目录 (二)快速温习LaTeX 1.介绍 2.源文件结构 3.文档的结构 4.字体的设置 5.图片的插入 6.表格的插入 7.数学公式的插入 8.交叉引用与浮动体 ...
- 第 16 章 C 预处理器和 C 库(可变参数:stdarg.h)
/*------------------------------------------------- varargs.c -- use variable number of arguments -- ...
- MyBatis实现模糊查询的几种方式
在学习MyBatis过程中想实现模糊查询,可惜失败了.后来上百度上查了一下,算是解决了.记录一下MyBatis实现模糊查询的几种方式. 数据库表名为test_student,初始化了几条记录,如图: ...
- win10系统安装两个版本的python,该怎么安装Django
最近遇到一个问题,系统上安装了python2,7 和python3.5两个版本,然后使用命令:pip install Django 安装Django后却发现以下情况: Traceback (most ...
- 【转】MySQL 当记录不存在时insert,当记录存在时update
MySQL当记录不存在时insert,当记录存在时更新:网上基本有三种解决方法 第一种: 示例一:insert多条记录 假设有一个主键为 client_id 的 clients 表,可以使用下面的语句 ...
- go标准库的学习-encoding/json
参考https://studygolang.com/pkgdoc 导入方式: import "encoding/json" json包实现了json对象的编解码,参见RFC 462 ...
- Shell脚本开发过程中遇到的问题处理
1. 执行shell脚本报 Unsupported major.minor version 52.0 报错原因:java文件jdk和服务器上的jdk不匹配, 解决方法: a.查看当前服务器用的jdk ...
- ConcurrentHashMap中的putIfAbsent方法的使用以及返回值的含义
public V putIfAbsent(@NotNull K key, @NotNull V value) putIfAbsent方法主要是在向ConcurrentHashMap中添加键—值对的时候 ...