Android 手机卫士--自定义组合控件构件布局结构
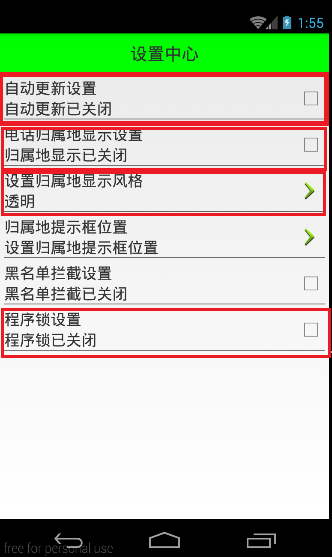
由于设置中心条目中的布局都很类似,所以可以考虑使用自定义组合控件来简化实现
本文地址:http://www.cnblogs.com/wuyudong/p/5909043.html,转载请注明源地址。
自定义组合控件
1.将已经编写好的布局文件,抽取到一个类中去做管理,下次还需要使用此布局结构的时候,直接使用组合控件对应的对象.
2.将组合控件的布局,抽取到单独的一个xml中
新建布局文件:setting_item_view.xml,将上篇文章中布局文件中的代码放进去
<?xml version="1.0" encoding="utf-8"?>

<RelativeLayout xmlns:android="http://schemas.android.com/apk/res/android"

    android:layout_width="match_parent"

    android:layout_height="wrap_content" >

    <RelativeLayout

        android:layout_width="match_parent"

        android:layout_height="wrap_content"

        android:padding="5dp" >

        <TextView

            android:id="@+id/tv_title"

            android:layout_width="wrap_content"

            android:layout_height="wrap_content"

            android:text="自动更新设置"

            android:textColor="#000"

            android:textSize="18sp" />

        <TextView

            android:id="@+id/tv_des"

            android:layout_width="wrap_content"

            android:layout_height="wrap_content"

            android:layout_below="@id/tv_title"

            android:text="自动更新已关闭"

            android:textColor="#000"

            android:textSize="18sp" />

        <CheckBox

            android:id="@+id/cb_box"

            android:layout_width="wrap_content"

            android:layout_height="wrap_content"

            android:layout_alignParentRight="true"

            android:layout_centerVertical="true" />

        <View

            android:layout_width="match_parent"

            android:layout_height="1dp"

            android:layout_below="@id/tv_des"

            android:background="#000" />

    </RelativeLayout>

</RelativeLayout>
3.通过一个单独的类SettingItemView.java,去加载此段布局文件.
package com.wuyudong.mobilesafe.view;

import com.wuyudong.mobilesafe.R;

import android.content.Context;

import android.util.AttributeSet;

import android.view.View;

import android.widget.CheckBox;

import android.widget.RelativeLayout;

import android.widget.TextView;

public class SettingItemView extends RelativeLayout {

    private TextView tv_des;

    private CheckBox cb_box;

    public SettingItemView(Context context) {

        this(context, null);

    }

    public SettingItemView(Context context, AttributeSet attrs) {

        this(context, attrs, 0);

    }

    public SettingItemView(Context context, AttributeSet attrs, int defStyle) {

        super(context, attrs, defStyle);

        // xml-->view 将设置界面的条目转换成view对象

        View.inflate(context, R.layout.setting_item_view, this);

        // 等同于以下两行代码

        /*

         * View view = View.inflate(context, R.layout.setting_item_view, null);

         * this.addView(view);

         */

        //自定义组合控件中的标题描述

        TextView tv_title = (TextView) findViewById(R.id.tv_title);

        tv_des = (TextView) findViewById(R.id.tv_des);

        cb_box = (CheckBox) findViewById(R.id.cb_box);

    }

}
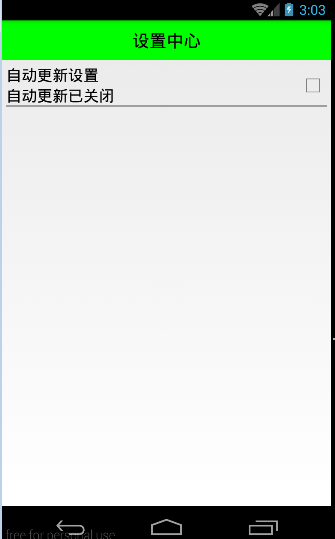
这样只需要简单的几行代码就可以完成布局文件的调用
<?xml version="1.0" encoding="utf-8"?>

<LinearLayout xmlns:android="http://schemas.android.com/apk/res/android"

    android:layout_width="match_parent"

    android:layout_height="match_parent"

    android:orientation="vertical" >

    <TextView

        style="@style/TitleStyle"

        android:text="设置中心" />

    <!--

    <RelativeLayout

        android:layout_width="match_parent"

        android:layout_height="wrap_content"

        android:padding="5dp" >

        <TextView

            android:id="@+id/tv_title"

            android:layout_width="wrap_content"

            android:layout_height="wrap_content"

            android:text="自动更新设置"

            android:textColor="#000"

            android:textSize="18sp" />

        <TextView

            android:id="@+id/tv_des"

            android:layout_width="wrap_content"

            android:layout_height="wrap_content"

            android:layout_below="@id/tv_title"

            android:text="自动更新已关闭"

            android:textColor="#000"

            android:textSize="18sp" />

        <CheckBox

            android:id="@+id/cb_box"

            android:layout_alignParentRight="true"

            android:layout_centerVertical="true"

            android:layout_width="wrap_content"

            android:layout_height="wrap_content" />

        <View

            android:layout_below="@id/tv_des"

            android:background="#000"

            android:layout_width="match_parent"

            android:layout_height="1dp"

            />

    </RelativeLayout>

    -->

    <com.wuyudong.mobilesafe.view.SettingItemView

        android:layout_width="match_parent"

        android:layout_height="wrap_content" >

    </com.wuyudong.mobilesafe.view.SettingItemView>

</LinearLayout>
运行项目后,有如下效果:
Android 手机卫士--自定义组合控件构件布局结构的更多相关文章
- [android] 手机卫士自定义组合控件
设置中心 新建SettingActivity 设置GridView条目的点击事件 调用GridView对象的setOnItemClickListenner()方法,参数:OnItemClickList ...
- [android] 手机卫士自定义滚动控件
TextView控件设置单行显示 android:singleLine=”true” 设置TextView开始的位置显示省略号,android:ellipsize=”start” 设置滚动属性,and ...
- Android自定义控件之自定义组合控件
前言: 前两篇介绍了自定义控件的基础原理Android自定义控件之基本原理(一).自定义属性Android自定义控件之自定义属性(二).今天重点介绍一下如何通过自定义组合控件来提高布局的复用,降低开发 ...
- Android开发之自定义组合控件
自定义组合控件的步骤1.自定义一个View,继承ViewGroup,比如RelativeLayout2.编写组合控件的布局文件,在自定义的view中加载(使用View.inflate())3.自定义属 ...
- Android自定义控件之自定义组合控件(三)
前言: 前两篇介绍了自定义控件的基础原理Android自定义控件之基本原理(一).自定义属性Android自定义控件之自定义属性(二).今天重点介绍一下如何通过自定义组合控件来提高布局的复用,降低开发 ...
- android自定义控件(五) 自定义组合控件
转自http://www.cnblogs.com/hdjjun/archive/2011/10/12/2209467.html 代码为自己编写 目标:实现textview和ImageButton组合, ...
- Android Studio自定义组合控件
在Android的开发中,为了能够服用代码,会把有一定共有特点的控件组合在一起定义成一个自定义组合控件. 本文就详细讲述这一过程.虽然这样的View的组合有一个粒度的问题.粒度太大了无法复用,粒度太小 ...
- Android自定义组合控件详细示例 (附完整源码)
在我们平时的Android开发中,有时候原生的控件无法满足我们的需求,或者经常用到几个控件组合在一起来使用.这个时候,我们就可以根据自己的需求创建自定义的控件了,一般通过继承View或其子类来实现. ...
- Android开发学习笔记-自定义组合控件的过程
自定义组合控件的过程 1.自定义一个View 一般来说,继承相对布局,或者线性布局 ViewGroup:2.实现父类的构造方法.一般来说,需要在构造方法里初始化自定义的布局文件:3.根据一些需要或者需 ...
随机推荐
- 《淘宝技术这十年》之LAMP架构的网站
本文节选自<淘宝技术这十年>一书,子柳(赵超)著,由电子工业出版社出版.作者的系列博文:从P1到P7--我在淘宝这7年 2003年4月7日,马云在杭州成立了一个神秘的组织.他叫来十位员工, ...
- rsync密码使用要注意的几个点
1 客户端和服务端的密码文件不一样 服务端的密码文件格式是: 用户名:密码 比如: yejianfeng:123456 客户端的密码文件格式是: 密码: 比如 123456 所以如果一个机器即 ...
- Java魔法堂:四种引用类型、ReferenceQueue和WeakHashMap
一.前言 JDK1.2以前只提供一种引用类型——强引用 Object obj = new Object(); .而JDK1.2后我们多另外的三个选择分别是软引用 java.lang.ref.SoftR ...
- 关于JQuery(最后一点动画效果*)
1,$(':radio').val(['1','2','3']);//特殊写法,把值为1 2 3的都选中. 2,math.abs(len)取绝对值 3,按钮高亮显示,一般是配置两个按钮,一个普通的,一 ...
- C#调用Java方法(详细实例)
C#可以直接引用C++的DLL和转换JAVA写好的程序.最近由于工作原因接触这方面比较多,根据实际需求,我们通过一个具体例子把一个JAVA方法转换成可以由C#直接调用的DLL C#调用c++ C#调用 ...
- C#利用浏览按钮获得文件路径和文件夹路径
生成文件夹路径 private void btnChoose_Click(object sender, EventArgs e) { using (OpenFileDialog ...
- win10下vs2015创建asp,net core项目并运行在ubuntu14.04下
上文说了.net core程序在win10与ubuntu下运行,用的是示例程序(https://github.com/aspnet/cli-samples),今天用vs2015 构建asp.net c ...
- MacOS下如何进行Git的冲突(Conflict)处理
Git在做merge时经常碰到冲突的问题,多数情况都是用IDE中集成的"解决冲突"工具解决了,但有时不能依赖IDE时,就得回过头来去搞清楚Git的一些基础操作了. mergetoo ...
- myeclipse中的文件内容被覆盖如何恢复
今天无意中,运行文件把原先的文件给覆盖掉了,通过查阅资料发现可以通过这样去恢复 点击被覆盖后的文件------->右击--------->选择replace with------>p ...
- oracle的基本数据类型(转载)
数据类型是在设计表结构中需要定义的,选择适当的数据类型可以节省存储空间,提高运算效率. Oracle数据类型主要包括 1.字符型 适合保存字符串类型的数据,如姓名.地址.简介等等. 如:char(20 ...