windows服务总结
一、创建windows服务项目
创建完成后结构,如:
其中,Program.cs代码:
using System;

using System.Collections.Generic;

using System.Linq;

using System.ServiceProcess;

using System.Text;

namespace WindowsService1

{

    static class Program

    {

        /// <summary>

        /// 应用程序的主入口点。

        /// </summary>

        static void Main()

        {

            ServiceBase[] ServicesToRun;

            ServicesToRun = new ServiceBase[]

            {

                new Service1()

            };

            ServiceBase.Run(ServicesToRun);

        }

    }

}
Service1.cs代码:
using System;

using System.Collections.Generic;

using System.ComponentModel;

using System.Data;

using System.Diagnostics;

using System.Linq;

using System.ServiceProcess;

using System.Text;

namespace WindowsService1

{

    public partial class Service1 : ServiceBase

    {

        public Service1()

        {

            InitializeComponent();

        }

        protected override void OnStart(string[] args)

        {

        }

        protected override void OnStop()

        {

        }

    }

}
此时,Service1.cs设计视图默认属性为:
二、配置windows服务,添加安装程序
(以上时默认初始化展示,为方便演示,下面将服务文件名Service1.cs改为XFKFinanceAccService.cs,服务名称也改成了XFKFinanceAccService)
回到XFKFinanceAccService.cs设计视图,空白处右键==》添加安装程序,如:
可以看到,在ProjectInstaller安装程序文件的设计视图里,有两个名为serviceInstaller1和serviceProcessInstaller1的组件,设置它们的属性,如:

三、编写windows服务代码
服务设置好以后,进入XFKFinanceAccService.cs代码视图,开始实现处理逻辑。
示例一:
using System;

using System.Collections.Generic;

using System.ComponentModel;

using System.Configuration;

using System.Data;

using System.Diagnostics;

using System.Linq;

using System.ServiceProcess;

using System.Text;

using System.Threading;

using XFKFinanceAccountsSys.BussinessLogic;

using XFKFinanceAccountsSys.Common;

namespace XFKFinanceAccountsSys.WindowsService

{

    public partial class XFKFinanceAccService : ServiceBase

    {

        DateTime lastDt = DateTime.Now.AddDays(-1);

        Thread thread = null;

        public XFKFinanceAccService()

        {

            InitializeComponent();

            LogHelper.WriteLog("---初始化windows服务!!!");

        }

        protected override void OnStart(string[] args)

        {

            LogHelper.WriteLog("---启动windows服务!!!");

            thread = new Thread(new ThreadStart(AutoGenElapsed));

            thread.IsBackground = true;

            thread.Start();

        }

        protected override void OnStop()

        {

            LogHelper.WriteLog("Stop");

            if (thread != null)

            {

                if (thread.ThreadState == System.Threading.ThreadState.Running)

                {

                    thread.Abort();

                }

            }

        }

        private void AutoGenElapsed()

        {

            LogHelper.WriteLog("---进入windows服务!!!");

            while (true)

            {

                //服务开始处理时间

                string startTime = ConfigurationManager.AppSettings["StartTime"];

                //每次处理完间隔时间

                int interval = int.Parse(ConfigurationManager.AppSettings["Interval"]);

                try

                {

                    //一天执行一次

                    if (DateTime.Now.DayOfYear == lastDt.DayOfYear + 1)

                    {

                        //到达处理时间时,任务开始处理数据

                        if (DateTime.Now > Convert.ToDateTime(DateTime.Now.ToString("yyyy-MM-dd") + " " + startTime))

                        {

                            /********** 处理逻辑主体 Begin***********/

                            /********** 处理逻辑主体 End***********/

                            //处理完后时间改为当前时间,下一次不再处理

                            lastDt = DateTime.Now;

                        }

                    }

                }

                catch (Exception ex)

                {

                    LogHelper.WriteLog("error" + ex);

                }

                finally

                {

                    Thread.Sleep(interval * 1000);

                }

            }

        }

    }

}
示例二(启用定时器):
using System;

using System.Collections.Generic;

using System.ComponentModel;

using System.Configuration;

using System.Data;

using System.Diagnostics;

using System.Linq;

using System.ServiceProcess;

using System.Text;

using System.Threading;

using XFKFinanceAccountsSys.BussinessLogic;

using XFKFinanceAccountsSys.Common;

namespace XFKFinanceAccountsSys.WindowsService

{

    public partial class XFKFinanceAccService : ServiceBase

    {

        DateTime lastDt = DateTime.Now.AddDays(-1);

        Thread thread = null;

        public XFKFinanceAccService()

        {

            InitializeComponent();

            LogHelper.WriteLog("---初始化windows服务!!!");

            //启用定时器

            System.Timers.Timer timer = new System.Timers.Timer();

            timer.Elapsed += timer_Elapsed;

            timer.Interval = 5000;//每5秒执行一次

            timer.Enabled = true;

        }

        void timer_Elapsed(object sender, System.Timers.ElapsedEventArgs e)

        {

            LogHelper.WriteLog("---进入windows服务!!!");

            //服务开始处理时间

            string startTime = ConfigurationManager.AppSettings["StartTime"];

            //每次处理完间隔时间

            int interval = int.Parse(ConfigurationManager.AppSettings["Interval"]);

            try

            {

                //一天执行一次

                if (DateTime.Now.DayOfYear == lastDt.DayOfYear + 1)

                {

                    //到达处理时间时,任务开始处理数据

                    if (DateTime.Now > Convert.ToDateTime(DateTime.Now.ToString("yyyy-MM-dd") + " " + startTime))

                    {

                        /********** 处理逻辑主体 Begin***********/

                        /********** 处理逻辑主体 End***********/

                        //处理完后时间改为当前时间,下一次不再处理

                        lastDt = DateTime.Now;

                    }

                }

            }

            catch (Exception ex)

            {

                LogHelper.WriteLog("error" + ex);

            }

            finally

            {

                Thread.Sleep(interval * 1000);

            }

        }

        protected override void OnStart(string[] args)

        {

            LogHelper.WriteLog("---启动windows服务!!!");

        }

        protected override void OnStop()

        {

            LogHelper.WriteLog("---停止windows服务!!!");

        }

    }

}
在项目中加入配置文件App.config,需加入下面配置:
我们可以修改程序入口代码,以便可以将服务定制化,如:
using System;

using System.Collections.Generic;

using System.Data;

using System.Linq;

using System.ServiceProcess;

using System.Text;

using System.Windows.Forms;

using XFKFinanceAccountsSys.BussinessLogic;

using XFKFinanceAccountsSys.WindowsService.Model;

namespace XFKFinanceAccountsSys.WindowsService

{

    static class Program

    {

        /// <summary>

        /// 应用程序的主入口点。

        /// </summary>

        [STAThread]

        static void Main(string[] args)

        {

            Application.EnableVisualStyles();

            Application.SetCompatibleTextRenderingDefault(false);

            string dataBaseXmlFile = System.AppDomain.CurrentDomain.BaseDirectory + "../../ConfigXml\\DataBase.xml";

            XFK.AFX1.Common.DB.ORM.Setting.Instance().DatabaseMapFile = dataBaseXmlFile;

            if (args.Length > 0)

            {

		//如果入口参数不为空,则运行服务

                if (args[0].ToLower() == "/s" || args[0].ToLower() == "-s")

                {

                    ServiceBase[] ServicesToRun;

                    ServicesToRun = new ServiceBase[]

                    {

                        new XFKFinanceAccService()

                    };

                    ServiceBase.Run(ServicesToRun);

                }

            }

            else

            {

		//如果入口参数为空,则进入到服务操作界面

                Application.Run(new OperationForm());

            }

        }

    }

}
OperationForm窗口: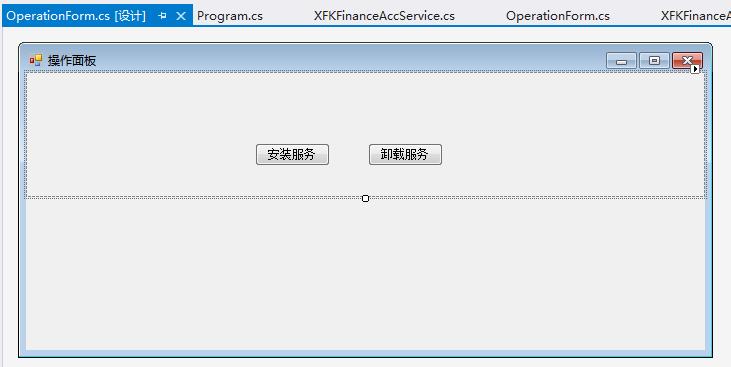
我们可以在这个winform窗体中增加需要的功能,如安装/卸载服务、查看/编辑数据等。
当然,我们也可以用DOS命令安装和卸载服务,如:
安装:
C:\WINDOWS\Microsoft.NET\Framework\v4.0.30319\InstallUtil.exe "E:\WORK\对账系统\XFKFinanceAccountsSys20170627\XFKFinanceAccountsSys.WindowsService\bin\Debug\XFKFinanceAccountsSys.WindowsService.exe"
卸载:
C:\WINDOWS\Microsoft.NET\Framework\v4.0.30319\InstallUtil.exe -U E:\WORK\对账系统\XFKFinanceAccountsSys20170627\XFKFinanceAccountsSys.WindowsService\bin\Debug\XFKFinanceAccountsSys.WindowsService.exe
参考资料:
http://www.cnblogs.com/xujie/p/5695673.html
http://blog.csdn.net/xiaoy_h/article/details/26090277(内存共享)
windows服务总结的更多相关文章
- 基于SignalR实现B/S系统对windows服务运行状态的监测
通常来讲一个BS项目肯定不止单独的一个BS应用,可能涉及到很多后台服务来支持BS的运行,特别是针对耗时较长的某些任务来说,Windows服务肯定是必不可少的,我们还需要利用B/S与windows服务进 ...
- C#创建、安装、卸载、调试Windows Service(Windows 服务)的简单教程
前言:Microsoft Windows 服务能够创建在它们自己的 Windows 会话中可长时间运行的可执行应用程序.这些服务可以在计算机启动时自动启动,可以暂停和重新启动而且不显示任何用户界面.这 ...
- 玩转Windows服务系列汇总
玩转Windows服务系列汇总 创建Windows服务 Debug.Release版本的注册和卸载及其原理 无COM接口Windows服务启动失败原因及解决方案 服务运行.停止流程浅析 Windows ...
- 玩转Windows服务系列——给Windows服务添加COM接口
当我们运行一个Windows服务的时候,一般情况下,我们会选择以非窗口或者非控制台的方式运行,这样,它就只是一个后台程序,没有界面供我们进行交互. 那么当我们想与Windows服务进行实时交互的时候, ...
- 玩转Windows服务系列——使用Boost.Application快速构建Windows服务
玩转Windows服务系列——创建Windows服务一文中,介绍了如何快速使用VS构建一个Windows服务.Debug.Release版本的注册和卸载,及其原理和服务运行.停止流程浅析分别介绍了Wi ...
- 玩转Windows服务系列——Debug、Release版本的注册和卸载,及其原理
Windows服务Debug版本 注册 Services.exe -regserver 卸载 Services.exe -unregserver Windows服务Release版本 注册 Servi ...
- C# 开发windows服务的一些心得
最近在做一个windows服务的项目,发现并解决了一些问题,拿出来和大家分享一下,以下windows服务简称“服务” 文章会在适合时间更新,因为朋友们在不断提出新的意见或思路,感谢-.- 1.服务如何 ...
- 使用topshelf包装redis为windows服务
Redis服务端目前用的是控制台程序运行,部署的时候能作为windows服务后台运行感觉更好.找到一篇文章Running Redis as a Windows Service,利用win ...
- 编写Windows服务疑问1:操作过程
Windows 服务开发平时不太受人关注,毕竟那是高大上的项目类型,平常需求也用不上,很多老掉牙的家伙也只知有WinForm,仍不知有WPF,更别说Windows 服务了,正如陶渊明所写的,“不知有汉 ...
- C# windows服务制作(包括安装及卸载)
开篇语 因工作内容需要做一个windows服务,此前并没有相关经验,所以做了一个demo来跑跑这个梗(高手跳过,需要的来踩)- 效果如下:打开服务,可以找到我们新增的一个windows服务,这个dem ...
随机推荐
- [MyBatis]完整MyBatis CRUD工程
下载地址:https://files.cnblogs.com/files/xiandedanteng/Person191005.rar pom.xml:这个文件主要是引入依赖 <project ...
- 用hugo搭建个人博客
这几天研究了用hugo搭建个人博客. 简单的整理了一下. 1.安装hugo(windows 请查看官网介绍 https://gohugo.io/getting-started/installing/) ...
- File Zilla连接Ubuntu 失败
一.SFTP方式连接失败 站点配置 连接失败 二.FTP连接方式失败 站点配置 连接失败
- React Native常用第三方汇总
React Native 项目常用第三方组件汇总: react-native-animatable 动画 react-navigation github : https://reactnavigat ...
- 简单wait(),notify()方法
1.两个类public class Name{ public static void main(String[] args) throws InterruptedException { User us ...
- Linux显存占用无进程清理方法(附批量清理命令)
在跑TensorFlow.pytorch之类的需要CUDA的程序时,强行Kill掉进程后发现显存仍然占用,这时候可以使用如下命令查看到top或者ps中看不到的进程,之后再kill掉: fuser -v ...
- java-创建对象实例
1.A a = new A(); 2.Class class = B.Class; B b = class .newInstance();
- 刀塔OMG塔防1.23单机版使用方法
使用方法1.确保魔兽的版本为1.26(低版本会报错),如果版本不对用附件中的版本转换器转一下2.把 omg.w3x 复制到 魔兽的MAPS文件夹 WarcraftIII 游戏根目录\Maps3.双击运 ...
- 一些常见的MySQL配置
目录 配置 参考 配置 [mysqld] port = 3306 socket = /mysql/log/mysql_3306.sock # mysql的目录(即mysql的文件所在目录) # bas ...
- 《基于TCP交换的电路交换与分组交换融合方法》读书笔记
简介 在论文<Is IP going to take over the world (of communications)?>中作者对IP相关的一些说法(假设)提出了质疑,并得出结论:虽然 ...