车脸检测 Adaboost 检测过程
上一节中我介绍了如何使用Opencv自带的opencv_traincascade.exe来做训练,接下来介绍如何使用训练生成的cascade.xml模型文件来检测车脸。
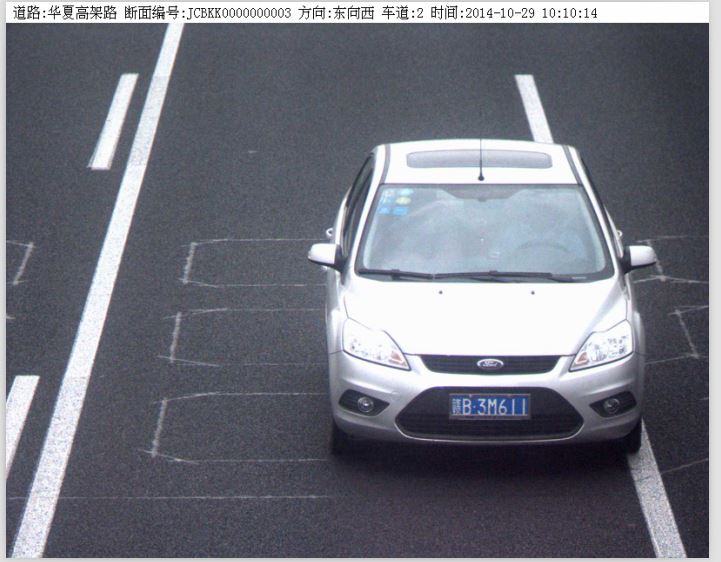
首先需要说明的是我这里的训练数据是卡口数据是在监控下面的照片,主要为了截取卡口摄像头拍摄下的照片的车脸部分,如下图是待检测图像:
这里主要基于了opencv中自带的检测函数,可以对目标物检测有一个较好的认识,读者可以用cmake生成Opencv的源码工程来细看具体实现细节(Cmake真是个神器)。这里用到了timer头文件,可以计算平均的检测时间。
一下是主要的代码部分,程序可以输出定位出来的坐标到txt文件中,同时也可以通过开关用imshow显示具体的截取效果。
给出工程链接github工程链接此处有链接!!
我的车是数据大部分都是如下,是卡口监控的拍摄图片
截出的车脸示意图,也可以用绿线在原图上标出,代码中已经将ROI部分截出,以下是代码部分。

// facedetection.cpp : 定义控制台应用程序的入口点。
#include<opencv/cv.h>
#include<opencv2/core/core.hpp>
#include<opencv2/highgui/highgui.hpp>
#include<opencv2/opencv.hpp>
#include <opencv2/opencv.hpp>
#include <stdio.h>
#include <stdlib.h>
#include <string>
#include <assert.h>
#include <math.h>
#include <float.h>
#include <limits.h>
#include <time.h>
#include <ctype.h>
#include<vector>
#include<fstream>
#include<sstream>
#include<iostream>
#include "timer.h"
using namespace std;
using namespace cv;
vector<string> testSamples;
cv::CascadeClassifier cascade;
const int detectSizeX = 320;//用来标明是将图缩放到在320*240
const int detectSizeY = 240;
const int detectRecXStart = 80;//检测窗口的起始大小
const int detectRecYStart = 80;
const int detectRecYEnd = 220;//检测窗口的终止大小
//const int detectRecYEnd = 220;
//***************************************************************
// 名称: find_overlap
// 功能: 计算矩形框的overlap
// 权限: public
// 返回值: float
// 参数: Rect x
// 参数: Rect y
//***************************************************************
float find_overlap(Rect x,Rect y)//判断框出图像的重叠面积
{
float endx=max(x.x+x.width,y.x+y.width);
float startx=min(x.x,y.x);
float endy=max(x.y+x.height,y.y+y.height);
float starty=min(x.y,y.y);
float w=x.width+y.width-(endx-startx);
float h=x.height+y.height-(endy-starty);
if (w<=0||h<=0)
return 0;
else
{
float area=w*h;
return area/(x.width*x.height);
}
}
//***************************************************************
// 名称: readFileList
// 功能: 待检测的图像列表
// 权限: public
// 返回值: void
// 参数: string testImgFile txt文件包含待检测图像
// 参数: string basePath 基地址,用来连接到txt中的相对位置构成绝对地址
//***************************************************************
//void readFileList(string testImgFile = "D:\\DataSet\\CarFaceTestDataSet\\CarFace_ImageList.txt", string basePath="")
void readFileList(string testImgFile, string basePath)
{
string buffer;
std::ifstream fIn(testImgFile.c_str());
while (fIn)
{
if (getline(fIn,buffer))
{
testSamples.push_back(basePath + buffer);
}
}
cout<<"Load FileList Successfully"<<endl;
}
//***************************************************************
// 名称: loadCascadeModel
// 功能: 载入cascade模型文件
// 权限: public
// 返回值: void
// 参数: string xmlPath
//***************************************************************
void loadCascadeModel(string xmlPath)
{
cascade.load(xmlPath.c_str());
if (!cascade.empty())
{
cout<<"Load Cascade Model Successfully"<<endl;
}
}
void detecctObject(string savePath)
{
TM_STATE timer;//用来计算检测的时间
TM_COUNTER start, end;
double duration, max_duration, total_duration, average_duration;
max_duration = total_duration = 0.;
ofstream fout;
fout.open(savePath + "\\cascade_detect_result.txt");//存储框出图像的坐标文件名
int num=0;
for (int i = 0; i < testSamples.size(); i++)
{
start_timer (&timer, &start);//启动计时器
IplImage * img = cvLoadImage(testSamples[i].c_str());
vector<cv::Rect> detectedRect;//存储检测到的图像
IplImage * copyImg = cvCreateImage(cvSize(detectSizeX,detectSizeY), 8, 3);//图像缩放到detectSizeX*detectSizeY,自己设置合适的数值,不能再原始图上检测,太慢,还会引入误差
cvResize(img, copyImg,1 );
IplImage * grayImage = cvCreateImage(cvGetSize(copyImg), 8, 1);
cvCvtColor(copyImg, grayImage, CV_BGR2GRAY);//转换到灰度图检测
detectedRect.clear();
cascade.detectMultiScale(grayImage, detectedRect, 1.1, 3, CV_HAAR_SCALE_IMAGE | CV_HAAR_DO_CANNY_PRUNING, cvSize(detectRecXStart, detectRecXStart), cvSize(detectRecYEnd, detectRecYEnd));//检测函数
fout<<testSamples[i].c_str()<<" "<<detectedRect.size()<<" ";
cout<<testSamples[i].c_str()<<" "<<detectedRect.size()<<" ";
for (vector<cv::Rect>::iterator k= detectedRect.begin(); k != detectedRect.end(); k++)
{
Rect r = *k;
vector<cv::Rect>::iterator j= detectedRect.begin();
for (j= detectedRect.begin(); j != detectedRect.end(); j++)
{
if ( k != j && (r & *j) == r)//用来消除嵌套的,一个矩形在另一个矩形框中的情况
break;
if(find_overlap(*k, *j)>0.6 && k->height*k->width < j->height*j->width)//用来消除检测中两个宽重叠超过0.6的框,一般视为误检测
break;
}
if(j ==detectedRect.end())
{
//此处将框出的图像放大了0.03倍 使用画矩阵函数可以看到
//cvRectangle(img, cvPoint(k->x*img->width/detectSizeX-k->width*img->width/detectSizeX*0.03, k->y*img->width/detectSizeX-k->width*img->width/detectSizeX*0.03), cvPoint(k->x*img->width/detectSizeX + k->width*img->width/detectSizeX + k->width*img->width/detectSizeX*0.03, k->y*img->width/detectSizeX + k->height*img->width/detectSizeX +k->width*img->width/detectSizeX*0.03),Scalar(0, 255, 0));
//cvRectangle(img, cvPoint(k->x*img->width/detectSizeX, k->y*img->width/detectSizeX), cvPoint(k->x*img->width/detectSizeX + k->width*img->width/detectSizeX, k->y*img->width/detectSizeX + k->height*img->width/detectSizeX),Scalar(0, 255, 0));
fout << k->x*img->width/detectSizeX-k->width*img->width/detectSizeX*0.03 << " "<<k->y*img->height/detectSizeY-k->width*img->width/detectSizeX*0.03<<" "<<k->width*img->width/detectSizeX + k->width*img->width/detectSizeX*0.06<<" "<<k->height*img->height/detectSizeY + k->width*img->width/detectSizeX*0.06<<" ";
cout << k->x*img->width/detectSizeX-k->width*img->width/detectSizeX*0.03 << " "<<k->y*img->height/detectSizeY-k->width*img->width/detectSizeX*0.03<<" "<<k->width*img->width/detectSizeX + k->width*img->width/detectSizeX*0.06<<" "<<k->height*img->height/detectSizeY + k->width*img->width/detectSizeX*0.06<<" ";
//用来截取车脸设定ROI
cvSetImageROI(img, cvRect(k->x*img->width/detectSizeX - k->width*img->width/detectSizeX*0.03,k->y*img->height/detectSizeY - k->width*img->width/detectSizeX*0.03,k->width*img->width/detectSizeX+ k->width*img->width/detectSizeX*0.06,k->width*img->width/detectSizeX+ k->width*img->width/detectSizeX*0.06));
//cvSetImageROI(img, cvRect(k->x*img->width/detectSizeX,k->y*img->height/detectSizeY,k->width*img->width/detectSizeX,k->width*img->width/detectSizeX));
string filePartName=testSamples[i].substr(testSamples[i].find_first_of("/\\") + 1 ,testSamples[i].find(".jpg") -testSamples[i].find_last_of("/\\") - 1);
std::stringstream ss;
string numstr;
ss<<num;
ss>>numstr;
num++;
string name=savePath+filePartName+"_"+numstr+".jpg";//存储图像命名
cout<<name<<endl;
cvSaveImage(name.c_str(),img);
}
}
fout <<endl;
cout<<endl;
stop_timer (&end);
duration = elapsed_time (&timer, &start, &end);
if (duration > max_duration)
max_duration = duration;
total_duration += duration;
cout<<"duration"<<duration<<" max_duration"<<max_duration<<" total_duration"<<total_duration<<endl;
////显示窗口
cvNamedWindow("output");
cvShowImage("output",copyImg);
cvShowImage("output",img);
waitKey(0);
cvReleaseImage(&img);
cvReleaseImage(&grayImage);
cvReleaseImage(©Img);
}
fout.close();
}
void main ()
{
string testImgFile = "D:\\DataSet\\CarFaceTestDataSet\\CarFace_ImageList.txt";
string basePath="";
string xmlPath = "D:\\WorkSpace\\VS_Projects\\facedetection\\cascade.xml";
string savePath = "D:\\DataSet\\CarFaceTestDataSet\\result";
readFileList(testImgFile,basePath);
loadCascadeModel(xmlPath);
detecctObject(savePath);
}
车脸检测 Adaboost 检测过程的更多相关文章
- 【图像处理】Haar Adaboost 检测自定义目标(视频车辆检测算法代码)
阅读须知 本博客涉及到的资源: 正样本:http://download.csdn.net/detail/zhuangxiaobin/7326197 负样本:http://download.csdn.n ...
- OpenCV:OpenCV目标检测Adaboost+haar源代码分析
使用OpenCV作图像检测, Adaboost+haar决策过程,其中一部分源代码如下: 函数调用堆栈的底层为: 1.使用有序决策桩进行预测 template<class FEval> i ...
- (77)zabbix主动、被动检测的详细过程与区别
zabbix agent检测分为主动(agent active)和被动(agent)两种形式,主动与被动的说法均是相对于agent来讨论的.简单说明一下主动与被动的区别如下: 主动:agent请求se ...
- [DeeplearningAI笔记]卷积神经网络3.1-3.5目标定位/特征点检测/目标检测/滑动窗口的卷积神经网络实现/YOLO算法
4.3目标检测 觉得有用的话,欢迎一起讨论相互学习~Follow Me 3.1目标定位 对象定位localization和目标检测detection 判断图像中的对象是不是汽车--Image clas ...
- 【python+opencv】直线检测+圆检测
Python+OpenCV图像处理—— 直线检测 直线检测理论知识: 1.霍夫变换(Hough Transform) 霍夫变换是图像处理中从图像中识别几何形状的基本方法之一,应用很广泛,也有很多改进 ...
- 人脸检测----Adaboost学习方法
有了haar特征,有了提升性能的积分图,是不是已经可以很好的解决人脸检测问题了?答案是:no. 因为,计算每一个特征值的时候速度都大幅提升了,但是,一个小小的24*24是人脸图像根据不同的位置, 以及 ...
- Faster R-CNN:详解目标检测的实现过程
本文详细解释了 Faster R-CNN 的网络架构和工作流,一步步带领读者理解目标检测的工作原理,作者本人也提供了 Luminoth 实现,供大家参考. Luminoth 实现:https:// ...
- 【3D】PoseCNN姿态检测网络复现过程记录
最近在研究室内6D姿态检测相关问题,计划在PoseCNN网络基础上进行改进实现.但是在第一步的复现过程中踩了无数的坑,最终成功运行了demo,但目前数据集train还是遇到了一些问题.有问题欢迎一起交 ...
- 学习OpenCV——行人检测&人脸检测(总算运行出来了)
之前运行haar特征的adaboost算法人脸检测一直出错,加上今天的HOG&SVM行人检测程序,一直报错. 今天总算发现自己犯了多么白痴的错误——是因为外部依赖项lib文件没有添加完整,想一 ...
随机推荐
- idea中maven项目xml资源文件无法读取
解决方法:编辑pom.xml文件 添加如下标签 <build> <resources> <resource> <directory>src/main/j ...
- Android5.0新特性——图片和颜色(drawable)
图片和颜色 tint属性 tint属性一个颜色值,可以对图片做颜色渲染,我们可以给view的背景设置tint色值,给ImageView的图片设置tint色值,也可以给任意Drawable或者NineP ...
- 最近提交并被合并的 jDiameter pull request 31 解决的问题
使用过程中发现的问题都提交并合并了,应该会出现在1.7.0版本中: https://github.com/RestComm/jdiameter/pull/31 修复多个超时事件同时发生的问题. 修复B ...
- C#生成条形码 Code128算法
条形有很多种,Code128是比较常用的一种,是一种高密度条码, CODE128 码可表示从 ASCII 0 到ASCII 127 共128个字符,故称128码.其中包含了数字.字母和符号字符. Co ...
- 一些js小题(一)
一些js小题,掌握这些对于一些常见的面试.笔试题应该很有帮助: var a=10; function aa(){ alert(a); } function bb(){ aa(); } bb();//1 ...
- WPF下递归生成树形数据绑定到TreeView上
最终效果图:(用于学习类的效果 图片丑了点,看官莫怪) 新建窗体 然后在前端适当位置插入如下代码: <TreeView x:Name="> <TreeView.ItemTe ...
- ArcGIS中定义图框样式
ArcGIS系统中的样式可能不能满足实际生产需要,为了实现快速制图,可自定义一些样式,以便重复利用. 安装字符 因为样式中定义了自定义的符号,这些符号都打包到字体中,所以在使用样式之前,必须安装字体文 ...
- 实验12:Problem D: 判断两个圆之间的关系
Home Web Board ProblemSet Standing Status Statistics Problem D: 判断两个圆之间的关系 Problem D: 判断两个圆之间的关系 T ...
- Android使用layer-list实现三面边框
layer-list可以将多个图片或形状按照顺序层叠起来 <?xml version="1.0" encoding="utf-8"?> <la ...
- Java从零开始学四十二(DOM解析XML)
一.DOM解析XML xml文件 favorite.xml <?xml version="1.0" encoding="UTF-8" standalone ...