SpringBoot进阶教程(八十二)Spring Security图形验证码
在之前的博文《SpringBoot进阶教程(八十)Spring Security》中,已经介绍了在Spring Security中如何基于formLogin认证、基于HttpBasic认证和自定义用户名和密码。这篇文章,我们将介绍自定义登录界面的登录验证方式。在上一篇博文《SpringBoot进阶教程(八十一)Spring Security自定义认证》中,已经介绍了如何实现Spring Security自定义认证。
v生成图形验证码
        <dependency>

            <groupId>org.springframework.social</groupId>

            <artifactId>spring-social-config</artifactId>

            <version>1.1.6.RELEASE</version>

        </dependency>
/**

 * @Author chen bo

 * @Date 2023/12

 * @Des

 */

@Data

public class ImageCode {

    /**

     * image图片

     */

    private BufferedImage image;

    /**

     * 验证码

     */

    private String code;

    /**

     * 过期时间

     */

    private LocalDateTime expireTime;

    public ImageCode(BufferedImage image, String code, int expireIn) {

        this.image = image;

        this.code = code;

        this.expireTime = LocalDateTime.now().plusSeconds(expireIn);

    }

    /**

     * 判断验证码是否已过期

     * @return

     */

    public boolean isExpire() {

        return LocalDateTime.now().isAfter(expireTime);

    }

}
编写接口,返回图形验证码:
/**

 * @Author chen bo

 * @Date 2023/12

 * @Des

 */

@RestController

public class ImageController {

    public final static String SESSION_KEY_IMAGE_CODE = "SESSION_VERIFICATION_CODE";

    private SessionStrategy sessionStrategy = new HttpSessionSessionStrategy();

    @GetMapping("/code/image")

    public void createCode(HttpServletRequest request, HttpServletResponse response) throws IOException {

        ImageCode imageCode = createImageCode();

        sessionStrategy.setAttribute(new ServletWebRequest(request), SESSION_KEY_IMAGE_CODE, imageCode);

        ImageIO.write(imageCode.getImage(), "jpeg", response.getOutputStream());

    }

    private ImageCode createImageCode() {

        // 验证码图片宽度

        int width = 100;

        // 验证码图片长度

        int height = 36;

        // 验证码位数

        int length = 4;

        // 验证码有效时间 60s

        int expireIn = 60;

        BufferedImage image = new BufferedImage(width, height, BufferedImage.TYPE_INT_RGB);

        Graphics graphics = image.getGraphics();

        Random random = new Random();

        graphics.setColor(getRandColor(200, 500));

        graphics.fillRect(0, 0, width, height);

        graphics.setFont(new Font("Times New Roman", Font.ITALIC, 20));

        graphics.setColor(getRandColor(160, 200));

        for (int i = 0; i < 155; i++) {

            int x = random.nextInt(width);

            int y = random.nextInt(height);

            int xl = random.nextInt(12);

            int yl = random.nextInt(12);

            graphics.drawLine(x, y, x + xl, y + yl);

        }

        StringBuilder sRand = new StringBuilder();

        for (int i = 0; i < length; i++) {

            String rand = String.valueOf(random.nextInt(10));

            sRand.append(rand);

            graphics.setColor(new Color(20 + random.nextInt(110), 20 + random.nextInt(110), 20 + random.nextInt(110)));

            graphics.drawString(rand, 13 * i + 6, 16);

        }

        graphics.dispose();

        return new ImageCode(image, sRand.toString(), expireIn);

    }

    private Color getRandColor(int fc, int bc) {

        Random random = new Random();

        if (fc > 255)

            fc = 255;

        if (bc > 255)

            bc = 255;

        int r = fc + random.nextInt(bc - fc);

        int g = fc + random.nextInt(bc - fc);

        int b = fc + random.nextInt(bc - fc);

        return new Color(r, g, b);

    }

}
org.springframework.social.connect.web.HttpSessionSessionStrategy对象封装了一些处理Session的方法,包含了setAttribute、getAttribute和removeAttribute方法,具体可以查看该类的源码。使用sessionStrategy将生成的验证码对象存储到Session中,并通过IO流将生成的图片输出到登录页面上。
v改造登录页面
在上一篇博文《SpringBoot进阶教程(八十一)Spring Security自定义认证》中的"重写form登录页",已经创建了login.html,在login.html中添加如下代码:
        <span style="display: inline">

            <input type="text" name="请输入验证码" placeholder="验证码" required="required"/>

            <img src="/code/image"/>

        </span>
img标签的src属性对应ImageController的createImageCode方法。
v认证流程添加验证码效验
在校验验证码的过程中,可能会抛出各种验证码类型的异常,比如“验证码错误”、“验证码已过期”等,所以我们定义一个验证码类型的异常类:
/**

 * @Author chen bo

 * @Date 2023/12

 * @Des

 */

public class ValidateCodeException extends AuthenticationException {

    private static final long serialVersionUID = 1715361291615299823L;

    public ValidateCodeException(String explanation) {

        super(explanation);

    }

}
注意:这里继承的是AuthenticationException而不是Exception。
Spring Security实际上是由许多过滤器组成的过滤器链,处理用户登录逻辑的过滤器为UsernamePasswordAuthenticationFilter,而验证码校验过程应该是在这个过滤器之前的,即只有验证码校验通过后才去校验用户名和密码。由于Spring Security并没有直接提供验证码校验相关的过滤器接口,所以我们需要自己定义一个验证码校验的过滤器ValidateCodeFilter:
/**

 * @Author chen bo

 * @Date 2023/12

 * @Des

 */

@Component

public class ValidateCodeFilter extends OncePerRequestFilter {

    @Autowired

    private MyAuthenticationFailureHandler myAuthenticationFailureHandler;

    private SessionStrategy sessionStrategy = new HttpSessionSessionStrategy();

    @Override

    protected void doFilterInternal(HttpServletRequest httpServletRequest, HttpServletResponse httpServletResponse, FilterChain filterChain) throws ServletException, IOException {

        if ("/login".equalsIgnoreCase(httpServletRequest.getRequestURI())

                && "post".equalsIgnoreCase(httpServletRequest.getMethod())) {

            try {

                validateCode(new ServletWebRequest(httpServletRequest));

            } catch (ValidateCodeException e) {

                myAuthenticationFailureHandler.onAuthenticationFailure(httpServletRequest, httpServletResponse, e);

                return;

            }

        }

        filterChain.doFilter(httpServletRequest, httpServletResponse);

    }

    private void validateCode(ServletWebRequest servletWebRequest) throws ServletRequestBindingException, ValidateCodeException {

        ImageCode codeInSession = (ImageCode) sessionStrategy.getAttribute(servletWebRequest, ImageController.SESSION_KEY_IMAGE_CODE);

        String codeInRequest = ServletRequestUtils.getStringParameter(servletWebRequest.getRequest(), "imageCode");

        if (StringUtils.isEmpty(codeInRequest)) {

            throw new ValidateCodeException("验证码不能为空!");

        }

        if (codeInSession == null) {

            throw new ValidateCodeException("验证码不存在!");

        }

        if (codeInSession.isExpire()) {

            sessionStrategy.removeAttribute(servletWebRequest, ImageController.SESSION_KEY_IMAGE_CODE);

            throw new ValidateCodeException("验证码已过期!");

        }

        if (!codeInRequest.equalsIgnoreCase(codeInSession.getCode())) {

            throw new ValidateCodeException("验证码不正确!");

        }

        sessionStrategy.removeAttribute(servletWebRequest, ImageController.SESSION_KEY_IMAGE_CODE);

    }

}
ValidateCodeFilter继承了org.springframework.web.filter.OncePerRequestFilter,该过滤器只会执行一次。ValidateCodeFilter继承了org.springframework.web.filter.OncePerRequestFilter,该过滤器只会执行一次。
在doFilterInternal方法中我们判断了请求URL是否为/login,该路径对应登录form表单的action路径,请求的方法是否为POST,是的话进行验证码校验逻辑,否则直接执行filterChain.doFilter让代码往下走。当在验证码校验的过程中捕获到异常时,调用Spring Security的校验失败处理器AuthenticationFailureHandler进行处理。
我们分别从Session中获取了ImageCode对象和请求参数imageCode(对应登录页面的验证码input框name属性),然后进行了各种判断并抛出相应的异常。当验证码过期或者验证码校验通过时,我们便可以删除Session中的ImageCode属性了。
v更新配置类
验证码校验过滤器定义好了,怎么才能将其添加到UsernamePasswordAuthenticationFilter前面呢?很简单,只需要在BrowserSecurityConfig的configure方法中添加些许配置即可,顺便配置验证码请求不配拦截: "/code/image"。
/**

 * @Author chen bo

 * @Date 2023/12

 * @Des

 */

@Configuration

public class SecurityConfig extends WebSecurityConfigurerAdapter {

    @Override

    protected void configure(HttpSecurity http) throws Exception {

        http.addFilterBefore(new ValidateCodeFilter(), UsernamePasswordAuthenticationFilter.class) //添加验证码效验过滤器

                .formLogin() // 表单登录

                .loginPage("/login.html")       // 登录跳转url

//                .loginPage("/authentication/require")

                .loginProcessingUrl("/login")   // 处理表单登录url

//                .successHandler(authenticationSuccessHandler)

                .failureHandler(new MyAuthenticationFailureHandler())

                .and()

                .authorizeRequests()            // 授权配置

                .antMatchers("/login.html", "/css/**", "/authentication/require", "/code/image").permitAll()  // 无需认证

                .anyRequest()                   // 所有请求

                .authenticated()                // 都需要认证

                .and().csrf().disable();

    }

    @Bean

    public PasswordEncoder passwordEncoder() {

        return new BCryptPasswordEncoder();

    }

}
上面代码中,我们注入了ValidateCodeFilter,然后通过addFilterBefore方法将ValidateCodeFilter验证码校验过滤器添加到了UsernamePasswordAuthenticationFilter前面。
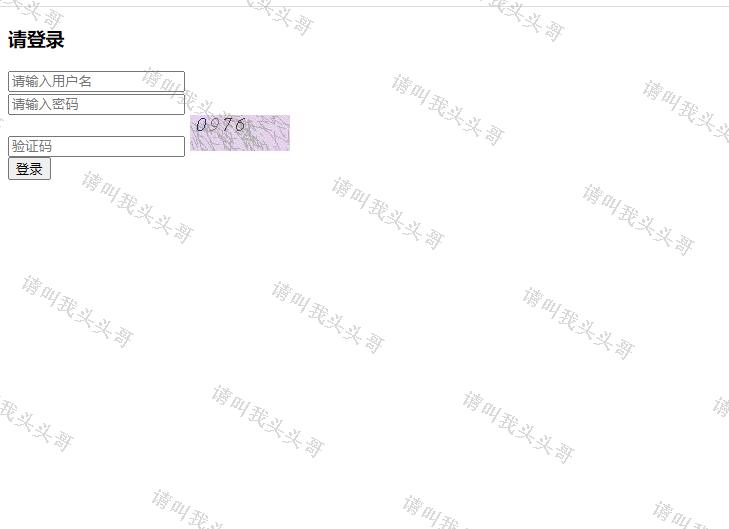
v运行效果图
其他参考/学习资料:
- https://www.cnblogs.com/kikochz/p/12895842.html
- https://www.cnblogs.com/fanqisoft/p/10630556.html
- https://www.jianshu.com/p/5a83e364869c
v源码地址
https://github.com/toutouge/javademosecond/tree/master/security-demo
作 者:请叫我头头哥
出 处:http://www.cnblogs.com/toutou/
关于作者:专注于基础平台的项目开发。如有问题或建议,请多多赐教!
版权声明:本文版权归作者和博客园共有,欢迎转载,但未经作者同意必须保留此段声明,且在文章页面明显位置给出原文链接。
特此声明:所有评论和私信都会在第一时间回复。也欢迎园子的大大们指正错误,共同进步。或者直接私信我
声援博主:如果您觉得文章对您有帮助,可以点击文章右下角【推荐】一下。您的鼓励是作者坚持原创和持续写作的最大动力!
#comment_body_3242240 { display: none }
SpringBoot进阶教程(八十二)Spring Security图形验证码的更多相关文章
- SpringBoot进阶教程(六十二)整合Kafka
在上一篇文章<Linux安装Kafka>中,已经介绍了如何在Linux安装Kafka,以及Kafka的启动/关闭和创建发话题并产生消息和消费消息.这篇文章就介绍介绍SpringBoot整合 ...
- SpringBoot进阶教程(五十九)整合Codis
上一篇博文<详解Codis安装与部署>中,详细介绍了codis的安装与部署,这篇文章主要介绍介绍springboot整合codis.如果之前看过<SpringBoot进阶教程(五十二 ...
- SpringBoot进阶教程(六十四)注解大全
在Spring1.x时代,还没出现注解,需要大量xml配置文件并在内部编写大量bean标签.Java5推出新特性annotation,为spring的更新奠定了基础.从Spring 2.X开始spri ...
- SpringBoot进阶教程(六十五)自定义注解
在上一篇文章<SpringBoot进阶教程(六十四)注解大全>中介绍了springboot的常用注解,springboot提供的注解非常的多,这些注解简化了我们的很多操作.今天主要介绍介绍 ...
- SpringBoot进阶教程(六十八)Sentinel实现限流降级
前面两篇文章nginx限流配置和SpringBoot进阶教程(六十七)RateLimiter限流,我们介绍了如何使用nginx和RateLimiter限流,这篇文章介绍另外一种限流方式---Senti ...
- SpringBoot进阶教程(七十四)整合ELK
在上一篇文章<SpringBoot进阶教程(七十三)整合elasticsearch >,已经详细介绍了关于elasticsearch的安装与使用,现在主要来看看关于ELK的定义.安装及使用 ...
- SpringBoot进阶教程(六十)intellij idea project下建多个module搭建架构(上)
在 IntelliJ IDEA 中,没有类似于 Eclipse 工作空间(Workspace)的概念,而是提出了Project和Module这两个概念.多module有一个父maven工程,多个子工程 ...
- SpringBoot非官方教程 | 第二十二篇: 创建含有多module的springboot工程
转载请标明出处: 原文首发于:https://www.fangzhipeng.com/springboot/2017/07/11/springbot22-modules/ 本文出自方志朋的博客 这篇文 ...
- SpringBoot进阶教程(七十)SkyWalking
流行的APM(Application Performance Management工具有很多,比如Cat.Zipkin.Pinpoint.SkyWalking.优秀的监控工具还有很多,其它比如还有za ...
- Spring Boot2 系列教程(三十二)Spring Boot 整合 Shiro
在 Spring Boot 中做权限管理,一般来说,主流的方案是 Spring Security ,但是,仅仅从技术角度来说,也可以使用 Shiro. 今天松哥就来和大家聊聊 Spring Boot ...
随机推荐
- 【Layui】13 轮播 Carousel
文档地址: https://www.layui.com/demo/carousel.html 基础轮播: <style> /* 为了区分效果 */ div[carousel-item]&g ...
- 传奇人物:“Linux之父”林纳斯·托瓦兹(Linus Torvalds)
偶然看到一个视频: https://www.youtube.com/watch?v=H32IXRkPjHA 林纳斯·托瓦兹(Linus Torvalds)是当之无愧的技术领袖.尤其是那句Just fo ...
- 读《PyTorch + NumPy这么做会降低模型准确率,这是bug还是预期功能?》
看了文章: [转载] 浅谈PyTorch的可重复性问题(如何使实验结果可复现) 然后,转到: PyTorch + NumPy这么做会降低模型准确率,这是bug还是预期功能? 发现了在pytorch中的 ...
- Canvas简历编辑器-图形绘制与状态管理(轻量级DOM)
Canvas简历编辑器-图形绘制与状态管理(轻量级DOM) 在前边我们聊了数据结构的设计和剪贴板的数据操作,那么这些操作都还是比较倾向于数据相关的操作,那么我们现在就来聊聊基本的图形绘制以及图形状态管 ...
- 【CDQ分治】【模板】三维偏序(陌上花开)
P3810 [模板]三维偏序(陌上花开) - 洛谷 | 计算机科学教育新生态 (luogu.com.cn) #include <bits/stdc++.h> using namespace ...
- .NET 轻量化定时任务调度 FreeScheduler
前言 在平时项目开发中,定时任务调度是一项重要的功能,广泛应用于后台作业.计划任务和自动化脚本等模块. FreeScheduler 是一款轻量级且功能强大的定时任务调度库,它支持临时的延时任务和重复循 ...
- 代码随想录Day19
235. 二叉搜索树的最近公共祖先 给定一个二叉搜索树, 找到该树中两个指定节点的最近公共祖先. 百度百科中最近公共祖先的定义为:"对于有根树 T 的两个结点 p.q,最近公共祖先表示为一个 ...
- Terraform中的for_each和count
通过Terraform创建云主机时,在某些业务场景下,一个机器需要挂载多个云盘,一般云厂商都是单独创建云主机和云硬盘然后通过attachment的资源去挂载,因此我们的模板大致如下: resource ...
- nexus3.x批量上传Windows本地仓库jar包
亲测可用!!! 传送门:https://blog.csdn.net/lihbps/article/details/104527652
- PPT或Visio比较舒适的RGB配色参数
1.187 204 235 2.222 156 83 3.117 156 83 4.64 116 52 5.117 121 74 6.69 137 148 7.182 194 154 8.207 19 ...