
【软件安装】CentOS7安装MariaDb(mysql_替代品安装)
1、背景
Maria Db是流行的跨平台MySQL数据库管理系统的分支,被认为是MySQL 的完全替代品。Maria Db是由Sun在Sun Micro systems合并期间被Oracle收购后,于2009年由MySQL的一位原始开发人员创建的。今天,Maria Db由Maria Db Foundation和社区贡献者维护和开发,
Maria Db将MySQL替换为Cent OS 7存储库中的默认数据库系统。虽然将MySQL安装到Cent OS 7并不困难,但是如果您只需要一个数据库,建议使用Maria Db进行官方支持,并且与其他存储库软件不兼容的可能性很小。
2、开始之前
- 虚拟机是最好的伙伴,推荐安装一个VM+CentOS 自己动手试试
$ 表示系统的一般权限,不用使用root 超级管理员权限配置。

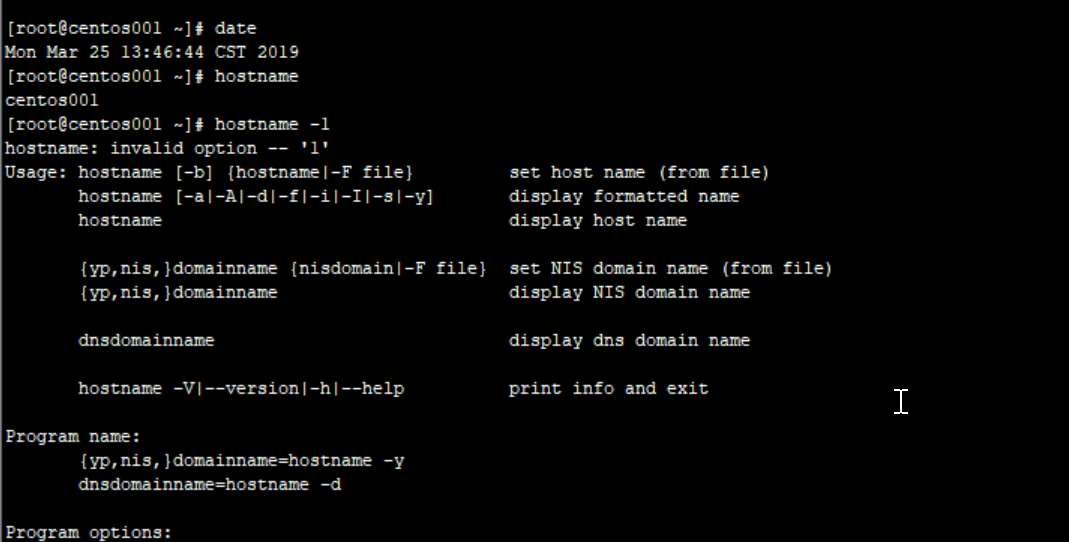
要检查您的主机名:
$ hostname -f

$ hostname
1.1 安装开始
第一个命令应显示您的短主机名,第二个命令应显示您的完全限定域名(FQDN)。
更新您的系统:
$ sudo yum update
- 安装并启动MariaDB
$ sudo yum install mariadb-server
- 启用MariaDB以在启动时启动,然后启动该服务:
systemctl start mariadb

systemctl status mariadb

systemctl enable mariadb
- 默认情况下,MariaDB将绑定到localhost(
127.0.0.1)。
注意
允许在公共IP上不受限制地访问MariaDB,但是您可以在
/etc/my.cnf中通过修改bind-address参数来更改它侦听的地址。如果您决定将MariaDB绑定到公共IP,则应实施仅允许来自特定IP地址连接的防火墙规则。
[root@centos001 ~]# systemctl start mariadb

[root@centos001 ~]# systemctl status mariadb

● mariadb.service - MariaDB database server

   Loaded: loaded (/usr/lib/systemd/system/mariadb.service; disabled; vendor preset: disabled)

   Active: active (running) since Wed 2019-05-08 15:23:10 CST; 14s ago

  Process: 13148 ExecStartPost=/usr/libexec/mariadb-wait-ready $MAINPID (code=exited, status=0/SUCCESS)

  Process: 13069 ExecStartPre=/usr/libexec/mariadb-prepare-db-dir %n (code=exited, status=0/SUCCESS)

 Main PID: 13147 (mysqld_safe)

   CGroup: /system.slice/mariadb.service

           ├─13147 /bin/sh /usr/bin/mysqld_safe --basedir=/usr

           └─13309 /usr/libexec/mysqld --basedir=/usr --datadir=/var/lib/mysql --plugin-dir=/usr/lib64/mysql/plugin --log-error=/var/log/mariadb/mariadb.log --pid-file=/var/run/mariadb/mariadb...

May 08 15:23:08 centos001 mariadb-prepare-db-dir[13069]: MySQL manual for more instructions.

May 08 15:23:08 centos001 mariadb-prepare-db-dir[13069]: Please report any problems at http://mariadb.org/jira

May 08 15:23:08 centos001 mariadb-prepare-db-dir[13069]: The latest information about MariaDB is available at http://mariadb.org/.

May 08 15:23:08 centos001 mariadb-prepare-db-dir[13069]: You can find additional information about the MySQL part at:

May 08 15:23:08 centos001 mariadb-prepare-db-dir[13069]: http://dev.mysql.com

May 08 15:23:08 centos001 mariadb-prepare-db-dir[13069]: Consider joining MariaDB's strong and vibrant community:

May 08 15:23:08 centos001 mariadb-prepare-db-dir[13069]: https://mariadb.org/get-involved/

May 08 15:23:08 centos001 mysqld_safe[13147]: 190508 15:23:08 mysqld_safe Logging to '/var/log/mariadb/mariadb.log'.

May 08 15:23:08 centos001 mysqld_safe[13147]: 190508 15:23:08 mysqld_safe Starting mysqld daemon with databases from /var/lib/mysql

May 08 15:23:10 centos001 systemd[1]: Started MariaDB database server.

[root@centos001 ~]#
1.2 最后检测
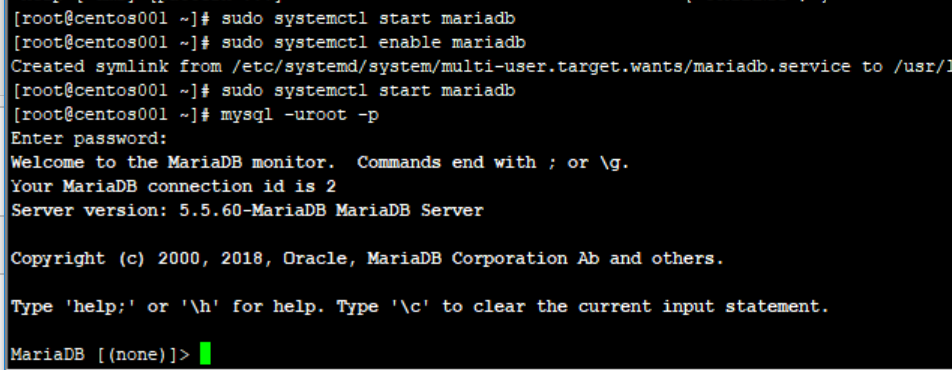
安装完成之后,运行一下命令,进入数据库,默认不需要密码

$ mysql -uroot -p
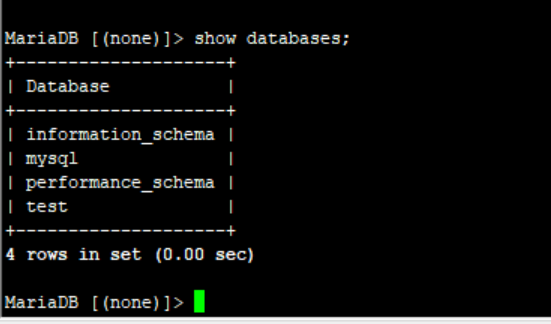
- 查询数据库列表
[root@centos001 ~]# mysql -u root -p

Enter password:

Welcome to the MariaDB monitor. Commands end with ; or \g.

Your MariaDB connection id is 13

Server version: 5.5.60-MariaDB MariaDB Server

Copyright (c) 2000, 2018, Oracle, MariaDB Corporation Ab and others.

Type 'help;' or '\h' for help. Type '\c' to clear the current input statement.

MariaDB [(none)]> show databases;

+--------------------+

| Database |

+--------------------+

| information_schema |

| mysql |

| performance_schema |

| test |

+--------------------+

4 rows in set (0.00 sec)

MariaDB [(none)]>
安装到此结束,余下是介绍如何使用配置
3、初始化配置,MariaDB的相关简单配置
- 接下来进行
$ mysql_secure_installation
- 首先是设置密码,会提示先输入密码
Enter current password for root (enter for none):<–初次运行直接回车
- 设置密码
Set root password? [Y/n] <– 是否设置root用户密码,输入y并回车或直接回车

New password: <– 设置root用户的密码

Re-enter new password: <– 再输入一次你设置的密码
- 其他配置
Remove anonymous users? [Y/n] <– 是否删除匿名用户,回车

Disallow root login remotely? [Y/n] <–是否禁止root远程登录,Y 回车,

Remove test database and access to it? [Y/n] <– 是否删除test数据库, N回车

Reload privilege tables now? [Y/n] <– 是否重新加载权限表,Y 回车
- 我的设置,设置错了再来一次
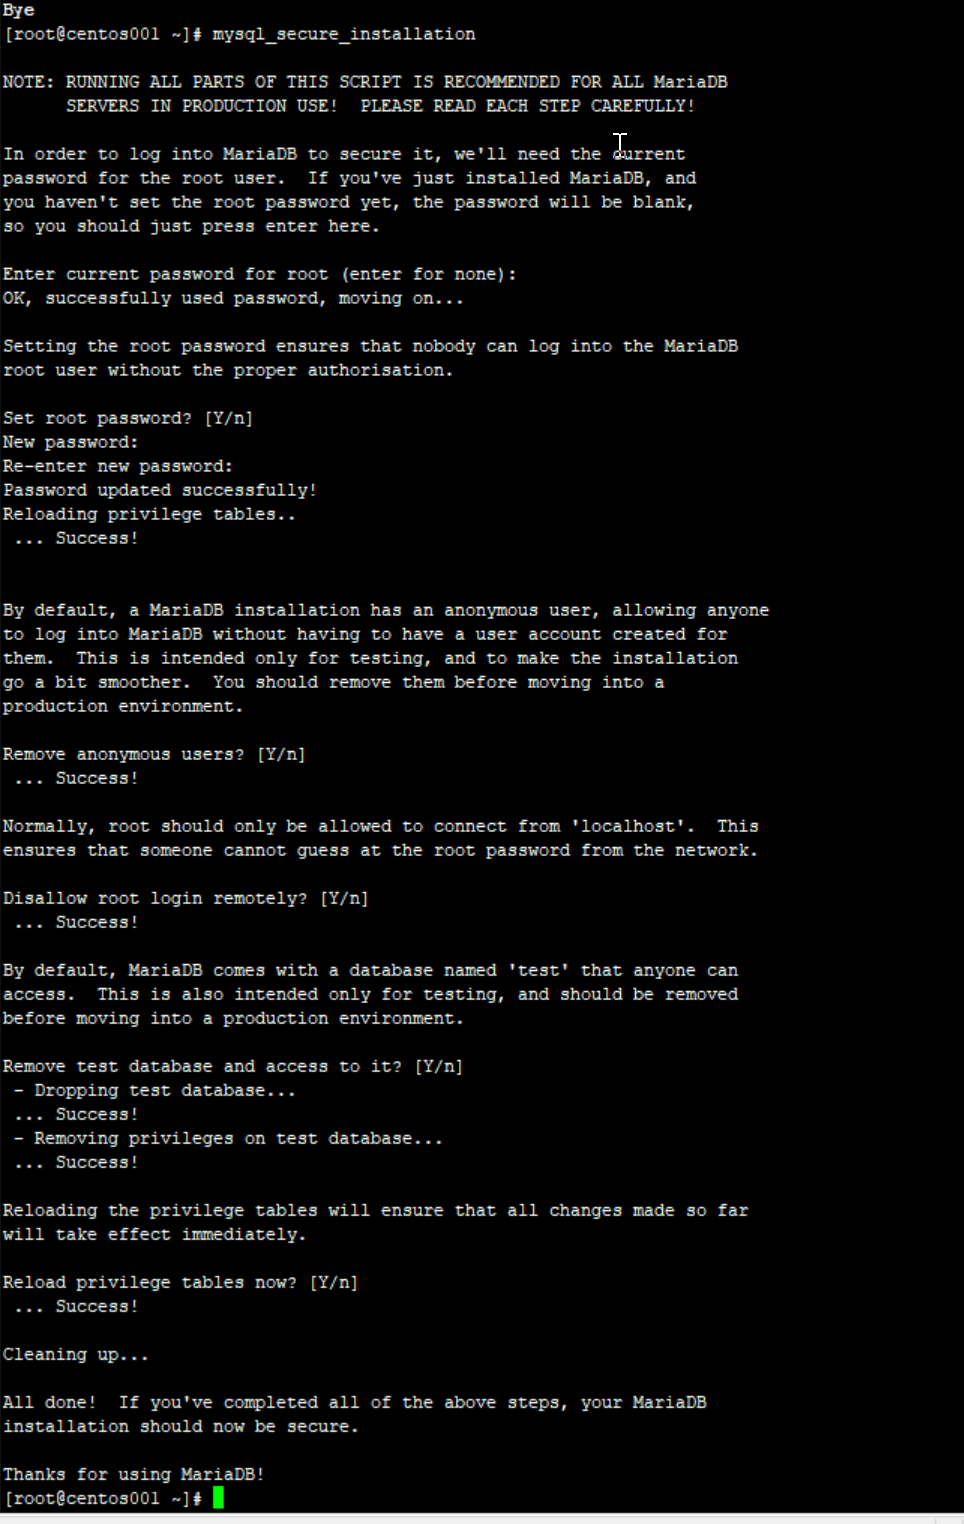
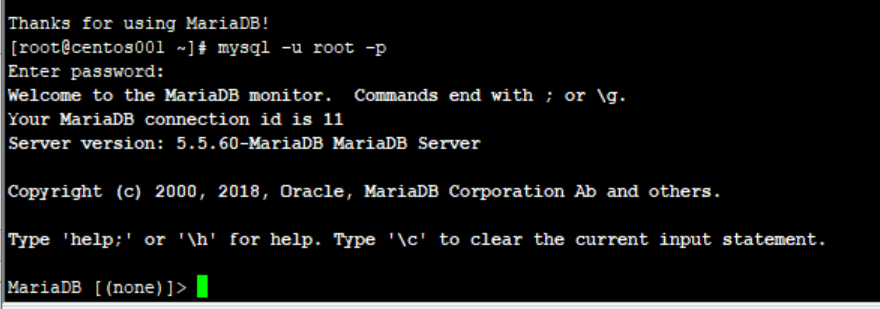
初始化MariaDB完成,接下来测试登录,输入一下命令和密码 登录进去
$ mysql -u root -p
4、操作不会请输入Help
要为MariaDB提示生成命令列表,请输入\h。然后你会看到:
   List of all MySQL commands:

   Note that all text commands must be first on line and end with ';'

   ?         (\?) Synonym for `help'.

   clear     (\c) Clear the current input statement.

   connect   (\r) Reconnect to the server. Optional arguments are db and host.

   delimiter (\d) Set statement delimiter.

   edit      (\e) Edit command with $EDITOR.

   ego       (\G) Send command to mysql server, display result vertically.

   exit      (\q) Exit mysql. Same as quit.

   go        (\g) Send command to mysql server.

   help      (\h) Display this help.

   nopager   (\n) Disable pager, print to stdout.

   notee     (\t) Don't write into outfile.

   pager     (\P) Set PAGER [to_pager]. Print the query results via PAGER.

   print     (\p) Print current command.

   prompt    (\R) Change your mysql prompt.

   quit      (\q) Quit mysql.

   rehash    (\#) Rebuild completion hash.

   source    (\.) Execute an SQL script file. Takes a file name as an argument.

   status    (\s) Get status information from the server.

   system    (\!) Execute a system shell command.

   tee       (\T) Set outfile [to_outfile]. Append everything into given outfile.

   use       (\u) Use another database. Takes database name as argument.

   charset   (\C) Switch to another charset. Might be needed for processing            binlog with multi-byte charsets.

   warnings  (\W) Show warnings after every statement.

   nowarning (\w) Don't show warnings after every statement.

   For server side help, type 'help contents'

   MariaDB [(none)]>
5 重置MariaDB Root密码
** 如果您忘记了root 密码,则可以重置密码。**
- 停止当前的MariaDB服务器实例,然后使用不要求输入密码的选项重新启动它:
   sudo systemctl stop mariadb

   sudo mysqld_safe --skip-grant-tables &
- 使用MariaDB root帐户重新连接到MariaDB服务器:
mysql -u root
- 使用以下命令重置root的密码。用强密码替换
password:
   use mysql;

   update user SET PASSWORD=PASSWORD("password") WHERE USER='root';

   flush privileges;

   exit
- 然后重启MariaDB:
sudo systemctl start mariadb
【软件安装】CentOS7安装MariaDb(mysql_替代品安装)的更多相关文章
- Linux学习-基于CentOS7的MariaDB数据库的安装
一.实验环境: 系统:CentOS7.6,关闭了防火墙与SELINUX 数据库版本:mariadb-10.2.25(二进制安装与源码安装) 二.安装方法: 1.yum源安装 (1) 配置yum源,官方 ...
- U盘安装centos7:不能载入到安装界面
在用U盘安装centos7时,我们需要修改镜像位置: 选择第一项:Install CentOS 7 ,按 e(也有可能是tab键)键进入编辑界面. 将 vmlinuz initrd=initrd.im ...
- 最小化安装CentOS7 + xfce4 +PHP + nginx +mariadb 开发环境
虚拟机自定义最小化安装,新增用户做为管理员,打开自动获取网络,桥接模式.所有的操作只有命令,不做解释,看不明白的可以自行搜索相关的资料. # 开头的行是注释行,# 开头的空行,我自己装机时做了快照.未 ...
- 环境篇:VMware Workstation安装Centos7
环境篇:VMware Workstation安装Centos7 1 VMware Workstation安装 CentOS下载地址:http://isoredirect.centos.org/cent ...
- Centos7 编译安装 Nginx PHP Mariadb Memcached 扩展 ZendOpcache扩展 (实测 笔记 Centos 7.3 + Mariadb 10.1.20 + Nginx 1.10.2 + PHP 7.1.0 + Laravel 5.3 )
环境: 系统硬件:vmware vsphere (CPU:2*4核,内存2G,双网卡) 系统版本:CentOS-7-x86_64-Minimal-1611.iso 安装步骤: 1.准备 1.0 查看硬 ...
- Centos7 编译安装 Nginx PHP Mariadb Memcached 扩展 ZendOpcache扩展 (实测 笔记 Centos 7.3 + Openssl 1.1.0e + Mariadb 10.1.22 + Nginx 1.12.0 + PHP 7.1.4 + Laravel 5.4 )
环境: 系统硬件:vmware vsphere (CPU:2*4核,内存2G,双网卡) 系统版本:CentOS-7-x86_64-Minimal-1611.iso 安装步骤: 1.准备 1.0 查看硬 ...
- Centos7 编译安装 Nginx、MariaDB、PHP
前言 本文主要大致介绍CentOS 7下编译安装Nginx.MariaDB.PHP.面向有Linux基础且爱好钻研的朋友.技艺不精,疏漏再所难免,还望指正. 环境简介: 系统: CentOS 7,最小 ...
- Linux系统centOS7在虚拟机下的安装及XShell软件的配置
前面的话 本文将详细介绍Linux系统centOS7在虚拟机下的安装 准备工作 [系统下载] 在安装centOS7之前,首先在官网下载合适的版本 然后,选择一个链接下载即可 [虚拟机配置] 接下来,需 ...
- Centos7 编译安装 Nginx PHP Mariadb Memcache扩展 ZendOpcache扩展 (实测 笔记 Centos 7.0 + Mariadb 10.1.9 + Nginx 1.9.9 + PHP 5.5.30)
环境: 系统硬件:vmware vsphere (CPU:2*4核,内存2G,双网卡) 系统版本:CentOS-7-x86_64-Minimal-1503-01.iso 安装步骤: 1.准备 1.1 ...
随机推荐
- 使用Kubeflow构建机器学习流水线
在此前的文章中,我已经向你介绍了Kubeflow,这是一个为团队设置的机器学习平台,需要构建机器学习流水线. 在本文中,我们将了解如何采用现有的机器学习详细并将其变成Kubeflow的机器学习流水线, ...
- Linux下搭建redis(源码编译)
[准备环境] Linux centos7 redis下载包 地址:http://www.redis.cn/download.html 前往下载稳定版本 [步骤] 1.下载成功后 把包上传到服务器 ...
- docker配置国内镜像地址,解决无法pull镜像问题docker: Error response from daemon
问题: 执行命令 $ docker run -it --rm -p 8888:8080 tomcat:8.5.32 报错 Unable to find image 'tomcat:8.5.32' lo ...
- 【JAVA8新的时间与日期 API】- 传统时间格式化的线程安全问题
Java8之前的日期和时间API,存在一些问题,最重要的就是线程安全的问题.这些问题都在Java8中的日期和时间API中得到了解决,而且Java8中的日期和时间API更加强大. 传统时间格式化的线程安 ...
- openstack Rocky 社区版部署1.2 安装ntp service
一.controller节点安装ntp 1 安装ntp服务 yum install chrony 2 Edit the chrony.conf file and add, change, or rem ...
- Python实用笔记 (15)函数式编程——装饰器
什么函数可以被称为闭包函数呢?主要是满足两点:函数内部定义的函数:引用了外部变量但非全局变量. python装饰器本质上就是一个函数,它可以让其他函数在不需要做任何代码变动的前提下增加额外的功能,装饰 ...
- js事件入门(6)
7.事件冒泡机制 7.1.什么是事件冒泡 当一个元素接收到一个事件以后,会将事件传播给它的父级元素,它的负级元素会一层一层往上传播,直到最顶层window,这种事件传播机制叫作事件冒泡. <!D ...
- 关于 charset 的几种编码方式
经常遇到charset=gb2312.charset=iso-8859-1.charset=utf-8这几种编码方式,它们有什么不同,看下面的图 编码方式 含义 charset=iso-8859-1 ...
- '%' For instance '%d'
with each % indicating where one of the other (second, third, ...) arguments is to be substituted, a ...
- Python数据结构-树与树的遍历
树:是一种抽象的数据类型 树的作用:用来模拟树状结构性质的数据集合 树的特点: 每个节点有零个或者多个节点 没有父节点的节点,叫做根节点 每一个根节点有且只有一个父节点 除了根节点外,每个节点可以分成 ...