springboot配置server相关配置&整合模板引擎Freemarker、thymeleaf&thymeleaf基本用法&thymeleaf 获取项目路径 contextPath 与取session中信息
1.Springboot配置server相关配置(包括默认tomcat的相关配置)
下面的配置也都是模板,需要的时候在application.properties配置即可
############################################################

#

# Server 服务端相关配置

#

############################################################

# 配置api端口号

server.port=8088

# 配置context-path, 一般来说这个配置在正式发布的时候不配置

server.context-path=/MySpringboot

# 错误页,指定发生错误时,跳转的URL --> BasicErrorController

#server.error.path=/error

# session最大超时时间(分钟),默认为30分钟

server.session-timeout=60

# 该服务绑定IP地址,启动服务器时如本机不是该IP地址则抛出异常启动失败,

# 只有特殊需求的情况下才配置, 具体根据各自的业务来设置

#server.address=192.168.1.2

############################################################

# Server - tomcat 相关常用配置

############################################################

# tomcat最大线程数, 默认为200

#server.tomcat.max-threads=250

# tomcat的URI编码

server.tomcat.uri-encoding=UTF-8

# 存放Tomcat的日志、Dump等文件的临时文件夹,默认为系统的tmp文件夹

#(如:C:%users\Shanhy\AppData\Local\Temp)

#server.tomcat.basedir=H:/springboot-tomcat-tmp

# 打开Tomcat的Access日志,并可以设置日志格式的方法:

#server.tomcat.access-log-enabled=true

#server.tomcat.access-log-pattern=

# accesslog目录,默认在basedir/logs

#server.tomcat.accesslog.directory=

# 日志文件目录

#logging.path=H:/springboot-tomcat-tmp

# 日志文件名称,默认为spring.log

#logging.file=myapp.log
例如上面我简单的修改了一下默认的端口与contextPath等信息,启动测试:

2.整合模板引擎
springboot提倡的方式是整合freemarker和thymeleaf。之前用普通项目的时候都是用的JSP,实际上JSP是一种servlet,需要在后台渲染页面之后在前台进行展示,所以比较耗时。而引擎相对于JSP来说就比较省时。引擎常用的有freemarker和thymeleaf,在项目中可以两种一起结合使用,但是一般有一种就足够了。注意applications.properties文件中两者的前缀一个最后加/一个不加。
2.1整合Freemarker引擎
freemarker的文件一般后缀是 ftl,关于freemarker的基本使用参考我的freemarker标签博客即可。
(1)首先pom中引入freemarker引擎
        <!-- 引入 freemarker 模板依赖 -->

        <dependency>

            <groupId>org.springframework.boot</groupId>

            <artifactId>spring-boot-starter-freemarker</artifactId>

        </dependency>
(2)application.properties引入freemarker相关配置:
############################################################

#

# freemarker 静态资源配置

#

############################################################

#设定ftl文件路径

spring.freemarker.template-loader-path=classpath:/templates

# 关闭缓存, 即时刷新, 上线生产环境需要改为true

spring.freemarker.cache=false

spring.freemarker.charset=UTF-8

spring.freemarker.check-template-location=true

spring.freemarker.content-type=text/html

spring.freemarker.expose-request-attributes=true

spring.freemarker.expose-session-attributes=true

spring.freemarker.request-context-attribute=request

spring.freemarker.suffix=.ftl
(3)编写后台Controller
package cn.qlq.action;

import org.springframework.stereotype.Controller;

import org.springframework.ui.ModelMap;

import org.springframework.web.bind.annotation.RequestMapping;

/**

 * 返回freemarker相关页面

 *

 * @author Administrator

 *

 */

@Controller

@RequestMapping("freemarker")

public class FreemarkerController {

    /**

     * 会跳转到templates/freemarker/index.ftl

     *

     * @param map

     * @return

     */

    @RequestMapping("/index")

    public String index(ModelMap map) {

        map.addAttribute("name", "testname");

        return "freemarker/index";

    }

    /**

     * 会跳转到templates/freemarker/center/center.ftl

     *

     * @return

     */

    @RequestMapping("/center")

    public String center() {

        return "freemarker/center/center";

    }

}
(4)建立模板结构:
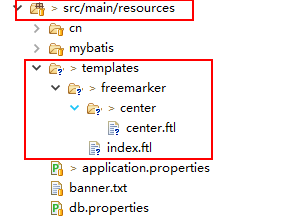
index.ftl内容如下:
<!DOCTYPE html>

<html>

<head lang="en">

    <meta charset="UTF-8" />

    <title>FreeMarker模板引擎</title>

</head>

<body>

FreeMarker模板引擎

<h1>${name}</h1>

</body>

</html>
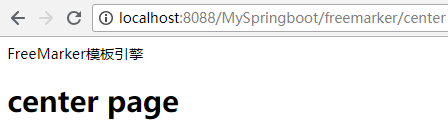
center.ftl内容如下:
<!DOCTYPE html>

<html>

<head lang="en">

    <meta charset="UTF-8" />

    <title></title>

</head>

<body>

FreeMarker模板引擎

<h1>center page</h1>

</body>

</html>
启动项目进行测试:

2.2整合thymeleaf引擎
thymeleaf文件的后缀是html。这种方式也适用于前后端分离。
(1)首先pom中引入thymeleaf引擎
        <!-- 引入 thymeleaf 模板依赖 -->

        <dependency>

            <groupId>org.springframework.boot</groupId>

            <artifactId>spring-boot-starter-thymeleaf</artifactId>

        </dependency>
(2)applications.properties引入配置:
############################################################

#

# thymeleaf 静态资源配置

#

############################################################

spring.thymeleaf.prefix=classpath:/templates/

spring.thymeleaf.suffix=.html

spring.thymeleaf.mode=HTML5

spring.thymeleaf.encoding=UTF-8

spring.thymeleaf.content-type=text/html

# 关闭缓存, 即时刷新, 上线生产环境需要改为true

spring.thymeleaf.cache=false
(3)编写后台Controller
package cn.qlq.action;

import org.springframework.stereotype.Controller;

import org.springframework.ui.ModelMap;

import org.springframework.web.bind.annotation.RequestMapping;

/**

 * 返回freemarker相关页面

 *

 * @author Administrator

 *

 */

@Controller

@RequestMapping("th")

public class ThymeleafController {

    /**

     * 会跳转到templates/freemarker/index.html

     *

     * @param map

     * @return

     */

    @RequestMapping("/index")

    public String index(ModelMap map) {

        map.addAttribute("name", "testname");

        return "thymeleaf/index";

    }

    /**

     * 会跳转到templates/thymeleaf/center/center.html

     *

     * @return

     */

    @RequestMapping("/center")

    public String center() {

        return "thymeleaf/center/center";

    }

}
(4)编写界面:
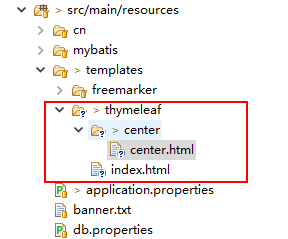
center.html: (一个静态的页面)
<!DOCTYPE html>

<html>

<head lang="en">

    <meta charset="UTF-8" />

    <title></title>

</head>

<body>

Thymeleaf模板引擎

<h1>center page</h1>

</body>

</html>
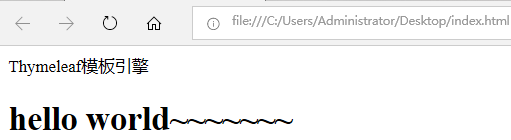
index.html(下面这个试用于前后端分离,也就是说在后端没有返回数据的时候h1显示的是中间的hello word ~~~ ,如果有数据了会用${name}取到的值取代两个标签中间的内容)
<!DOCTYPE html>
<html>
<head lang="en">
<meta charset="UTF-8" />
<title></title>
</head>
<body>
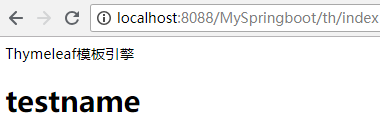
Thymeleaf模板引擎
<h1 th:text="${name}">hello world~~~~~~~</h1>
</body>
</html>
单独访问这个index.html效果如下:
(5)启动测试:

3.thymeleaf 获取项目路径 contextPath
1.页面通过标签获取:
<span th:text="${#httpServletRequest.getContextPath()}">abc</span>
如下:
<a th:href="${#httpServletRequest.getContextPath()+'/index.html'}">XXX</a>
结果:

2.通过JS获取
<script th:inline="javascript">

        var contextPath= [[@{/}]];

</script>
关于项目中路径带根路径的URL的写法如下:
    <link rel="stylesheet" th:href="${#httpServletRequest.getContextPath()+'/static/x-admin/css/xadmin.css'}"/>

    <script type="text/javascript" th:src="${#httpServletRequest.getContextPath()+'/static/js/jquery.min.js'}"></script>
补充:通过JS获取request和session中变量的方法如下:
第一种方法:
    <script th:inline="javascript">

        var currentUsername= /*[[${session.user.username}]]*/;

        var address=/*[[${message.address}]]*/

    </script>
第二种方法:
    <script th:inline="javascript">

        /*<![CDATA[*/

            var currentUsername= /*[[${session.user.username}]]*/;

           /*]]>*/

    </script>
4. thymeleaf 获取session中的值
后台存:
    @RequestMapping("doLogin")

    @ResponseBody

    public JSONResultUtil doLogin(String username, String password, HttpSession session) {

        User loginUser = null;

        if (username.equals("admin") && password.equals("admin")) {

            loginUser = new User();

            loginUser.setFullname("系统管理员");

        } else {

            loginUser = userService.getUserByUserNameAndPassword(username, password);

        }

        if (loginUser == null) {

            return JSONResultUtil.error("账号或者密码错误");

        }

        session.setAttribute("user", loginUser);

        return JSONResultUtil.ok();

    }
前台:
<span class="x-red" th:text="${session.user.fullname}">admin</span>
5.thymeleaf常用标签用法(如果会用可以不看下面例子)
官方文档:https://www.thymeleaf.org/documentation.htm
https://www.thymeleaf.org/doc/tutorials/2.1/usingthymeleaf.html
下面都是针对的动态数据的方式(数据从后台返回到前台的方法),如果是静态方式使用方法同以前普通的html的使用方法一样。
0.字符串拼接
<a th:href="${context+'/JS/XXXX'+context}">XXX</a>
context是变量,单引号中间的是常量
结果:

1.基本使用方式
th:id="${id}" th:name="${name}" th:value="${name}" 等标签如果取到属性就会取代原来界面上的对应的属性。
例如对于如下页面:
用户姓名:<input id="id" name="name" value="value" th:id="${user.username}" th:name="${user.username}" th:value="${user.username}"/>
(1)查看静态页面

(2)经过后台的渲染页面

2.对象引用方式
如下面写法:
<div th:object="${user}">

    用户姓名:<input th:id="*{username}" th:name="*{username}" th:value="*{username}"/>

    <br/>

    用户生日:<input th:value="*{#dates.format(birthday, 'yyyy-MM-dd hh:mm:ss')}"/>

    <br/>

</div>
3.时间类型转换
    <br/>

    用户生日:<input th:value="${user.birthday}"/>

    <br/>

    用户生日:<input th:value="${#dates.format(user.birthday, 'yyyy-MM-dd')}"/>
界面查看:

4.th:text与th:utext
th:text会将后台传回来的字符串原封不动的替换标签中的内容为后台返回的内容
th:utext会解析后台传回来的内容中的html标签,也就是这个会解析html标签。
如下:后台设置地址为:
user.setAddress("<font color='red'>中国<font>");
前台代码:
text 与 utext :<br/>

<span th:text="${user.address}">abc</span>

<br/>

<span th:utext="${user.address}">abc</span>
结果:

5.URL
URL的用法是: @{url}。
例如:
URL:<br/>

<a href="http://www.baidu.com" th:href="@{${user.address}}">网站地址</a>

<br/>
结果:

6.引入静态资源文件js/css
如果引入静态文件需要在applications.properties文件中进行配置放开静态文件:
#设定静态文件路径,js,css等

spring.mvc.static-path-pattern=/static/**
对应的目录结构:
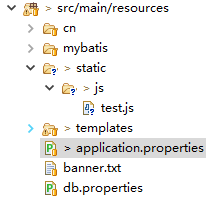
页面引入JS的方法:
<script th:src="@{/static/js/test.js}"></script>
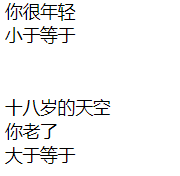
7.条件判断 th:if th:unless与th:if
th:if 相当于 JSTL的<:if>标签,判断等于直接用 == ,大于用ge(grater than),大于等于用ge(grater or equal)。。。。。。
th:unless是if的取反
<br/>

<div th:if="${user.id} == 18">十八岁的天空</div>

<div th:if="${user.id} gt 18">你老了</div>

<div th:if="${user.id} lt 18">你很年轻</div>

<div th:if="${user.id} ge 18">大于等于</div>

<div th:if="${user.id} le 18">小于等于</div>

<br/>

<br/>

<div th:unless="${user.id} == 18">十八岁的天空</div>

<div th:unless="${user.id} gt 18">你老了</div>

<div th:unless="${user.id} lt 18">你很年轻</div>

<div th:unless="${user.id} ge 18">大于等于</div>

<div th:unless="${user.id} le 18">小于等于</div>

<br/>
后台设置id为2查看结果页面填充结果:
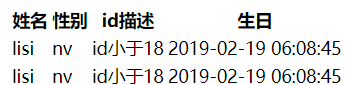
8.循环
th:each相当于<c:foreach....>
<br/>

<table>

    <tr>

        <th>姓名</th>

        <th>性别</th>

        <th>id描述</th>

        <th>生日</th>

    </tr>

    <tr th:each="person:${userList}">

        <td th:text="${person.username}"></td>

        <td th:text="${person.sex}"></td>

        <td th:text="${person.id gt 18} ? id大于18 : id小于18">18岁</td>

        <td th:text="${#dates.format(user.birthday, 'yyyy-MM-dd hh:mm:ss')}"></td>

    </tr>

</table>

<br/>
后台:
    @RequestMapping("/test")

    public String test(ModelMap map) {

        User user = new User();

        user.setId(2);

        user.setSex("nv");

        user.setUsername("lisi");

        user.setAddress("http://qiaoliqiang.cn");

        user.setBirthday(new Date());

        map.addAttribute("user", user);

        User user2 = user;

        List<User> userList = new ArrayList<>();

        userList.add(user);

        userList.add(user2);

        map.addAttribute("userList", userList);

        return "thymeleaf/test";

    }
前台填充后结果:
例如:循环取list中数据放入option
<select name="bodylocation" >

                      <option th:each="body:${bodys}" th:text="${body}" th:value="${body}"></option>

                  </select>
循环中option的选中回显如下:
                  <select name="bodylocation" >

                      <option th:each="body:${bodys}" th:text="${body}" th:value="${body}" th:selected="${plan.bodylocation eq body}"></option>

                  </select>
补充:循环遍历集和显示checkbox以及回显选中的值:
                   <input type ="checkbox" name="userblank"

                     th:each ="parentName : ${parentNames}"

                     th:value="${parentName}"

                     th:text ="${parentName}"

                     th:attr ="checked=${parentNamesSeted.contains(parentName)?true:false}"

                     />
java代码:
            List<String> parentNames = firstChargeReportService.listDistinctParentName();

            map.addAttribute("from", from);

            map.addAttribute("parentNames", parentNames);

            List<String> parentNamesSeted = new ArrayList<>();

            String userblank = user.getUserblank();

            if (StringUtils.isNotBlank(userblank)) {

                parentNamesSeted = Arrays.asList(userblank.split(","));

            }

            map.addAttribute("parentNamesSeted", parentNamesSeted);
补充:循环遍历Map中数据
<input type="text" name="foods" autocomplete="off" class="layui-input"

                      th:each="entry:${foods}" th:placeholder="${entry.key}" th:class="entry.value" onchange=""/>
补充:遍历List<Map>的方式,已经知道Map中的key
             <tr th:each="sequence:${sequences}">

                <td th:text="${sequenceStat.index+1}"></td>

                <td th:utext="${sequence['fullname']}"></td>

                <td th:text="${sequence['stepnumber']}"></td>

            </tr>
补充:遍历出来也有一个状态信息,可以获取序号、是否第一个等信息,如下:
When using th:each, Thymeleaf offers a mechanism useful for keeping track of the status of your iteration: the status variable.
Status variables are defined within a th:each attribute and contain the following data:
- The current iteration index, starting with 0. This is the index property.
- The current iteration index, starting with 1. This is the count property.
- The total amount of elements in the iterated variable. This is the size property.
- The iter variable for each iteration. This is the current property.
- Whether the current iteration is even or odd. These are the even/odd boolean properties.
- Whether the current iteration is the first one. This is the first boolean property.
- Whether the current iteration is the last one. This is the last boolean property.
例如:
  <tr th:each="prod,iterStat : ${prods}" th:class="${iterStat.odd}? 'odd'">

    <td th:text="${prod.name}">Onions</td>

    <td th:text="${prod.price}">2.41</td>

    <td th:text="${prod.inStock}? #{true} : #{false}">yes</td>

  </tr>
如果只写了一个变量,比如prod,那么thymeleaf会默 认给个“变量名+Stat"的状态变量 prodStat。
9.th:switch与th:case
相当于java的switch 。。。 case 语句
<div th:switch="${user.username}">

  <p th:case="'zhangsan'">zhangsan</p>

  <p th:case="'lisi'">lisi</p>

  <p th:case="*">其他用户</p>

</div>
10. #{}读取资源文件 properties文件 (不能直接读取,需要结合th标签使用)
(1)applications.properties文件中配置资源文件
############################################################

#

# 配置i18n 资源文件,供thymeleaf 读取

#

############################################################

spring.messages.basename=i18n/messages

spring.messages.cache-seconds=3600

spring.messages.encoding=UTF-8
(2)建立相应文件:
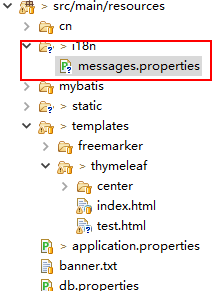
messages.properties内容如下:
############################################################

#

# 用户自定义权限

#

############################################################

# 普通管理员

roles.manager=manager

roles.superadmin=superadmin
(3)页面使用#{key}读取即可
<p th:utext="#{roles.manager}">xxxxxxx</p>
结果:
manager
11.表单提交
<form th:action="@{/th/postform}" th:object="${user}" method="post" th:method="post">

    <input type="text" th:field="*{username}"/>

    <input type="text" th:field="*{address}"/>

    <input type="submit"/>

</form>
查看填充后的源码:

th:object="${user}"是上面介绍的对象引用的方式,
th:field="*{username}"相当于 id="username" name="username" value="${username}"
后台接受的方法:(重定向到 /th/test )
    /**

     *

     * @return

     */

    @RequestMapping("/postform")

    public String postform(User user) {

        System.out.println(user.getUsername());

        System.out.println(user.getAddress());

        return "redirect:/th/test";

    }
12.下拉选择框的默认选中与单选框的选中:
<br/>

<select>

     <option >选择框</option>

     <option th:selected="${user.username eq 'zhangsan'}">zhangsan</option>

     <option th:selected="${user.username eq 'lisi'}">lisi</option>

     <option th:selected="${user.username eq 'wangwu'}">wangwu</option>

</select>

<br/>

<br/>

<input type="radio" th:checked="${user.sex eq 'nan'}"/>男

<input type="radio" th:checked="${user.sex eq 'nv'}"/>女

<br/>
后台:
    @RequestMapping("/test")

    public String test(ModelMap map) {

        User user = new User();

        user.setId(2);

        user.setSex("nv");

        user.setUsername("lisi");

        user.setAddress("http://qiaoliqiang.cn");

        user.setBirthday(new Date());

        map.addAttribute("user", user);

        return "thymeleaf/test";

    }
前台填充后结果:

13 . 判断集合不为空集合
        <div th:unless="${#lists.isEmpty(commentsByViewId)}">

            <b>评论:<br/></b>

            <div th:each="comment:${commentsByViewId}">

                <span th:text="${#dates.format(view.createtime, 'yyyy-MM-dd')}"></span>

                <span th:text="${comment.content}"></span>

            </div>

        </div>
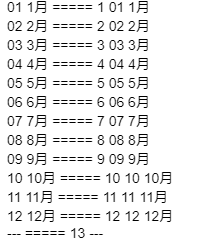
补充:遍历map的方式,获取key、value以及序号
Map中数据如下
        Map<String, String> result = new LinkedHashMap<>();

        result.put("01", "1月");

        result.put("02", "2月");

        result.put("03", "3月");

        result.put("04", "4月");

        result.put("05", "5月");

        result.put("06", "6月");

        result.put("07", "7月");

        result.put("08", "8月");

        result.put("09", "9月");

        result.put("10", "10月");

        result.put("11", "11月");

        result.put("12", "12月");

        result.put("", "---");
遍历方法:
       <span th:each="item,userStat:${months}">

               <span th:text="${item.key}"></span>

               <span th:text="${item.value}"></span>

               =====

            <span th:text="${userStat.index}+1"></span>

            <span th:text="${userStat.current.key}"></span><!-- key-->

            <span th:text="${userStat.current.value}"></span><!-- value-->

            <br/>

        </span>
结果:
补充:thymeleaf中的==可以用于两个变量比较
例如:下拉列表根据属性动态设置值:
                  <select name="flowerId">

                      <option th:each="flowerIdAndName:${flowerIdAndNames}" th:text="${flowerIdAndName['name']}"

                           th:value="${flowerIdAndName['id']}" th:selected="${bean.flowerId} == ${flowerIdAndName['id']}"></option>

                  </select>
后端代码:
        Purchase findById = purchaseService.findById(id);

        map.addAttribute("bean", findById);

        List<Map<String, Object>> flowerIdAndNames = flowerService.listFlowerIdAndNames();

        map.put("flowerIdAndNames", flowerIdAndNames);
补充:thymeleaf动态修改元素的display属性
th:style="'display:' + @{(${bean.productstatus == '未出租' or bean.productstatus == '已出租'} ? 'inline-block' : 'none' )} + ''"
补充:thymeleaf在JS的onclick事件中传递参数的方法如下:
<a href="javascript:void(0)" title="删除" th:onclick="'deleteStage(' + ${stage.id} + ')'">
<i class="layui-icon"></i>
</a>
如果加字符串可以:
<a href="javascript:void(0)" th:onclick="'replyInstantMessage(' + ${instantMessage.id} + ',\'' + ${instantMessage.creator} + '\')'">回复</a>
总结:
(1) thymeleaf中 eq 等计算方式可以在}里面也可以在}外面,比如,下面是等价的:
<a _href="/fixedReport/list.html" th:if="${session.user.roles eq '系统管理员'}">
<i class="iconfont"></i>
<cite>日报表</cite>
</a>
<a _href="/fixedReport/list.html" th:if="${session.user.roles} eq '系统管理员'">
<i class="iconfont"></i>
<cite>日报表</cite>
</a>
(2)${}是获取容器上下文变量的值,应该是包括所有上下文中的key-value。
*{}这个表达式,是获取指定的对象中的变量值。需要在前面指定对象,可以是集合中的某个对象,也可以是单独的一个对象。
#maps 这个是thymeleaf的工具类,还有#dates#calendars#numbers #strings#objects#bools#arrays#lists#sets#ids
springboot配置server相关配置&整合模板引擎Freemarker、thymeleaf&thymeleaf基本用法&thymeleaf 获取项目路径 contextPath 与取session中信息的更多相关文章
- SpringBoot常用Starter介绍和整合模板引擎Freemaker、thymeleaf 4节课
1.SpringBoot Starter讲解 简介:介绍什么是SpringBoot Starter和主要作用 1.官网地址:https://docs.spring.io/spring-boot/doc ...
- 小D课堂 - 零基础入门SpringBoot2.X到实战_第7节 SpringBoot常用Starter介绍和整合模板引擎Freemaker、thymeleaf_28..SpringBoot Starter讲解
笔记 1.SpringBoot Starter讲解 简介:介绍什么是SpringBoot Starter和主要作用 1.官网地址:https://docs.spring.io/spring-b ...
- SpringBoot系列:Spring Boot使用模板引擎FreeMarker
一.Java模板引擎 模板引擎(这里特指用于Web开发的模板引擎)是为了使用户界面与业务数据(内容)分离而产生的,它可以生成特定格式的文档,用于网站的模板引擎就会生成一个标准的HTML文档. 在jav ...
- Spring Boot整合模板引擎freemarker
jsp本质是servlet,渲染都在服务器,freemarker模板引擎也是在服务器端渲染. 项目结构 引入依赖pom.xml <!-- 引入 freemarker 模板依赖 --> &l ...
- 【SpringBoot】常用Starter介绍和整合模板引擎Freemaker、thymeleaf
========7.SpringBoot常用Starter介绍和整合模板引擎Freemaker.thymeleaf ========================= 1.SpringBoot Sta ...
- 实现一个代码自动生成(一):模板引擎Freemarker
目录 前言 模板引擎FreeMarker 前言 在现在的开发当中,代码生成已经是必不可少的一个功能,每个公司都会有自己的一套定制的项目骨架,而实现代码自动生成,模板引擎是必不可少的,所以在这篇博客中, ...
- PHP模板引擎Smarty内建函数section,sectionelse用法详解
本文实例讲述了PHP模板引擎Smarty内建函数section,sectionelse用法.分享给大家供大家参考,具体如下: section 是 Smarty 模板中除了 foreach 以外的另一种 ...
- Java模板引擎Freemarker
Java模板引擎Freemarker 1.取值(插值)指令 2.逻辑指令:if.switch 3.字符串.集合操作 4.自定义函数 5.list排序内建函数.常用指令 6.自定义指令 7.freema ...
- SpringBoot入门系列(四)整合模板引擎Thymeleaf
前面介绍了Spring Boot的优点,然后介绍了如何快速创建Spring Boot 项目.不清楚的朋友可以看看之前的文章:https://www.cnblogs.com/zhangweizhong/ ...
随机推荐
- go的net/rpc用法
一:PRC是什么? RPC(Remote Procedure Call) 远程过程调用,是一个计算通信协议.该协议允许一台计算机上的程序调用另外一台计算机上的程序.远程过程调用就是2个不在同一台计算机 ...
- java连接数据库报了ssl连接的警告
警告内容:Establishing SSL connection without server's identity verification is not recommended(不建议在没有服务器 ...
- qml: 模块定义与使用
1. 模块的定义qmldir Module MyModule MyTest 1.0 MyTest.qml MyTest 1.3 MyTest.qml 2. 导入: 使用qrc: RESOU ...
- python自动化开发-[第二十四天]-高性能相关与初识scrapy
今日内容概要 1.高性能相关 2.scrapy初识 上节回顾: 1. Http协议 Http协议:GET / http1.1/r/n...../r/r/r/na=1 TCP协议:sendall(&qu ...
- 三层结构、MVC的简介
以前总是听说什么三层结构.什么MVC,但是一直傻傻分不清这是什么意思,下面来简单介绍一下它们吧~ 1.三层结构 在 B/S 架构中,系统标准的三层架构包括:表现层.业务层.持久层 1)表现层 也就是我 ...
- UDP中的sendto 与recvfrom
sendto 头文件: #include <sys/types.h> #include <sys/socket.h> 定义函数: int sendto(int s, con ...
- python 变量 if
#########################总结###################### 1. 初识python python是一门弱类型的解释型高级编程语言 解释器: CPython 官方 ...
- Kafka权威指南 读书笔记之(五)深入Kafka
集中讨论以下3 个有意思的话题 :• Kafka 如何进行复制:• Kafka 如何处理来自生产者和消费者的请求 :• Kafka 的存储细节,比如文件格式和索引. 集群成员关系 Kafka 使用 Z ...
- Python assert作用
使用assert断言是学习python一个非常好的习惯,python assert 断言句语格式及用法很简单.在没完善一个程序之前, 我们不知道程序在哪里会出错.与其让它在运行最后崩溃,不如在出现错误 ...
- css3实现单行文本溢出显示省略号
文本超出一定宽度让其隐藏,以省略号替代 width:200px; white-space:nowrap; text-overflow:ellipsis; overflow:hidden; 如下图