windows下安装nginx和基本配置
1.下载并安装nginx
到nginx官网上下载相应的安装包,http://nginx.org/en/download.html;
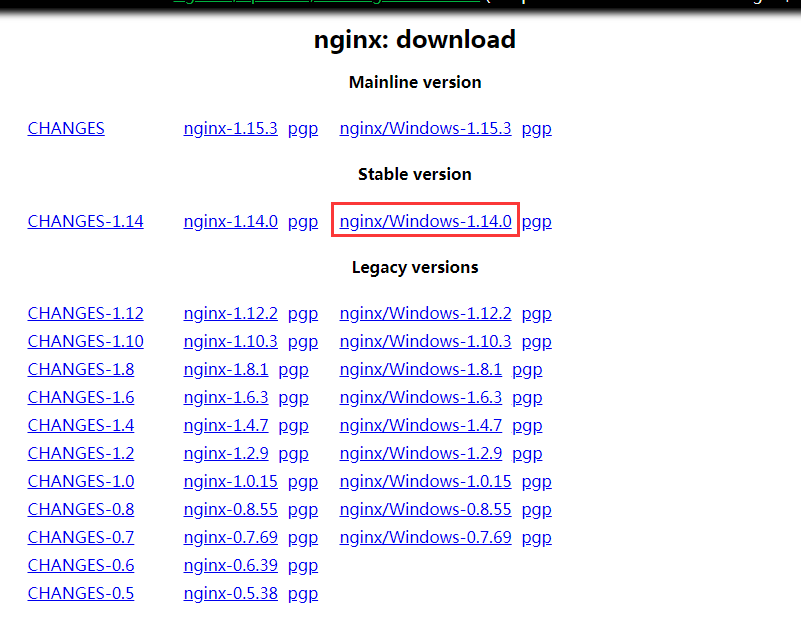
下载之后进行解压,将解压后的文件放到自己心仪的目录下,如下图所示:

至此,下载和安装nginx就已经完成了。
2.启动nginx
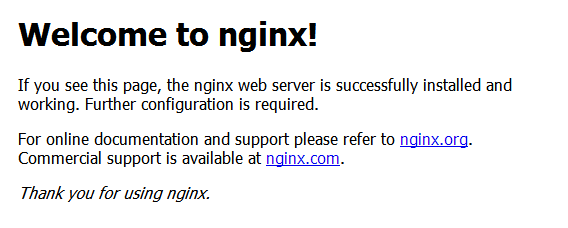
打开cmd命令窗口,切换到nginx解压目录下,输入命令 start nginx ,回车即可,此时可能会有一个黑色的弹窗一闪而过,不用理会。
打开浏览器,输入网址 http://localhost:80;回车,如果出现以下页面说明启动成功:
3.nginx常用命令
| 命令 | 描述 |
|---|---|
| nginx -h | 查看nginx帮助 |
| nginx -v | 查看nginx版本 |
| nginx -t | 测试nginx配置 |
| nginx -T | 测试nginx帮助,并打印配置信息 |
| nginx -s reload | 重新加载配置文件,平滑启动nginx |
| nginx -s stop | 快速停止nginx |
| nginx -s quit | 完整有序的停止nginx |
4.nginx基本配置
nginx的配置文件在nginx解压目录/conf/nginx.conf,用编辑器打开即可进行相关配置
#user  nobody;              # 设置nginx服务的系统使用用户

worker_processes  1;        # 工作进程数

#error_log  logs/error.log;           # nginx错误日志

#error_log  logs/error.log  notice;

#error_log  logs/error.log  info;

#pid        logs/nginx.pid;           # nginx服务启动时候的pid

events {

    worker_connections  1024;         # 每个进程允许最大连接数

}

http {

    include       mime.types;

    default_type  application/octet-stream;

    # access_log日志展示格式

    # $remote_addr:客户端地址

    # $remote_user:客户端请求nginx认证的用户名,默认不开启认证模块,没有记录

    # $time_local: 客户端请求的时间

    # $request:客户端请求的请求头

    # $status: 请求的状态码

    # $body_bytes_sent: 服务端相应客户端body信息的大小

    # $http_referer: 访问当前页面的上一级页面地址

    # $http_user_agent: 客户端浏览器的agent

    # $http_x_forwarded_for:请求所携带的http信息

    log_format  main  '$remote_addr - $remote_user [$time_local] "$request" '

                      '$status $body_bytes_sent "$http_referer" '

                      '"$http_user_agent" "$http_x_forwarded_for"';

    access_log  logs/access.log  main;

    sendfile        on;

    #tcp_nopush     on;

    #keepalive_timeout  0;

    keepalive_timeout  65;        # 连接超时时间

    #gzip  on;

    server {

        listen       80;                # 监听前端打开的80端口

        server_name  localhost;         # 代理前端访问的地址

        charset utf-8;

        #access_log  logs/host.access.log  main;

        location / {

            root   html;                   # 需要代理的前端页面代码目录(包含index.html等文件的目录)

            index  index.html index.htm;

        }

        location /test/ {

            proxy_pass http://127.0.0.1:8000/test/;       # 将前端的/test/请求转发到后端哪个地址

            proxy_set_header   Host             $host;

            proxy_set_header   X-Real-IP        $remote_addr;

            proxy_set_header   X-Forwarded-For  $proxy_add_x_forwarded_for;

        }

        # 静态资源文件

		location /files/ {

			root F:/nginx-1.12.2/nginx-1.12.2/;

			autoindex on;

		}

        #error_page  404              /404.html;

        # redirect server error pages to the static page /50x.html

        #

        error_page   500 502 503 504  /50x.html;

        location = /50x.html {

            root   html;

        }

        # proxy the PHP scripts to Apache listening on 127.0.0.1:80

        #

        #location ~ \.php$ {

        #    proxy_pass   http://127.0.0.1;

        #}

        # pass the PHP scripts to FastCGI server listening on 127.0.0.1:9000

        #

        #location ~ \.php$ {

        #    root           html;

        #    fastcgi_pass   127.0.0.1:9000;

        #    fastcgi_index  index.php;

        #    fastcgi_param  SCRIPT_FILENAME  /scripts$fastcgi_script_name;

        #    include        fastcgi_params;

        #}

        # deny access to .htaccess files, if Apache's document root

        # concurs with nginx's one

        #

        #location ~ /\.ht {

        #    deny  all;

        #}

    }

    # another virtual host using mix of IP-, name-, and port-based configuration

    #

    #server {

    #    listen       8000;

    #    listen       somename:8080;

    #    server_name  somename  alias  another.alias;

    #    location / {

    #        root   html;

    #        index  index.html index.htm;

    #    }

    #}

    # HTTPS server

    #

    #server {

    #    listen       443 ssl;

    #    server_name  localhost;

    #    ssl_certificate      cert.pem;

    #    ssl_certificate_key  cert.key;

    #    ssl_session_cache    shared:SSL:1m;

    #    ssl_session_timeout  5m;

    #    ssl_ciphers  HIGH:!aNULL:!MD5;

    #    ssl_prefer_server_ciphers  on;

    #    location / {

    #        root   html;

    #        index  index.html index.htm;

    #    }

    #}

}
(完)
windows下安装nginx和基本配置的更多相关文章
- windows下安装nginx
说起开发,自己感到非常惭愧,由于公司让我给<绿电侠>项目写整体架构解决方案,才开始接触nginx这个东东,突然觉得它是一把非常好的利器. 本文主要记录在windows下安装nginx,另参 ...
- windows下安装MongoDB扩展和配置
windows下安装MongoDB扩展和配置 1.下载mongoDB扩展,根据当前php版本进行下载 地址如下:http://pecl.php.net/package/mongo 我本地php版本是 ...
- Windows下安装Nginx+php+mysql环境
系统:Windows 7 64位系统 安装之前,首先下载软件: Nginx: http://nginx.org/en/download.html PHP Stable PHP 5.6.26: http ...
- mac下安装nginx及相关配置
1. 安装 Homebrew 首先 homebrew是什么?它是Mac中的一款软件包管理工具,通过brew可以很方便的在Mac中安装软件或者是卸载软件.不了解的同学看以看官网(https://br ...
- Windows下安装Nginx及负载均衡
1.下载Windows版本的Nginx http://nginx.org/en/download.html 2.解压Nginx包,配置conf文件下的nginx.conf文件 3.配置说明: #use ...
- windows 下安装nginx
1.首先去官网下载 nginxWindows版本,官网下载:http://nginx.org/en/download.html 选择最新版本,下载到软件包后,解压文件包到指定目录,例如我的目录是D:\ ...
- windows下安装nginx,并添加至系统服务
安装:解压修改配置文件运行即可 添加服务 需要借助"Windows Service Wrapper"小工具下载地址:winsw GitHub 下载后放在nginx目录下,并修改名字 ...
- windows 下安装 nginx + php
1. 下载软件 需要的软件有nginx,php,mysql(如不需要可不安装) nginx.org,www.php.net上面有得下 全部解压出来 php基本不用做任何修改(下载直接解压版本的) 用c ...
- (转)Windows下安装Docker, GitBash环境配置
转:https://blog.csdn.net/chengly0129/article/details/68944269 官网介绍: https://docs.docker.com/toolbox/t ...
随机推荐
- charles抓包小程序
charles抓包小程序: 原理呢,简单理解,通过charles开代理,然后手工wifi设置代理上网. 但是要做一些准备:手机要安装charles 证书. 注意的是安卓和ios有区别:目前安卓7.0版 ...
- MySQL 配置环境
MySQL 显示 Can't connect to MySQL server on 'localhost' (10061)怎么解决 在cmd中配置启动sql后,找不到密码.然后怎么也没办法弄,不知道怎 ...
- A-06 最小角回归法
目录 最小角回归法 一.举例 二.最小角回归法优缺点 2.1 优点 2.2 缺点 三.小结 更新.更全的<机器学习>的更新网站,更有python.go.数据结构与算法.爬虫.人工智能教学等 ...
- BZOJ 4621: Tc605
Description 最初你有一个长度为 N 的数字序列 A.为了方便起见,序列 A 是一个排列. 你可以操作最多 K 次.每一次操作你可以先选定一个 A 的一个子串,然后将这个子串的数字全部变成原 ...
- COGS 2089. 平凡的测试数据
[题目描述] 树链剖分可以干什么? “可以支持在树中快速修改一个点信息,快速询问一条链信息” LCT可以干什么? “可以支持树链剖分支持的特性,并且支持快速链接两个棵树,或者断开某条边” 那我现在要出 ...
- Java技能树-图片版
最近在总结技能树,打算先拓宽下视野和技术的广度,后面会详细研究每个常用的技术点,补充技术的深度!下面是我在ProcessOn上总结的,里面有些有注释,点击这里注册ProcessOn,点击这里,可查看或 ...
- hibernate之小白一
关于hibernate框架,以下是我自己的见解,每个人的理解各不同,希望各位读者根据自己的需要来查询自己想要的.以下我来给你们分享我学习hibernate的一些理论和实践: 首先我们来了解一下hibe ...
- python常用算法(5)——树,二叉树与AVL树
1,树 树是一种非常重要的非线性数据结构,直观的看,它是数据元素(在树中称为节点)按分支关系组织起来的结构,很像自然界中树那样.树结构在客观世界中广泛存在,如人类社会的族谱和各种社会组织机构都可用树形 ...
- SystemMetrics
头文件: #define NUMLINES ((int) (sizeof sysmetrics / sizeof sysmetrics [0]))struct { int iIndex ; TCHAR ...
- Potato土豆win综合提权
0x01 NBNS和WDAP NBNS: 在 Windows 系统中的另外一种名称就是 NetBIOS 名称,准确的说 NetBIOS 名称并非是一种名字系统,而是 Windows 操作系统网络的一个 ...