【记录】尝试用QEMU模拟ARM开发板去加载并运行Uboot,kernel,rootfs【转】
转自:https://www.crifan.com/try_use_qemu_emulate_arm_board_to_load_and_run_uboot_kernel_rootfs/
【背景】
手上有一个嵌入式Linux的项目。
已经用交叉编译器arm-xscale-linux-gnueabi去编译了Uboot和kernel:
【记录】Ubuntu下用arm-xscale-linux-gnueabi交叉编译uboot
【记录】Ubuntu下用arm-xscale-linux-gnueabi交叉编译linux-2.6.19.1内核
且已经有了对应的rootfs了,所以算是基本齐全了。
后来得知有个QEMU,和SkyEye类似,可以模拟arm开发板。
所以,尝试去试试,能否在Ubuntu下,用QEMU去模拟加载并运行Uboot,kernel,rootfs。
【折腾过程】
1.再去看看关于QEMU的介绍资料:
2.其下载页面:
下载QEMU:
http://wiki.qemu-project.org/download/qemu-1.6.0-rc3.tar.bz2
解压得到源码:
|
1
2
3
4
5
6
7
8
9
10
11
12
13
14
15
16
17
18
19
20
21
22
23
24
25
26
27
28
29
30
31
32
|
crifan@ubuntu:qemu-1.6.0-rc3$ tar xvfj qemu-1.6.0-rc3.tar.bz2crifan@ubuntu:qemu-1.6.0-rc3$ lsaio-posix.c cputlb.c linux-headers qdict-test-data.txt qmp-commands.hx target-sparcaio-win32.c default-configs linux-user qemu-bridge-helper.c qobject target-unicore32arch_init.c device-hotplug.c main-loop.c qemu-char.c qom target-xtensaasync.c device_tree.c MAINTAINERS qemu-coroutine.c qtest.c tcgaudio disas Makefile qemu-coroutine-io.c readline.c tcg-runtime.cbackends disas.c Makefile.objs qemu-coroutine-lock.c README tci.cballoon.c dma-helpers.c Makefile.target qemu-coroutine-sleep.c roms testsblock docs memory.c qemu-doc.texi rules.mak thread-pool.cblock.c dtc memory_mapping.c qemu-img.c savevm.c thunk.cblockdev.c dump.c migration.c qemu-img-cmds.hx scripts tpm.cblockdev-nbd.c exec.c migration-exec.c qemu-img.texi slirp traceblockjob.c fpu migration-fd.c qemu-io.c spice-qemu-char.c trace-eventsblock-migration.c fsdev migration-rdma.c qemu-io-cmds.c stubs translate-all.cbsd-user gdbstub.c migration-tcp.c qemu-log.c sysconfigs translate-all.hbt-host.c gdb-xml migration-unix.c qemu-nbd.c target-alpha uibt-vhci.c HACKING monitor.c qemu-nbd.texi target-arm user-exec.cChangelog hmp.c nbd.c qemu.nsi target-cris utilCODING_STYLE hmp-commands.hx net qemu-options.h target-i386 VERSIONconfigure hmp.h os-posix.c qemu-options.hx target-lm32 version.rcCOPYING hw os-win32.c qemu-options-wrapper.h target-m68k vl.cCOPYING.LIB include page_cache.c qemu.sasl target-microblaze xbzrle.ccoroutine-gthread.c iohandler.c pc-bios qemu-seccomp.c target-mips xen-all.ccoroutine-sigaltstack.c ioport.c pixman qemu-tech.texi target-moxie xen-mapcache.ccoroutine-ucontext.c kvm-all.c po qemu-timer.c target-openrisc xen-stub.ccoroutine-win32.c kvm-stub.c qapi qga target-ppccpu-exec.c libcacard qapi-schema.json QMP target-s390xcpus.c LICENSE qdev-monitor.c qmp.c target-sh4crifan@ubuntu:qemu-1.6.0-rc3$ pwd/home/crifan/develop/embedded/qemu/qemu-1.6.0-rc3 |
3.参考官网的文档:
中的:
Debian on an emulated ARM machine
QEMU Emulator User Documentation
去折腾。
4.先去在Ubuntu的Host上为arm平台安装QEMU:
【记录】在Ubuntu 13.04上为arm平台安装QEMU
5.然后再去下载测试软件:
http://wiki.qemu.org/download/arm-test-0.2.tar.gz
然后解压:
|
1
2
3
4
5
6
7
8
9
10
11
12
13
14
15
16
17
18
19
20
21
22
23
24
25
26
27
28
29
30
31
32
|
crifan@ubuntu:qemu-1.6.0-rc3$ pwd/home/crifan/develop/embedded/qemu/qemu-1.6.0-rc3crifan@ubuntu:qemu-1.6.0-rc3$ cd ..crifan@ubuntu:qemu$ lsqemu-1.6.0-rc3 qemu-1.6.0-rc3.tar.bz2crifan@ubuntu:qemu$ mkdir testcrifan@ubuntu:qemu$ cd testcrifan@ubuntu:test$ mkdir armcrifan@ubuntu:test$ cd armcrifan@ubuntu:arm$ wget http://wiki.qemu.org/download/arm-test-0.2.tar.gz--2013-08-15 03:02:29-- http://wiki.qemu.org/download/arm-test-0.2.tar.gzResolving wiki.qemu.org (wiki.qemu.org)... 140.211.15.109Connecting to wiki.qemu.org (wiki.qemu.org)|140.211.15.109|:80... connected.HTTP request sent, awaiting response... 200 OKLength: 3310162 (3.2M) [application/x-gzip]Saving to: ‘arm-test-0.2.tar.gz’100%[=======================================================================================================>] 3,310,162 978KB/s in 3.4s 2013-08-15 03:02:35 (938 KB/s) - ‘arm-test-0.2.tar.gz’ saved [3310162/3310162]crifan@ubuntu:arm$ lsarm-test-0.2.tar.gzcrifan@ubuntu:arm$ tar xf arm-test-0.2.tar.gz crifan@ubuntu:arm$ lsarm-test arm-test-0.2.tar.gzcrifan@ubuntu:arm$ cd arm-test/crifan@ubuntu:arm-test$ lsarm_root.img README zImage.integratorcrifan@ubuntu:arm-test$ pwd/home/crifan/develop/embedded/qemu/test/arm/arm-testcrifan@ubuntu:arm-test$ |
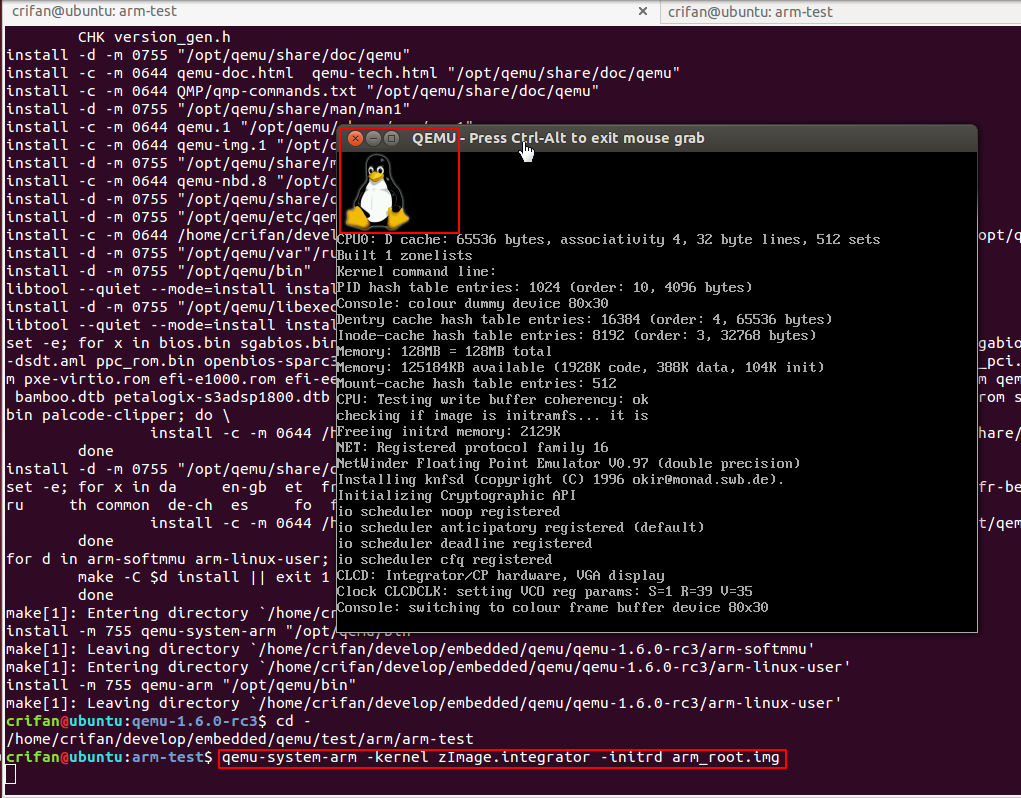
6.再去测试,结果只输出一行VNC:
【已解决】QUEMU安装完毕后测试arm出错:只有一行VNC server running on `127.0.0.1:5900′没其他输出
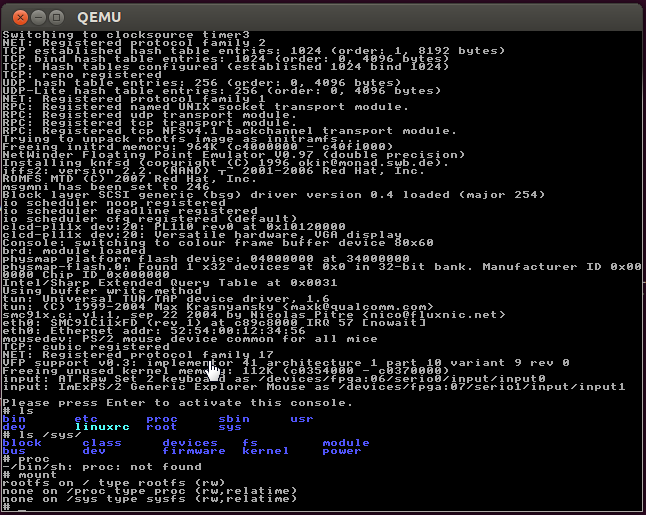
解决后,可以看到QEMU的arm的linux界面了:
7.再去测试测试arm的hello world是否可用。
先写个hello_qemu.c:
|
1
2
3
4
5
6
7
|
#include <stdio.h>int main(void){ printf("Hello QEMU for ARM !\n"); return 0;} |
再去用自己的交叉编译器arm-xscale-linux-gnueabi去编译:
|
1
2
3
4
|
crifan@ubuntu:helloworld$ arm-xscale-linux-gnueabi-gcc -o hello_qemu hello_qemu.c crifan@ubuntu:helloworld$ file hello_qemuhello_qemu: ELF 32-bit LSB executable, ARM, version 1 (SYSV), dynamically linked (uses shared libs), for GNU/Linux 2.6.19, not strippedcrifan@ubuntu:helloworld$ |
然后去运行试试:
先去找到sysroot的路径,是参考之前的折腾:
【已解决】Eclipse通过Makefile调用交叉编译器交叉编译C项目出错:Type ‘FILE’ could not be resolved
的路径:
/opt/crosscompile/xscale/gcc-4.6.0-glibc-2.9/arm-xscale-linux-gnueabi/sysroot/usr/include
所以sysroot,应该是:
/opt/crosscompile/xscale/gcc-4.6.0-glibc-2.9/arm-xscale-linux-gnueabi/sysroot
所以去试试:
|
1
2
3
|
crifan@ubuntu:helloworld$ qemu-arm -L /opt/crosscompile/xscale/gcc-4.6.0-glibc-2.9/arm-xscale-linux-gnueabi/sysroot hello_qemuHello QEMU for ARM !crifan@ubuntu:helloworld$ |
说明交叉工具链是正常的。
8.再去折腾uboot:
9.然后再去下载编译kernel:
【记录】Ubuntu下测试QEMU中加载和测试Linux内核
10.然后再去弄Open TFTP Server:
【记录】Ubuntu下为QEMU安装Open TFTP Server
11.然后再去折腾qemu-ifup & qemu-ifdown:
【记录】Ubuntu下为QEMU准备qemu-ifup和qemu-ifdown
12.都准备好了,就可以去启动内核了:
13.折腾完毕内核,就可以去弄rootfs了:
【记录】Ubuntu下为QEMU建立一个arm平台的可用的根文件系统rootfs
【总结】
此处,已经可以正常运行,一个基于busybox的,从ram启动的rootfs了。
至此,算是基本可用了。
有空再折腾,如何从uboot启动内核,从nfs加载rootfs等等内容。
转载请注明:在路上 » 【记录】尝试用QEMU模拟ARM开发板去加载并运行Uboot,kernel,rootfs
【记录】尝试用QEMU模拟ARM开发板去加载并运行Uboot,kernel,rootfs【转】的更多相关文章
- 列出当前ARM开发板系统加载的模块
lsmod 列出当前系统中加载的模块,其中左边第一列是模块名,第二列是该模块大小,第三列则是使用该模块的对象数目
- qemu 模拟-arm-mini2440开发板-启动u-boot,kernel和nfs文件系统
qemu 本文介绍了如何编译u-boot.linux kernel,然后用qemu启动u-boot和linux kernel,达到与开发板上一样的学习效果! 虽然已经买了2440开发板,但是在实际学习 ...
- qemu 模拟-arm-mini2440开发板-启动u-boot,kernel和nfs文件系统【转】
转自:http://www.cnblogs.com/riskyer/p/3366001.html qemu 本文介绍了如何编译u-boot.linux kernel,然后用qemu启动u-boot和l ...
- IMX6开发板虚拟机加载Ubuntu12.04.2镜像
基于迅为IMX6开发板安装好虚拟机之后,用户就可以加载 Ubuntu12.04.2 镜像.用户可以在网盘中下载“编译好的镜像”,该镜像已经安装好了编译 Android4.4.2 所需要的大部分软件.用 ...
- 【记录】恢复win7与ARM开发板TQ2440的串口连接
1.给板子上电. 2.接好物理上的串口连接,板子那端就是普通的RS232串口,电脑这端是USB转串口的线的USB这头,连到电脑上,然后在Win7系统下,先去看看,当前连接的USB虚拟出来的串口是哪个口 ...
- ubuntu下使用qemu模拟ARM(六)------驱动程序【转】
转自:http://blog.csdn.net/rfidunion/article/details/54709843 驱动程序分为在ubuntu上运行和在ARM开发板上运行两种,我们分别来进行测试 1 ...
- ubuntu(物理机)连接ARM开发板
非虚拟机 ubuntu下连接开发板 首先安装超级终端minicom sudo apt-get install minicom 安装完minicom以后,需要将开发板和电脑进行物理连接.需要使用一条网线 ...
- CentOS 7 利用qemu模拟ARM vexpress A9开发板
听说qemu用于仿真arm很不错,今日就来试了一把.由于刚刚开始,了解的并不多.本文仅仅记录Qemu装载Linux kernel和busybox根文件系统的过程.后续将会深入了解仿真的其他内容. 先上 ...
- 一步步教你如何在ubuntu虚拟机中安装QEMU并模拟arm 开发环境(二)rootfs制作
过了,一天,周又到了,博主终于可以拿出时间来把上一次没有给大家展示完了的内容今天在这里一并展示给大家,希望和大家共同进步,共同学习,同时我也虔诚的希望各位业界的朋友把自己的工作经验拿出来大家一起分享, ...
随机推荐
- 每日一问(常用的集合接口和类有哪些【二】)—ArrayList类和数组之间的转换
ArrayList的实质是数组,但是在类的实例中所存储的数组是无法访问的,因此实际上是无法直接作为数组使用,那么如何将这两者进行转化呢? Collection接口定义了toArray的方法,可将实现该 ...
- 【CF888G】Xor-MST(最小生成树,Trie树)
[CF888G]Xor-MST(最小生成树,Trie树) 题面 CF 洛谷 题解 利用\(Kruskal\)或者\(Prim\)算法都很不好计算. 然而我们还有一个叫啥来着?\(B\)啥啥的算法,就叫 ...
- Merge Two Sorted Lists - LeetCode
目录 题目链接 注意点 解法 小结 题目链接 Merge Two Sorted Lists - LeetCode 注意点 两个链表长度可能不一致 解法 解法一:先比较两个链表长度一致的部分,多余的部分 ...
- Java EE之JSP
1.使用JSP的原因 编写Servlet代码的时候,向响应中输出HTML文档是非常不方便的. PrintWriter writer = response.getWriter(); writer.app ...
- Gradle 命令之 --stacktrace , --info , --debug 用法
FAQ: Android studio 出现错误Run with --stacktrace option to get the stack trace. Run with --info or --de ...
- Android6.0 org.apache.http.util.EncodingUtils等相关类被移除(转)
ref: Android6.0 org.apache.http.util.EncodingUtils等相关类被移除 - 博客频道 - CSDN.NEThttp://blog.csdn.net/u012 ...
- BP神经网络人口预测程序(matlab实现)
自己测试人口预测的matlab实现: x=[54167 55196 56300 57482 58796 60266 61465 62828 64653 ...
- bzoj 2809
2809: [Apio2012]dispatching Time Limit: 10 Sec Memory Limit: 128 MBSubmit: 4519 Solved: 2329[Submi ...
- Python之——生产环境代码包发布管理fabirc
程序生产环境的发布是业务上线最后一个环境,要求具备源码打包.发布.切换.回滚.版本管理等功能,本实例实现了一整套流程,其中版本切换与回滚使用了Linux的软链接来实现.具体代码如下: # -*- ...
- linux命令总结dd命令详解
一:dd命令 dd:用指定大小的块拷贝一个文件,并在拷贝的同时进行指定的转换. 注意:指定数字的地方若以下列字符结尾,则乘以相应的数字:b=512:c=1:k=1024:w=2 参数注释: if=文件 ...