SpringBoot+Swagger2 整合
SpringBoot+Swagger2四步整合
第一步:添加相关依赖
<parent>

    <groupId>org.springframework.boot</groupId>

    <artifactId>spring-boot-starter-parent</artifactId>

    <version>1.5.9.RELEASE</version>

</parent>

<properties>

    <swagger2.version>2.7.0</swagger2.version>

</properties>

<dependencies>

    <!--springBoot 相关依赖-->

    <dependency>

        <groupId>org.springframework.boot</groupId>

        <artifactId>spring-boot-starter-web</artifactId>

    </dependency>

    <!--swagger2 相关依赖-->

    <dependency>

        <groupId>io.springfox</groupId>

        <artifactId>springfox-swagger2</artifactId>

        <version>${swagger2.version}</version>

    </dependency>

    <dependency>

        <groupId>io.springfox</groupId>

        <artifactId>springfox-swagger-ui</artifactId>

        <version>${swagger2.version}</version>

    </dependency>

</dependencies>
创建SrpingBoot启动类
/**

 * Springboot+Swagger整合启动类

 *

 * @author Y.yang

 * @date 2019/3/12

 */

@SpringBootApplication

public class SwaggerApplication {

	public static void main(String[] args) {

		SpringApplication.run(SwaggerApplication.class, args);

	}

}
第二步:配置Swagger2
注意添加@Configuration EnableSwagger2注解
/**
* Swagger2 接口Api文档 配置文件
*
* @author Y.yang
* @date 2019/3/12
*/
@Configuration
@EnableSwagger2
public class SwaggerConfig {
/**
* 初始化创建Swagger Api
*/
@Bean
public Docket createRestApi() {
return new Docket(DocumentationType.SWAGGER_2)
// 详细信息定制
.apiInfo(apiInfo())
.select()
// 指定当前包路径
.apis(RequestHandlerSelectors.basePackage("com.fame.controller"))
// 扫描所有 .apis(RequestHandlerSelectors.any())
.paths(PathSelectors.any())
.build();
}
/**
* 添加摘要信息
*/
private ApiInfo apiInfo() {
// 用ApiInfoBuilder进行定制
return new ApiInfoBuilder()
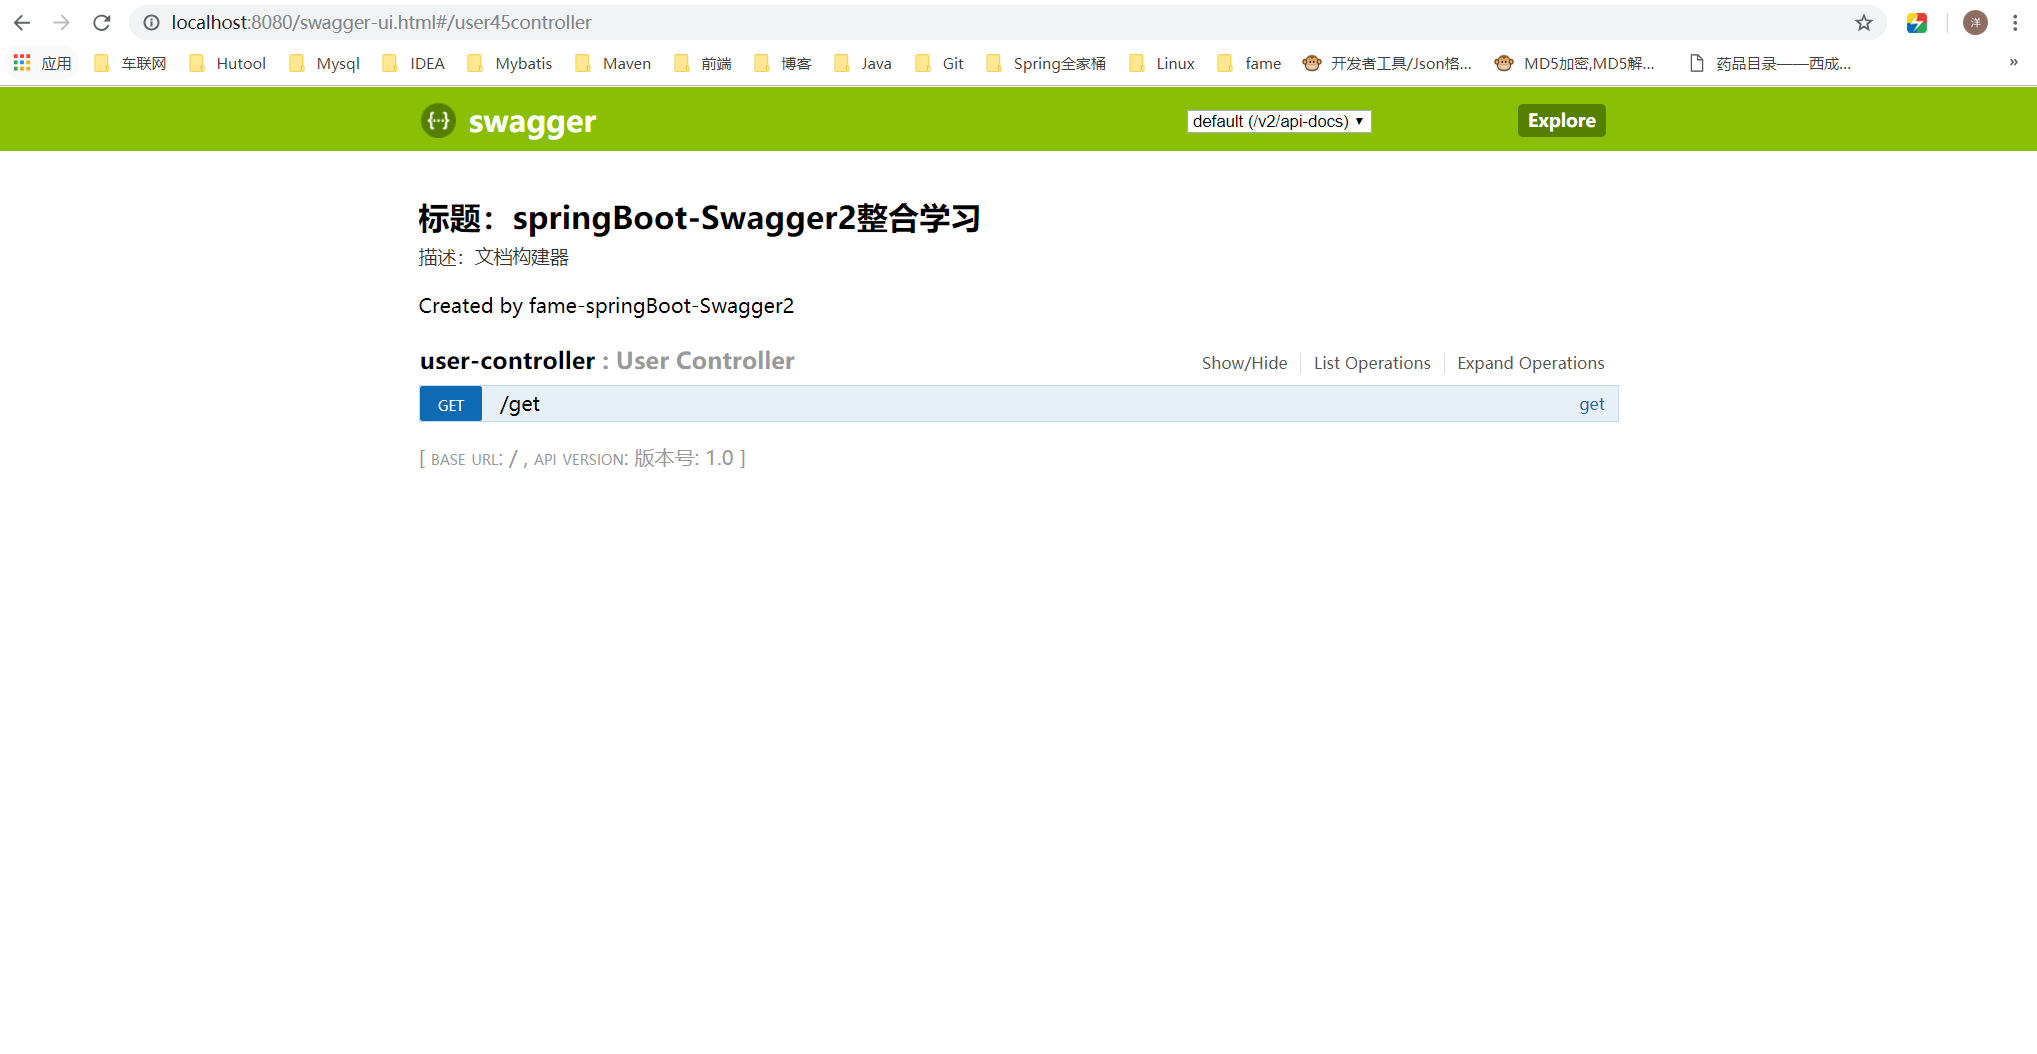
.title("标题:springBoot-Swagger2整合学习")
.description("描述:文档构建器")
.contact(new Contact("Fame-springBoot-Swagger2", null, null))
.version("版本号: 1.0")
.build();
}
}
springfox为我们提供了一个Docket(摘要的意思)类,我们需要把它做成一个Bean注入到spring中,
显然,我们需要一个配置文件,并通过一种方式(显然它会是一个注解)告诉程序,这是一个Swagger配置文件。
springfox允许我们将信息组合成一个ApiInfo的类,作为构造参数传给Docket(当然也可以不构造这个类,而直接使用null,但是你的这个API就太low了)。
第三步:创建测试实例
/**

 * Swagger接口测试

 *

 * @author Y.yang

 * @date 2019/3/12

 */

@RestController

public class UserController {

    @GetMapping("/get")

    public String get(){

        return "Hello Swagger2";

    }

}
第四步:输入SwaggerUI地址
http://localhost:8080/swagger-ui.html
Swagger2基本使用-常用注解
接口/方法常用注解
/**

 * Swagger接口测试

 *

 * @author Y.yang

 * @date 2019/3/12

 */

@Api(value = "用户信息", tags = { "用户信息" })

@RestController

public class UserController {

	@ApiOperation(value = "用户信息分页查询")

	@GetMapping("/page")

	public String page(User user) {

		return "Hello Swagger2";

	}

	@ApiOperation(value = "用户信息查询")

	@ApiImplicitParams({

		@ApiImplicitParam(name = "id", value = "用户ID", required = true, dataType = "Integer"),

		@ApiImplicitParam(name = "file", value = "文件导入", required = true, dataType = "MultipartFile")

	})

	@GetMapping("/id")

	public UserVo getUser(Long id, MultipartFile file) {

		return new UserVo();

	}

}
@Api: 描述类/接口的主要用途
用于类;表示标识这个类是swagger的资源
tags–表示说明
value–也是说明,不会显示在接口文档上,可以使用tags替代
但是tags如果有多个值,会生成多个list
@Api(value = "用户信息", tags = { "用户信息" })
@ApiOperation: 描述方法用途
@ApiOperation(value = "用户信息分页查询")
@ApiImplicitParam: 描述方法的参数
@ApiImplicitParams: 描述方法的参数(Multi-Params)
@ApiImplicitParams({

	@ApiImplicitParam(name = "id", value = "用户ID", required = true, dataType = "Integer"),

	@ApiImplicitParam(name = "file", value = "文件导入", dataType = "MultipartFile")

})
实体类常用注解
/**

 * 用户信息 数据传输对象 Dto(Data Transfer Object)

 *

 * @author Y.yang

 * @date 2019/3/29

 */

@ApiModel(description = "用户信息请求对象")

@Data

public class User implements Serializable {

	private static final long serialVersionUID = -6986638131456347054L;

	@ApiModelProperty(value = "姓名")

	private String username;

	@ApiModelProperty(value = "性别")

	private String sex;

	@ApiModelProperty(value = "年龄")

	private Integer age;

}
@ApiModel:描述实体类(Dto、Vo、Do等)
@ApiModel(description = "用户信息请求对象")
@ApiModelProperty:描述实体类的字段
@ApiModelProperty(value = "姓名")
SpringBoot+Swagger2 整合的更多相关文章
- SpringBoot与Swagger2整合
一.Swagger简介与优势 相信各位在公司写API文档数量应该不少,当然如果你还处在自己一个人开发前后台的年代,当我没说,如今为了前后台更好的对接,还为了以后交接方便,都有要求写API文档. Swa ...
- SpringBoot+Swagger整合API
SpringBoot+Swagger整合API Swagger:整合规范的api,有界面的操作,测试 1.在pom.xml加入swagger依赖 <!--整合Swagger2配置类--> ...
- 学习SpringBoot,整合全网各种优秀资源,SpringBoot基础,中间件,优质项目,博客资源等,仅供个人学习SpringBoot使用
学习SpringBoot,整合全网各种优秀资源,SpringBoot基础,中间件,优质项目,博客资源等,仅供个人学习SpringBoot使用 一.SpringBoot系列教程 二.SpringBoot ...
- SpringMVC中使用Swagger2整合
Swagger2是什么 Swagger 是一款RESTFUL接口的文档在线自动生成+功能测试功能软件. Swagger 是一个规范和完整的框架,用于生成.描述.调用和可视化 RESTful 风格的 W ...
- springboot+swagger2
springboot+swagger2 小序 新公司的第二个项目,是一个配置管理终端机(比如:自动售卖机,银行取款机)的web项目,之前写过一个分模块的springboot框架,就在那个框架基础上进行 ...
- SpringBoot 同时整合thymeleaf html、vue html和jsp
问题描述 SpringBoot如何同时访问html和jsp SpringBoot访问html页面可以,访问jsp页面报错 SpringBoot如何同时整合thymeleaf html.vue html ...
- SpringBoot+AOP整合
SpringBoot+AOP整合 https://blog.csdn.net/lmb55/article/details/82470388 https://www.cnblogs.com/onlyma ...
- SpringBoot+Redis整合
SpringBoot+Redis整合 1.在pom.xml添加Redis依赖 <!--整合Redis--> <dependency> <groupId>org.sp ...
- springboot+maven整合spring security
springboot+maven整合spring security已经做了两次了,然而还是不太熟悉,这里针对后台简单记录一下需要做哪些事情,具体的步骤怎么操作网上都有,不再赘述.1.pom.xml中添 ...
随机推荐
- 【cocos2d-x 仙凡奇缘-网游研发(1) 登录&注册】
转载请注明出处:http://www.cnblogs.com/zisou/p/xianfan01.html 公司的项目总算告一段落了,年前憋到年后,总算要上线了,所以我也有了时间来搞我自己的游戏项目了 ...
- DDoS防护之TCP防护
本文由 网易云 发布. TCP协议,相信对于每一个开发工程师都不陌生.由于该协议是一个面向连接,可靠的特性,广泛应用于现在互联网的应用中.如常见的Web.SSH.FTP等都是基于TCP协议.目前TC ...
- QT for Android记录
1.<Qt on Android核心编程> blog: http://blog.csdn.net/foruok/article/details/38510195
- Linux中MySQLl单实例源码编译安装
MySQL5.5以后源码安装要用cmake 1.3 安装相关包(cmake) 1.3.1 cmake软件 cd /home/Public/tools/ tar xf cmake-2.8.8.tar.g ...
- 一个MySQL 5.7 分区表性能下降的案例分析
告知MySQL5.7.18的使用者分区表使用中存在的陷阱,避免在该版本上继续踩坑.同时通过对源码的讲解,升级MySQL5.7.18时分区表性能下降的根本原因,向MySQL源码爱好者展示分区表实现中锁的 ...
- C#之初识单例模式
当我们使用QQ的时候就会发现,他可以启动多个QQ,但是有时候,我们不想这样做,这时候我们就需要使用到单例模式. 1.将Form2的构造函数转为私有 using System.Windows.Forms ...
- 原生JavaScript的DOM操作方法总结
什么是DOM? DOM即文档对象模型,Document Object Model. 是HTML和XML文档的编程接口.它提供了对文档的结构化的表述,并定义了一种方式可以使从程序中对该结构进行访问,从 ...
- EJB3 EntityBean中EntityManager的管理类型
EJB中EntityManager的管理方式有两种:Container-managed EntityManager和Application-managed EntityManager 即容器管理的En ...
- python中del函数的垃圾回收
今天学习面向对象里的类被del函数的垃圾回收过程搞的晕头转向,经过了老师的讲解还是是懂非懂,然后看了很多博客慢慢的心里才有了个大概的了解. 刚刚看到一篇博客,觉得讲的很好,转载过来以供参考.以下转自笨 ...
- 【优化】Filddler用于移动端
Fiddler是一个非常强大的Web调试工具,它能捕获所有客户端和服务器的http和https请求,我们可以对请求监视.设置断点,也能修改输入输出数据,这些特性使得Fiddler成为广大web开发者的 ...