在Fedora10上安装MySQL5.0.18,告捷!
又一次安MySQL了,为什么又呢,因为前面成功那次算配置,即配置Fedora10自带的MySQL,这个还不算自己安装的,所以有必要再安装一次,以后还装也有可能,换操作系统,换MySql版本都可能这样做。
前几次安装失败的精力总算没白花,这会安装顺利多了。当然,这篇网文的帮助也是不小的:http://www.hackbase.com/tech/2011-10-28/65455.html
我安装的mysql-5.0.18.tar.gz可以从这里下载:http://pan.baidu.com/share/link?shareid=3134485043&uk=34256769
正文开始了,首先解压。
[root@Dawalixi hy]# tar xvzf mysql-5.0.18.tar.gz
...
mysql-5.0.18/server-tools/instance-manager/buffer.h
mysql-5.0.18/server-tools/instance-manager/buffer.cc
mysql-5.0.18/server-tools/instance-manager/parse.cc
mysql-5.0.18/server-tools/instance-manager/parse.h
mysql-5.0.18/server-tools/instance-manager/guardian.cc
mysql-5.0.18/server-tools/instance-manager/guardian.h
mysql-5.0.18/server-tools/instance-manager/parse_output.cc
mysql-5.0.18/server-tools/instance-manager/parse_output.h
mysql-5.0.18/server-tools/instance-manager/mysql_manager_error.h
mysql-5.0.18/server-tools/instance-manager/portability.h
看看解压完的目录
[root@Dawalixi hy]# ls
4.sh Desktop Download mysql-5.0.18 Pictures Templates
backup Documents Music mysql-5.0.18.tar.gz Public Videos
[root@Dawalixi hy]#
进行设置,utf8一项很重要,因为这个数据库将来要容纳中文
[root@Dawalixi mysql-5.0.18]# ./configure --prefix=/usr/local/mysql --with-charset=utf8 --with-extra-charsets=all
...
config.status: creating read/Makefile
config.status: creating rem/Makefile
config.status: creating row/Makefile
config.status: creating srv/Makefile
config.status: creating sync/Makefile
config.status: creating thr/Makefile
config.status: creating trx/Makefile
config.status: creating usr/Makefile
config.status: creating ib_config.h
config.status: ib_config.h is unchanged
config.status: executing depfiles commands
MySQL has a Web site at http://www.mysql.com/ which carries details on the
latest release, upcoming features, and other information to make your
work or play with MySQL more productive. There you can also find
information about mailing lists for MySQL discussion.
Remember to check the platform specific part of the reference manual for
hints about installing MySQL on your platform. Also have a look at the
files in the Docs directory.
Thank you for choosing MySQL!
开始编译
[root@Dawalixi mysql-5.0.18]# make
...
".deps/parse_output.Tpo"; exit 1; fi
/bin/sh ../../libtool --preserve-dup-deps --mode=link g++ -O3 -DDBUG_OFF -fno-implicit-templates -fno-exceptions -fno-rtti -rdynamic -o mysqlmanager command.o mysqlmanager.o manager.o log.o thread_registry.o listener.o protocol.o mysql_connection.o user_map.o messages.o commands.o instance.o instance_map.o instance_options.o buffer.o parse.o guardian.o parse_output.o liboptions.a libnet.a ../../vio/libvio.a ../../mysys/libmysys.a ../../strings/libmystrings.a ../../dbug/libdbug.a -lz -lpthread -lcrypt -lnsl -lm -lpthread
mkdir .libs
g++ -O3 -DDBUG_OFF -fno-implicit-templates -fno-exceptions -fno-rtti -rdynamic -o mysqlmanager command.o mysqlmanager.o manager.o log.o thread_registry.o listener.o protocol.o mysql_connection.o user_map.o messages.o commands.o instance.o instance_map.o instance_options.o buffer.o parse.o guardian.o parse_output.o liboptions.a libnet.a ../../vio/libvio.a ../../mysys/libmysys.a ../../strings/libmystrings.a ../../dbug/libdbug.a -lz -lpthread -lcrypt -lnsl -lm -lpthread
make[3]: Leaving directory `/home/hy/mysql-5.0.18/server-tools/instance-manager'
make[3]: Entering directory `/home/hy/mysql-5.0.18/server-tools'
make[3]: Nothing to be done for `all-am'.
make[3]: Leaving directory `/home/hy/mysql-5.0.18/server-tools'
make[2]: Leaving directory `/home/hy/mysql-5.0.18/server-tools'
make[1]: Leaving directory `/home/hy/mysql-5.0.18'
安装了!
[root@Dawalixi mysql-5.0.18]# make install
...
make[2]: Leaving directory `/home/hy/mysql-5.0.18/support-files'
Making install in server-tools
make[2]: Entering directory `/home/hy/mysql-5.0.18/server-tools'
Making install in instance-manager
make[3]: Entering directory `/home/hy/mysql-5.0.18/server-tools/instance-manager'
make[4]: Entering directory `/home/hy/mysql-5.0.18/server-tools/instance-manager'
test -z "/usr/local/mysql/libexec" || mkdir -p -- . "/usr/local/mysql/libexec"
/bin/sh ../../libtool --preserve-dup-deps --mode=install /usr/bin/install -c 'mysqlmanager' '/usr/local/mysql/libexec/mysqlmanager'
/usr/bin/install -c mysqlmanager /usr/local/mysql/libexec/mysqlmanager
make[4]: Nothing to be done for `install-data-am'.
make[4]: Leaving directory `/home/hy/mysql-5.0.18/server-tools/instance-manager'
make[3]: Leaving directory `/home/hy/mysql-5.0.18/server-tools/instance-manager'
make[3]: Entering directory `/home/hy/mysql-5.0.18/server-tools'
make[4]: Entering directory `/home/hy/mysql-5.0.18/server-tools'
make[4]: Nothing to be done for `install-exec-am'.
make[4]: Nothing to be done for `install-data-am'.
make[4]: Leaving directory `/home/hy/mysql-5.0.18/server-tools'
make[3]: Leaving directory `/home/hy/mysql-5.0.18/server-tools'
make[2]: Leaving directory `/home/hy/mysql-5.0.18/server-tools'
make[1]: Leaving directory `/home/hy/mysql-5.0.18'
增加mysql组和mysql用户
[root@Dawalixi mysql-5.0.18]# groupadd mysql
[root@Dawalixi mysql-5.0.18]# useradd -g mysql mysql
进入mysql的安装目录
[root@Dawalixi mysql-5.0.18]# cd /usr/local/mysql
[root@Dawalixi mysql]# ls
bin include info lib libexec man mysql-test share sql-bench
进入share目录是想得到my.cnf
[root@Dawalixi mysql]# cd share/
[root@Dawalixi share]# ls
mysql
[root@Dawalixi share]# cd mysql/
[root@Dawalixi mysql]# ls
binary-configure italian ndb-config-2-node.ini
charsets japanese norwegian
czech korean norwegian-ny
danish mi_test_all polish
dutch mi_test_all.res portuguese
english my-huge.cnf romanian
errmsg.txt my-innodb-heavy-4G.cnf russian
estonian my-large.cnf serbian
fill_help_tables.sql my-medium.cnf slovak
french my-small.cnf spanish
german mysql_fix_privilege_tables.sql swedish
greek mysql-log-rotate ukrainian
hungarian mysql.server
[root@Dawalixi mysql]# vi my-medium.cnf #这一步就是看看,没改什么
拷贝mysql配置文件,2G以下内存选择my.medium.cnf,如果有原来的选择覆盖。
[root@Dawalixi mysql]# cp my-medium.cnf /etc/my.cnf
cp: overwrite `/etc/my.cnf'? y
下面进行数据表的安装
[root@Dawalixi mysql]# cd /usr/local/mysql/bin
[root@Dawalixi bin]# ls
comp_err mysql_config mysql_setpermission
innochecksum mysql_convert_table_format mysqlshow
msql2mysql mysql_create_system_tables mysql_tableinfo
myisamchk mysqld_multi mysqltest
myisam_ftdump mysqld_safe mysqltestmanagerc
myisamlog mysqldump mysqltestmanager-pwgen
myisampack mysqldumpslow mysql_tzinfo_to_sql
my_print_defaults mysql_explain_log mysql_waitpid
mysql mysql_find_rows mysql_zap
mysqlaccess mysql_fix_extensions perror
mysqladmin mysql_fix_privilege_tables replace
mysqlbinlog mysqlhotcopy resolveip
mysqlbug mysqlimport resolve_stack_dump
mysqlcheck mysql_install_db
mysql_client_test mysql_secure_installation
[root@Dawalixi bin]# ./mysql_install_db --user=mysql
Installing all prepared tables
Fill help tables
To start mysqld at boot time you have to copy support-files/mysql.server
to the right place for your system
PLEASE REMEMBER TO SET A PASSWORD FOR THE MySQL root USER !
To do so, start the server, then issue the following commands:
/usr/local/mysql/bin/mysqladmin -u root password 'new-password'
/usr/local/mysql/bin/mysqladmin -u root -h Dawalixi password 'new-password'
See the manual for more instructions.
You can start the MySQL daemon with:
cd /usr/local/mysql ; /usr/local/mysql/bin/mysqld_safe &
You can test the MySQL daemon with the benchmarks in the 'sql-bench' directory:
cd sql-bench ; perl run-all-tests
Please report any problems with the /usr/local/mysql/bin/mysqlbug script!
The latest information about MySQL is available on the web at
http://www.mysql.com
Support MySQL by buying support/licenses at https://order.mysql.com
下面要把mysql添加到系统服务中
[root@Dawalixi bin]# pwd
/usr/local/mysql/bin
[root@Dawalixi bin]# cd /usr/local/mysql/share/mysql/
[root@Dawalixi mysql]# ls
binary-configure italian ndb-config-2-node.ini
charsets japanese norwegian
czech korean norwegian-ny
danish mi_test_all polish
dutch mi_test_all.res portuguese
english my-huge.cnf romanian
errmsg.txt my-innodb-heavy-4G.cnf russian
estonian my-large.cnf serbian
fill_help_tables.sql my-medium.cnf slovak
french my-small.cnf spanish
german mysql_fix_privilege_tables.sql swedish
greek mysql-log-rotate ukrainian
hungarian mysql.server
[root@Dawalixi mysql]# cp mysql.server /etc/init.d/mysqld
现在可以使用系统服务了,不做这一步下一步设置密码也跑不起来。
[root@Dawalixi bin]# service mysqld start
Starting MySQL [ OK ]
下面给root用户设置密码
[root@Dawalixi mysql]# cd /usr/local/mysql/bin
[root@Dawalixi bin]# ./mysqladmin -u root password '123456'
进行数据库授权,需要提醒的是,只要授权一次,root的密码必须重设一次,切记。
[root@Dawalixi bin]# mysql -u root -p
Enter password:
Welcome to the MySQL monitor. Commands end with ; or \g.
Your MySQL connection id is 10
Server version: 5.0.18-log
Copyright (c) 2000, 2013, Oracle and/or its affiliates. All rights reserved.
Oracle is a registered trademark of Oracle Corporation and/or its
affiliates. Other names may be trademarks of their respective
owners.
Type 'help;' or '\h' for help. Type '\c' to clear the current input statement.
mysql> grant all privileges on *.* to root@'%' identified by "root";
Query OK, 0 rows affected (0.01 sec)
mysql> flush privileges;
Query OK, 0 rows affected (0.00 sec)
mysql> grant select,update,insert,delete,create on *.* to root@192.168.0.100 identified by "root"; #注意这里比上回增加了create,这是为了建表用的
Query OK, 0 rows affected (0.01 sec)
mysql> flush privileges;
Query OK, 0 rows affected (0.01 sec)
mysql> quit
Bye
下面开始重设密码
[root@Dawalixi bin]# mysql -u root -p
Enter password:
Welcome to the MySQL monitor. Commands end with ; or \g.
Your MySQL connection id is 11
Server version: 5.0.18-log
Copyright (c) 2000, 2013, Oracle and/or its affiliates. All rights reserved.
Oracle is a registered trademark of Oracle Corporation and/or its
affiliates. Other names may be trademarks of their respective
owners.
Type 'help;' or '\h' for help. Type '\c' to clear the current input statement.
mysql> use mysql
Database changed
mysql> update user set password=password('12345678') where user='root';
Query OK, 2 rows affected (0.00 sec)
Rows matched: 4 Changed: 2 Warnings: 0
mysql> flush privileges;
Query OK, 0 rows affected (0.00 sec)
mysql> quit
Bye
[root@Dawalixi bin]#
打开防火墙对3306端口的限制
[root@Dawalixi bin]# vi /etc/sysconfig/iptables
# Firewall configuration written by system-config-firewall
# Manual customization of this file is not recommended.
*filter
:INPUT ACCEPT [0:0]
:FORWARD ACCEPT [0:0]
:OUTPUT ACCEPT [0:0]
-A INPUT -m state --state ESTABLISHED,RELATED -j ACCEPT
-A INPUT -p icmp -j ACCEPT
-A INPUT -i lo -j ACCEPT
-A INPUT -m state --state NEW -m tcp -p tcp --dport 22 -j ACCEPT
-A INPUT -m state --state NEW -m tcp -p tcp --dport 3306 -j ACCEPT #这一行是我新加的
-A INPUT -j REJECT --reject-with icmp-host-prohibited
-A FORWARD -j REJECT --reject-with icmp-host-prohibited
COMMIT
重启防火墙
[root@Dawalixi bin]# service iptables restart
iptables: Flushing firewall rules: [ OK ]
iptables: Setting chains to policy ACCEPT: filter [ OK ]
iptables: Unloading modules: [ OK ]
iptables: Applying firewall rules: [ OK ]
[root@Dawalixi bin]#
此时端口应该对3306开放了
[root@Dawalixi bin]# netstat -tlnpu
Active Internet connections (only servers)
Proto Recv-Q Send-Q Local Address Foreign Address State PID/Program name
tcp 0 0 0.0.0.0:3306 0.0.0.0:* LISTEN 19227/mysqld
tcp 0 0 0.0.0.0:111 0.0.0.0:* LISTEN 1477/rpcbind
tcp 0 0 0.0.0.0:22 0.0.0.0:* LISTEN 1836/sshd
tcp 0 0 0.0.0.0:57846 0.0.0.0:* LISTEN 1490/rpc.statd
tcp 0 0 127.0.0.1:631 0.0.0.0:* LISTEN 1931/cupsd
tcp 0 0 127.0.0.1:25 0.0.0.0:* LISTEN 1859/sendmail: acce
tcp 0 0 :::111 :::* LISTEN 1477/rpcbind
tcp 0 0 :::22 :::* LISTEN 1836/sshd
udp 0 0 0.0.0.0:804 0.0.0.0:* 1477/rpcbind
udp 0 0 0.0.0.0:45617 0.0.0.0:* 1490/rpc.statd
udp 0 0 0.0.0.0:818 0.0.0.0:* 1490/rpc.statd
udp 0 0 0.0.0.0:68
现在可以通过数据库客户端对MySql数据库进行连接了。
我想做的是增加一张表,然后加入两条带中文的记录。
下面是加表。
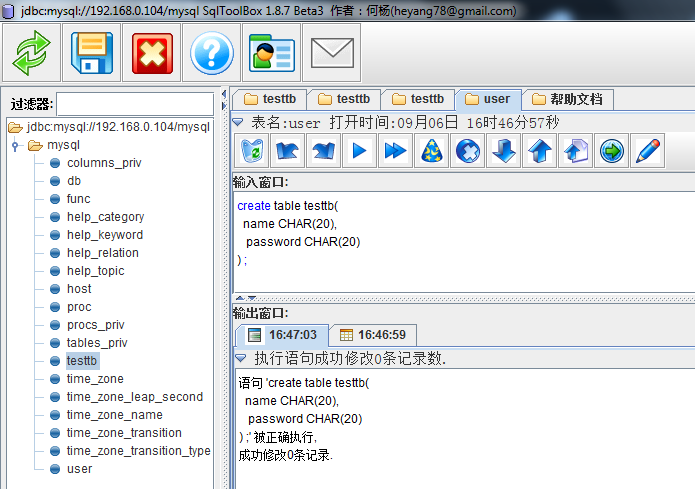
插入记录
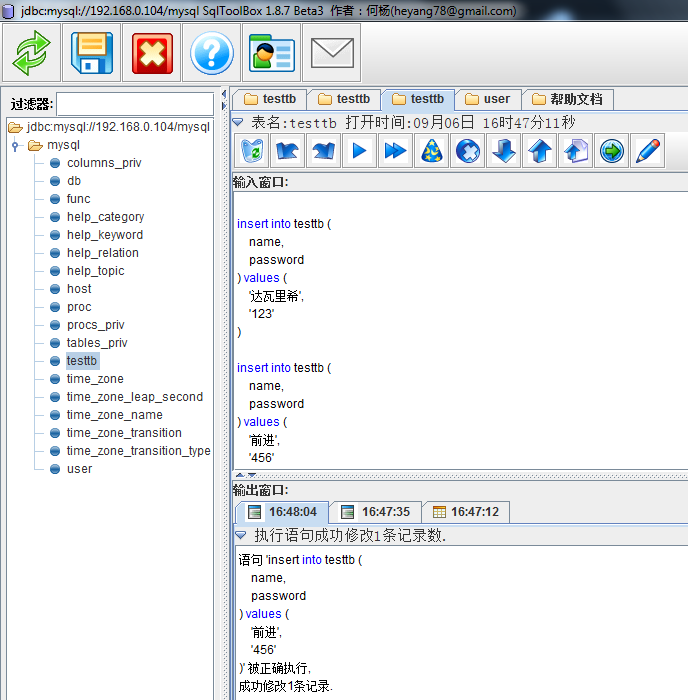
查询成功

接下来从服务器上查看下客户端加入进来的数据
[root@Dawalixi bin]# mysql -u root -p
Enter password:
Welcome to the MySQL monitor. Commands end with ; or \g.
Your MySQL connection id is 35
Server version: 5.0.18-log
Copyright (c) 2000, 2013, Oracle and/or its affiliates. All rights reserved.
Oracle is a registered trademark of Oracle Corporation and/or its
affiliates. Other names may be trademarks of their respective
owners.
Type 'help;' or '\h' for help. Type '\c' to clear the current input statement.
mysql> use mysql;
Database changed
mysql> select * from testtb;
+--------------+----------+
| name | password |
+--------------+----------+
| 达瓦里希 | 123 |
| 前进 | 456 |
+--------------+----------+
2 rows in set (0.00 sec)
mysql> quit
Bye
[root@Dawalixi bin]#
很好,表和中文文字都加入进来了,说明之前对MySQL的设置是正确的。
《全文完》有问题烦请指出
在Fedora10上安装MySQL5.0.18,告捷!的更多相关文章
- 在Fedora8上安装MySQL5.0.45的过程
本来想安装最新的5.6.13-1版本,下载下来后,依赖的包rpmlib无处下载,无法只得作罢.从Foreda8的安装光盘中找到了以下文件: mysql-5.0.45-4.fc8.i386.rpm my ...
- 在mac os10.12上安装mysql5.7.18
搜了全网都是各种坑,没能解决我的问题.最后自己琢磨出来了. 安装好以后,会弹出临时密码 ,copy住.如果手点快了,在通知栏还有一次机会,通知栏的就只能看着手打了.如果通知栏也x了,那就GG最快方法只 ...
- 在 CentOS7 上安装 MySQL5.7
在 CentOS7 上安装 MySQL5.7 1 通过 SecureCRT 连接到阿里云 CentOS7 服务器: 2 进入到目录 /usr/local/ 中: cd /usr/local/ 3 创建 ...
- CentOS6.7上安装Mysql5.7
CentOS6.7上安装Mysql5.7 2017年07月22日 18:27:05 阅读数:564 环境的配置总是令人作呕,所以这次表明版本条件: 首先,这是一台新机器 其次,CentOS版本如下: ...
- 在centos上安装mysql5.7的三种方法
带OS信息的是已编译的二进制文件,不带OS信息的是源码包 mysql-5.7.14-linux-glibc2.5-x86_64.tar.gz 二进制包 mysql-5.5.51.tar.gz 源码包 ...
- CentOS 6.9上安装mysql-5.6.36
CentOS 6.9上安装mysql-5.6.36 1.准备数据存放的文件系统 新建一个逻辑卷,并将其挂载至特定目录即可.这里不再给出过程. 这里假设其逻辑卷的挂载目录为/data,而后需要创建/da ...
- 图解如何安装MySQL5.0
如何安装MySQL5.0数据库.. mysql-5.5.50-winx64下载地址: http://www.jb51.net/softs/363920.html 我的电脑因为提前安装了.所以需要卸载一 ...
- 通过xshell在linux上安装mysql5.7(终极版)
通过xshell在linux上安装mysql5.7(终极版) 0)通过xshell连接到远程服务器 1)彻底删除原来安装的mysql 首先查看:rpm -qa|grep -i mysql 删除操作(一 ...
- CentOS 6.9上安装mysql-5.6.37
CentOS 6.9上安装mysql-5.6.37 1.准备数据存放的文件系统 新建一个逻辑卷,并将其挂载至特定目录即可.这里不再给出过程. 这里假设其逻辑卷的挂载目录为/data,而后需要创建/da ...
随机推荐
- [BZOJ1758][WC2010]重建计划(点分治+单调队列)
点分治,对于每个分治中心,考虑求出经过它的符合长度条件的链的最大权值和. 从分治中心dfs下去取出所有链,为了防止两条链属于同一个子树,我们一个子树一个子树地处理. 用s1[i]记录目前分治中心伸下去 ...
- Codeforces Round #281 (Div. 2) C. Vasya and Basketball 暴力水题
C. Vasya and Basketball time limit per test 2 seconds memory limit per test 256 megabytes input stan ...
- SVN服务端的版本对比及创建仓库时的注意事项
SVN是一个开放源代码的版本控制系统,分为客户端和服务端.就windows系统而言,客户端通常使用 TortoiseSVN,下载地址:https://tortoisesvn.net/ ,而服务端通常 ...
- PostgreSQL控制台以竖行显示
\x select * from user; 这个和MySQL的有点区别,在查询之前使用\x进行显示的开启 注意:只需要用一次即可,以后的查询都是以竖行进行显示.
- 在当前的webview中跳转到新的url 使用WebView组件显示网页
如果希望点击链接由自己处理,而不是新开Android的系统browser中响应该链接.给WebView加一个事件监听对象(WebViewClient)并重写其中的一些方法:shouldOverride ...
- How far away ?(DFS)
How far away ? Time Limit: 2000/1000 MS (Java/Others) Memory Limit: 32768/32768 K (Java/Others) T ...
- Digital Adjustment of DC-DC Converter Output Voltage in Portable Applications
http://pdfserv.maximintegrated.com/en/an/AN818.pdf http://www.maximintegrated.com/app-notes/index.mv ...
- 多个rs485设备怎样跟上位机通讯?
http://bbs.hcbbs.com/thread-819457-1-1.html 多个rs485设备怎样跟上位机通讯? [复制链接] |关注本帖 fdemeng 签到天数: 1228 天 ...
- java变量深入理解
4,变量:其实就是内存中的一个存储空间,用于存储常量数据. 作用:方便于运算.因为有些数据不确定.所以确定该数据的名词和存储空间. 特点:变量空间可以重复使用. 什么时候定义变量?只要是数据不确定的时 ...
- cocos2d-x avdrid 试例
今天将cocos2d-x的示例项目tests编译到android真机运行,以及如何创建cocos2d-x的android项目. 打开cocos2d-x的tests项目,路径为:D:\cocos2d-x ...