Thinhole类声明和实现
Thinhole类说白了就是在眼睛处,放一个放大镜。就像我们平时用放大镜观察物体一样。这样实现的效果的是,周围会模糊。原理书上都说的很清楚了,我把算法截图下来了。这个应用我猜测是在竞技游戏比如csgo中,狙击开镜后效果。具体等之后开发游戏时,再测试一下。如下:

类声明:
#pragma once

#ifndef __THINLENS_HEADER__

#define __THINLENS_HEADER__

#include "camera.h"

class Sampler;

class Thinlens :public Camera {

public:

	Thinlens();

	~Thinlens();

	Thinlens(const Thinlens& tl);

	void set_view_distance(const ldouble a);

	void set_focal_distance(const ldouble a);//这个是放大镜的系数,我默认是取0.8,因为我用的物体是1个像素,比较小。

	void set_lens_radius(const ldouble rad);//放大镜的半径

	void set_zoom(const ldouble factor);//缩放

	void set_angle(const ldouble deg);//旋转角

	void set_sampler(Sampler* const sampler);//随机采样数组,实现模糊效果

	Vector3 ray_direction(const Point3& pixel_point, const Point3& lens_point) const;

	virtual Camera* clone() const;

	virtual void render_scene(World& w);

	Thinlens& operator=(const Thinlens& tl);

private:

	ldouble lens_radius, d, f, zoom;

	Sampler* sampler;

};

#endif
类实现
#include "pch.h"

#include "thinlens.h"

#include "../utilities/world.h"

#include "../utilities/viewplane.h"

#include "../samplers/sampler.h"

#include "../tracers/tracer.h"

Thinlens::Thinlens()

    :Camera(), lens_radius(0.5), f(0.8), d(1), zoom(1), sampler(nullptr) {}

Thinlens::~Thinlens() {

    if (sampler)

        delete sampler;

}

Thinlens::Thinlens(const Thinlens& tl)

    :Camera(tl), lens_radius(tl.lens_radius), f(tl.f), d(tl.d)

    , zoom(tl.zoom), sampler(tl.sampler) {}

void Thinlens::set_view_distance(const ldouble a) {

    d = a;

}

void Thinlens::set_focal_distance(const ldouble a) {

    f = a;

}

void Thinlens::set_lens_radius(const ldouble rad) {

    lens_radius = rad;

}

void Thinlens::set_zoom(const ldouble factor) {

    zoom = factor;

}

void Thinlens::set_angle(const ldouble deg) {

	ldouble rad = radian(deg);

	up = Point3(std::cos(rad) * up.x - std::sin(rad) * up.y,

		std::sin(rad) * up.x + std::cos(rad) * up.y, up.z);

}

void Thinlens::set_sampler(Sampler* const sam) {

    if (sampler) {

        delete sampler;

        sampler = nullptr;

    }

    sampler = sam;

    sampler->map_to_unit_disk();

}

Vector3 Thinlens::ray_direction(const Point3& pixel_point, const Point3& lens_point) const {

    Point3 p;

    p.x = pixel_point.x * d * f;

    p.y = pixel_point.y * d * f;

    Vector3 dir = (p.x - lens_point.x) * u + (p.y - lens_point.y) * v - f * w;

    dir.normalize();

    return dir;

}

Camera* Thinlens::clone() const {

    return new Thinlens(*this);

}

void Thinlens::render_scene(World& w) {

    Ray ray;

    ViewPlane vp(w.vp);

    integer depth = 0;

    Point3 sp, pp, lp;

    w.open_window(vp.hres, vp.vres);

    vp.s = 1 / (vp.s * zoom);

	for (integer r = vp.vres - 1; r >= 0; r--)//render from left-corner to right-corner

        for (integer c = 0; c < vp.hres; c++) {

            RGBColor color;

            for (integer p = 0; p < vp.nsamples; p++) {

                sp = vp.sampler->sample_unit_square();

				pp.x = (c - 0.5 * vp.hres + sp.x) * vp.s;

				pp.y = (r - 0.5 * vp.vres + sp.y) * vp.s;

                lp = sampler->sample_unit_square() * lens_radius;

                ray.o = eye + lp.x * u + lp.y * v;

                ray.d = ray_direction(pp, lp);

                color += w.tracer_ptr->trace_ray(ray);

            }

            color /= vp.nsamples;

            color *= exposure_time;

            w.display_pixel(r, c, color);

        }

}

Thinlens& Thinlens::operator=(const Thinlens& tl) {

    if (this == &tl)

        return *this;

	Camera::operator= (tl);

    lens_radius = tl.lens_radius;

    d = tl.d;

    f = tl.f;

    zoom = tl.zoom;

    sampler = tl.sampler;

    return *this;

}
需要修改的World类:
void World::build() {

	vp.set_hres(200);

	vp.set_vres(100);

	vp.set_sampler(new Hammersley());

	vp.sampler->map_to_sphere();

	tracer_ptr = new MultiSphere(this);

	Geometrics* obj = new Sphere(0, 0.5);

	obj->set_color(RGBColor(1, 0, 0));

	add_object(obj);

	obj = new Sphere(Point3(0, -100.5, 0), 100);

	obj->set_color(RGBColor(0, 0, 1));

	add_object(obj);

	Thinlens* thinlens = new Thinlens();

	thinlens->set_eye(Point3(0, 0, 1));

	thinlens->set_lookat(Point3(0));

	thinlens->set_view_distance(1.5);

	thinlens->set_sampler(new MultiJittered());//书上是采用多重采样,可以替换为其他采样。不过这个采样效果是比较好的。

	thinlens->set_angle(-45);

	//thinlens->set_zoom(2.0);

	thinlens->compute_uvw();

	set_camera(thinlens);

}
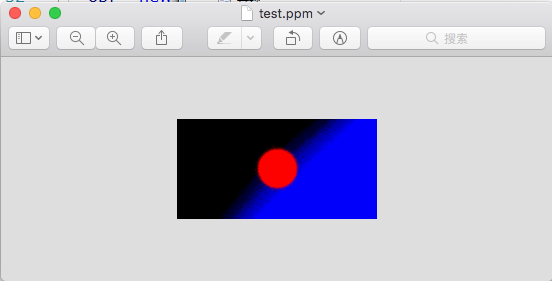
测试效果图(蓝色和黑色部分已经模糊了,算法测试成功!):
Thinhole类声明和实现的更多相关文章
- EC笔记,第二部分:7.为多态基类声明虚析构函数
7.为多态基类声明虚析构函数 1.为多态基类声明虚析构函数 code1: class A{ public: int* a; A():a(new int(5)) {} ~A(){ delete a; } ...
- C++ 中的模板类声明头文件和实现文件分离后,如何能实现正常编译?
C++ 中的模板类声明头文件和实现文件分离后,如何能实现正常编译? 这个feature叫做Export Template,即外名模板,它的作用在于使得模板代码可依照C/C++语言习惯,将模板声明和实现 ...
- [Effective C++ --007]为多态基类声明virtual析构函数
引言: 我们都知道类的一个很明显的特性是多态,比如我们声明一个水果的基类: class Fruit { public: Fruit() {}; ~Fruit(){}; } 那么我们根据这个Fruit基 ...
- c++,基类声明的指针变量和引用类型变量可以指向派 生类的对象
基类声明的指针变量和引用类型变量可以指向派生类的对象,而反过来派生类的指针却不能指向基类变量. 这与基类和派生类之间,被允许的赋值方向是相反的. 但是从逻辑上很容易推敲其合理性.
- error C2248: “CObject::operator =”: 不可访问 private 员(于“CObject”类声明)
MFC如果编码错误: 演出:error C2248: "CObject::operator =": 不可访问 private 员(于"CObject"类声明) ...
- 类声明、类作用域、前向声明、this指针、嵌套类、PIMPL 技法 等
一.类声明 //类是一种用户自定义类型,声明形式: class 类名称 { public: 公有成员(外部接口) private: 私有 ...
- C++模板类内友元(友元函数,友元类)声明的三种情况
根据<C++ Primer>第三版16.4节的叙述,C++类模板友元分为以下几种情况 1.非模板友元类或友元函数. 书上给了一个例子: class Foo{ void bar(); ...
- Pinhole类声明和实现
针孔相机,带旋转,移动等功能. 类声明: #pragma once #ifndef __PINHOLE_HEADER__ #define __PINHOLE_HEADER__ #include &qu ...
- 07——为多态基类声明为virtual析构函数
当基类确定被继承的时候,析构函数声明为virtual是必须的 当返回的派生类的指针或引用的时候,调用析构函数容易发生内存泄漏 当基类作为抽象类使用,声明pure virtual析构函数 析构函数的顺序 ...
随机推荐
- 345. Reverse Vowels of a String - LeetCode
Question 345. Reverse Vowels of a String Solution 思路:交换元音,第一次遍历,先把出现元音的索引位置记录下来,第二遍遍历元音的索引并替换. Java实 ...
- NoClassDefFoundError问题
问题: 遇到一个问题,报NoClassDefFoundError,如下图: NoClassDefFoundError和ClassNotFoundException区别 我们经常被java.lang.C ...
- 126_Power BI中使用DAX计算股票RSI及股票均线相关
博客:www.jiaopengzi.com 焦棚子的文章目录 请点击下载附件 一.背景 前些日子,有朋友在交流股票RSI用DAX处理的问题,由于RSI股票软件的算法几乎都是需要用到股票从上市第一天开始 ...
- Vue项目中的接口进阶使用
创建services文件夹 1.文件夹apis.index.request的三个文件. 2.apis文件放接口 export const apis = { checkDeviceNo: '/api/c ...
- 看Spring源码不得不会的@Enable模块驱动实现原理讲解
这篇文章我想和你聊一聊 spring的@Enable模块驱动的实现原理. 在我们平时使用spring的过程中,如果想要加个定时任务的功能,那么就需要加注解@EnableScheduling,如果想使用 ...
- c++ 辗转相除(动图)
#include<iostream> #include<cstdio> #include<iomanip> #include<cstring> usin ...
- iOS全埋点解决方案-采集奔溃
前言 采集应用程序奔溃信息,主要分为以下两种场景: NSException 异常 Unix 信号异常 一.NSException 异常 NSException 异常是 Objectiv ...
- Redis初启(一)
1.数据库存存储性能优化 在mysql的文章专题中我写过了关于传统关系型数据库的一些优化思路,整体来说,通过优化之后能够提升程序访问数据库的计算性能.但是还是有一些情况,即便是优化之后,使用传统关系型 ...
- 【Spring】AOP实现原理(三):创建代理
AbstractAutoProxyCreator 在AbstractAutoProxyCreator的wrapIfNecessary方法中,调用getAdvicesAndAdvisorsForBean ...
- 重学ES系列之模版字符串
<!DOCTYPE html> <html lang="en"> <head> <meta charset="UTF-8&quo ...