2017-2018-2 20165202 实验四《Android程序设计》实验报告
一、实验报告封面
二、实验内容
1.基于Android Studio开发简单的Android应用并部署测试;
2.了解Android、组件、布局管理器的使用;
3.掌握Android中事件处理机制。
三、实验步骤
(一)Android Stuidio的安装测试
实验要求:
- 参考《Java和Android开发学习指南(第二版)(EPUBIT,Java for Android 2nd)》第二十四章:
- 参考http://www.cnblogs.com/rocedu/p/6371315.html#SECANDROID,安装 Android Stuidio
- 完成Hello World, 要求修改res目录中的内容,Hello World后要显示自己的学号,自己学号前后一名同学的学号,提交代码运行截图和码云Git链接,截图没有学号要扣分
- 学习Android Stuidio调试应用程序
步骤:
将布局文件activity_main.xml中的android:text="Hello World!"改为android:text="Hello World20165315!"
详细代码:
<?xml version="1.0" encoding="utf-8"?>

<android.support.constraint.ConstraintLayout

    xmlns:android="http://schemas.android.com/apk/res/android"

    xmlns:tools="http://schemas.android.com/tools"

    xmlns:app="http://schemas.android.com/apk/res-auto"

    android:layout_width="match_parent"

    android:layout_height="match_parent"

    tools:context=".MainActivity">

    <TextView

        android:layout_width="wrap_content"

        android:layout_height="wrap_content"

        android:text="Hello World 20165201 20165202 20165203!"

        app:layout_constraintBottom_toBottomOf="parent"

        app:layout_constraintLeft_toLeftOf="parent"

        app:layout_constraintRight_toRightOf="parent"

        app:layout_constraintTop_toTopOf="parent" />

</android.support.constraint.ConstraintLayout>
运行截图:

(二)Activity测试
实验要求:
- 参考《Java和Android开发学习指南(第二版)(EPUBIT,Java for Android 2nd)》第二十五章:
- 构建项目,运行教材相关代码
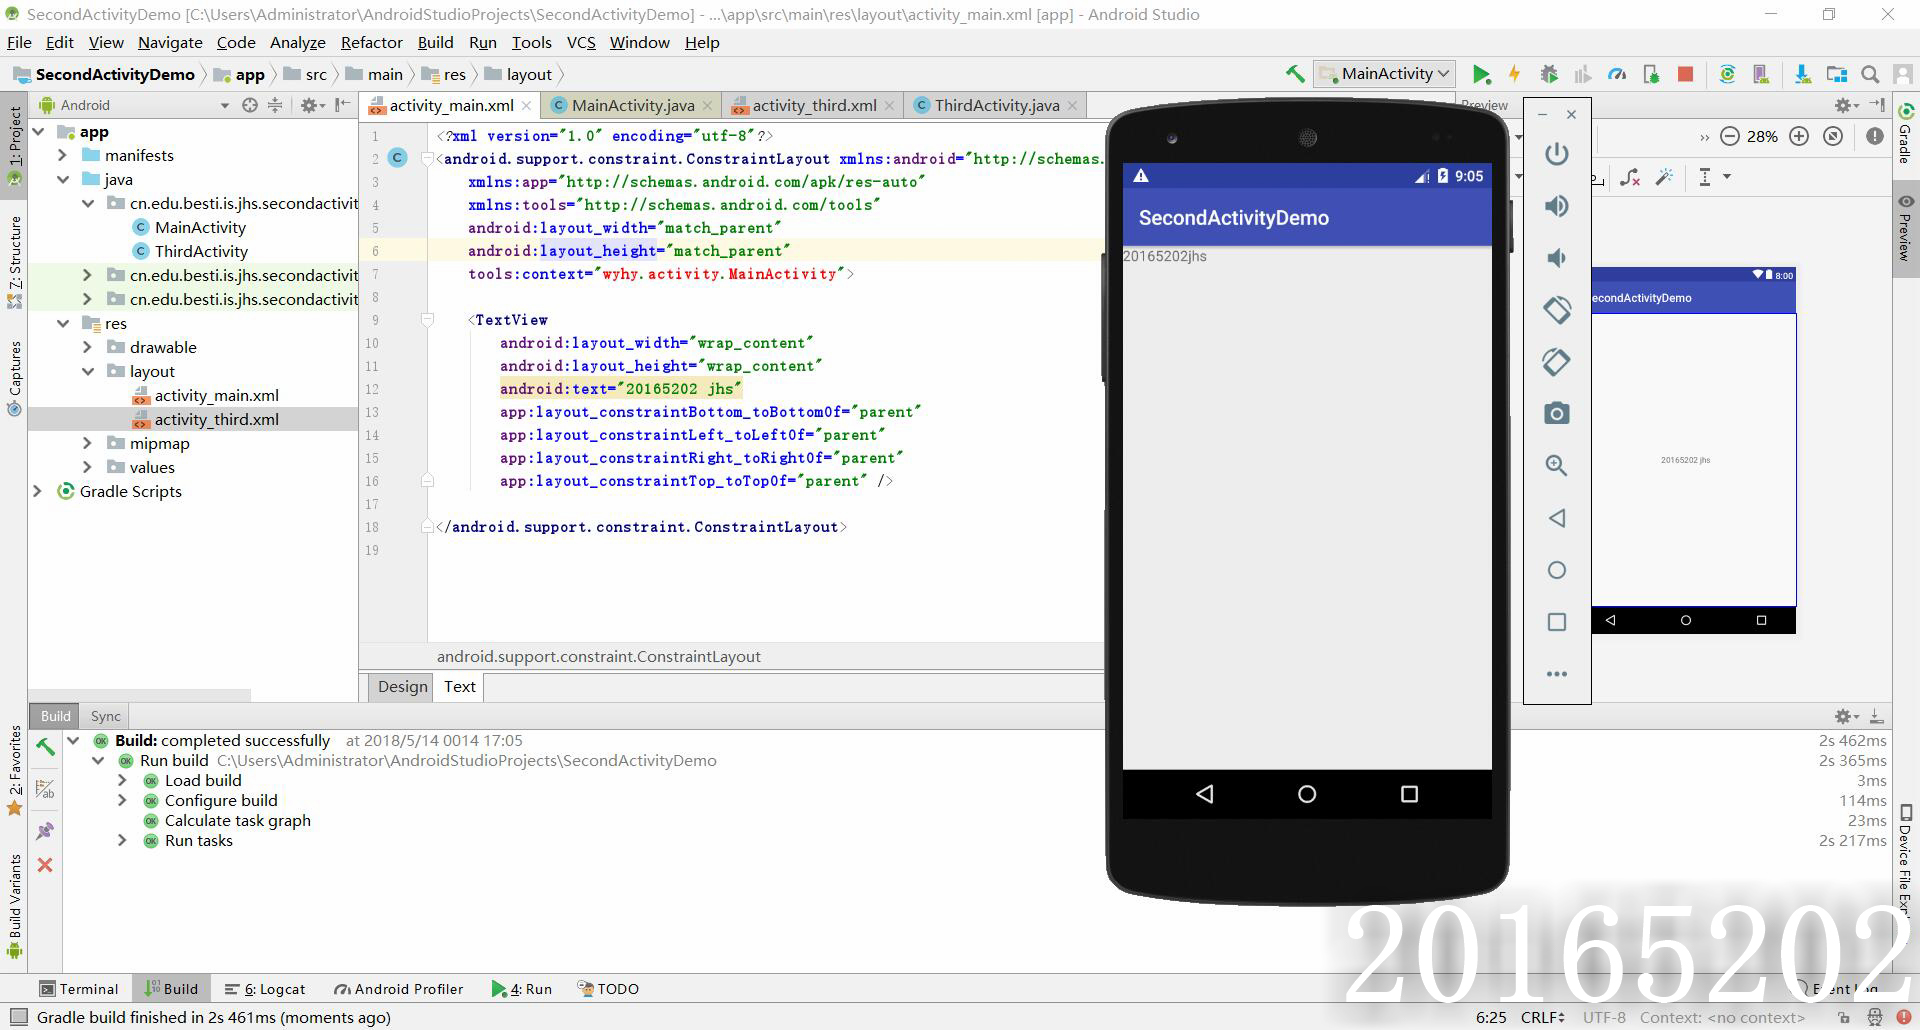
- 创建 ThirdActivity, 在ThirdActivity中显示自己的学号,修改代码让MainActivity启动ThirdActivity
- 提交代码运行截图和码云Git链接,截图要有学号水印,否则会扣分
步骤:
1.MainActivity:
package cn.edu.besti.is.jhs.secondactivitydemo;

import android.support.v7.app.AppCompatActivity;

import android.os.Bundle;

import android.content.Intent;

import android.support.v7.app.AppCompatActivity;

import android.os.Bundle;

public class MainActivity extends AppCompatActivity {

    @Override

    protected void onCreate(Bundle savedInstanceState) {

        super.onCreate(savedInstanceState);

        Intent intent = new Intent(this,ThirdActivity.class);

        startActivity(intent);

    }

}
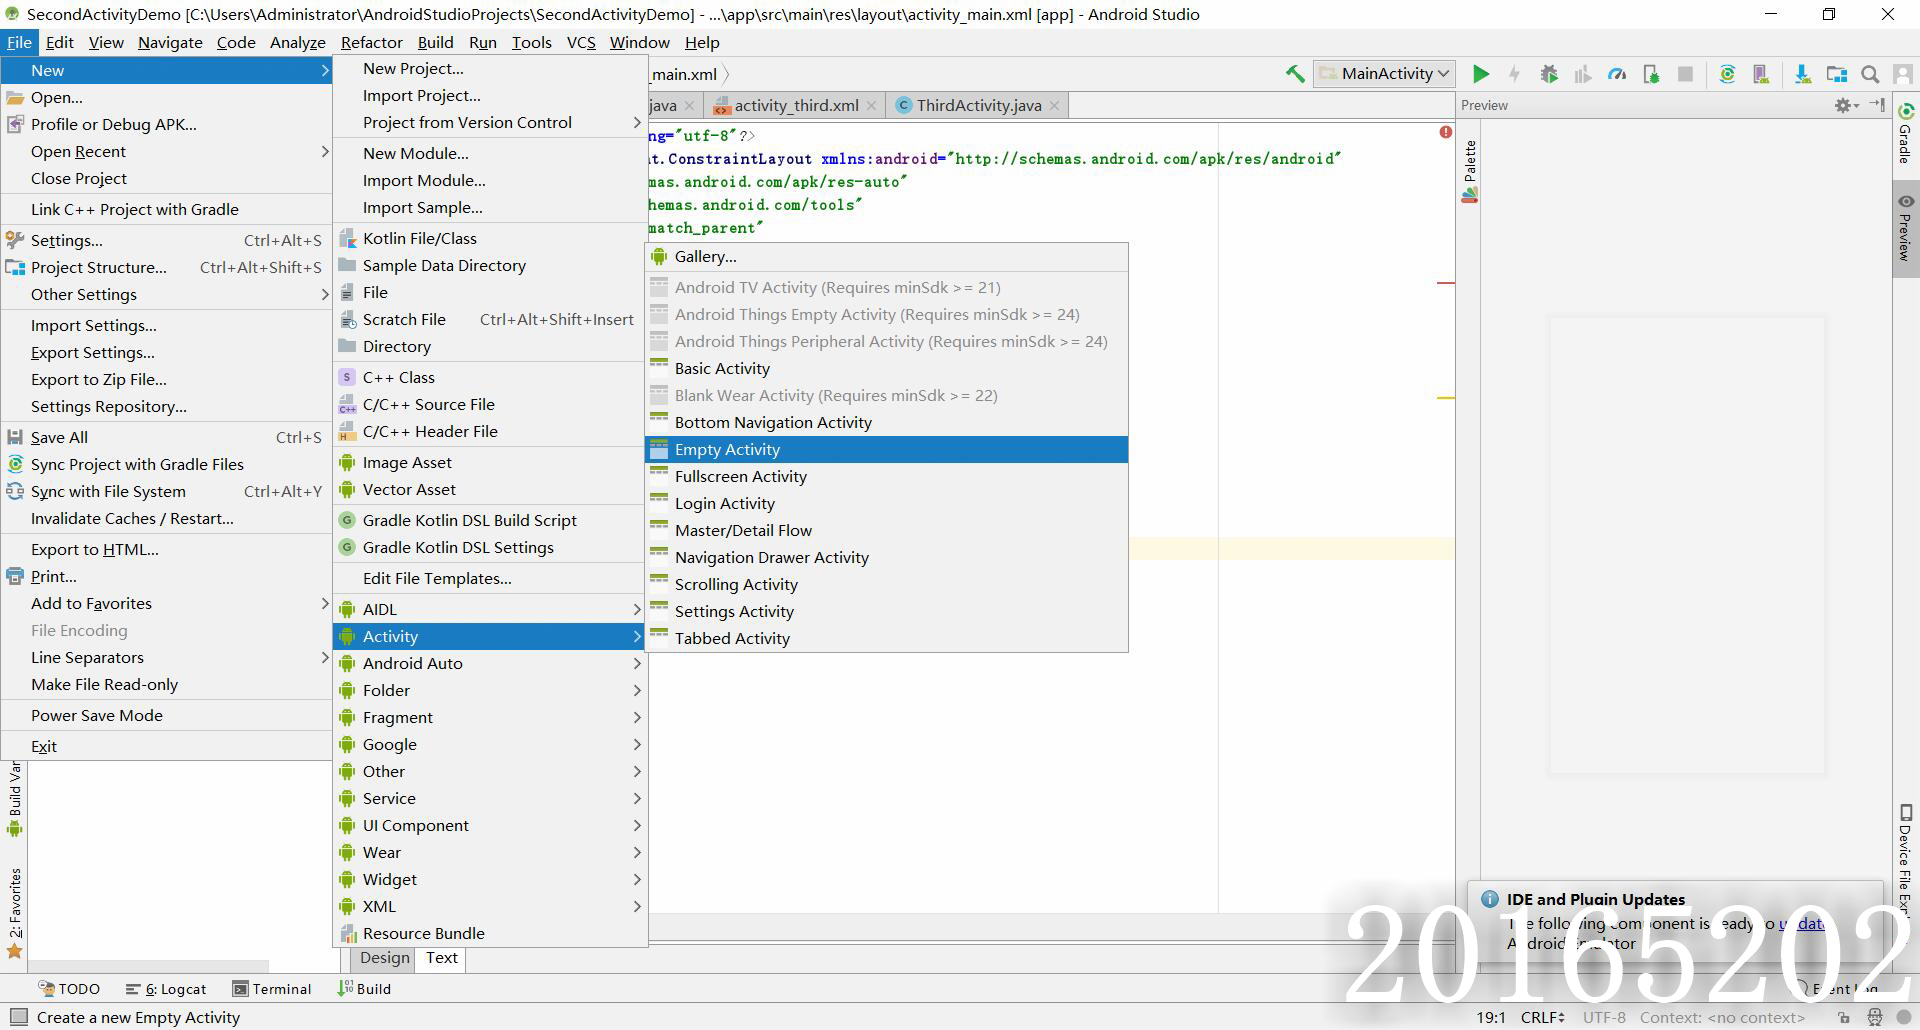
2.左上角file->new->Activity->empty Activity创建ThirdActicity
3.activity_main.xml
<?xml version="1.0" encoding="utf-8"?>

<android.support.constraint.ConstraintLayout xmlns:android="http://schemas.android.com/apk/res/android"

    xmlns:app="http://schemas.android.com/apk/res-auto"

    xmlns:tools="http://schemas.android.com/tools"

    android:layout_width="match_parent"

    android:layout_height="match_parent"

    tools:context="wyhy.activity.MainActivity">

    <TextView

        android:layout_width="wrap_content"

        android:layout_height="wrap_content"

        android:text="20165202 jhs"

        app:layout_constraintBottom_toBottomOf="parent"

        app:layout_constraintLeft_toLeftOf="parent"

        app:layout_constraintRight_toRightOf="parent"

        app:layout_constraintTop_toTopOf="parent" />

</android.support.constraint.ConstraintLayout>
4.activity_third.xml
<?xml version="1.0" encoding="utf-8"?>

<android.support.constraint.ConstraintLayout xmlns:android="http://schemas.android.com/apk/res/android"

    xmlns:tools="http://schemas.android.com/tools"

    android:layout_width="match_parent"

    android:layout_height="match_parent">

    <TextView

        android:layout_width="144dp"

        android:layout_height="26dp"

        android:text="20165202jhs"

        tools:ignore="MissingConstraints"

        tools:layout_editor_absoluteX="109dp"

        tools:layout_editor_absoluteY="242dp" />

</android.support.constraint.ConstraintLayout>
运行截图
(三)UI测试
实验要求
- 参考《Java和Android开发学习指南(第二版)(EPUBIT,Java for Android 2nd)》第二十六章:
- 构建项目,运行教材相关代码
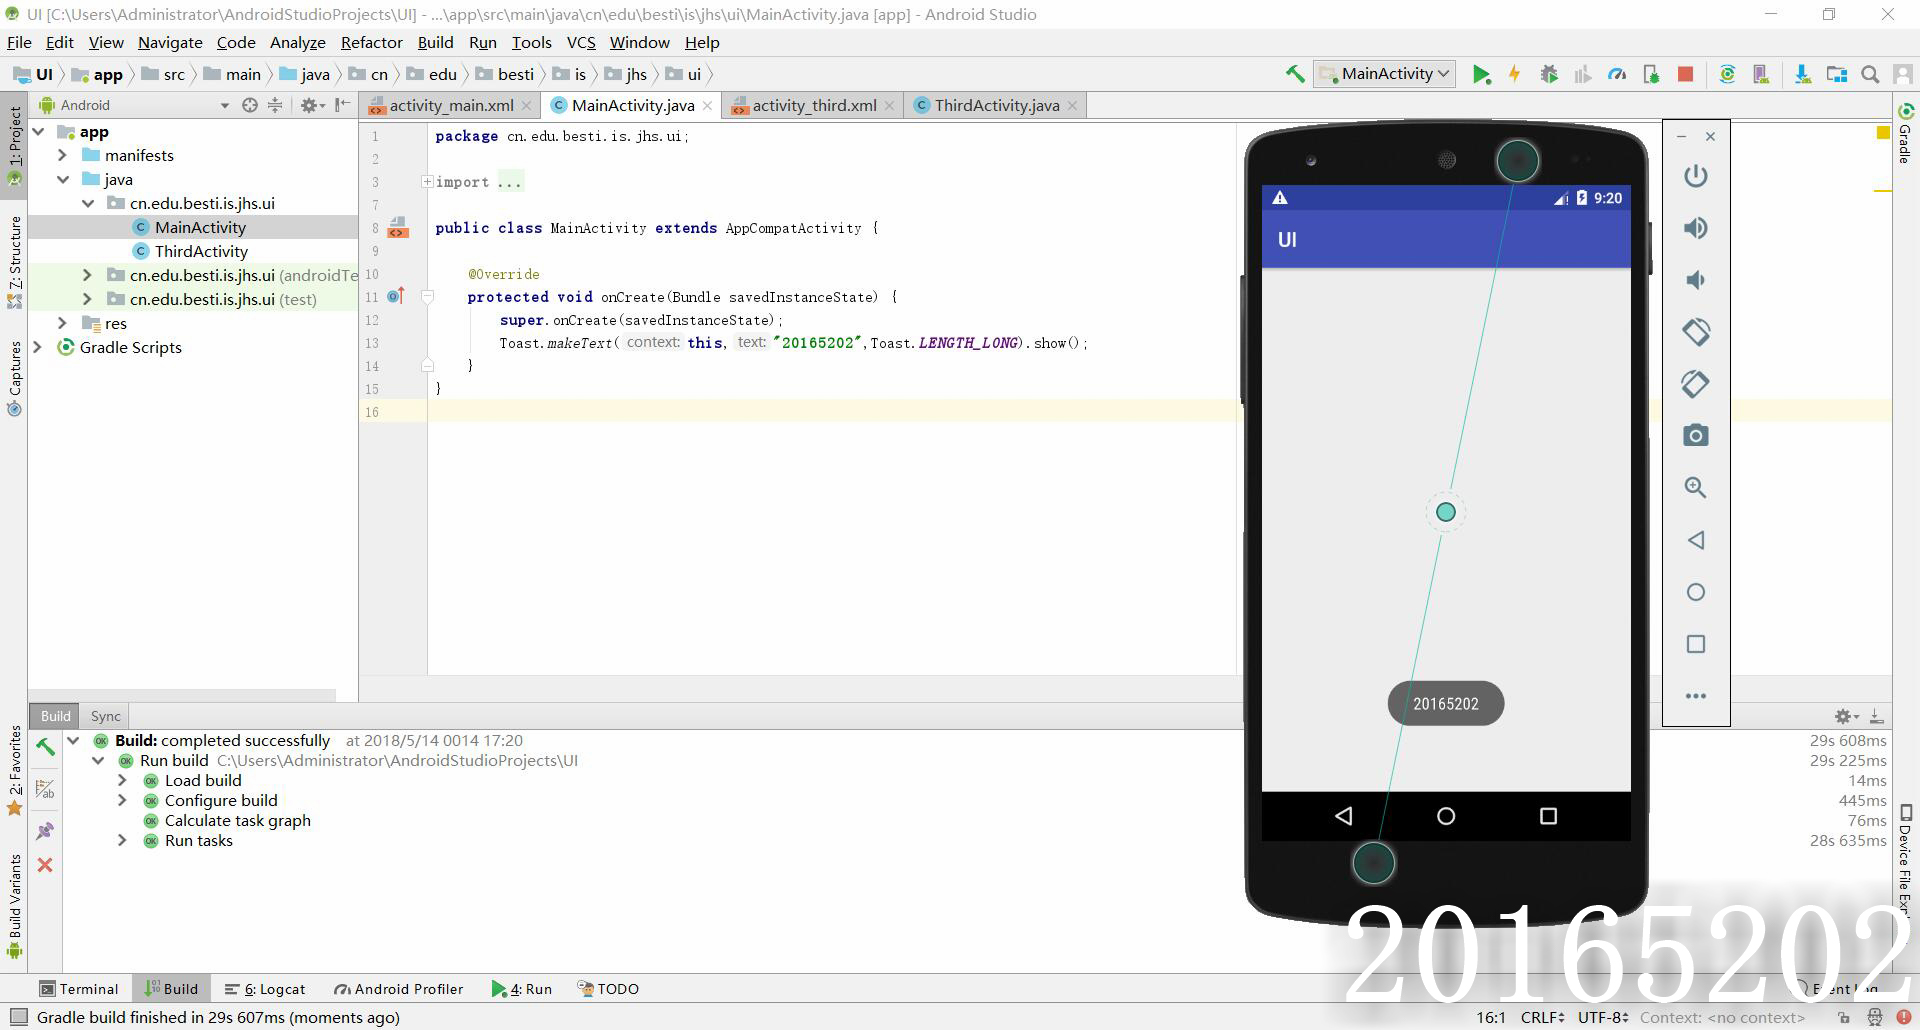
- 修改代码让Toast消息中显示自己的学号信息
- 提交代码运行截图和码云Git链接,截图要有学号水印,否则会扣分
步骤:
1.Main_Activity
package cn.edu.besti.is.jhs.ui;

import android.content.Intent;

import android.support.v7.app.AppCompatActivity;

import android.os.Bundle;

import android.widget.Toast;

public class MainActivity extends AppCompatActivity {

    @Override

    protected void onCreate(Bundle savedInstanceState) {

        super.onCreate(savedInstanceState);

        Toast.makeText(this,"20165202",Toast.LENGTH_LONG).show();

    }

}
2.activity_main.xml
<?xml version="1.0" encoding="utf-8"?>

<android.support.constraint.ConstraintLayout xmlns:android="http://schemas.android.com/apk/res/android"

    xmlns:app="http://schemas.android.com/apk/res-auto"

    xmlns:tools="http://schemas.android.com/tools"

    android:layout_width="match_parent"

    android:layout_height="match_parent"

    tools:context="wyhy.ui.MainActivity">

    <TextView

        android:layout_width="wrap_content"

        android:layout_height="wrap_content"

        android:text="20165202"

        app:layout_constraintBottom_toBottomOf="parent"

        app:layout_constraintLeft_toLeftOf="parent"

        app:layout_constraintRight_toRightOf="parent"

        app:layout_constraintTop_toTopOf="parent" />

</android.support.constraint.ConstraintLayout>
运行截图
(四)布局测试
实验要求
-参考《Java和Android开发学习指南(第二版)(EPUBIT,Java for Android 2nd)》第二十七章:
- 构建项目,运行教材相关代码
- 修改布局让P290页的界面与教材不同
- 提交代码运行截图和码云Git链接,截图要有学号水印,否则会扣分
步骤
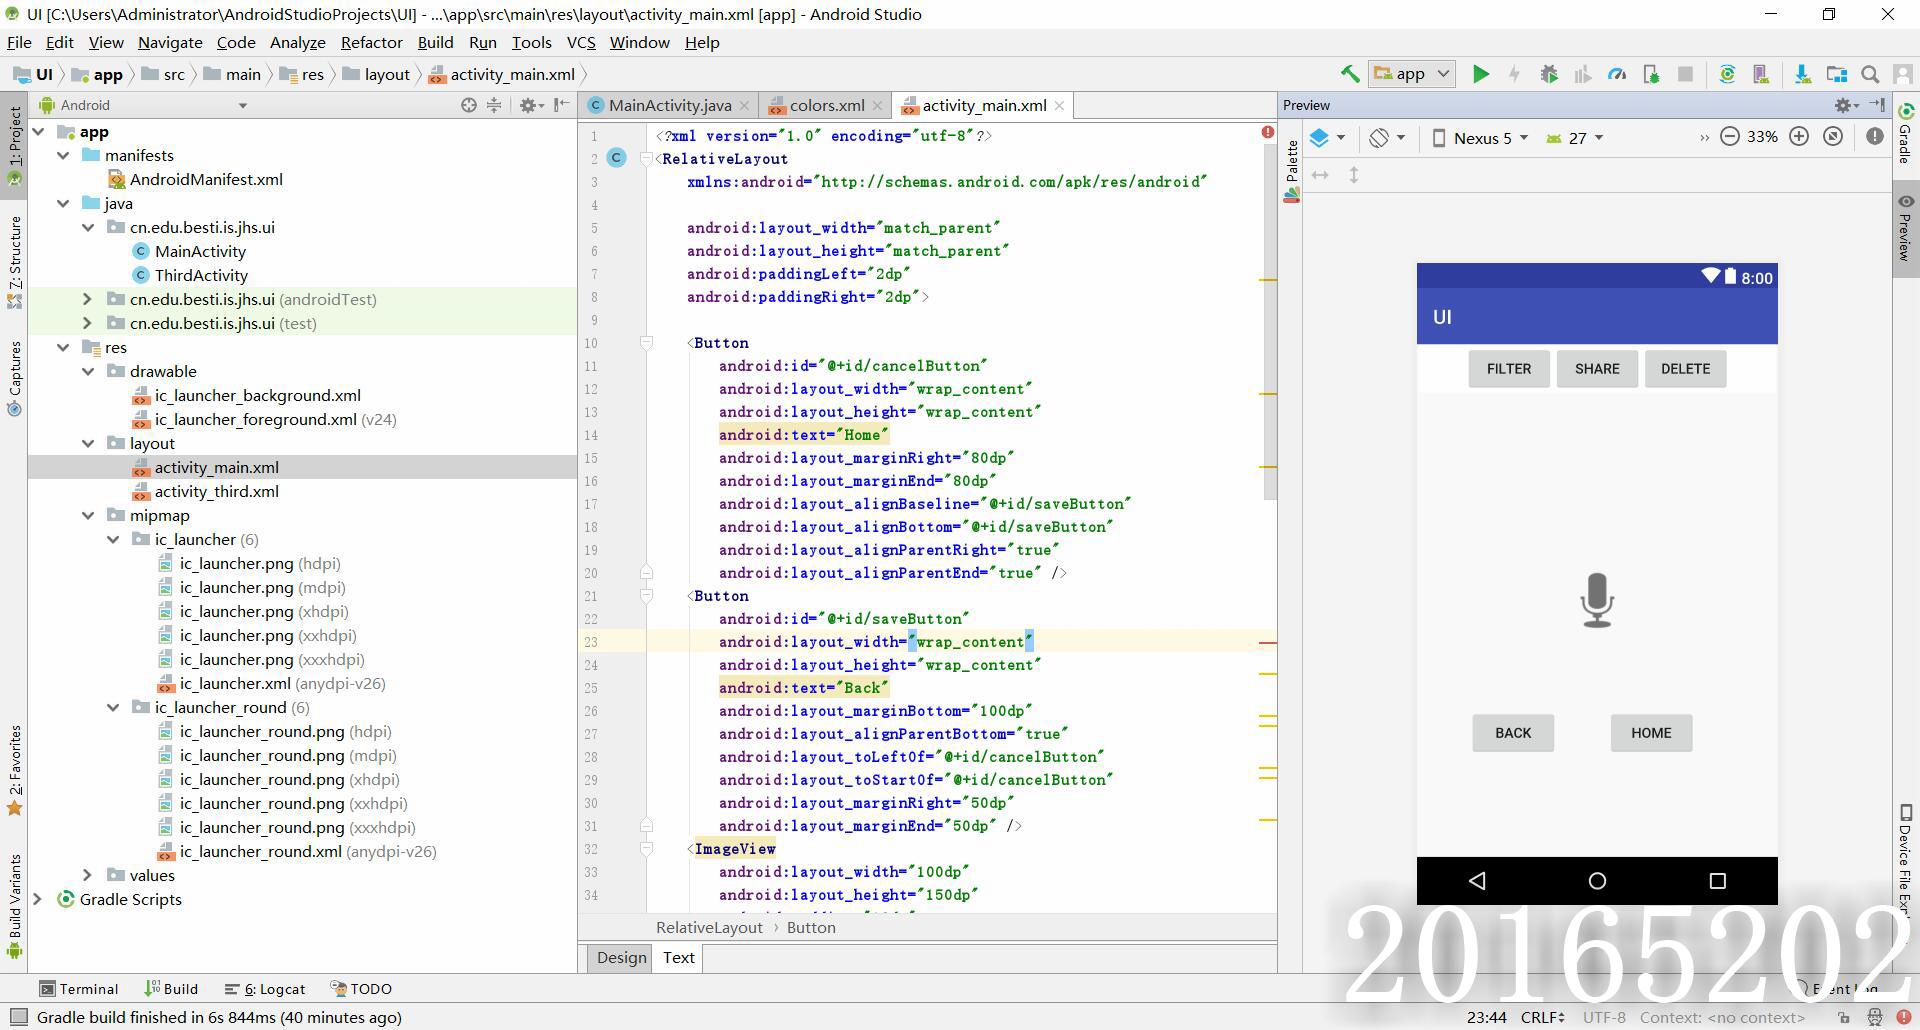
1.activity_main.xml
<?xml version="1.0" encoding="utf-8"?>

<RelativeLayout

    xmlns:android="http://schemas.android.com/apk/res/android"

    android:layout_width="match_parent"

    android:layout_height="match_parent"

    android:paddingLeft="2dp"

    android:paddingRight="2dp">

    <Button

        android:id="@+id/cancelButton"

        android:layout_width="wrap_content"

        android:layout_height="wrap_content"

        android:text="Home"

        android:layout_marginRight="80dp"

        android:layout_marginEnd="80dp"

        android:layout_alignBaseline="@+id/saveButton"

        android:layout_alignBottom="@+id/saveButton"

        android:layout_alignParentRight="true"

        android:layout_alignParentEnd="true" />

    <Button

        android:id="@+id/saveButton"

        android:layout_width="wrap_content"

        android:layout_height="wrap_content"

        android:text="Back"

        android:layout_marginBottom="100dp"

        android:layout_alignParentBottom="true"

        android:layout_toLeftOf="@+id/cancelButton"

        android:layout_toStartOf="@+id/cancelButton"

        android:layout_marginRight="50dp"

        android:layout_marginEnd="50dp" />

    <ImageView

        android:layout_width="100dp"

        android:layout_height="150dp"

        android:padding="10dp"

        android:src="@android:drawable/ic_btn_speak_now"

        android:id="@+id/imageView"

        android:layout_centerVertical="true"

        android:layout_centerHorizontal="true" />

    <LinearLayout

        android:id="@+id/filter_button_container"

        android:layout_width="match_parent"

        android:layout_height="wrap_content"

        android:gravity="center|bottom"

        android:background="@android:color/white"

        android:orientation="horizontal"

        android:layout_marginBottom="50dp"

        android:layout_above="@+id/imageView2"

        android:layout_alignParentLeft="true"

        android:layout_alignParentStart="true">

        <Button

            android:id="@+id/filterButton"

            android:layout_width="wrap_content"

            android:layout_height="fill_parent"

            android:text="Filter" />

        <Button

            android:id="@+id/shareButton"

            android:layout_width="wrap_content"

            android:layout_height="fill_parent"

            android:text="Share" />

        <Button

            android:id="@+id/deleteButton"

            android:layout_width="wrap_content"

            android:layout_height="fill_parent"

            android:text="Delete" />

    </LinearLayout>

</RelativeLayout>
运行截图
(五)事件处理测试
实验要求
- 参考《Java和Android开发学习指南(第二版)(EPUBIT,Java for Android 2nd)》第二十八章:
- 构建项目,运行教材相关代码
- 提交代码运行截图和码云Git链接,截图要有学号水印,否则会扣分
步骤
1.MainActivity
package cn.edu.besti.is.jhs.multicolorclock;

import android.support.v7.app.AppCompatActivity;

import android.os.Bundle;

import android.app.Activity;

import android.graphics.Color;

import android.os.Bundle;

import android.view.Menu;

import android.view.View;

import android.widget.AnalogClock;

import android.app.Activity;

import android.graphics.Color;

import android.os.Bundle;

import android.view.Menu;

import android.view.View;

import android.widget.AnalogClock;

public class MainActivity extends Activity {

    int counter = 0;

    int[] colors = { Color.BLACK, Color.BLUE, Color.CYAN,

            Color.DKGRAY, Color.GRAY, Color.GREEN, Color.LTGRAY,

            Color.MAGENTA, Color.RED, Color.WHITE, Color.YELLOW };

    @Override

    protected void onCreate(Bundle savedInstanceState) {

        super.onCreate(savedInstanceState);

        setContentView(R.layout.activity_main);

    }

    @Override

    public boolean onCreateOptionsMenu(Menu menu) {

// Inflate the menu; this adds items to the action bar if it

// is present.

        getMenuInflater().inflate(R.menu.menu_main, menu);

        return true;

    }

    public void changeColor(View view) {

        if (counter == colors.length) {

            counter = 0;

        }

        view.setBackgroundColor(colors[counter++]);

    }

}
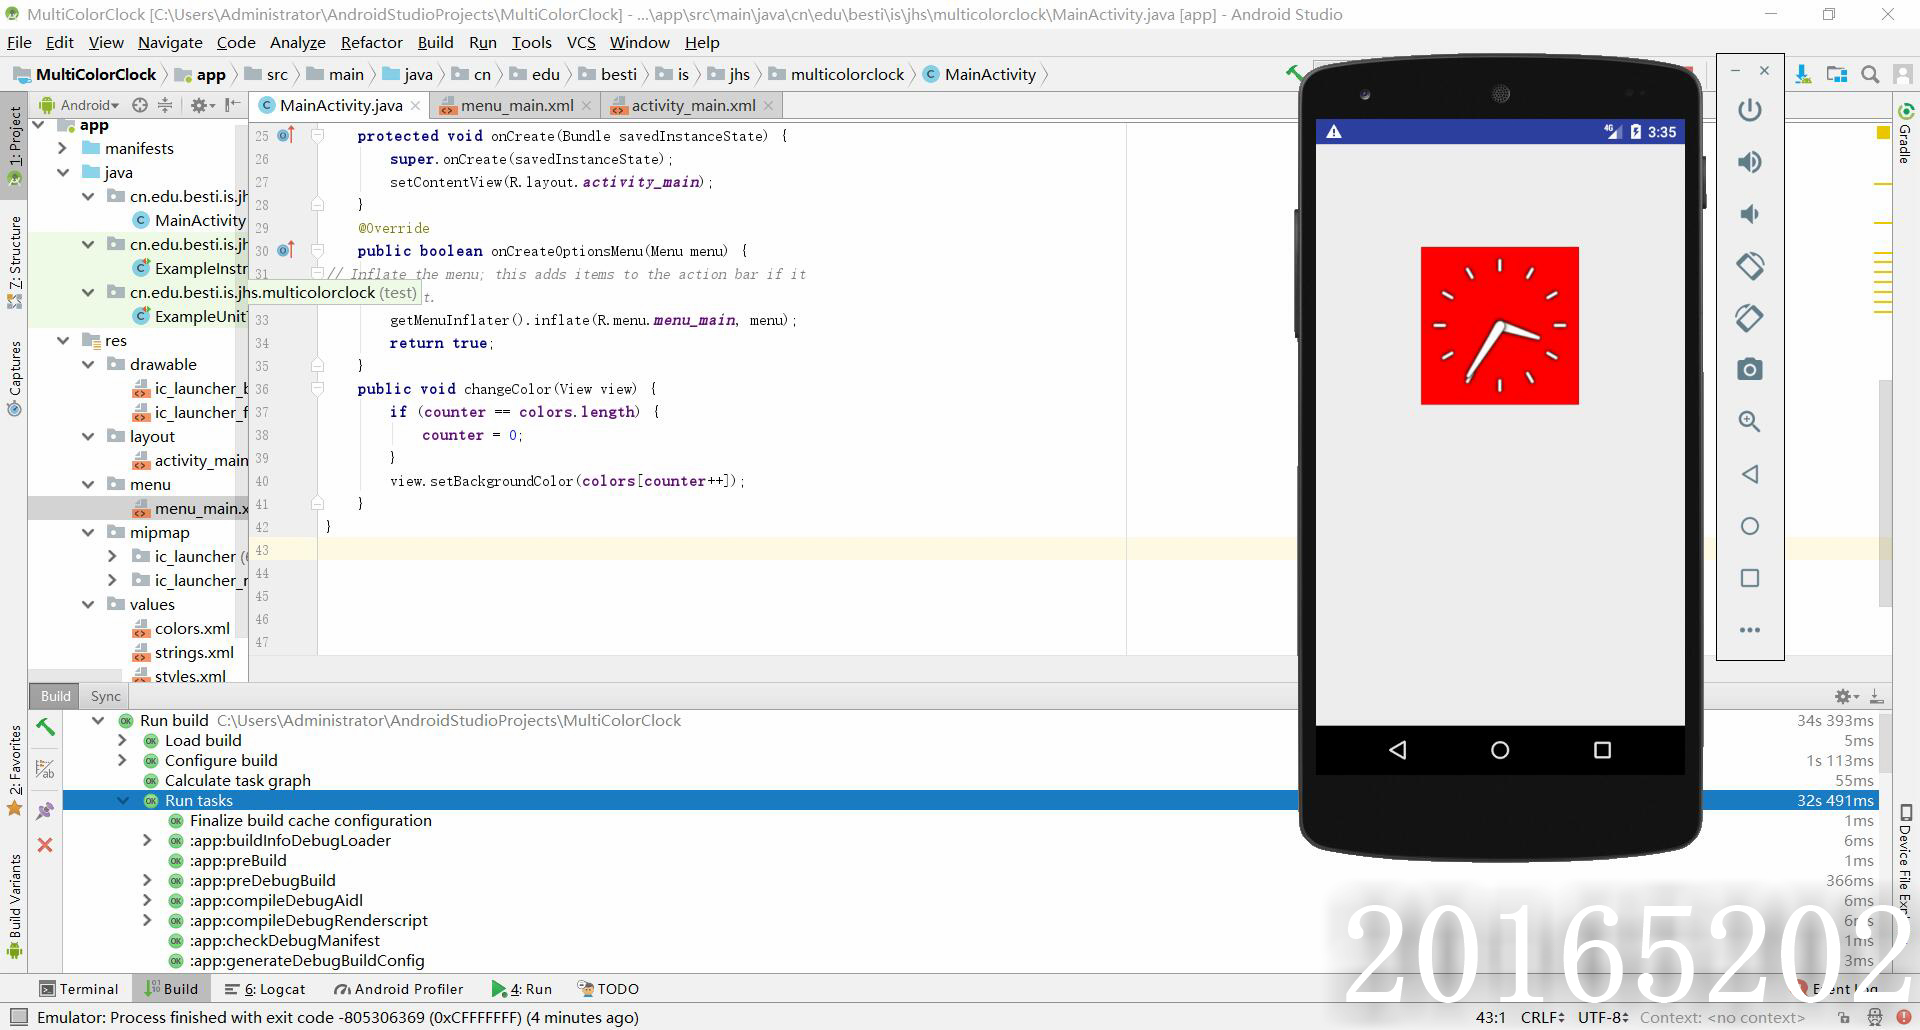
2.activity_main
<RelativeLayout

    xmlns:android="http://schemas.android.com/apk/res/android"

    xmlns:tools="http://schemas.android.com/tools"

    android:layout_width="match_parent"

    android:layout_height="match_parent"

    android:paddingBottom="10dp"

    android:paddingLeft="10dp"

    android:paddingRight="10dp"

    android:paddingTop="10dp"

    tools:context=".MainActivity">

    <AnalogClock

        android:id="@+id/analogClock1"

        android:layout_width="wrap_content"

        android:layout_height="wrap_content"

        android:layout_alignParentTop="true"

        android:layout_centerHorizontal="true"

        android:layout_marginTop="90dp"

        android:onClick="changeColor"

        />

</RelativeLayout>
运行截图
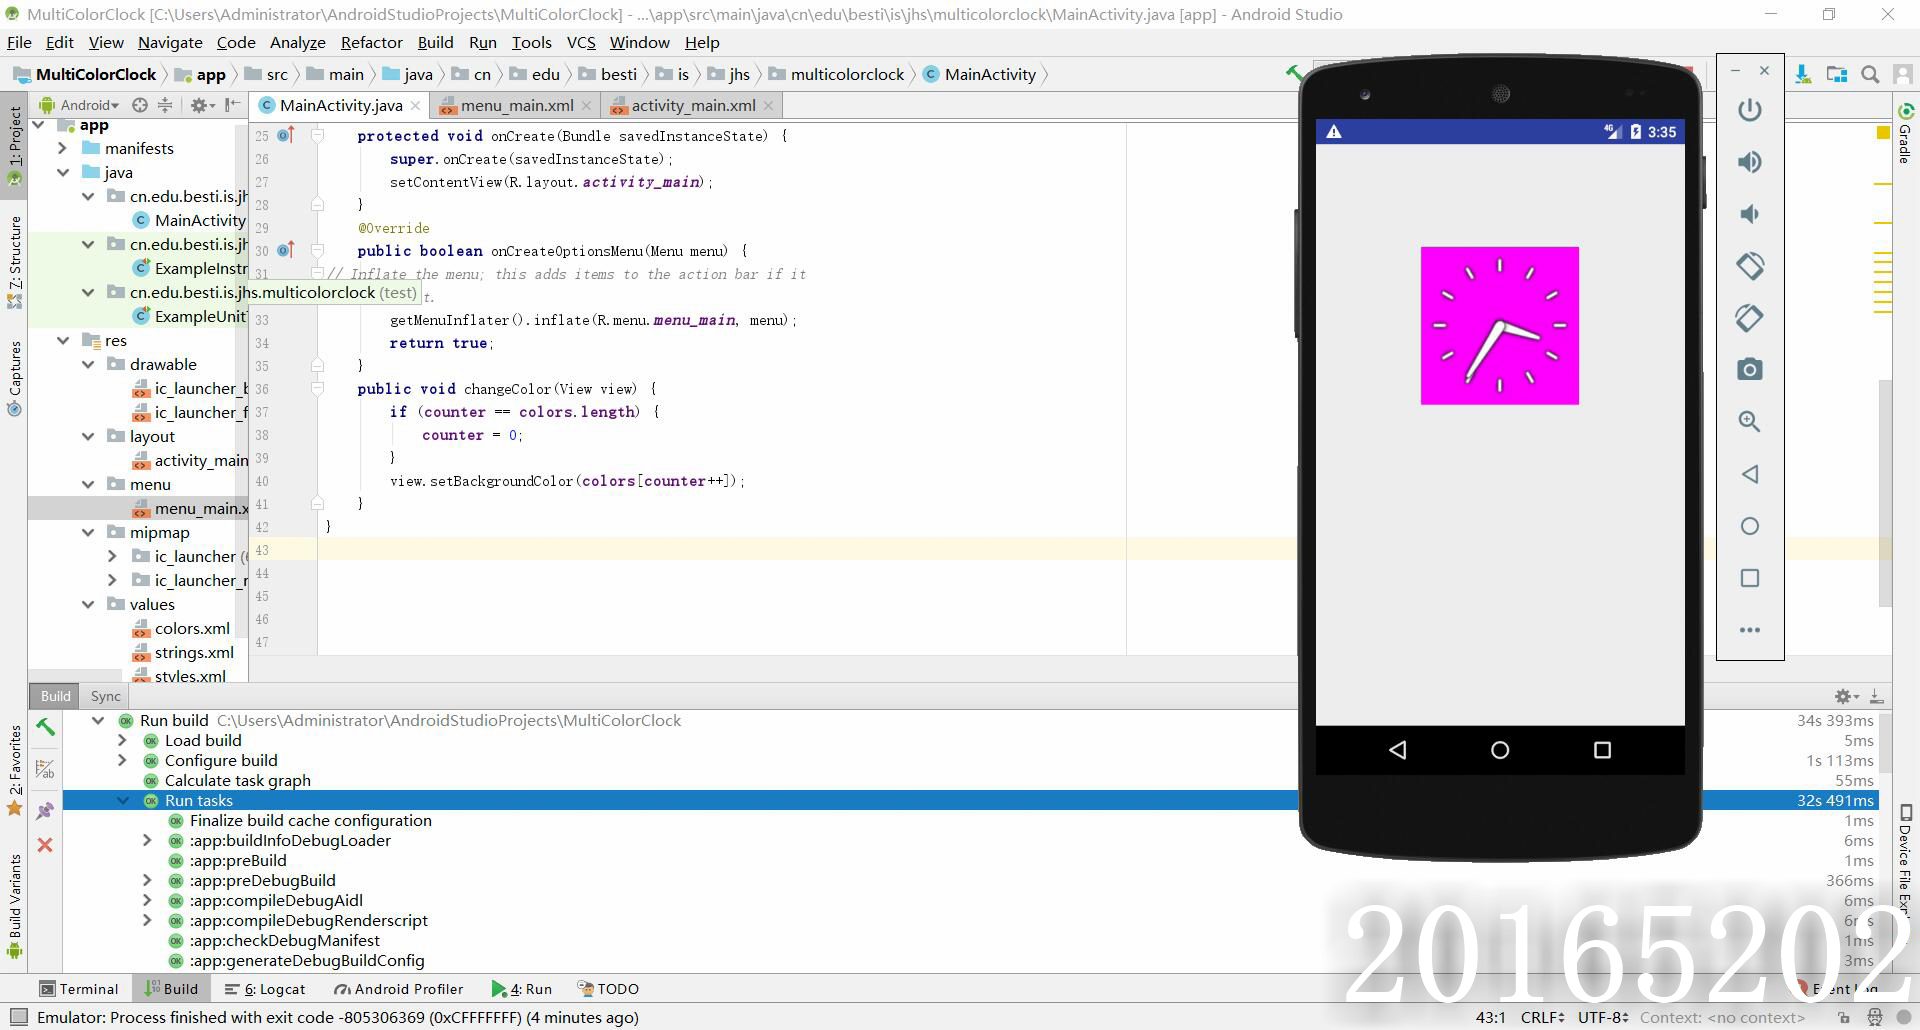
触摸变色
四、遇到的问题及解决
1.用AndriodStudio第一次新建项目时卡在buiilding界面进不去
第一次新建项目时AndriodStudio会尝试从官网上下载gradle,下载速度非常慢或者根本无法下载,所以卡在buiilding界面进不去。
解决办法:
- 打开C:\Users<用户名>.gradle\wrapper\dists。你会看到这个目录下有个gradle-x.xx-all的文件夹,这就是我们要手动下载的gradle版本,如果x.xx是1.9 ,那我们就要手动下载 1.9 版本,如果是1.10, 我们就要手动下载gradle 1.10 版本。
- gradle下载地址
- 下载相应版本的gradle后,将下载的.zip文件(不需要解压)复制到上述的gradle-x.xx-all\55gk2rcmfc6p2dg9u9ohc3hw9 文件夹下
- 再次打开AndriodStudio时候就很快了
2.如何在项目中新建一个活动并用其他活动启动?
新建活动:在左侧目录栏中app >manifests >New>Activity>Gallery。注意点击manifests时是右键点击,点击Gallery之后进入新建活动页面.
- 在一个项目里面启动另外一个项目:
  Intent intent = new Intent(this, SecondActivity.class);//要启动活动就必须要新建一个Intent类的对象,传递的参数分别是启动活动的语句所在活动的名字和被启动的活动的名字

  startActivity(intent);//启动活动
3.如何在活动中设置一个Toast?
在活动中添加以下代码即可
@Override

protected void onCreate(Bundle savedInstanceState) {

    super.onCreate(savedInstanceState);

    setContentView(R.layout.activity_main);

    Toast.makeText(this, "你想要写的内容", Toast.LENGTH_LONG).show();

}
五、PSP时间统计
| 步骤 | 耗时 | 百分比 |
|---|---|---|
| 需求分析 | 35min | 7% |
| 设计 | 45min | 21% |
| 代码实现 | 90min | 42% |
| 测试 | 30min | 15% |
| 分析总结 | 21min | 11% |
六、码云链接
七、实验体会
本次实验重点是AndroidStudio的使用,重点在于简单修改代码并运行验证程序。第一次接触AndroidStudio确实很多地方不了解,在上手初期遇到很多问题。在第一次运行成功后看到模拟的NEXUS机上的程序还是有些小兴奋的,我认为这也是几次实验中最有趣的一次。
2017-2018-2 20165202 实验四《Android程序设计》实验报告的更多相关文章
- 20165230 《Java程序设计》实验四 Android程序设计实验报告
20165230 <Java程序设计>实验四 Android程序设计实验报告 一.实验报告封面 课程:Java程序设计 班级:1652班 姓名:田坤烨 学号:20165230 成绩: 指导 ...
- 实验四 Android程序设计 实验报告
实验四 Android程序设计 实验报告 目录 代码托管地址 Android程序设计-1 Android程序设计-2 Android程序设计-3 Android程序设计-4 Android程序设计-5 ...
- 20155326 实验四 Android程序设计实验报告
20155326 实验四 Android程序设计实验报告 实验内容 1.基于Android Studio开发简单的Android应用并部署测试; 2.了解Android.组件.布局管理器的使用: 3. ...
- 20162325金立清 实验四 Android程序设计 实验报告
实验四 Android程序设计 实验报告 代码托管地址 码云链接 实验内容 安装使用Android Stuidio Activity测试 UI测试 布局测试 事件处理测试 Android程序设计-1 ...
- 实验四 Android程序设计 实验报告 20162305李昱兴
实验四 Android程序设计 实验报告 20162305李昱兴 一.Android Studio的安装测试 1.有关该软件 Android Studio,是基于Itellij IDEA的一款流行的I ...
- 20172302《程序设计与数据结构》实验四Android程序设计实验报告
课程:<程序设计与数据结构> 班级: 1723 姓名: 侯泽洋 学号:20172302 实验教师:王志强老师 实验日期:2018年5月30日 必修/选修: 必修 1.实验内容 (1)And ...
- 20155328 实验四 Android程序设计 实验报告
20155328 实验四 Android程序设计 第24章 初识Android 提交点1:完成HelloWorld并显示自己的学号 安装Android Studio后,创建了属于自己的Project( ...
- 2016-2017-2 20155312 实验四Android程序设计实验报告
遇到的问题及解决过程 「问题1」Android Studio-R文件出错 解决:参考Android Studio-R文件错误的解决办法步骤如下: 第一步:检查xml文件,R文件错误通常是由于我们的xm ...
- 20165235实验四 Android程序设计
20165235实验四 Android程序设计 实验课程:JAVA编程设计 实验名称:Android开发 姓名:祁瑛 学号:20165235 实验时间:2018.05.16 指导老师:娄家鹏 Andr ...
- 实验四 Android程序设计
20155224 实验四 Android程序设计 实验报告 实验报告封面: 课程:Java程序设计 班级:1652班 姓名:王高源 学号:20165225 指导教师:娄嘉鹏 实验日期:2018年5月1 ...
随机推荐
- 查看ubuntu 各系统的内核版本
1.查看ubuntu版本号: cat /etc/issue 返回结果: Ubuntu 16.04.2 LTS \n \l 2.查看内核版本号: cat /proc/version 返回结 ...
- 20145327 《Java程序设计》第四周学习总结
20145327 <Java程序设计>第四周学习总结 教材学习内容总结 继承也符合DRY原则. Java中只有单一继承,也就是只能有一个父类 继承可以复用代码,更大的用处是实现「多态」:封 ...
- 20135320赵瀚青LINUX内核分析第四周学习笔记
赵瀚青原创作品转载请注明出处<Linux内核分析>MOOC课程http://mooc.study.163.com/course/USTC-1000029000 概述 本周的内容主要是讲解系 ...
- 【bzoj2734】集合选数(有点思维的状压dp)
题目传送门:bzoj2734 这题一个月前看的时候没什么头绪.现在一看,其实超简单. 我们对于每个在$ [1,n] $范围内的,没有因数2和3的数$ d $,将它的倍数$ 2^a 3^b d $一起处 ...
- poj 3461 - Oulipo 经典kmp算法问题
2017-08-13 19:31:47 writer:pprp 对kmp算法有了大概的了解以后,虽然还不够深入,但是已经可以写出来代码,(可以说是背会了) 所以这道题就作为一个模板,为大家使用吧. 题 ...
- HTTP-API-DESIGN 怎样设计一个合理的 HTTP API (一)
这个附件的幻灯片是我最近给团队分享关于设计 HTTP API 的时候,结合 这篇 和我们团队历史上的一些错误,总结出来一些适合内部的经验. 简介. 这次分享主要关注以下几部分: HTTP + JSON ...
- 如何将JS里变量的值赋给文本框
举个栗子: <html><HEAD><script type="text/javascript" language="Javascript1 ...
- nagios配置邮件报警
1.配置sendmail vi /etc/mail.rc 加入以下行 set bsdcompat set from=邮件用户名@domain.com smtp=smtp.126.com set smt ...
- Nginx的坑
Nginx的重启命令:./nginx -s reload 有时候没有效果,原因不知, 要重启可以使用:killall nginx,然后./nginx (就是先kill掉Nginx,然后再重启Ngi ...
- RedLock 实现分布式锁
J并发是程序开发中不可避免的问题,根据系统面向用户.功能场景的不同,并发的重视程度会有不同.从程序的角度来说,并发意味着相同的时间点执行了相同的代码,而有些情况是不被允许的,比如:转账.抢购占库存等, ...