【译】Spring 4 @PropertySource和@Value注解示例
前言
译文链接:http://websystique.com/spring/spring-propertysource-value-annotations-example/
本篇文章将展示如何通过@PropertySource 和 @Value注解从配置文件中读取属性值。
同样,我们也会讨论Spring的Environment接口,还会看到使用XML配置和使用注解的对比。
Spring的@PropertySource注解主要是让Spring的Environment接口读取属性配置文件用的,这个注解是标识在@Configuration配置类上的。
Spring的@Value注解可以用在字段和方法上。通常用于从属性配置文件中读取属性值,也可以设置默认值。接下来就让我么看下完整的例子吧。
涉及的技术及开发工具
- Spring 4.0.6.RELEASE
- Maven 3
- JDK 1.6
- Eclipse JUNO Service Release 2
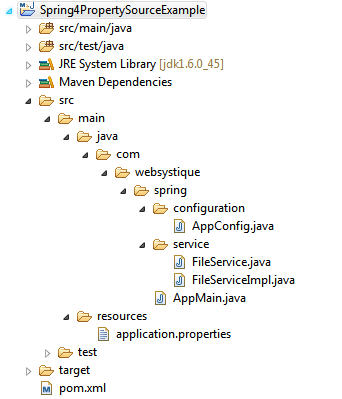
工程结构目录
步骤一:往pom.xml中添加依赖
<project xmlns="http://maven.apache.org/POM/4.0.0" xmlns:xsi="http://www.w3.org/2001/XMLSchema-instance"

    xsi:schemaLocation="http://maven.apache.org/POM/4.0.0 http://maven.apache.org/xsd/maven-4.0.0.xsd">

    <modelVersion>4.0.0</modelVersion>

    <groupId>com.websystique.spring</groupId>

    <artifactId>Spring4PropertySourceExample</artifactId>

    <version>1.0.0</version>

    <packaging>jar</packaging>

    <name>Spring4PropertySourceExample</name>

    <properties>

        <springframework.version>4.0.6.RELEASE</springframework.version>

    </properties>

    <dependencies>

        <dependency>

            <groupId>org.springframework</groupId>

            <artifactId>spring-core</artifactId>

            <version>${springframework.version}</version>

        </dependency>

        <dependency>

            <groupId>org.springframework</groupId>

            <artifactId>spring-context</artifactId>

            <version>${springframework.version}</version>

        </dependency>

    </dependencies>

    <build>

        <pluginManagement>

            <plugins>

                <plugin>

                    <groupId>org.apache.maven.plugins</groupId>

                    <artifactId>maven-compiler-plugin</artifactId>

                    <version>3.2</version>

                    <configuration>

                        <source>1.6</source>

                        <target>1.6</target>

                    </configuration>

                </plugin>

            </plugins>

        </pluginManagement>

    </build>

</project>
步骤二:创建Spring配置类
Spring配置类是指用@Configuration注解标注的类,这些类包含了用@Bean标注的方法。这些被@Bean标注的方法可以生产bean并交由spring容器管理。
package com.websystique.spring.configuration;

import org.springframework.context.annotation.Bean;

import org.springframework.context.annotation.ComponentScan;

import org.springframework.context.annotation.Configuration;

import org.springframework.context.annotation.PropertySource;

import org.springframework.context.support.PropertySourcesPlaceholderConfigurer;

@Configuration

@ComponentScan(basePackages = "com.websystique.spring")

@PropertySource(value = { "classpath:application.properties" })

public class AppConfig {

    /*

     * PropertySourcesPlaceHolderConfigurer Bean only required for @Value("{}") annotations.

     * Remove this bean if you are not using @Value annotations for injecting properties.

     */

    @Bean

    public static PropertySourcesPlaceholderConfigurer propertySourcesPlaceholderConfigurer() {

        return new PropertySourcesPlaceholderConfigurer();

    }

}
@PropertySource(value = { “classpath:application.properties” })注解可以让在application.properties文件中定义的属性对Spring Envirronment bean可用,Environment接口提供了getter方法读取单独的属性值。
注意PropertySourcesPlaceholderConfigurer这个bean,这个bean主要用于解决@value中使用的${…}占位符。假如你不使用${…}占位符的话,可以不使用这个bean。
以上的配置使用XML替代的话,如下:
app-config.xml
<?xml version="1.0" encoding="UTF-8"?>

<beans xmlns="http://www.springframework.org/schema/beans"

        xmlns:xsi="http://www.w3.org/2001/XMLSchema-instance"

        xmlns:context="http://www.springframework.org/schema/context"

        xsi:schemaLocation="http://www.springframework.org/schema/beans http://www.springframework.org/schema/beans/spring-beans-4.0.xsd

    http://www.springframework.org/schema/context   http://www.springframework.org/schema/context/spring-context-4.0.xsd">

    <context:component-scan base-package="com.websystique.spring"/>

    <bean class="org.springframework.context.support.PropertySourcesPlaceholderConfigurer">

        <property name="ignoreUnresolvablePlaceholders" value="true"/>

        <property name="locations">

          <list>

            <value>classpath:application.properties</value>

          </list>

        </property>

      </bean>

</beans>
步骤三:创建配置文件
jdbc.driverClassName = com.mysql.jdbc.Driver

jdbc.url = jdbc:mysql://localhost:3306/websystique

jdbc.username = myuser

jdbc.password = mypassword

hibernate.dialect = org.hibernate.dialect.MySQLDialect

hibernate.show_sql = false

hibernate.format_sql = false

sourceLocation = /dev/input
我们将会在service类里使用上面提到的配置方式读取这个配置文件
步骤四:创建服务类
package com.websystique.spring.service;

public interface FileService {

    void readValues();

}
package com.websystique.spring.service;

import org.springframework.beans.factory.annotation.Autowired;

import org.springframework.beans.factory.annotation.Value;

import org.springframework.core.env.Environment;

import org.springframework.stereotype.Service;

@Service("fileService")

public class FileServiceImpl implements FileService {

    @Value("${sourceLocation:c:/temp/input}")

    private String source;

    @Value("${destinationLocation:c:/temp/output}")

    private String destination;

    @Autowired

    private Environment environment;

    public void readValues() {

        System.out.println("Getting property via Spring Environment :"

                + environment.getProperty("jdbc.driverClassName"));

        System.out.println("Source Location : " + source);

        System.out.println("Destination Location : " + destination);

    }

}
这里首先要注意的是Environment bean被Spring自动注入。另外,由于配置了@PropertySoruce注解,Environment bean可以访问指定配置文件里定义的所有属性值。你可以使用getProperty方法得到指定值。
另外一点值得注意的是@Value注解,基本格式如下:
@value("${key:default")

private String var;
以上声明指导spring根据key去属性配置文件查找value,如果没找到,则使用default作为默认值。
注意以上的${…}占位符只有当注册了PropertySourcesPlaceholderConfigurer bean后才能被解析,否则@Value注解会一直将默认值赋值给var。
步骤五:创建Main方法运行程序
package com.websystique.spring;

import org.springframework.context.annotation.AnnotationConfigApplicationContext;

import org.springframework.context.support.AbstractApplicationContext;

import com.websystique.spring.configuration.AppConfig;

import com.websystique.spring.service.FileService;

public class AppMain {

    public static void main(String args[]){

        AbstractApplicationContext  context = new AnnotationConfigApplicationContext(AppConfig.class);

        FileService service = (FileService) context.getBean("fileService");

        service.readValues();

        context.close();

    }

}
运行以上程序,得到如下结果:
Getting property via Spring Environment :com.mysql.jdbc.Driver
Source Location : /dev/input
Destination Location : c:/temp/output
AbstractApplicationContext context = new AnnotationConfigApplicationContext(AppConfig.class);AbstractApplicationContext context = new ClassPathXmlApplicationContext("app-config.xml");工程源码
http://websystique.com/?smd_process_download=1&download_id=796
【译】Spring 4 @PropertySource和@Value注解示例的更多相关文章
- Spring学习(三)——@PropertySource,@ImportResource,@Bean注解
@PropertySource注解是将配置文件中 的值赋值给POJO 项目结构如下 一.创建一个Person.Java文件: import org.springframework.boot.conte ...
- [译]Spring构建微服务
此文为译文,原文地址 介绍 本文通过一个使用Spring.Spring Boot和Spring Cloud的小例子来说明如何构建微服务系统. 我们可以通过数个微服务组合成一个大型系统. 我们可以想象下 ...
- 深入学习Spring框架(二)- 注解配置
1.为什么要学习Spring的注解配置? 基于注解配置的方式也已经逐渐代替xml.所以我们必须要掌握使用注解的方式配置Spring. 关于实际的开发中到底使用xml还是注解,每家公司有着不同的使用习惯 ...
- 循序渐进之Spring AOP(6) - 使用@Aspect注解
前面几节的示例看起来让人沮丧,要记忆如此多的接口.类和继承关系,做各种复杂的配置.好在这些只是一种相对过时的实现方式,现在只需要使用@Aspect注解及表达式就可以轻松的使用POJO来定义切面,设计精 ...
- Spring的bean管理(注解)
前端时间总是用配置文件 内容太多 下面认识一下注解 注解是什么? 1代码里面的特殊标记,使用注解可以完成功能 2注解写法@XXX 3使用注解可以少些很多配置文件 Spring注解开发准备 注解创建准 ...
- J2EE进阶(十三)Spring MVC常用的那些注解
Spring MVC常用的那些注解 前言 Spring从2.5版本开始在编程中引入注解,用户可以使用@RequestMapping, @RequestParam,@ModelAttribute等等这样 ...
- Spring和SpringMVC的常用注解
Spring的部分: 使用注解之前要开启自动扫描功能 其中base-package为需要扫描的包(含子包). <context:component-scan base-package=" ...
- (转)Spring的bean管理(注解方式)
http://blog.csdn.net/yerenyuan_pku/article/details/69663779 Spring的bean管理(注解方式) 注解:代码中的特殊标记,注解可以使用在类 ...
- Spring自动装配----注解装配----Spring自带的@Autowired注解
Spring自动装配----注解装配----Spring自带的@Autowired注解 父类 package cn.ychx; public interface Person { public voi ...
随机推荐
- (转)C++语言的15个晦涩特性
原文链接: Evan Wallace 翻译: 伯乐在线- 敏敏 译文链接: http://blog.jobbole.com/54140/ 这个列表收集了 C++ 语言的一些晦涩(Obscure)特 ...
- .NET里简易实现IoC
.NET里简易实现IoC 前言 在前面的篇幅中对依赖倒置原则和IoC框架的使用只是做了个简单的介绍,并没有很详细的去演示,可能有的朋友还是区分不了依赖倒置.依赖注入.控制反转这几个名词,或许知道的也只 ...
- Sass用法指南
写在前面的话:随着CSS文件越来越大,内容越来越复杂,对其进行很好的维护将变的很困难.这时CSS预处理器就能够帮上大忙了,它们往往拥有变量.嵌套.继承等许多CSS不具备的特性.有很多CSS预处理器,这 ...
- 理解Session与Cookie
写在前面的话:Session和Cookie是非常有意思的两个概念,对于两者的管理可以处理的很复杂,但是无论如何,理解Session和Cookie的基本概念和发明初衷,对于问题的解决,大有裨益. === ...
- 一种简单,轻量,灵活的C#对象转Json对象的方案(续)
本文参考资料 一种简单,轻量,灵活的C#对象转Json对象的方案 [源码]Literacy 快速反射读写对象属性,字段 一段废话 之前我已经介绍了这个方案的名称为JsonBuilder,这套方案最大的 ...
- Atitit 外包管理规范attilax总结
Atitit 外包管理规范attilax总结 1. 常见的外包问题2 1.1. 使用了过时的语言与技术2 1.2. 不易扩展的架构,架构落后2 1.3. 使用了小众语言,框架类库,组件等技术,导致维护 ...
- FireFox调试手机浏览器
https://developer.mozilla.org/en-US/docs/Tools/Remote_Debugging/Firefox_for_Android IN THIS ARTICLE ...
- ASP.NET MVC5+EF6+EasyUI 后台管理系统(17)-LinQ动态排序
系列目录 首先修复程序中的一个BUG这个BUG在GridPager类中,把sord修改为sort这个名称填写错误,会导致后台一直无法获取datagrid的排序字段 本来是没有这一讲的,为了使20行的代 ...
- SQL Server-聚焦NOT EXISTS AND NOT IN性能分析(十五)
前言 上一节我们分析了INNER JOIN和IN,对于不同场景其性能是不一样的,本节我们接着分析NOT EXISTS和NOT IN,简短的内容,深入的理解,Always to review the b ...
- 压缩SWF文件大小!减少40%体积!
使用FlashBuild作为IDE的痛苦是显著的!如果开发的项目比较大,那么卡顿.崩溃.白屏是常事,使用别的IDE开发如Sublime.FlashDevelop.IDEA等,然后再用mxmlc编译出 ...