SSM(SpringMVC Spring Mybatis)框架整合搭建
1、新建一个web工程。
2、首先看一下整体的框架结构:

3、将ssm框架搭建所需要的jar包复制到lib目录下


3、需要配置各个配置文件。
1)配置web.xml文件:
<?xml version="1.0" encoding="UTF-8"?>

<web-app

xmlns:xsi="http://www.w3.org/2001/XMLSchema-instance

http://www.springmodules.org/schema/cache/springmodules-cache.xsd

http://www.springmodules.org/schema/cache/springmodules-encache.xsd"

xmlns="http://java.sun.com/xml/ns/javaee"

xsi:schemaLocation="http://java.sun.com/xml/ns/javaee http://java.sun.com/xml/ns/javaee/web-app_3_0.xsd"

id="WebApp_ID" version="3.0">

<display-name>qzone</display-name>

<welcome-file-list>

<welcome-file>user.jsp</welcome-file>

</welcome-file-list>

<!-- spring配置文件 -->

<context-param>

<param-name>contextConfigLocation</param-name>

<param-value>classpath:spring/applicationContext.xml</param-value>

</context-param>

<!-- spring监听器 -->

<listener>

<listener-class>org.springframework.web.context.ContextLoaderListener</listener-class>

</listener>

<!-- 编码过滤器 -->

<filter>

<filter-name>encodingFilter</filter-name>

<filter-class>org.springframework.web.filter.CharacterEncodingFilter</filter-class>

<async-supported>true</async-supported>

<init-param>

<param-name>encoding</param-name>

<param-value>UTF-8</param-value>

</init-param>

</filter>

<filter-mapping>

<filter-name>encodingFilter</filter-name>

<url-pattern>/*</url-pattern>

</filter-mapping>

<!-- 添加springmvc的支持 -->

<servlet>

<servlet-name>springMVC</servlet-name>

<servlet-class>org.springframework.web.servlet.DispatcherServlet</servlet-class>

<init-param>

<param-name>contextConfigLocation</param-name>

<param-value>classpath:spring/spring-mvc.xml</param-value>

</init-param>

<load-on-startup>1</load-on-startup>

<async-supported>true</async-supported>

</servlet>

<servlet-mapping>

<servlet-name>springMVC</servlet-name>

<url-pattern>*.do</url-pattern>

</servlet-mapping>

</web-app>
2)在resource/spring下创建applicationContext.xml配置文件:
<?xml version="1.0" encoding="UTF-8"?>

<beans xmlns="http://www.springframework.org/schema/beans"

    xmlns:xsi="http://www.w3.org/2001/XMLSchema-instance" xmlns:p="http://www.springframework.org/schema/p"

    xmlns:aop="http://www.springframework.org/schema/aop" xmlns:context="http://www.springframework.org/schema/context"

    xmlns:jee="http://www.springframework.org/schema/jee" xmlns:tx="http://www.springframework.org/schema/tx"

    xsi:schemaLocation="

    http://www.springframework.org/schema/beans http://www.springframework.org/schema/beans/spring-beans-3.1.xsd

    http://www.springframework.org/schema/aop http://www.springframework.org/schema/aop/spring-aop-3.1.xsd

    http://www.springframework.org/schema/context http://www.springframework.org/schema/context/spring-context-3.1.xsd

    http://www.springframework.org/schema/jee http://www.springframework.org/schema/jee/spring-jee-3.1.xsd

    http://www.springframework.org/schema/tx http://www.springframework.org/schema/tx/spring-tx-3.1.xsd">

    <!-- 指定要扫描的包com.etc下的所有 -->

    <context:component-scan base-package="com.ekingwin.bas.cloud.user"></context:component-scan>

    <!-- 配置数据源

    <bean id="dataSource"

        class="org.springframework.jdbc.datasource.DriverManagerDataSource">

        <property name="driverClassName" value="com.mysql.jdbc.Driver"></property>

        <property name="url" value="jdbc:mysql://localhost:3306/ssm"></property>

        <property name="username" value="root"></property>

        <property name="password" value="123456"></property>

    </bean>   -->

    <!-- 加载配置文件 -->

    <context:property-placeholder location="classpath:*.properties" />

    <!-- 数据库连接池 -->

    <bean id="dataSource" class="com.alibaba.druid.pool.DruidDataSource">

        <property name="url" value="${jdbc.url}" />

        <property name="username" value="${jdbc.username}" />

        <property name="password" value="${jdbc.password}" />

        <property name="driverClassName" value="${jdbc.driver}" />

    </bean>

    <!-- 配置service的事务切面 -->

    <aop:config>

        <aop:pointcut id="serviceOperation" expression="execution(* com.etc.service.*.*(..))" />

        <aop:advisor advice-ref="txAdvice" pointcut-ref="serviceOperation" />

    </aop:config>

    <!-- 配置mybatis的SessionFactory -->

    <bean id="sqlSessionFactory" class="org.mybatis.spring.SqlSessionFactoryBean">

        <property name="dataSource" ref="dataSource"></property>

        <!-- 自动扫描Mapper.xml文件 -->

        <property name="mapperLocations" value="classpath:mapper/*.xml"></property>

        <!-- mybaits配置文件 -->

        <property name="configLocation" value="classpath:mybatis/mybatis-config.xml"></property>

    </bean>

    <!-- spring将mybatis下的sqlSessionFactory注入到daoceng -->

    <bean class="org.mybatis.spring.mapper.MapperScannerConfigurer">

        <property name="basePackage" value="com.ekingwin.bas.cloud"></property>

        <property name="sqlSessionFactoryBeanName" value="sqlSessionFactory"></property>

    </bean>

    <!-- 事务管理 -->

    <bean id="transactionManager"

        class="org.springframework.jdbc.datasource.DataSourceTransactionManager">

        <property name="dataSource" ref="dataSource"></property>

    </bean>

    <!-- 配置事务通知属性 -->

    <tx:advice id="txAdvice" transaction-manager="transactionManager">

        <!-- 定义事务传播属性 -->

        <tx:attributes>

            <tx:method name="insert*" propagation="REQUIRED" />

            <tx:method name="update*" propagation="REQUIRED" />

            <tx:method name="edit*" propagation="REQUIRED" />

            <tx:method name="save*" propagation="REQUIRED" />

            <tx:method name="add*" propagation="REQUIRED" />

            <tx:method name="new*" propagation="REQUIRED" />

            <tx:method name="set*" propagation="REQUIRED" />

            <tx:method name="remove*" propagation="REQUIRED" />

            <tx:method name="delete*" propagation="REQUIRED" />

            <tx:method name="change*" propagation="REQUIRED" />

            <tx:method name="get*" propagation="REQUIRED" read-only="true" />

            <tx:method name="find*" propagation="REQUIRED" read-only="true" />

            <tx:method name="load*" propagation="REQUIRED" read-only="true" />

            <tx:method name="*" propagation="REQUIRED" read-only="true" />

        </tx:attributes>

    </tx:advice>

</beans>
3)在resource/spring下创建spring-mvc.xml文件:
<?xml version="1.0" encoding="UTF-8"?>

<beans xmlns="http://www.springframework.org/schema/beans"

    xmlns:xsi="http://www.w3.org/2001/XMLSchema-instance" xmlns:p="http://www.springframework.org/schema/p"

    xmlns:aop="http://www.springframework.org/schema/aop" xmlns:context="http://www.springframework.org/schema/context"

    xmlns:jee="http://www.springframework.org/schema/jee" xmlns:tx="http://www.springframework.org/schema/tx"

    xmlns:mvc="http://www.springframework.org/schema/mvc"

    xsi:schemaLocation="

    http://www.springframework.org/schema/beans http://www.springframework.org/schema/beans/spring-beans-3.1.xsd

    http://www.springframework.org/schema/mvc http://www.springframework.org/schema/mvc/spring-mvc-4.0.xsd

    http://www.springframework.org/schema/aop http://www.springframework.org/schema/aop/spring-aop-3.1.xsd

    http://www.springframework.org/schema/context http://www.springframework.org/schema/context/spring-context-3.1.xsd

    http://www.springframework.org/schema/jee http://www.springframework.org/schema/jee/spring-jee-3.1.xsd

    http://www.springframework.org/schema/tx http://www.springframework.org/schema/tx/spring-tx-3.1.xsd">

    <!-- 指定注解要扫描的包 -->

    <context:component-scan base-package="com.ekingwin.bas.cloud.user.web"></context:component-scan>

    <!-- 视图解析器,自动加上前缀和后缀 -->

    <bean id="viewResolver" class="org.springframework.web.servlet.view.InternalResourceViewResolver">

        <property name="prefix" value="/"></property>

        <property name="suffix" value=".jsp"></property>

    </bean>

    <!-- Spring 来扫描指定包下的类,并注册被@Component,@Controller,@Service,@Repository等注解标记的组件 -->

    <mvc:annotation-driven />

</beans>
4)在resource/mybatis下创建mybatis-config.xml配置文件:
<?xml version="1.0" encoding="UTF-8"?>

<!DOCTYPE configuration

PUBLIC "-//mybatis.org//DTD Config 3.0//EN"

"http://mybatis.org/dtd/mybatis-3-config.dtd">

<configuration>

    <!-- 批量定义别名,使得com.etc.entity包下的所有bean都使用别名(别名就是类名,首字母大写或小写都可以) -->

    <typeAliases>

        <package name="com.ekingwin.bas.cloud"/>

    </typeAliases>

</configuration>
5)在resource下创建dbconfig.properties文件:
jdbc.driver=com.mysql.jdbc.Driver

jdbc.url=jdbc:mysql://localhost:3306/ssm

jdbc.username=root

jdbc.password=123456
6)在resource下创建log4j.properties文件:
<span style="font-size:18px;">log4j.rootLogger=info,appender1,appender2

log4j.appender.appender1=org.apache.log4j.ConsoleAppender

log4j.appender.appender2=org.apache.log4j.FileAppender

log4j.appender.appender2.File=D:/logFile.txt

log4j.appender.appender1.layout=org.apache.log4j.TTCCLayout

log4j.appender.appender2.layout=org.apache.log4j.TTCCLayout</span>
7)在resource/mapper下创建UserMapper.xml文件:
<?xml version="1.0" encoding="UTF-8"?>

<!DOCTYPE mapper

PUBLIC "-//mybatis.org//DTD Mapper 3.0//EN"

"http://mybatis.org/dtd/mybatis-3-mapper.dtd">

<mapper namespace="com.ekingwin.bas.cloud.user.dao.IUserDao">

<!-- <resultMap type="User" id="UserResult">

        <result property="id" column="id"/>

        <result property="username" column="username"/>

    <result property="password" column="password"/>

    </resultMap>      -->

<!--      <select id="login" parameterType="User" resultMap="UserResult">

        select * from user where username=#{username}

    </select> -->

   <select id="getInfo" parameterType="String" resultType="map">

        select * from user where username=#{username}

    </select>

</mapper>
8)在user/web下的到下创建UserController.java文件:
package com.ekingwin.bas.cloud.user.web;

import javax.annotation.Resource;
import javax.servlet.http.HttpServletRequest;
import javax.servlet.http.HttpSession;

import org.springframework.beans.factory.annotation.Autowired;
import org.springframework.beans.factory.annotation.Qualifier;
import org.springframework.stereotype.Controller;
import org.springframework.web.bind.annotation.RequestBody;
import org.springframework.web.bind.annotation.RequestMapping;
import org.springframework.web.bind.annotation.RequestMethod;
import org.springframework.web.bind.annotation.RestController;

import com.ekingwin.bas.cloud.user.UserException;
import com.ekingwin.bas.cloud.user.dao.entity.User;
import com.ekingwin.bas.cloud.user.dto.UserDto;
import com.ekingwin.bas.cloud.user.service.IUserService;
import com.ekingwin.bas.cloud.user.service.impl.UserServiceImpl;

//@RestController
@Controller
@RequestMapping("/user")
public class UserController {

    @Autowired
//    @Qualifier(value = "userMetaServiceImpl")
    private IUserService userService;

//
//    @Resource
//    private UserServiceImpl userService;

    @RequestMapping(value = "/login", method = RequestMethod.POST)
    public String login (UserDto user) throws UserException{
        System.out.println("123123");
        String userresult = userService.getmessage(user);
        return "redirect:/success.jsp";
    }

//    @RequestMapping(value = "/login", method = RequestMethod.POST)
//    public String login (@RequestBody UserDto user) throws UserException{
//        System.out.println("123123");
//        String userresult = userService.getmessage(user);
//        return "redirect:/success.jsp";
//    }

}
9)在user/service下创建IUserService.java:
package com.ekingwin.bas.cloud.user.service;

import javax.servlet.http.HttpServletRequest;

import com.ekingwin.bas.cloud.user.UserException;

import com.ekingwin.bas.cloud.user.dto.UserDto;

public interface IUserService {

    public String  getmessage(UserDto user) throws UserException;

}
10)在user/service/impl下创建UserServiceImpl.java文件:
package com.ekingwin.bas.cloud.user.service.impl;

import java.util.List;

import java.util.Map;

import javax.annotation.Resource;

import javax.servlet.http.HttpServletRequest;

import org.springframework.beans.factory.annotation.Autowired;

import org.springframework.context.annotation.Primary;

import org.springframework.stereotype.Service;

import com.ekingwin.bas.cloud.user.UserException;

import com.ekingwin.bas.cloud.user.dao.IUserDao;

import com.ekingwin.bas.cloud.user.dao.entity.User;

import com.ekingwin.bas.cloud.user.dto.UserDto;

import com.ekingwin.bas.cloud.user.service.IUserService;

@Primary

@Service

public class UserServiceImpl implements IUserService{

//    @Resource

//    private UserDao userDao;

    @Autowired

    private IUserDao userDao;

    public User login(User user) {

        User users =  userDao.login(user);

        System.out.println("12313247092137498123");

         return users;

    }

    @Override

    public String getmessage(UserDto user) throws UserException {

        // TODO Auto-generated method stub

        String username = user.getUsername();

        List<Map<String, Object>>  list = userDao.getInfo(username);

        System.out.println(list);

        System.out.println("123123");

        return null;

    }

}

//@Service

//public class UserServiceImpl implements IUserService{

//

//

//    @Autowired

//    private UserDao userDao;

//

//

//    @Override

//    public String getmessage(UserDto user) throws UserException {

////        String username = user.getUsername();

////        String username=user.getParameter("username");

////        List<Map<String,Object>> list =userDao.getInfo(username);

////        System.out.println(list.get(0).get("username"));

//        return null;

//    }

//    }
11)user/dto下创建UserDto.java文件:
package com.ekingwin.bas.cloud.user.dto;

public class UserDto {

    private String id;

    private String username;

    private String password;

    private String company;

    private String age;

    private String sex;

    public String getId() {

        return id;

    }

    public void setId(String id) {

        this.id = id;

    }

    public String getUsername() {

        return username;

    }

    public void setUsername(String username) {

        this.username = username;

    }

    public String getPassword() {

        return password;

    }

    public void setPassword(String password) {

        this.password = password;

    }

    public String getCompany() {

        return company;

    }

    public void setCompany(String company) {

        this.company = company;

    }

    public String getAge() {

        return age;

    }

    public void setAge(String age) {

        this.age = age;

    }

    public String getSex() {

        return sex;

    }

    public void setSex(String sex) {

        this.sex = sex;

    }

}
12)user/dao下创建IUserDao.java文件:
package com.ekingwin.bas.cloud.user.dao;

import java.util.List;

import java.util.Map;

import org.apache.ibatis.annotations.Param;

import com.ekingwin.bas.cloud.user.dao.entity.User;

import com.ekingwin.bas.cloud.utils.BasMapper;

public interface IUserDao extends BasMapper<User>{

    public User login(User user);

    public List<Map<String, Object>> getInfo(@Param("username")String username);

}
13)在user/dao/entity下创建User.java文件:
package com.ekingwin.bas.cloud.user.dao.entity;

import javax.persistence.Id;

import javax.persistence.Table;

//@Table(name = "user")

public class User {

    @Id

    private String id;

    private String username;

    private String password;

    private String company;

    private String age;

    private String sex;

    public String getId() {

        return id;

    }

    public void setId(String id) {

        this.id = id;

    }

    public String getUsername() {

        return username;

    }

    public void setUsername(String username) {

        this.username = username;

    }

    public String getPassword() {

        return password;

    }

    public void setPassword(String password) {

        this.password = password;

    }

    public String getCompany() {

        return company;

    }

    public void setCompany(String company) {

        this.company = company;

    }

    public String getAge() {

        return age;

    }

    public void setAge(String age) {

        this.age = age;

    }

    public String getSex() {

        return sex;

    }

    public void setSex(String sex) {

        this.sex = sex;

    }

}
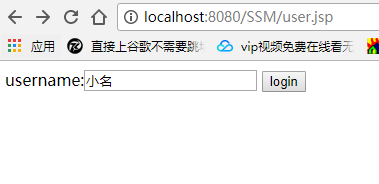
14)在WebContent下创建user.jsp文件:
<%@ page language="java" import="java.util.*" pageEncoding="UTF-8"%>

<!DOCTYPE HTML PUBLIC "-//W3C//DTD HTML 4.01 Transitional//EN">

<html>

  <head>

    <title>My JSP 'index.jsp' starting page</title>

    <!--    <meta http-equiv="pragma" content="no-cache">

    <meta http-equiv="cache-control" content="no-cache">

    <meta http-equiv="expires" content="0">

    <meta http-equiv="keywords" content="keyword1,keyword2,keyword3">

    <meta http-equiv="description" content="This is my page">

    <link rel="stylesheet" type="text/css" href="styles.css">

    -->

    <script type="text/javascript"

            src="./js/jquery-3.1.0.min.js"></script>

  </head>

   <body>

      <form action="user/login.do" method="post">

          username:<input type="text" name="username" value="${user.username}"/>

          <input type="submit" value="login"/><font  color="red">${errorMsg}</font>

      </form>

  </body>

 <!--  <body>

<div>

    <button id="subBtn">测试</button>

</div>

<script type= "text/javascript">

    $().ready(function(){

        document.getElementById("subBtn").onclick = function () {

            request3();

        };

        //=========================请求方式3================//

        var url = "/SSM/user/login.do";

        var data = {"username":"小名" };

        var request3 = function (){

            $.ajax({

                contentType: 'application/json;charset=UTF-8',

                url: url,

                type: 'POST',

                data: JSON.stringify(data),

                dataType: 'json'

            })

            .done(function (res) {

                console.log(res);}

            )

            .fail(function (jqXHR, textStatus, errorThrown) {

                // console.log("请求发送错误");

            });

        };

    });

</script>

</body>-->

</html>
15)在WebContent下创建success.jsp文件:
<%@ page language="java" import="java.util.*" pageEncoding="UTF-8"%>

<!DOCTYPE HTML PUBLIC "-//W3C//DTD HTML 4.01 Transitional//EN">

<html>

  <head>

    <title>My JSP 'index.jsp' starting page</title>

    <meta http-equiv="pragma" content="no-cache">

    <meta http-equiv="cache-control" content="no-cache">

    <meta http-equiv="expires" content="0">

    <meta http-equiv="keywords" content="keyword1,keyword2,keyword3">

    <meta http-equiv="description" content="This is my page">

    <!--

    <link rel="stylesheet" type="text/css" href="styles.css">

    -->

  </head>

  <body>

       欢迎登录

  </body>

</html>
4、启动Tomcat在浏览器上即可。
成功后跳转:
SSM(SpringMVC Spring Mybatis)框架整合搭建的更多相关文章
- SSM框架-----------SpringMVC+Spring+Mybatis框架整合详细教程
1.基本概念 1.1.Spring Spring是一个开源框架,Spring是于2003 年兴起的一个轻量级的Java 开发框架,由Rod Johnson 在其著作Expert One-On-One ...
- SpringMVC Spring MyBatis 框架整合 Annotation MavenProject
项目结构目录 pom.xml jar包管理 <project xmlns="http://maven.apache.org/POM/4.0.0" xmlns:xsi=&q ...
- SSM(SpringMVC+Spring+Mybatis)框架程序on IDEA
有了之前文章搭建的SSH框架之后,现在搭建基于Mybatis的框架.主要基于如下这篇文章: http://blog.csdn.net/gallenzhang/article/details/51932 ...
- SSM(SpringMVC+Spring+MyBatis)三大框架使用Maven快速搭建整合(实现数据库数据到页面进行展示)
本文介绍使用SpringMVC+Spring+MyBatis三大框架使用Maven快速搭建一个demo,实现数据从数据库中查询返回到页面进行展示的过程. 技术选型:SpringMVC+Spring+M ...
- 手把手Maven搭建SpringMVC+Spring+MyBatis框架(超级详细版)
手把手Maven搭建SpringMVC+Spring+MyBatis框架(超级详细版) SSM(Spring+SpringMVC+Mybatis),目前较为主流的企业级架构方案.标准的MVC设计模式, ...
- springmvc学习总结(二) -- maven+springmvc+spring+mybatis+mysql详细搭建整合过程讲解
@_@ 写在最前 之前分享过下面这几篇: mybatis学习笔记(五) -- maven+spring+mybatis从零开始搭建整合详细过程(上)(附demo和搭建过程遇到的问题解决方法) myba ...
- maven+springmvc+spring+mybatis+mysql详细搭建整合过程讲解
转自:https://www.cnblogs.com/lmei/p/7190755.html?utm_source=itdadao&utm_medium=referral @_@ 写在最前 之 ...
- JavaWeb_(SpringMVC框架)测试SpringMVC&Spring&MyBatis三大整合
搭建 SpringMVC&Spring&MyBatis三大整合 传送门 1.准备 测试搭建S pringMVC&Spring&MyBatis三大整合 用例 a)准备 ...
- struts2 + spring + mybatis 框架整合详细介绍
struts2 + spring + mybatis 框架整合详细介绍 参考地址: https://blog.csdn.net/qq_22028771/article/details/5149898 ...
随机推荐
- Linux(Ubuntu)使用日记(三)------git安装使用
1. 安装 首先,确认你的系统是否已安装git,可以通过git指令进行查看,如果没有,在命令行模式下输入sudo apt-get install git命令进行安装. 2. 配置 git confi ...
- Python——Socket编程
一.TCP 1.客户端 import socket sk = socket.socket() # 买个手机 sk.connect(('127.0.0.1',8080)) # 拨号 ret = sk.r ...
- js和jquery设置css样式的几种方法
一.js设置样式的方法 1. 直接设置style的属性 某些情况用这个设置 !important值无效 element.style.height = '50px'; 2. 直接设置属性(只能用于某些 ...
- HDU 2571 命运(简单dp)
传送门 真是刷越多题,越容易满足.算是一道很简单的DP了.终于可以自己写出来了. 二维矩阵每个点都有一个幸运值,要求从左上走到右下最多能积累多少幸运值. 重点就是左上右下必须都踩到. dp[i][j] ...
- python之旅九【第九篇】socket
什么是socket 建立网络通信连接至少要一对端口号(socket).socket本质是编程接口(API),对TCP/IP的封装,TCP/IP也要提供可供程序员做网络开发所用的接口,这就是Socket ...
- BZOJ 3669 魔法森林
LCT维护生成树 先按照a的权值把边排序,离线维护b的最小生成树. 将a排序后,依次动态加边,我们只需要关注b的值.要保证1-n花费最少,两点间的b值肯定是越小越好,所以我们可以考虑以b为关键字维护最 ...
- POJ 3974 Palindrome (算竞进阶习题)
hash + 二分答案 数据范围肯定不能暴力,所以考虑哈希. 把前缀和后缀都哈希过之后,扫描一边字符串,对每个字符串二分枚举回文串长度,注意要分奇数和偶数 #include <iostream& ...
- ☆ [WC2006] 水管局长 「LCT动态维护最小生成树」
题目类型:\(LCT\)动态维护最小生成树 传送门:>Here< 题意:给出一张简单无向图,要求找到两点间的一条路径,使其最长边最小.同时有删边操作 解题思路 两点间路径的最长边最小,也就 ...
- 用python 发 帝国cms 文章
在e\extent下面放一个jiekou.php #!/usr/bin/env python3 # -*- coding: utf-8 -*- import time import urlli ...
- javascript: Element.getBoundingClientRect() 获取元素在网页上的坐标位置
来自:https://blog.csdn.net/weixin_42895400/article/details/81811095?utm_source=blogxgwz1 Element.getBo ...