
docker 安装使用gitlab
官方镜像地址 ce版本:
https://hub.docker.com/r/gitlab/gitlab-ce
文档地址:
https://docs.gitlab.com/omnibus/docker/
环境:
阿里云 centos 7.4 2核4G
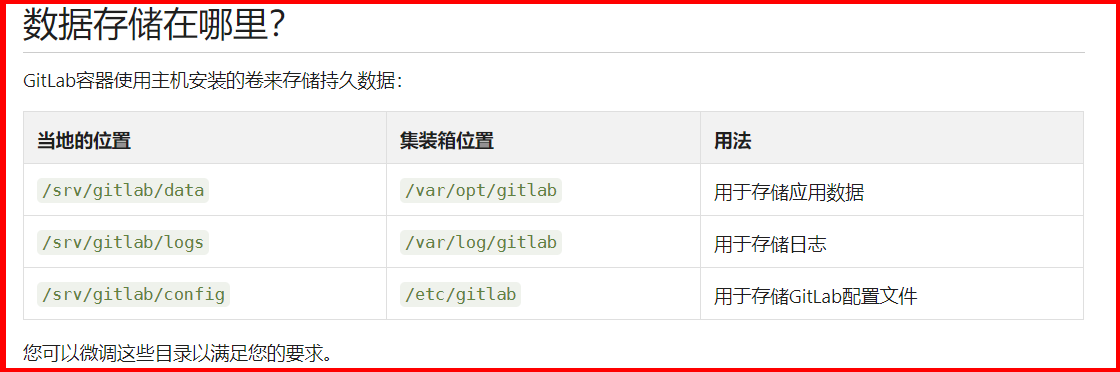
首先创建好存储目录:
[root@iZbp1625jeg61bc2zzfcotZ ~]# mkdir /usr/local/gitlab_data
[root@iZbp1625jeg61bc2zzfcotZ ~]# cd /usr/local/gitlab_data/

[root@iZbp1625jeg61bc2zzfcotZ gitlab_data]# mkdir -p /usr/local/gitlab_data/gitlab/config

[root@iZbp1625jeg61bc2zzfcotZ gitlab_data]# mkdir -p /usr/local/gitlab_data/gitlab/logs

[root@iZbp1625jeg61bc2zzfcotZ gitlab_data]# mkdir -p /usr/local/gitlab_data/gitlab/data
然后下载docker下载gitlab的镜像
[root@iZbp1625jeg61bc2zzfcotZ gitlab_data]# docker pull gitlab/gitlab-ce
[root@iZbp1625jeg61bc2zzfcotZ gitlab_data]# docker images
[root@iZbp1625jeg61bc2zzfcotZ gitlab_data]# docker inspect gitlab/gitlab-ce:latest
[root@iZbp1jcx2imdc3mj7mqdh0Z gitlab_data]# docker inspect gitlab/gitlab-ce:latest | grep DockerVersion
然后开始创建容器:
[root@iZbp1625jeg61bc2zzfcotZ gitlab_data]# docker run -d \
--hostname gitlab.example.com \
--name gitlab \
--restart always \
-p : -p : -p : \
-v /etc/localtime:/etc/localtime:ro \
-v /usr/local/gitlab_data/gitlab/config:/etc/gitlab \
-v /usr/local/gitlab_data/gitlab/logs:/var/log/gitlab \
-v /usr/local/gitlab_data/gitlab/data:/var/opt/gitlab \
gitlab/gitlab-ce:latest
#解释:
  #-d 指定后台运行
  #--hostname 指定主机名
  #--name 指定容器名
  #-p 端口映射
  #--restart always  指定容器停止后的重启策略: 容器退出时总是重启
  # -v 指定挂载存储卷
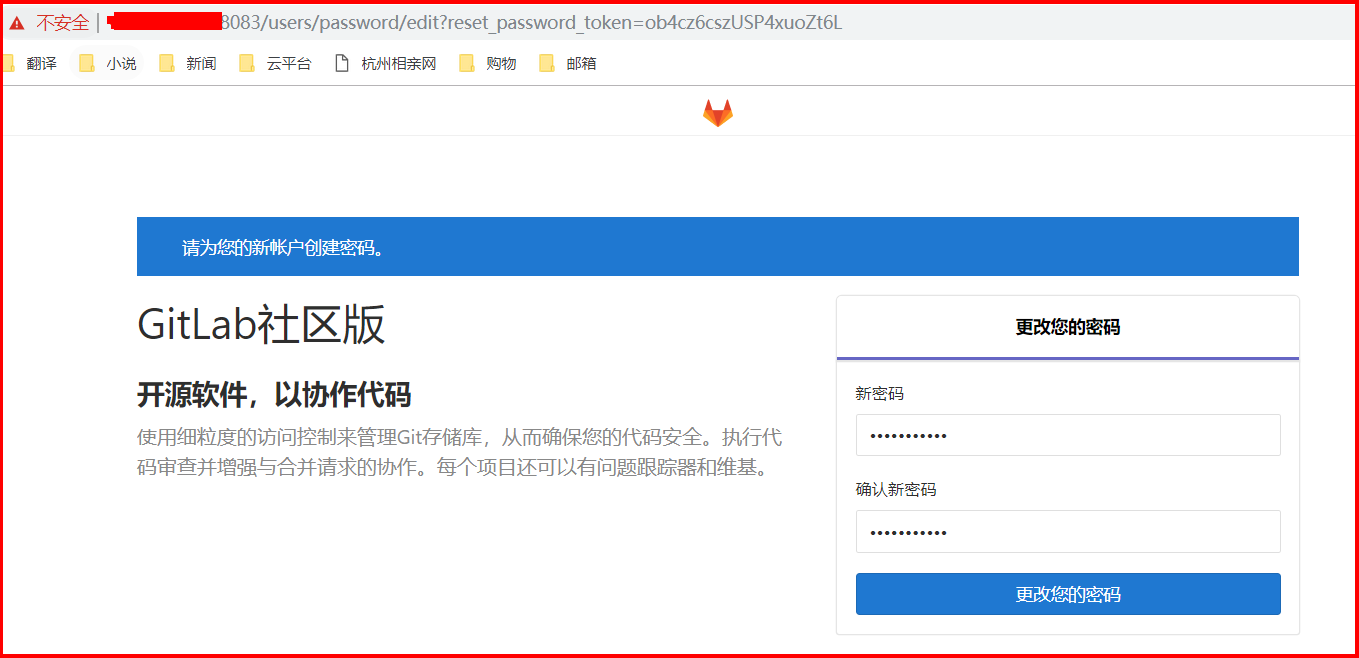
最后登录测试:
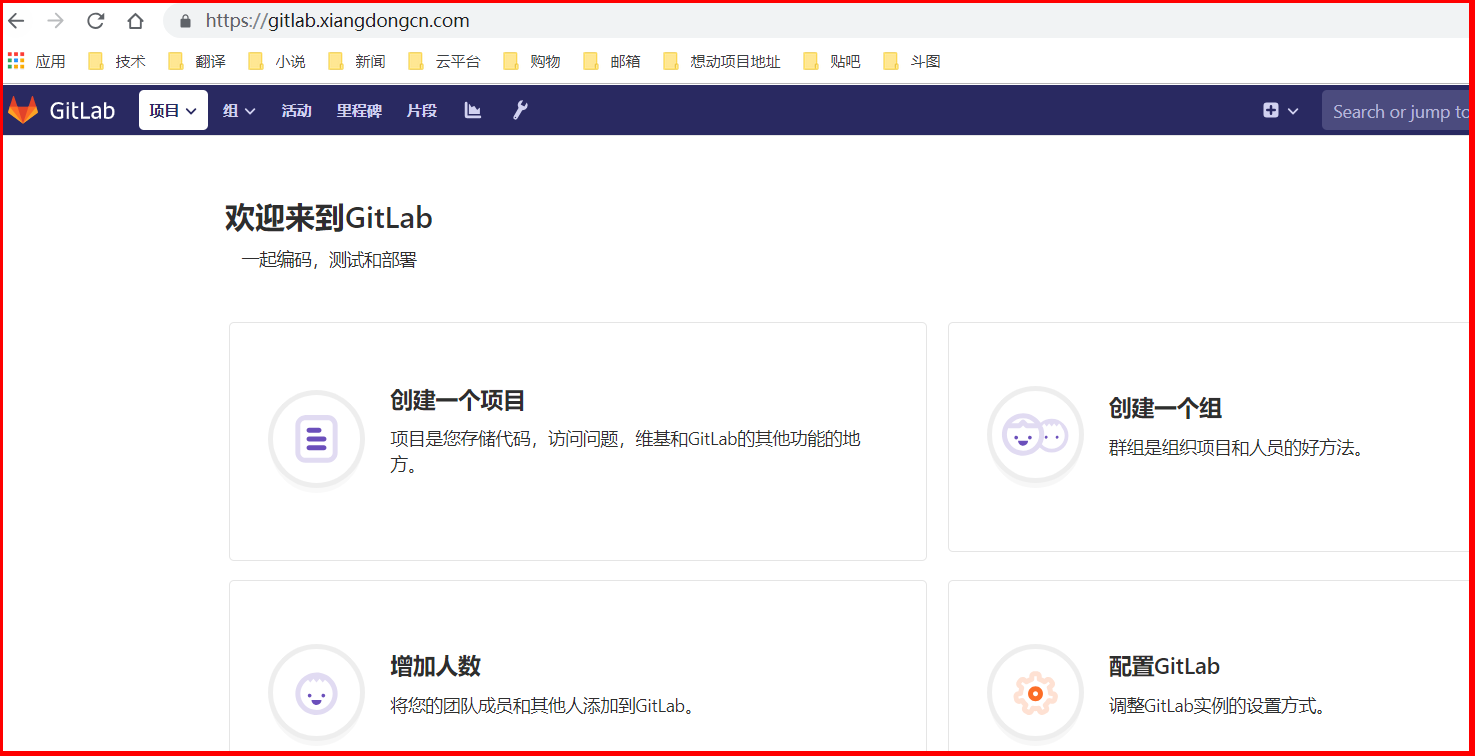
配置以https 方式访问的gitlab
1、无论是阿里云还是腾讯云都能获得免费的域名证书,把证书弄出来
2、修改配置文件
[root@iZbp1jcx2imdc3mj7mqdh0Z config]# pwd

/usr/local/gitlab_data/gitlab/config

[root@iZbp1jcx2imdc3mj7mqdh0Z config]# ls

gitlab.rb  gitlab-secrets.json  ssh_host_ecdsa_key  ssh_host_ecdsa_key.pub  ssh_host_ed25519_key  ssh_host_ed25519_key.pub  ssh_host_rsa_key  ssh_host_rsa_key.pub trusted-certs

[root@iZbp1jcx2imdc3mj7mqdh0Z config]# vim gitlab.rb

3、创建ssl目录,并将证书改名放入其中
[root@iZbp1jcx2imdc3mj7mqdh0Z config]# mkdir ssl

[root@iZbp1jcx2imdc3mj7mqdh0Z config]# cd ssl/

[root@iZbp1jcx2imdc3mj7mqdh0Z ssl]# pwd

/usr/local/gitlab_data/gitlab/config/ssl

[root@iZbp1jcx2imdc3mj7mqdh0Z ssl]# ls

gitlab.xiangdongcn.com.crt  gitlab.xiangdongcn.com.key
举例:我这边是腾讯云的证书,获得:
1_gitlab.xiangdongcn.com_bundle.crt
2_gitlab.xiangdongcn.com.key
然后将其改名为:
gitlab.xiangdongcn.com.crt
gitlab.xiangdongcn.com.key
4、安装docker-nginx
https://www.cnblogs.com/shijunjie/p/10571586.html
5、配置https访问
vim conf.d/default.conf
server {

    listen      ;

    server_name   gitlab.xiangdongcn.com;

    ssl on;

    ssl_certificate ssl/1_gitlab.xiangdongcn.com_bundle.crt;

    ssl_certificate_key ssl/2_gitlab.xiangdongcn.com.key;

    location / {

        proxy_pass https://172.16.77.9:8082;

        proxy_set_header X_FORWARDED_PROTO https;

        proxy_set_header X-Real-IP $remote_addr;

        proxy_set_header X-Forwarded-For $remote_addr;

        proxy_set_header X-Forwarded-For $proxy_add_x_forwarded_for;

        proxy_set_header Host $host;

    }

    error_page        /50x.html;

    location = /50x.html {

        root   /usr/share/nginx/html;

    }

}

server {

    listen ;

    server_name  gitlab.xiangdongcn.com;

    rewrite ^(.*)$ https://${server_name}$1 permanent;

}
6、开启阿里云安全组的端口,测试访问
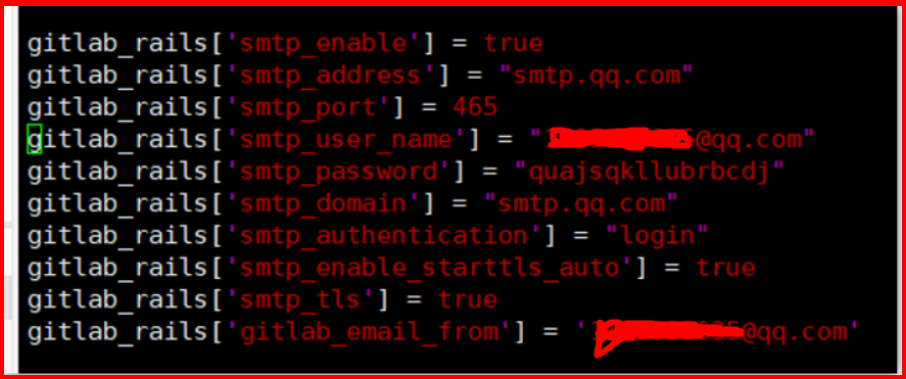
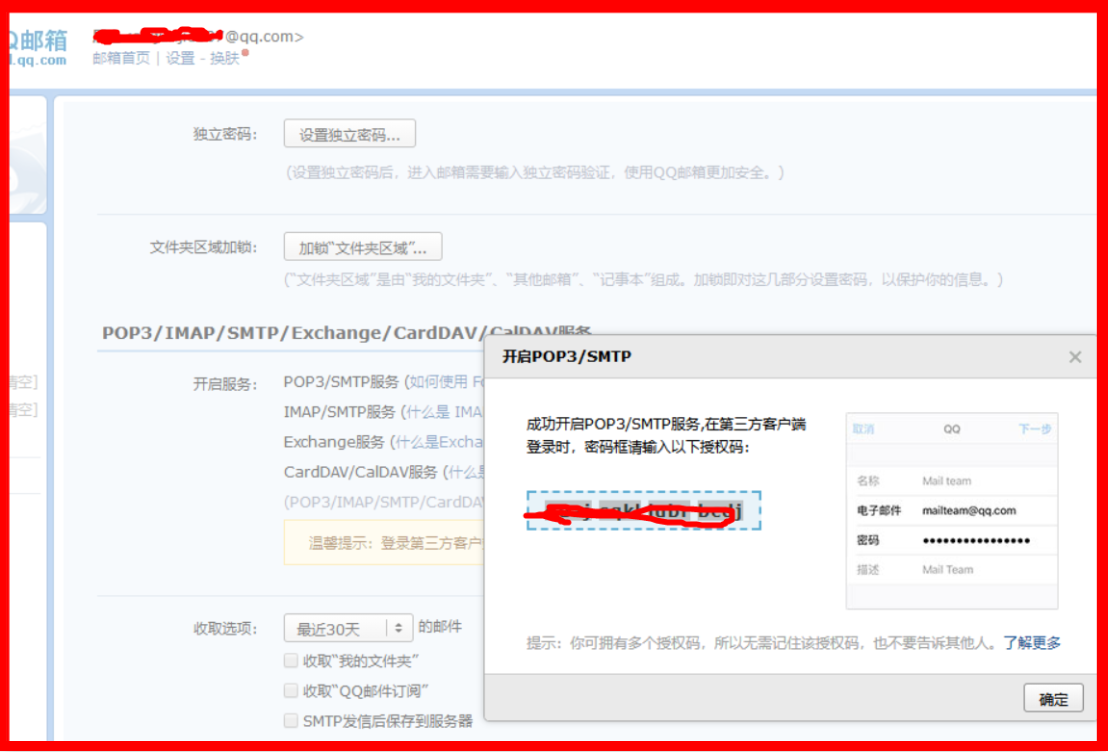
配置邮件
vim gitlab.rb

gitlab_rails['smtp_enable'] = true

gitlab_rails['smtp_address'] = "smtp.qq.com"

gitlab_rails['smtp_port'] =

gitlab_rails['smtp_user_name'] = "xxxxxxxxxx@qq.com"

gitlab_rails['smtp_password'] = "quajsqkllubrbcdj"   #开启qq的POP3时得到的密码

gitlab_rails['smtp_domain'] = "smtp.qq.com"

gitlab_rails['smtp_authentication'] = "login"

gitlab_rails['smtp_enable_starttls_auto'] = true

gitlab_rails['smtp_tls'] = true

gitlab_rails['gitlab_email_from'] = 'xxxxxxxxxx@qq.com'
测试配置是否成功:
执行 gitlab-rails console进入控制台。 然后在控制台提示符后输入下面的命令 发送一封测试邮件:Notify.test_email('收件人邮箱', '邮件标题', '邮件正文').deliver_now
解决gitlab上传文件大小的限制:
报错关键字:
error: RPC failed; result=22, HTTP code = 413fatal: The remote end hung up unexpectedlyfatal: The remote end hung up unexpectedly
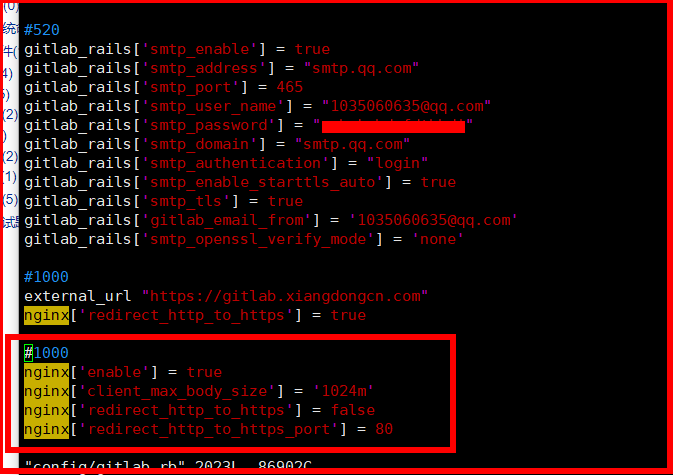
vim gitlab.rb
nginx['enable'] = true

nginx['client_max_body_size'] = '1024m'

nginx['redirect_http_to_https'] = false

nginx['redirect_http_to_https_port'] = 80
然后重启容器
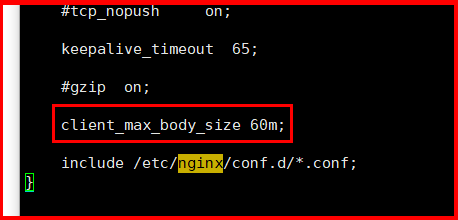
再然后修改nginx的配置文件
vim nginx.conf

client_max_body_size 60m;  ##在http内加上
即可解决上传文件大小限制的问题。
解决nginx出现的问题:
今天有时间进入容器nginx,输入命令:
[root@iZbp1jcx2imdc3mj7mqdh0Z gitlab]# docker exec -it nginx /bin/bash

root@ae87a1c53ab2:/# /usr/sbin/nginx -t

nginx: the configuration file /etc/nginx/nginx.conf syntax is ok

nginx: configuration file /etc/nginx/nginx.conf test is successful

以上是我修复好后没问题了,但是在修复好之前,出现了两个警告! 虽然不影响nginx的启动与使用,但是还是需要排查的。
第一个警告是:
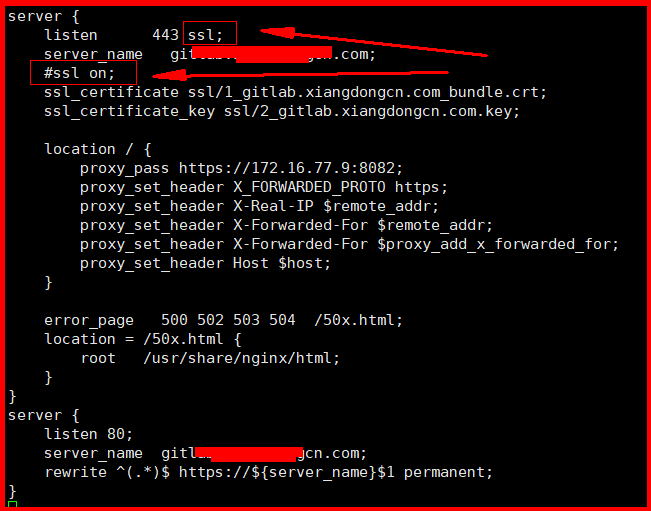
nginx: [warn] the "ssl" directive is deprecated, use the "listen ... ssl"
这是因为nginx版本的问题,新版本的nginx 是不需要ssl on的,即便设置了ssl on也不影响功能,但是最好改成下图所示,在443 后面加上ssl 即可。
第二个警告是:
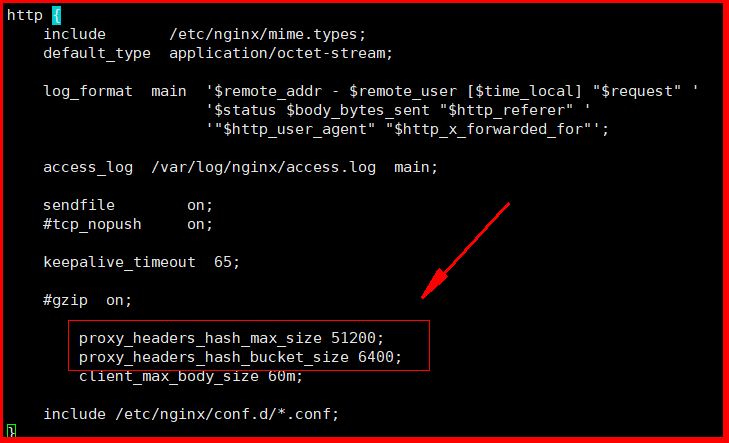
nginx: [warn] could not build optimal proxy_headers_hash, you should increase either proxy_headers_hash_max_size: 512 or proxy_headers_hash_bucket_size: 64; ignoring proxy_headers_hash_bucket_size
编辑nginx.conf,在http里面增加
proxy_headers_hash_max_size ;

proxy_headers_hash_bucket_size ;
解决gitlab出现的无法git push的问题:
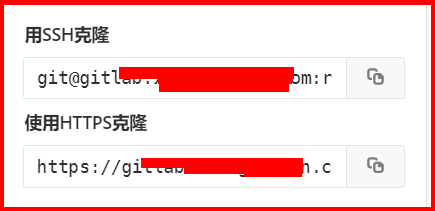
有技术反馈使用HTTPS可以 clone 但是使用SSH时无法成功;
排查了很多问题,用了很多方法,终于发现了问题存在于端口上。
仔细的小伙伴能够发现我们在创建容器时,映射的端口是:
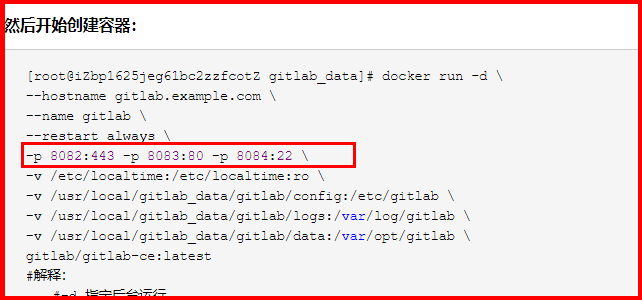
这样导致了在git push的时候无法顺利的找到容器gitlab的22端口,于是解决的办法就是:
1、先修改sshd监听的22端口,换成别的端口
2、然后docker rm -f gitlab 删除容器
3、最后重新创建容器,并修改端口映射 -p 22:22 即可
以上操作成功后,如果还是无法成功git push 有两种可能
1、公钥过期,需要技术重新制作以及上传公钥
2、git没有设置密码,docker exec -it gitlab /bin/bash 进入容器后 输入命令 passwd git 设置密码 即可。
docker 安装使用gitlab的更多相关文章
- docker安装配置gitlab详细过程
docker安装配置gitlab详细过程 获取镜像 1.方法一 1 docker pull beginor/gitlab-ce:11.0.1-ce.0 2.方法二如果服务器网路不好或者pull不下 ...
- docker安装的gitlab的备份与恢复
1.对docker容器安装gitlab备份 1) 查看容器id docker ps 2) 将容器备份成镜像文件 docker commit -a 'James' -m 'gitlab_backup' ...
- Windows10 上Docker 安装运行Gitlab
准备条件 安装好Docker For Windows客户端. 配置好Docker 阿里云加速镜像地址. 检查Docker版本,大于等于v19. 拉取Gitlab镜像 docker pull gitla ...
- 使用docker安装使用gitlab
1.下载镜像 gitlab/gitlab-ce:latest 当前gitlab最新版本为10.0.4 2.在服务器上创建目录 mkdir -p /home/work/ins/co ...
- docker安装中文版Gitlab服务端
1.pull中文版镜像: docker pull beginor/gitlab-ce:11.3.0-ce.0 2.创建目录: 通常会将 GitLab 的配置 (etc) . 日志 (log) .数据 ...
- Docker安装Gitlab
一.Ubuntu16.4上Docker安装Gitlab 1.安装docker 参见:https://docs.docker.com/engine/installation/linux/ubuntuli ...
- Ubuntu Docker 安装和配置 GitLab CI 持续集成
相关文章: Ubuntu Docker 简单安装 GitLab 劈荆斩棘:Gitlab 部署 CI 持续集成 目的:在 Ubuntu 服务器上,使用 Docker 安装和配置 GitLab Runne ...
- centos7下使用docker安装gitlab
环境背景: Docker化已经成为一种热门,记录一下使用docker引擎安装gitlab的过程. 测试环境: 系统 软件 依赖 CentOS 7.4 GitLab(latest) docker-ce ...
- 解决 Windows Docker 安装 Gitlab Volume 权限问题
本文首发于我的个人博客,解决 Windows Docker 安装 Gitlab Volume 权限问题 ,欢迎访问! 记录一下 Windows10 下 Docker 安装 Gitlab 的步骤. Ca ...
随机推荐
- oracle数据库登录
在做以下操作时,要确保你的数据库环境已经正确安装完成.数据库在实际应用中是比较多的,我们测试人员经常会在前台造一些测试数据,在后台数据库进行验证,当然,不局限于此,数据库也可以作为一个专项测试来谈.反 ...
- easyui-dialog 弹窗
<!DOCTYPE html PUBLIC "-//W3C//DTD HTML 4.01 Transitional//EN" "http://www.w3.org/ ...
- 牌型总数——第六届蓝桥杯C语言B组(省赛)第七题
原创 牌型种数 小明被劫持到X赌城,被迫与其他3人玩牌.一副扑克牌(去掉大小王牌,共52张),均匀发给4个人,每个人13张.这时,小明脑子里突然冒出一个问题:如果不考虑花色,只考虑点数,也不考虑自己得 ...
- MongoDB整理笔记のReplica oplog
主从操作日志oplog MongoDB的Replica Set架构是通过一个日志来存储写操作的,这个日志就叫做"oplog".oplog.rs是一个固定长度的capped coll ...
- Delphi7中的Char和XE中的Char
我用FillChar()函数时,发现两个版本中的Char不一样. 在delphi7中 procedure TForm2.Button1Click(Sender: TObject); var s: ar ...
- PHP foreach引用&
将以下代码打印 $variable = ['a', 'b', 'c']; foreach ($variable as $key => &$value) { } foreach ($var ...
- C#中的枚举使用
基本用法 默认从0开始分配各个枚举值对应的数字值 public enum VariableType { Type1, Type2 } 指定各个枚举值对应的数字值 public enum Variabl ...
- 模拟Springboot二:内置tomcat
既然要将tomcat内置到项目中,并且能够成功的启动项目就要知道 tomcat 做了哪些事情 ,那么就必须先搞明白 一个 普通的web项目是如何被我们本地配置的tomcat启动并运行的 (1). 先 ...
- winform发布桌面程序后提示需开启“目录浏览”
把发布文件里的publish.htm名字改为index.htm就好了
- Python3 + django2.0 + apache2 + ubuntu14部署网站上线
自己尝试在本地搭建了 Django 项目后,想部署到自己云服务器上,经常多次尝试和多次踩坑(捂脸),总结如下: 环境:ubuntu14, django2.0, apache2. 1.首先安装需要的库包 ...