杨韬的Python/Jupyter学习笔记
- Python语法学习 https://zhuanlan.zhihu.com/p/24162430
Python 安装库
安装Jupyter Notebook
- 先安装Python
- cmd 进入K:\Jupyter Notebook Python\Python_3.6.4\Scripts目录
- cmd 输入 pip install jupyter 开始安装
- 运行 Python_3.6.4\Scripts下的 jupyter-notebook.exe
安装numpy 数学包
到https://pypi.python.org/pypi/numpy#downloads 下载对应版本的numpy-1.14.0-cp36-none-win_amd64.whl 文件,复制到Scripts目录下安装
cmd运行 在K:\Jupyter Notebook Python\Python_3.6.4\Scripts>pip install numpy-1.14.0-cp36-none-win_amd64.whl
安装绘图包matplotlib
- cmd 输入 pip install matplotlib
安装pandas 数据输入输出库
- cmd 输入 pip install pandas
安装seaborn绘图库
- cmd 输入 pip install seaborn
pip安装命令
安装 pip install jupyterthemes
安装最新版本 pip install --upgrade jupyterthemes
安装指定版本 pip install jupyterthemes==0.18.3
实际上pip instal 既可以安装本地.whl 也可以在线安装
若在线安装失败,如UnicodeDecodeError: 'gbk' codec can't decode 这类问题。可能需要安装之前的指定版本
import math
math.sin(3)
0.1411200080598672
words = ['cat', 'window', 'defenestrate']

for w in words:

    print("单词 "+w, "长度"+str(len(w)))
单词 cat 长度3

单词 window 长度6

单词 defenestrate 长度12
# 绘图包 matplotlib 的使用
# https://liam0205.me/2014/09/11/matplotlib-tutorial-zh-cn/
# http://codingpy.com/article/a-quick-intro-to-matplotlib/
import matplotlib.pyplot as plt # 需要先包含绘图包
import numpy as np
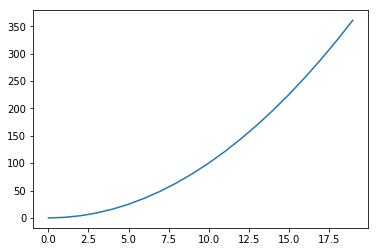
x = np.arange(20)
y = x**2
plt.plot(x, y)
plt.show() # 显示图形
#参考 http://codingpy.com/article/a-quick-intro-to-matplotlib/
$$ \int_0^{+\infty} x^2 dx $$
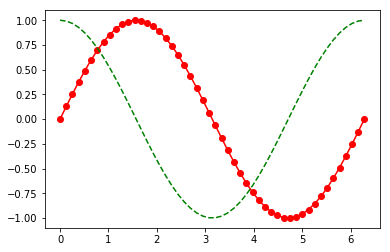
# 自定义曲线的外观

x = np.linspace(0, 2 * np.pi, 50)

plt.plot(x, np.sin(x), 'r-o',

        x, np.cos(x), 'g--')   # r g 颜色   - 线型

plt.show()
# 彩色映射散点图

x = np.random.rand(1000)

y = np.random.rand(1000)

size = np.random.rand(1000) * 50

colour = np.random.rand(1000)

plt.scatter(x, y, size, colour) # 散点图

plt.colorbar() #颜色栏

plt.show()

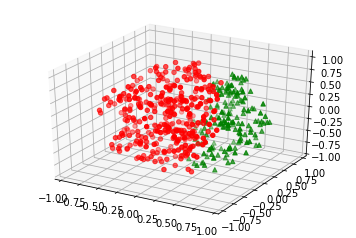
import matplotlib.pyplot as plt

import numpy as np

from mpl_toolkits.mplot3d import Axes3D

np.random.seed(42)

# 采样个数500

n_samples = 500

dim = 3

# 先生成一组3维正态分布数据,数据方向完全随机

samples = np.random.multivariate_normal(

    np.zeros(dim),

    np.eye(dim),

    n_samples

)

# 通过把每个样本到原点距离和均匀分布吻合得到球体内均匀分布的样本

for i in range(samples.shape[0]):

    r = np.power(np.random.random(), 1.0/3.0)

    samples[i] *= r / np.linalg.norm(samples[i])

upper_samples = []

lower_samples = []

for x, y, z in samples:

    # 3x+2y-z=1作为判别平面

    if z > 3*x + 2*y - 1:

        upper_samples.append((x, y, z))

    else:

        lower_samples.append((x, y, z))

fig = plt.figure('3D scatter plot')

ax = fig.add_subplot(111, projection='3d')

uppers = np.array(upper_samples)

lowers = np.array(lower_samples)

# 用不同颜色不同形状的图标表示平面上下的样本

# 判别平面上半部分为红色圆点,下半部分为绿色三角

ax.scatter(uppers[:, 0], uppers[:, 1], uppers[:, 2], c='r', marker='o')

ax.scatter(lowers[:, 0], lowers[:, 1], lowers[:, 2], c='g', marker='^')

plt.show()

# 参考 https://zhuanlan.zhihu.com/p/24309547
使用pandas数据输入输出库
参考 http://python.jobbole.com/80853/
import pandas as pd

df = pd.DataFrame({  'A' : 1.,

                                    'B' : pd.Timestamp('20130102'),

                                    'C' : pd.Series(1, index=list(range(4)), dtype='float32'),

                                    'D' : pd.Series([1, 2, 1, 2], dtype='int32'),

                                    'E' : pd.Categorical(["test", "train", "test", "train"]),

                                    'F' : 'foo' })

df
.dataframe tbody tr th:only-of-type {
vertical-align: middle;
}
.dataframe tbody tr th {

    vertical-align: top;

}

.dataframe thead th {

    text-align: right;

}
| A | B | C | D | E | F | |
|---|---|---|---|---|---|---|
| 0 | 1.0 | 2013-01-02 | 1.0 | 1 | test | foo |
| 1 | 1.0 | 2013-01-02 | 1.0 | 2 | train | foo |
| 2 | 1.0 | 2013-01-02 | 1.0 | 1 | test | foo |
| 3 | 1.0 | 2013-01-02 | 1.0 | 2 | train | foo |
df.B
0   2013-01-02

1   2013-01-02

2   2013-01-02

3   2013-01-02

Name: B, dtype: datetime64[ns]
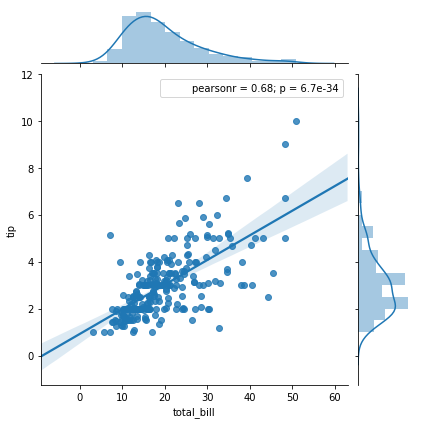
使用Seaborn绘图库
Seaborn本质上使用Matplotlib作为核心库,默认情况下就能创建赏心悦目的图
# http://python.jobbole.com/80853/

import seaborn as sns

# Load one of the data sets that come with seaborn

tips = sns.load_dataset("tips")

sns.jointplot("total_bill", "tip", tips, kind='reg');
tips.head()
.dataframe tbody tr th:only-of-type {
vertical-align: middle;
}
.dataframe tbody tr th {

    vertical-align: top;

}

.dataframe thead th {

    text-align: right;

}
| total_bill | tip | sex | smoker | day | time | size | |
|---|---|---|---|---|---|---|---|
| 0 | 16.99 | 1.01 | Female | No | Sun | Dinner | 2 |
| 1 | 10.34 | 1.66 | Male | No | Sun | Dinner | 3 |
| 2 | 21.01 | 3.50 | Male | No | Sun | Dinner | 3 |
| 3 | 23.68 | 3.31 | Male | No | Sun | Dinner | 2 |
| 4 | 24.59 | 3.61 | Female | No | Sun | Dinner | 4 |
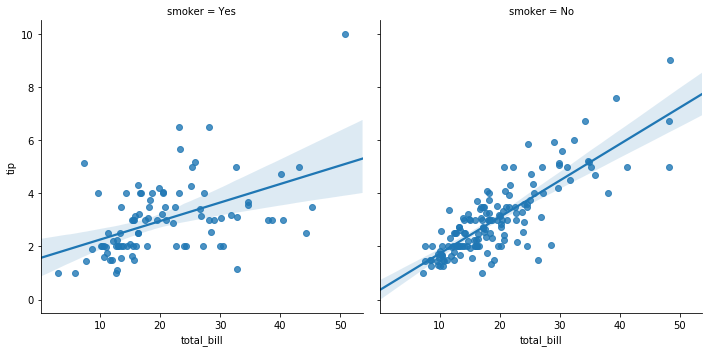
sns.lmplot("total_bill", "tip", tips, col="smoker");
其它参考
http://blog.csdn.net/qq_34264472/article/details/53814653
https://www.cnblogs.com/kylinlin/p/5236601.html
http://blog.csdn.net/u013082989/article/details/73278458
https://www.cnblogs.com/gczr/p/6767175.html
Python·Jupyter Notebook各种使用方法记录
http://blog.csdn.net/tina_ttl/article/details/51031113
Jupyter更换主题
https://github.com/dunovank/jupyter-themes
安装主题
- pip install jupyterthemes
若出现UnicodeDecodeError: 'gbk' 中文问题,可安装之前的版本
pip install jupyterthemes==0.18.3
查看已安装带主题
- 命令行 jt -l
应用主题
- 命令行 jt -t onedork -f fira -fs 13
-fs 13 字体
回复原始状态
- jt -r
# 嵌入视频

from IPython.display import VimeoVideo

VimeoVideo("63250251",with=600, height=400)
  File "<ipython-input-21-5e0fd48278da>", line 3

    VimeoVideo("63250251",with=600, height=400)

                             ^

SyntaxError: invalid syntax
# 交互图表

import ipywidgets

a=ipywidgets.IntSlider(value=5,min=0, max=10, step=1)

a
ipywidgets.Text()
# 嵌入HTML页面

from IPython.display import HTML

HTML('<iframe src="https://www.baidu.com" width=800 height=400></iframe>')
# 运行外部.py程序

#    %run xxxx/xxxx.py
# Geo-Json
安装jupyter lab Python IDE
- pip install jupyterlab
执行 jupyter lab
杨韬的Python/Jupyter学习笔记的更多相关文章
- 【原】Learning Spark (Python版) 学习笔记(三)----工作原理、调优与Spark SQL
周末的任务是更新Learning Spark系列第三篇,以为自己写不完了,但为了改正拖延症,还是得完成给自己定的任务啊 = =.这三章主要讲Spark的运行过程(本地+集群),性能调优以及Spark ...
- Python Click 学习笔记(转)
原文链接:Python Click 学习笔记 Click 是 Flask 的团队 pallets 开发的优秀开源项目,它为命令行工具的开发封装了大量方法,使开发者只需要专注于功能实现.恰好我最近在开发 ...
- 0003.5-20180422-自动化第四章-python基础学习笔记--脚本
0003.5-20180422-自动化第四章-python基础学习笔记--脚本 1-shopping """ v = [ {"name": " ...
- Python Flask学习笔记之模板
Python Flask学习笔记之模板 Jinja2模板引擎 默认情况下,Flask在程序文件夹中的templates子文件夹中寻找模板.Flask提供的render_template函数把Jinja ...
- Python Flask学习笔记之Hello World
Python Flask学习笔记之Hello World 安装virtualenv,配置Flask开发环境 virtualenv 虚拟环境是Python解释器的一个私有副本,在这个环境中可以安装私有包 ...
- 获取字段唯一值工具- -ArcPy和Python案例学习笔记
获取字段唯一值工具- -ArcPy和Python案例学习笔记 目的:获取某一字段的唯一值,可以作为工具使用,也可以作为函数调用 联系方式:谢老师,135-4855-4328,xiexiaokui# ...
- Python高级学习笔记
Python高级学习笔记,此笔记中包含Linux操作系统.Html+CSS+JS.网络协议等. 所有思维导图为本人亲手所画,请勿用于商用. 大哥们,求点赞哦. 第一天笔记:链接 第二天笔记:链接 第三 ...
- python爬虫学习笔记(一)——环境配置(windows系统)
在进行python爬虫学习前,需要进行如下准备工作: python3+pip官方配置 1.Anaconda(推荐,包括python和相关库) [推荐地址:清华镜像] https://mirrors ...
- Python入门学习笔记4:他人的博客及他人的学习思路
看其他人的学习笔记,可以保证自己不走弯路.并且一举两得,即学知识又学方法! 廖雪峰:https://www.liaoxuefeng.com/wiki/0014316089557264a6b348958 ...
随机推荐
- 阿里云php-7.2.12 安装
安装依赖 yum -y install libjpeg libjpeg-devel libpng libpng-devel freetype freetype-devel libxml2 libxml ...
- k8s(6)-滚动更新
用户希望应用程序始终可用,开发人员应该每天多次部署新版本的应用程序.在Kubernetes中,这是通过滚动更新完成的.滚动更新允许通过使用新的实例逐步更新Pods实例来实现部署的更新,从而实现零停机. ...
- k8s(4)-使用服务公开应用程序
Kubernetes中的服务是一个抽象,它定义了一组逻辑Pod和一个访问它们的策略.服务允许从属Pod之间的松散耦合.与所有Kubernetes对象一样,使用YAML (首选)或JSON 定义服务.服 ...
- ubuntu中安装blogPost
1.实验环境 Ubuntu16.04x86 2.安装blogPost步骤 2.1 安装方式比较简单,打开ubuntu软件中心 2.2 搜索DB Browser for SQLite,点击安装即可 上图 ...
- react useRef()函数
"ref"对象是一个通用容器,其current属性是可变的 保存dom function Test() { const t = useRef(null); useEffect(() ...
- windows Apache服务器简单配置虚拟域名(转载)
1.找到apache目录下的conf下的extra下的httpd-vhosts.conf虚拟主机配置文件 将下面的代码复制粘贴到最下面: #<VirtualHost *:80># ...
- image的srcset属性
介绍 响应式页面中经常用到根据屏幕密度设置不同的图片.这个时候肯定会用到image标签的srcset属性.srcset属性用于设置不同屏幕密度下,image自动加载不同的图片.用法如下: <im ...
- java 三大框架 hibernate部分知识实现增删该查操作
1.三层架构 表现层 web层(MVC是一个表现层的设计模型) 业务层 service层 持久层 dao层2.三大框架和三层架构的关系(建议学习三大框架的顺序:先学习hibernat ...
- mpdf中文开发使用文档附demo实例
官网URL:http://www.mpdf1.com/mpdf/index.php github:https://github.com/mpdf/mpdf 官方开发手册,英文的:http://www. ...
- [No0000D1]WPF—TreeView无限极绑定集合形成树结构
1.如图所示:绑定树效果图 2.前台Xaml代码: <Window x:Class="WpfTest.MainWindow" xmlns="http://schem ...