ubuntu18.04初始化配置
ubuntu18.04初始化配置
虚拟机挂了, 又得重新安装配置一遍, 这里记录了我几乎每次都要配置安装的那些软件.
ifconfig
apt install net-tools
sshd
sudo apt install ssh
ifconfig
xshell
smb
sudo apt install vim
sudo apt-get update
sudo apt-get install samba
vim /etc/samba/smb.conf (我的配置如下)
service smbd restart
sudo smbpasswd -a sola
[share]

comment = Public stuff

path = /home/sola/Coder

public = yes

writeable = yes

browseable = yes

guest ok = no

create mask = 0770

directory mode = 0770
#部分smb配置释义, 不可直接复制粘贴 ,格式不对,smb会起不来. 要复制请用上面那段.

[share]                                     #自定义共享名称

comment =  This is share software                       #共享描述

path  =  /home/                                                   #共享目录路径

browseable  =  yes                                    #设置共享是否可浏览,如果no就表示隐藏,需要通过IP+共享名称进行访问

writable  =  yes                            #设置共享是否具有可写权限

read only  =  no                             #设置共享是否具有只读权限

admin users  =  root                          #设置共享的管理员,如果security =share,引项无效,多用户中间使用逗号隔开,例如admin users = root,user1,user2

valid users  =  sola                             #设置允许访问共享的用户,例如valid users =

invalid users  =  sola                              #设置不允许访问共享的用户

write list  =  sola                               #设置在共享具有写入权限的用户,例如例如write list  =

public  =  no                                  #设置共享是否允许guest账户访问

create mask = 0770                                    #创建的文件权限为770

directory mode = 0770                                 #创建的文件目录为 770
other
sudo apt install git

sudo apt instal make

sudo apt install tree
vim 配置
vim ~/.vimrc
:set paste
" This line should not be removed as it ensures that various options are

    " properly set to work with the Vim-related packages available in Debian.

    " Uncomment the next line to make Vim more Vi-compatible

    " NOTE: debian.vim sets 'nocompatible'. Setting 'compatible' changes numerous

    " options, so any other options should be set AFTER setting 'compatible'.

    set nocompatible

    " Vim5 and later versions support syntax highlighting. Uncommenting the

    " following enables syntax highlighting by default.

    "设置字符编码

    :set encoding=utf-8

    :set fileencodings=ucs-bom,utf-8,cp936

    :set fileencoding=utf-8

    :set termencoding=utf-8

    if has("syntax")

      syntax on            " 语法高亮

    endif

    colorscheme ron        " elflord ron peachpuff default 设置配色方案,vim自带的配色方案保存在/usr/share/vim/vim72/colors目录下

    " detect file type

    filetype on

    filetype plugin on

    " If using a dark background within the editing area and syntax highlighting

    " turn on this option as well

    set background=dark

    " Uncomment the following to have Vim jump to the last position when

    " reopening a file

    if has("autocmd")

      au BufReadPost * if line("'\"") > 1 && line("'\"") <= line("$") | exe "normal! g'\"" | endif

      "have Vim load indentation rules and plugins according to the detected filetype

      filetype plugin indent on

    endif

    " The following are commented out as they cause vim to behave a lot

    " differently from regular Vi. They are highly recommended though.

    "set ignorecase        " 搜索模式里忽略大小写

    "set smartcase        " 如果搜索模式包含大写字符,不使用 'ignorecase' 选项。只有在输入搜索模式并且打开 'ignorecase' 选项时才会使用。

    set autowrite        " 自动把内容写回文件: 如果文件被修改过,在每个 :next、:rewind、:last、:first、:previous、:stop、:suspend、:tag、:!、:make、CTRL-] 和 CTRL-^命令时进行;用 :buffer、CTRL-O、CTRL-I、'{A-Z0-9} 或 `{A-Z0-9} 命令转到别的文件时亦然。

    set autoindent        " 设置自动对齐(缩进):即每行的缩进值与上一行相等;使用 noautoindent 取消设置

    set smartindent        " 智能对齐方式

    set tabstop=4        " 设置制表符(tab键)的宽度

    set softtabstop=4     " 设置软制表符的宽度

    set shiftwidth=4    " (自动) 缩进使用的4个空格

    set cindent            " 使用 C/C++ 语言的自动缩进方式

    set cinoptions={0,1s,t0,n-2,p2s,(03s,=.5s,>1s,=1s,:1s     "设置C/C++语言的具体缩进方式

    "set backspace=2    " 设置退格键可用

    set showmatch        " 设置匹配模式,显示匹配的括号

    set linebreak        " 整词换行

    set whichwrap=b,s,<,>,[,] " 光标从行首和行末时可以跳到另一行去

    "set hidden " Hide buffers when they are abandoned

    "set mouse=a             Enable mouse usage (all modes)    使用鼠标

    set number            " Enable line number    "显示行号

    "set previewwindow    " 标识预览窗口

    set history=50        " set command history to 50    "历史记录50条

    "--状态行设置--

    set laststatus=2 " 总显示最后一个窗口的状态行;设为1则窗口数多于一个的时候显示最后一个窗口的状态行;0不显示最后一个窗口的状态行

    set ruler            " 标尺,用于显示光标位置的行号和列号,逗号分隔。每个窗口都有自己的标尺。如果窗口有状态行,标尺在那里显示。否则,它显示在屏幕的最后一行上。

    "--命令行设置--

    set showcmd            " 命令行显示输入的命令

    set showmode        " 命令行显示vim当前模式

    "--find setting--

    set incsearch        " 输入字符串就显示匹配点

    set hlsearch

"设置一键编译

map <F5> :call CompileRunGcc()<CR>

imap <F5> <ESC>:call CompileRunGcc()<CR>

func! CompileRunGcc()

    exec "w"

    exec "cd %:p:h"

    if &filetype == 'c'

        exec "!g++ % -o %<"

        exec "! ./%<"

    elseif &filetype == 'cpp'

        exec "!g++ % -o %<"

        exec "! ./%<"

    elseif &filetype == 'java'

        exec "!javac %"

        exec "!java %<"

    elseif &filetype == 'sh'

        :!./%

    endif

endfunc

   "设置pathonen插件可用

    "execute pathogen#infect()"

" About NERDTree

noremap :<F2> NERDTreeToggle

autocmd vimenter * if !argc() | NERDTree | endif  "open a NERDTree automatically when vim starts up if no files were specified

autocmd bufenter * if (winnr("$") == 1 && exists("b:NERDTreeType") && b:NERDTreeType == "primary") | q | endif

" TagBar 自动生成参数和方法

" Then the F8 key will toggle the Tagbar window.

nmap :<F8> TagbarToggle

"syntastic 保存检查代码时候传入参数

let g:syntastic_java_javac_args="-cp ../../lib:../../bin -sourcepath ../../bin -Djava.ext.dirs=../../lib -d ../../bin"

" 关于Java自动文件补全插件
最后
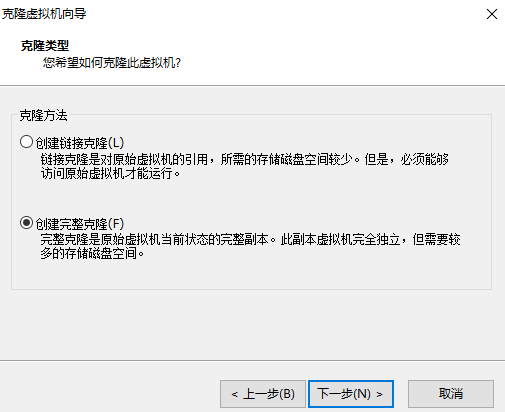
最好关机克隆一份, 免得以后挂了,又装一道。
ubuntu18.04初始化配置的更多相关文章
- Ubuntu18.04初始化
Ubuntu18.04初始化 更新源: sudo cp /etc/apt/sources.list /etc/apt/sources.list.bak sudo gedit /etc/apt/sour ...
- Ubuntu18.04下配置深度学习开发环境
在Ubuntu18.04下配置深度学习/机器学习开发环境 1.下载并安装Anaconda 下载地址:https://www.anaconda.com/distribution/#linux 安装步骤: ...
- 在Ubuntu18.04下配置hadoop集群
服务器准备 启动hadoop最小集群的典型配置是3台服务器, 一台作为Master, NameNode, 两台作为Slave, DataNode. 操作系统使用的Ubuntu18.04 Server, ...
- ubuntu18.04 server配置静态ip (转载)
原文地址: https://blog.csdn.net/mossan/article/details/80381679 最新发布的ubuntu18.04 server,启用了新的网络工具netplan ...
- ubuntu18.04错误配置变量环境导致无法进入系统
1.问题描述 错误配置环境变量(直接在/etc/profile文件末尾添加了export xxx),关机后一直在登录界面循环无法进入系统. ###环境变量的添加是在原有变量之后以冒号(:)分隔加入,并 ...
- ubuntu18.04 server配置静态ip
最新发布的ubuntu18.04 server,启用了新的网络工具netplan,对于命令行配置网络参数跟之前的版本有比较大的差别,现在介绍如下:1.其网络配置文件是放在/etc/netplan/50 ...
- ubuntu18.04 server配置静态ip,新的网络工具netplan的使用方法【转:http://forum.ubuntu.org.cn/viewtopic.php?t=487463】
最新发布的ubuntu18.04 server,启用了新的网络工具netplan,对于命令行配置网络参数跟之前的版本有比较大的差别,现在介绍如下:1.其网络配置文件是放在/etc/netplan/50 ...
- 虚拟机(Vmware)安装ubuntu18.04和配置调整(一)
一.虚拟机(Vmware)安装ubuntu18.04 1.下载ubuntu18.04桌面版镜像文件< ubuntu-18.04.3-desktop-amd64.iso> 2.使用VMwar ...
- Ubuntu18.04中配置QT5.11开发环境
准备工作 参考 https://wiki.qt.io/Install_Qt_5_on_Ubuntu . # 安装g++ sudo apt install build-essential # sudo ...
随机推荐
- cygwin简介及使用
一个是真实的假货,一个是冒牌的真品前指 Cygwin,后指 Linux/VMWare 路不管平还是陡,终归你要走的,如果你愿意投入到linux开发的社群中来,不会安装linux系统,不会配置工作环境是 ...
- 为什么使用消息队列,为什么使用RabbitMQ、springAMQP
1.为什么使用消息队列? 2.为什么使用RabbbitMQ? 3.为什么使用spring AMQP?
- get请求中的url encode问题
首先发表一下感慨,Python的requests模块确实太简便,省却了很多的转码等等等等的问题,但这也是缺点,对于我这种基础不好的同学来说让我少知道了许多本来应该知道的东西. url encode: ...
- RESTful记录-RESTful介绍
RESTful Web服务是基于REST架构的Web服务.在REST架构一切都是一种资源. RESTful Web服务是轻量级的,高度可扩展性和可维护性,并且非常常用于创建基于API的Web应用程序. ...
- BFS搜索算法应用_Codevs 1004 四子连棋
#define _CRT_SECURE_NO_WARNINGS #include <iostream> #include <algorithm> #include <cs ...
- .NET面试题系列(七)IIS
应用程序池的集成模式和经典模式的区别 应用程序池模式会影响服务器处理托管代码请求的方式. 如果托管应用程序在采用集成模式的应用程序池中运行,服务器将使用 IIS 和 ASP.NET 的集成请求处理管道 ...
- [整理]JS中的状态机
/*StateMachine*/ var StateMachine = (function(){ function StateMachine(opts){ this.current = opts.in ...
- J2EE架构
从整体上讲,J2EE是使用Java技术开发企业级应用的一种事实上的工业标准(Sun公司出于其自身利益的考虑,至今没有将Java及其相关技术纳入标准化组织的体系),它是Java技术不断适应和促进企业级应 ...
- [LeetCode] Candy (分糖果),时间复杂度O(n),空间复杂度为O(1),且只需遍历一次的实现
[LeetCode] Candy (分糖果),时间复杂度O(n),空间复杂度为O(1),且只需遍历一次的实现 原题: There are N children standing in a line. ...
- 运动规划——PT and PVT 模式
最近项目成员在做机器人上层开发时,经常说到PT模式和PVT模式.一直没搞懂这两种模式的实际差别.上网检索进行学习...... ref link:https://blog.csdn.net/m0_376 ...