
CentOS7 lamp安装 centoOS6 lamp
快速lamp安装
How To Install Linux, Apache, MySQL, PHP (LAMP) stack On CentOS 7
Introduction
A "LAMP" stack is a group of open source software that is typically installed together to enable a server to host dynamic websites and web apps. This term is actually an acronym which represents the Linux operating system, with the Apache web server. The site data is stored in a MySQL database (using MariaDB), and dynamic content is processed by PHP.
In this guide, we'll get a LAMP stack installed on an CentOS 7 VPS. CentOS will fulfill our first requirement: a Linux operating system.
Prerequisites
Before you begin with this guide, you should have a separate, non-root user account set up on your server. You can learn how to do this by completing steps 1-4 in the initial server setup for CentOS 7.
Step One — Install Apache
The Apache web server is currently the most popular web server in the world, which makes it a great default choice for hosting a website.
We can install Apache easily using CentOS's package manager, yum. A package manager allows us to install most software pain-free from a repository maintained by CentOS. You can learn more about how to use yum here.
For our purposes, we can get started by typing these commands:
sudo yum install httpd
Since we are using a sudo command, these operations get executed with root privileges. It will ask you for your regular user's password to verify your intentions.
Afterwards, your web server is installed.
Once it installs, you can start Apache on your VPS:
sudo systemctl start httpd.service
You can do a spot check right away to verify that everything went as planned by visiting your server's public IP address in your web browser (see the note under the next heading to find out what your public IP address is if you do not have this information already):
http://your_server_IP_address/
You will see the default CentOS 7 Apache web page, which is there for informational and testing purposes. It should look something like this:
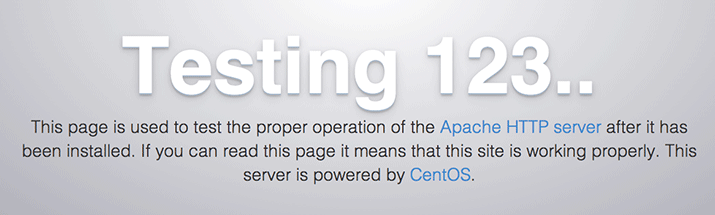
If you see this page, then your web server is now correctly installed.
The last thing you will want to do is enable Apache to start on boot. Use the following command to do so:
sudo systemctl enable httpd.service
How To Find your Server's Public IP Address
If you do not know what your server's public IP address is, there are a number of ways you can find it. Usually, this is the address you use to connect to your server through SSH.
From the command line, you can find this a few ways. First, you can use the iproute2 tools to get your address by typing this:
ip addr show eth0 | grep inet | awk '{ print $2; }' | sed 's/\/.*$//'
This will give you one or two lines back. They are both correct addresses, but your computer may only be able to use one of them, so feel free to try each one.
An alternative method is to use an outside party to tell you how it sees your server. You can do this by asking a specific server what your IP address is:
curl http://icanhazip.com
Regardless of the method you use to get your IP address, you can type it into your web browser's address bar to get to your server.
Step Two — Install MySQL (MariaDB)
Now that we have our web server up and running, it is time to install MariaDB, a MySQL drop-in replacement. MariaDB is a community-developed fork of the MySQL relational database management system. Basically, it will organize and provide access to databases where our site can store information.
Again, we can use yum to acquire and install our software. This time, we'll also install some other "helper" packages that will assist us in getting our components to communicate with each other:
sudo yum install mariadb-server mariadb
When the installation is complete, we need to start MariaDB with the following command:
sudo systemctl start mariadb
Now that our MySQL database is running, we want to run a simple security script that will remove some dangerous defaults and lock down access to our database system a little bit. Start the interactive script by running:
sudo mysql_secure_installation
The prompt will ask you for your current root password. Since you just installed MySQL, you most likely won’t have one, so leave it blank by pressing enter. Then the prompt will ask you if you want to set a root password. Go ahead and enter Y, and follow the instructions:
Enter current password for root (enter for none):

OK, successfully used password, moving on...

Setting the root password ensures that nobody can log into the MariaDB

root user without the proper authorization.

New password: password

Re-enter new password: password

Password updated successfully!

Reloading privilege tables..

 ... Success!
For the rest of the questions, you should simply hit the "ENTER" key through each prompt to accept the default values. This will remove some sample users and databases, disable remote root logins, and load these new rules so that MySQL immediately respects the changes we have made.
The last thing you will want to do is enable MariaDB to start on boot. Use the following command to do so:
sudo systemctl enable mariadb.service
At this point, your database system is now set up and we can move on.
Step Three — Install PHP
PHP is the component of our setup that will process code to display dynamic content. It can run scripts, connect to our MySQL databases to get information, and hand the processed content over to our web server to display.
We can once again leverage the yum system to install our components. We're going to include the php-mysql package as well:
sudo yum install php php-mysql
This should install PHP without any problems. We need to restart the Apache web server in order for it to work with PHP. You can do this by typing this:
sudo systemctl restart httpd.service
Install PHP Modules
To enhance the functionality of PHP, we can optionally install some additional modules.
To see the available options for PHP modules and libraries, you can type this into your system:
yum search php-
The results are all optional components that you can install. It will give you a short description for each:
php-bcmath.x86_64 : A module for PHP applications for using the bcmath library

php-cli.x86_64 : Command-line interface for PHP

php-common.x86_64 : Common files for PHP

php-dba.x86_64 : A database abstraction layer module for PHP applications

php-devel.x86_64 : Files needed for building PHP extensions

php-embedded.x86_64 : PHP library for embedding in applications

php-enchant.x86_64 : Enchant spelling extension for PHP applications

php-fpm.x86_64 : PHP FastCGI Process Manager

php-gd.x86_64 : A module for PHP applications for using the gd graphics library

. . .
To get more information about what each module does, you can either search the internet, or you can look at the long description in the package by typing:
yum info package_name
There will be a lot of output, with one field called Description which will have a longer explanation of the functionality that the module provides.
For example, to find out what the php-fpm module does, we could type this:
yum info php-fpm
Along with a large amount of other information, you'll find something that looks like this:
. . .

Summary     : PHP FastCGI Process Manager

URL         : http://www.php.net/

License     : PHP and Zend and BSD

Description : PHP-FPM (FastCGI Process Manager) is an alternative PHP FastCGI

            : implementation with some additional features useful for sites of

            : any size, especially busier sites.
If, after researching, you decide you would like to install a package, you can do so by using the yum install command like we have been doing for our other software.
If we decided that php-fpm is something that we need, we could type:
sudo yum install php-fpm
If you want to install more than one module, you can do that by listing each one, separated by a space, following the yum install command, like this:
sudo yum install package1 package2 ...
At this point, your LAMP stack is installed and configured. We should still test out our PHP though.
Step Four — Test PHP Processing on your Web Server
In order to test that our system is configured properly for PHP, we can create a very basic PHP script.
We will call this script info.php. In order for Apache to find the file and serve it correctly, it must be saved to a very specific directory, which is called the "web root".
In CentOS 7, this directory is located at /var/www/html/. We can create the file at that location by typing:
sudo vi /var/www/html/info.php
This will open a blank file. We want to put the following text, which is valid PHP code, inside the file:
<?php phpinfo(); ?>
When you are finished, save and close the file.
If you are running a firewall, run the following commands to allow HTTP and HTTPS traffic:
sudo firewall-cmd --permanent --zone=public --add-service=http

sudo firewall-cmd --permanent --zone=public --add-service=https

sudo firewall-cmd --reload
Now we can test whether our web server can correctly display content generated by a PHP script. To try this out, we just have to visit this page in our web browser. You'll need your server's public IP address again.
The address you want to visit will be:
http://your_server_IP_address/info.php
The page that you come to should look something like this:
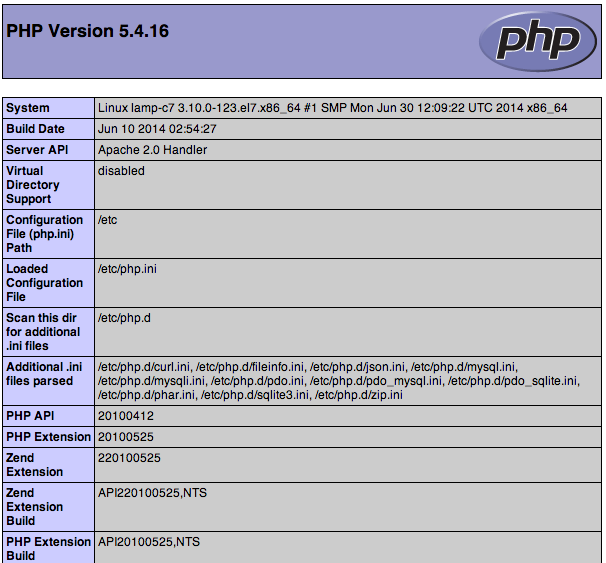
This page basically gives you information about your server from the perspective of PHP. It is useful for debugging and to ensure that your settings are being applied correctly.
If this was successful, then your PHP is working as expected.
You probably want to remove this file after this test because it could actually give information about your server to unauthorized users. To do this, you can type this:
sudo rm /var/www/html/info.php
You can always recreate this page if you need to access the information again later.
Conclusion
Now that you have a LAMP stack installed, you have many choices for what to do next. Basically, you've installed a platform that will allow you to install most kinds of websites and web software on your server.
https://www.digitalocean.com/community/tutorials/how-to-install-linux-apache-mysql-php-lamp-stack-on-centos-7
2,CentOS 6 lamp
yum install httpd httpd-devel mysql mysql-server mysql-devel php php-mysql php-common php-gd php-mbstring php-mcrypt php-devel php-xml -y
CentOS7 lamp安装 centoOS6 lamp的更多相关文章
- 在CentOS7上通过RPM安装实现LAMP+phpMyAdmin过程全记录
在CentOS7上通过RPM安装实现LAMP+phpMyAdmin过程全记录 时间:2017年9月20日 一.软件环境: IP:192.168.1.71 Hostname:centos73-2.sur ...
- 【运维技术】CentOS7上从零开始安装LAMP安装织梦DedeCMS教程
前期准备数据 centos7 系统 安装 appache httpd # 更新httpd yum update httpd # 安装httpd yum install -y httpd # 启动服务 ...
- 实战!基于lamp安装Discuz论坛-技术流ken
简介 我前面的博客已经详细介绍了lamp采用yum安装以及编译安装的方式,这篇博客将基于yum安装的lamp架构来实战安装Discuz论坛,你可以任选其一来完成. 系统环境 centos7.5 服务器 ...
- CentOS 6.6安装配置LAMP服务器(Apache+PHP5+MySQL)
准备篇: CentOS 6.6系统安装配置图解教程 http://www.osyunwei.com/archives/8398.html 1.配置防火墙,开启80端口.3306端口 vi /etc/s ...
- lamp安装
一.简介 什么是LAMPLAMP是一种Web网络应用和开发环境,是Linux, Apache, MySQL, Php/Perl的缩写,每一个字母代表了一个组件,每个组件就其本身而言都是在它所代表的方面 ...
- LAMP安装各种问题解决方案
LAMP环境配置安装注意安装步骤及说明事项. LAMP安装各种问题解决 1. 访问ftp报错 解决: 关闭selinux vi /etc/selinux/config 内容修改为: selinux=d ...
- CentOS 6.4安装配置LAMP服务器(Apache+PHP5+MySQL)
这篇文章主要介绍了CentOS 6.4安装配置LAMP服务器(Apache+PHP5+MySQL)的方法,需要的朋友可以参考下 文章写的不错,很详细:IDO转载自网络: 准备篇: 1.配置防火墙,开启 ...
- CentOS 7.0安装配置LAMP服务器(Apache+PHP+MariaDB)
CentOS 7.0默认使用的是firewall作为防火墙,这里改为iptables防火墙. 1.关闭firewall: systemctl stop firewalld.service #停止fir ...
- 阿里云服务器CentOS 5.7(64位)安装配置LAMP服务器(Apache+PHP5+MySQL)
一.快速安装Apache+PHP5+MySql ----------------------------------------------------- 补充:由于163的yum源上只有php5.1 ...
随机推荐
- 使用XAML在WPF项目中承载ArcGIS Engine地图控件开发
原文 http://blog.csdn.net/flexmapserver/article/details/5868882 用Windows Form进行ArcGIS Engine二次开发时常见的形式 ...
- Unix/Linux环境C编程入门教程(35) 编程管理系统中的组
组管理相关函数介绍 相关函数 getgid,setgid,setregid 表头文件 #include<unistd.h> #include<sys/types.h> 定 ...
- 百度地图LV1.5实践项目开发工具类bmap.util.jsV1.0
/** * 百度地图使用工具类-v1.5 * * @author boonya * @date 2013-7-7 * @address Chengdu,Sichuan,China * @email b ...
- Container With Most Water 解答
Question Given n non-negative integers a1, a2, ..., an, where each represents a point at coordinate ...
- 剑指offer-面试题6.重建二叉树
题目:输入某二叉树的前序遍历和中序遍历结果,请重建出该二叉树.假设 输入的前序遍历和中序遍历的结果都不含重复的数字.例如输入前序遍历 序列{1,2,4,7,3,5,6,8}和中序遍历序列{4,7,2, ...
- LeeCode-Merge Sorted Array
Given two sorted integer arrays nums1 and nums2, merge nums2 into nums1 as one sorted array. Note:Yo ...
- android的init过程分析
前言 Android系统是运作在linux kernal上的,因此它的启动过程也遵循linux的启动过程,当linux内核启动之后,运行的第一个进程是init,这个进程是一个守护进程,它的生命周期贯穿 ...
- Python列表及元组
列表(list)是Python以及其他语言中最常用到的数据结构之一.Python使用使用中括号[ ] 来解析列表.列表是可变的(mutable)——可以改变列表的内容. 如 list1 = ['phy ...
- onvif规范 中文介绍
什么是ONVIF ? ONVIF规范描述了网络视频的模型.接口.数据类型以及数据交互的模式.并复用了一些现有的标准,如WS系列标准等. ONVIF规范的目标是实现一个网络视频框架协议,使不同厂商所生产 ...
- java中String的用法
String的用法很活跃,也用到的很多.可以根据自己的需要查询API.这里只有concat和substring,indexof的用法 class TestString { public static ...