SpringMVC配置环境
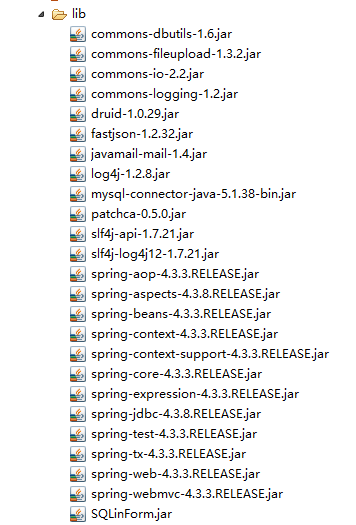
一,lib目录下加入spring一般所需的jar包
二,配置web.xml
<?xml version="1.0" encoding="UTF-8"?>

<web-app xmlns:xsi="http://www.w3.org/2001/XMLSchema-instance"

xmlns="http://java.sun.com/xml/ns/javaee" xmlns:web="http://java.sun.com/xml/ns/javaee/web-app_2_5.xsd"

xsi:schemaLocation="http://java.sun.com/xml/ns/javaee http://java.sun.com/xml/ns/javaee/web-app_3_0.xsd"

id="WebApp_ID" version="3.0">

<display-name>songtian</display-name>

<!-- Spring 全局上下文的 监听器,必须有spring上下文配置文件,否则报错 -->

<listener>

<listener-class>org.springframework.web.context.ContextLoaderListener</listener-class>

</listener>

<!-- Spring上下文配置, 默认为classpath:applicationContext.xml -->

<context-param>

<param-name>contextConfigLocation</param-name>

<param-value>classpath:spring-config.xml</param-value>

</context-param>

<!-- 字符集编码过滤器characterEncoding -->

<filter>

<filter-name>characterEncoding</filter-name>

<filter-class>org.springframework.web.filter.CharacterEncodingFilter</filter-class>

<init-param>

<param-name>encoding</param-name>

<param-value>UTF-8</param-value>

</init-param>

</filter>

<filter-mapping>

<filter-name>characterEncoding</filter-name>

<url-pattern>/*</url-pattern>

</filter-mapping>

<!-- spring mvc -->

<servlet>

<servlet-name>springmvc</servlet-name>

<servlet-class>org.springframework.web.servlet.DispatcherServlet</servlet-class>

<!-- DispatcherServlet上下文配置, 默认为/WEB-INF/${servlet-name}-servlet.xml -->

<init-param>

<param-name>contextConfigLocation</param-name>

<param-value>classpath:spring-mvc.xml</param-value>

</init-param>

<load-on-startup>1</load-on-startup>

</servlet>

<servlet-mapping>

<servlet-name>springmvc</servlet-name>

<url-pattern>*.do</url-pattern>

</servlet-mapping>

<welcome-file-list>

<welcome-file>pages/sys/login/pages/signin.html</welcome-file>

</welcome-file-list>

</web-app>
三(1),配置spring-mvc.xml
<?xml version="1.0" encoding="utf-8"?>

<beans xmlns="http://www.springframework.org/schema/beans" xmlns:xsi="http://www.w3.org/2001/XMLSchema-instance"

	xmlns:context="http://www.springframework.org/schema/context"

	xmlns:aop="http://www.springframework.org/schema/aop"

	xmlns:tx="http://www.springframework.org/schema/tx"

	xmlns:mvc="http://www.springframework.org/schema/mvc"

	xsi:schemaLocation="http://www.springframework.org/schema/beans

	http://www.springframework.org/schema/beans/spring-beans.xsd

	http://www.springframework.org/schema/context

	http://www.springframework.org/schema/context/spring-context.xsd

	http://www.springframework.org/schema/aop

	http://www.springframework.org/schema/aop/spring-aop.xsd

	http://www.springframework.org/schema/tx

	http://www.springframework.org/schema/tx/spring-tx.xsd

	http://www.springframework.org/schema/mvc

	http://www.springframework.org/schema/mvc/spring-mvc.xsd">

	<!-- 扫描controller -->

	<context:component-scan base-package="com.st"/>

	<!-- 注解驱动:配置映射器和适配器驱动 -->

	<mvc:annotation-driven>

		<mvc:message-converters>

			<!-- 用fastjson替换默认的jackjson序列化方案 -->

			<bean class="com.alibaba.fastjson.support.spring.FastJsonHttpMessageConverter">

				<property name="supportedMediaTypes">

					<list>

						<value>application/json;charset=utf-8</value>

					</list>

				</property>

			</bean>

		</mvc:message-converters>

	</mvc:annotation-driven>

</beans>
三(2),配置spring-config.xml
<?xml version="1.0" encoding="utf-8"?>

<beans xmlns="http://www.springframework.org/schema/beans" xmlns:xsi="http://www.w3.org/2001/XMLSchema-instance"

	xmlns:context="http://www.springframework.org/schema/context"

	xmlns:aop="http://www.springframework.org/schema/aop"

	xmlns:tx="http://www.springframework.org/schema/tx"

	xmlns:mvc="http://www.springframework.org/schema/mvc"

	xsi:schemaLocation="http://www.springframework.org/schema/beans

	http://www.springframework.org/schema/beans/spring-beans.xsd

	http://www.springframework.org/schema/context

	http://www.springframework.org/schema/context/spring-context.xsd

	http://www.springframework.org/schema/aop

	http://www.springframework.org/schema/aop/spring-aop.xsd

	http://www.springframework.org/schema/tx

	http://www.springframework.org/schema/tx/spring-tx.xsd

	http://www.springframework.org/schema/mvc

	http://www.springframework.org/schema/mvc/spring-mvc.xsd">

	<!-- jdbc.properteis 以下的 三(3) 指定数据源路径-->

	<context:property-placeholder location="classpath:jdbc.properties"/>

	<!-- DataSource 配置数据源 -->

    <bean id="dataSource" class="com.alibaba.druid.pool.DruidDataSource" init-method="init" destroy-method="close">

        <property name="driverClassName" value="${mysql.driver}"/>

		<property name="url" value="${mysql.url}"/>

		<property name="username" value="${mysql.user}"/>

		<property name="password" value="${mysql.password}"/>

        <property name="initialSize" value="${initialSize}" />

        <property name="maxActive" value="${maxActive}" />

        <property name="minIdle" value="${minIdle}" />

        <property name="maxWait" value="${maxWait}" />

        <property name="testOnBorrow" value="true" />

        <property name="testOnReturn" value="true" />

        <property name="testWhileIdle" value="true" />

        <property name="removeAbandoned" value="true" />

        <property name="logAbandoned" value="true" />

        <property name="timeBetweenEvictionRunsMillis" value="60000" />

        <property name="minEvictableIdleTimeMillis" value="300000" />

        <property name="removeAbandonedTimeout" value="1800" />

        <property name="validationQuery" value="select 1 from dual" />

    </bean>

    <!-- 配置事务开始 -->

    <bean id="proxyDataSource" class="org.springframework.jdbc.datasource.TransactionAwareDataSourceProxy">

		<constructor-arg>

			<ref bean="dataSource" />

		</constructor-arg>

	</bean>

	<bean id="transactionManager" class="org.springframework.jdbc.datasource.DataSourceTransactionManager">

		<property name="dataSource" ref="proxyDataSource" />

	</bean>

	<tx:annotation-driven transaction-manager="transactionManager"/>

    <!-- 配置事务结束 -->

    <!-- 使用构造方法加载数据源  -->

    <bean id="queryRunner" class="org.apache.commons.dbutils.QueryRunner">

    	<!-- <constructor-arg index="0" ref="proxyDataSource"></constructor-arg> -->

    	<constructor-arg>

			<ref bean="proxyDataSource"/>

		</constructor-arg>

    </bean>

    <!-- 发送邮件配置开始 -->

    <bean id="javaMailSender" class="org.springframework.mail.javamail.JavaMailSenderImpl">

     <property name="host" value="smtp.163.com"/>

     <property name="port" value="25"/>

     <property name="username" value="163邮箱"/>

     <property name="password" value="邮箱授权码"/>

     <property name="javaMailProperties">

            <props>

              <prop key="mail.smtp.auth">true</prop>

              <prop key="mail.smtp.timeout">25000</prop>

            </props>

      </property>

    </bean>

    <bean id="simpleMailMessage" class="org.springframework.mail.SimpleMailMessage">

        <property name="from" value="163邮箱"/>

        <property name="subject" value="发送邮件验证码" />

    </bean>

    <!-- 发送邮件结束 -->

    <!-- 支持上传文件 -->

    <bean id="multipartResolver" class="org.springframework.web.multipart.commons.CommonsMultipartResolver">

             <!-- 设置上传文件的最大尺寸为5MB -->

            <property name="maxUploadSize">

                 <value>5242880</value>

            </property>

    </bean>

</beans>
三(3)数据库连接配置 jdbc.properties
#mysql

mysql.driver=com.mysql.jdbc.Driver

mysql.url=jdbc:mysql://localhost:3306/db?useUnicode=true&characterEncoding=utf8

mysql.user=root

mysql.password=

initialSize=5

maxActive=100

minIdle=10

maxWait=6000
SpringMVC配置环境的更多相关文章
- SpringMVC配置环境中一般用的jar包
配置SpringMVC需要把这些jar包加入lib目录下 下载地址,复制到地址栏.回车即可下载 http://files.cnblogs.com/files/QW-lzm/SpringMVC----. ...
- idea spring+springmvc+mybatis环境配置整合详解
idea spring+springmvc+mybatis环境配置整合详解 1.配置整合前所需准备的环境: 1.1:jdk1.8 1.2:idea2017.1.5 1.3:Maven 3.5.2 2. ...
- Spring学习资料以及配置环境
一.Spring4 1.介绍 新特性 SpringIDE 插件 IOC DI 在 Spring 中配置 Bean 自动装配 Bean 之间的关系(依赖.继承) Bean 的作用域 使用外部属性文件 S ...
- 构建web应用之——maven创建以及SpringMVC配置
构建web应用第一步需要创建以及配置maven项目管理,同时配置启动SpringMVC,这里推荐参考CSDN的一篇文章链接:https://blog.csdn.net/weixin_42222334/ ...
- 基于java代码的springmvc配置
在我的印象中,开发一个web项目首选当然是springmvc,而配置springmvc无非就是web.xml里配置其核心控制器DispatcherServlet.然后把所有的请求都交给它处理,再配个视 ...
- SpringMVC配置多视图-内容协商原理
SpringMVC配置多视图-内容协商原理 2014年03月06日 16:46:59 日积月累_滴水石穿 阅读数:10964更多 个人分类: SpringMVC Spring Framework ...
- Spring Boot2 系列教程(十八)Spring Boot 中自定义 SpringMVC 配置
用过 Spring Boot 的小伙伴都知道,我们只需要在项目中引入 spring-boot-starter-web 依赖,SpringMVC 的一整套东西就会自动给我们配置好,但是,真实的项目环境比 ...
- Spring Boot 中自定义 SpringMVC 配置,到底继承谁哪一个类或则接口?
看了这篇文章,写的非常的言简意赅,特此记录下: 1.Spring Boot 1.x 中,自定义 SpringMVC 配置可以通过继承 WebMvcConfigurerAdapter 来实现. 2.Sp ...
- Linux系统下配置环境变量
一.环境变量文件介绍 转自:http://blog.csdn.net/cscmaker/article/details/7261921 Linux中环境变量包括系统级和用户级,系统级的环境变量是每个登 ...
随机推荐
- 文艺平衡树(bzoj 3223)
Description 您需要写一种数据结构(可参考题目标题),来维护一个有序数列,其中需要提供以下操作:翻转一个区间,例如原有序序列是5 4 3 2 1,翻转区间是[2,4]的话,结果是5 2 ...
- 【Codeforces Round #503 (Div. 2)】
A:https://www.cnblogs.com/myx12345/p/9843198.html B:https://www.cnblogs.com/myx12345/p/9843245.html ...
- @Validated注解
参考: https://blog.csdn.net/changerzhuo_319/article/details/55804651
- vcenter api 接口获取开发
通过连接vcenter 管理服务器,获取其下所有的:存储,网络,ESXI实体机,虚拟机相关信息的脚步: #!/opt/python3/bin/python3 #Author: zhaoyong &qu ...
- 树莓派学习笔记——I2C设备载入和速率设置
原文:http://blog.csdn.net/xukai871105/article/details/18234075 1.载入设备 方法1——临时载入设备 sudo modprobe -r i2c ...
- Spring MVC使用Schedule实现定时任务
Schedule存在spring-context.jar包中. 实现简单步骤: 1.配置bean.xml开启定时任务支持. <?xml version="1.0" encod ...
- iOS开发-用keychain替代UDID
从2013-5-1日开始苹果就禁止对UUID的应用的通过了.所以我们需要用一些办法替换,下面我就是用keychain的访问替换掉UUID的. 那么,关于Keychain的应用,Apple提供了一个叫G ...
- ASP.NET Core 依赖注入(构造函数注入,属性注入等)
原文:ASP.NET Core 依赖注入(构造函数注入,属性注入等) 如果你不熟悉ASP.NET Core依赖注入,先阅读文章: 在ASP.NET Core中使用依赖注入 构造函数注入 构造函数注 ...
- php 解决MySQL插入数据出现 Incorrect string value: '\xF0\x9F\x92\x8BTi...'错误
在项目中向MySQL插入数据时.发现数据插入不完整,通过调试,发现插入语句也没什么特殊的错误. 可是就是差不进去,于是就打开mysqli错误的调试 $ret = mysqli_query($this- ...
- 干货--安装eclipse-hadoop-plugin插件及HDFS API编程两个遇到的重要错误的解决
在Windows的eclipse上写hdfs的API程序,都会遇到两个错误,在网上查了很多资料,都没有解决的办法,经过了很多时间的研究,终于把这个问题解决了 错误是 1.java.io.IOExcep ...