SpringBoot学习笔记(四)
本文主要介绍:SpringBoot开发中如何自定义starter
1.什么是starter
Starter可以理解为一个可拔插式的插件,提供一系列便利的依赖描述符,您可以获得所需的所有Spring和相关技术的一站式服务。应用程序只需要在maven中引入starter依赖,SpringBoot就能自动扫描到要加载的信息并启动相应的默认配置。用一句话描述,就是springboot的场景启动器。
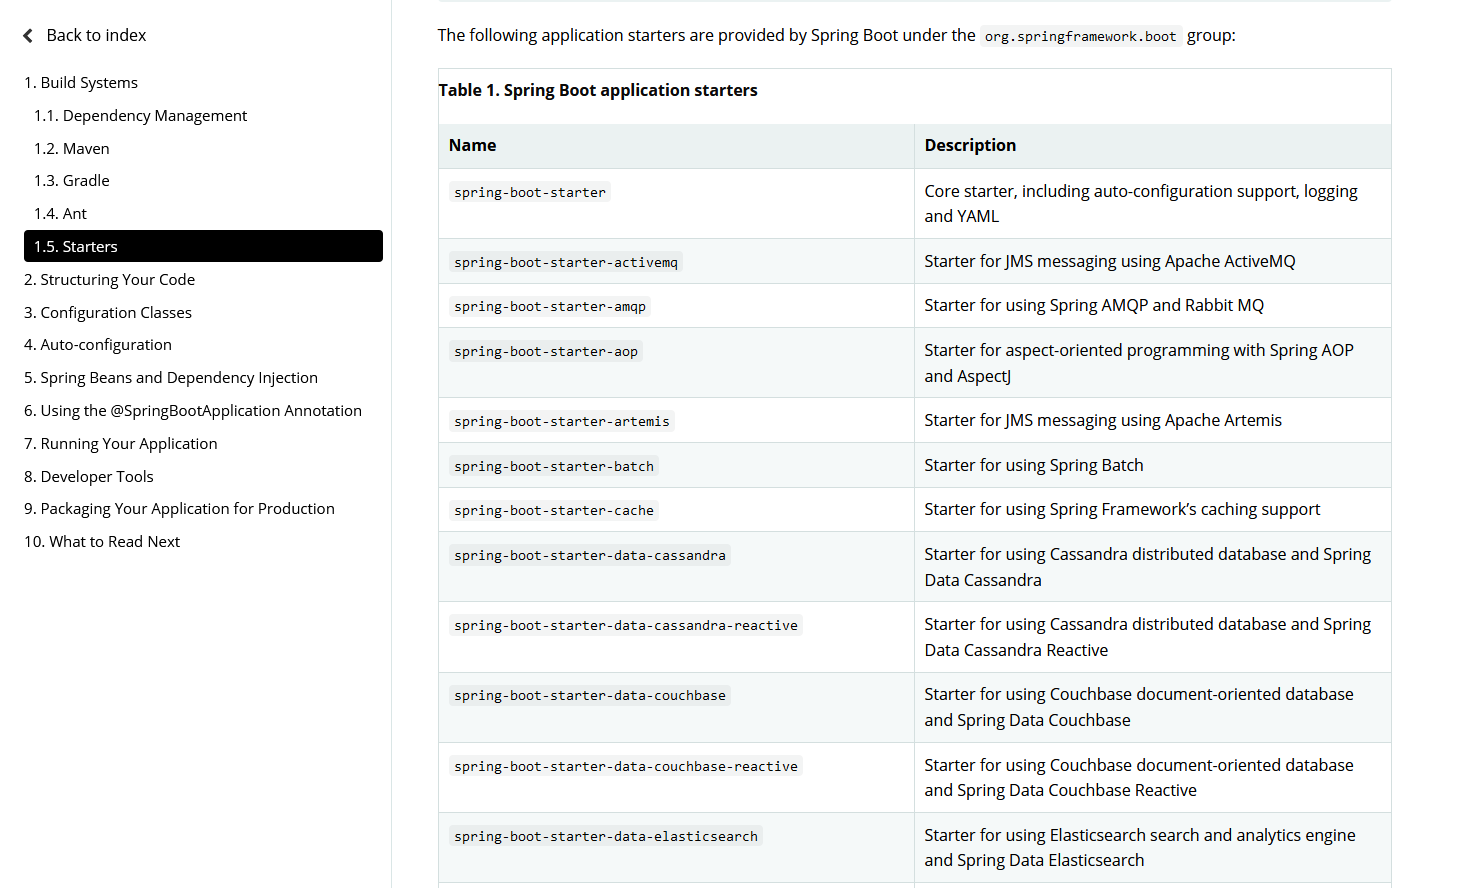
下面是Spring官方提供的部分starter,全部的请参考官网:starter文档
开始自定义starter前看看Springboot的AutoConfiguration机制。
2.Spring boot的AutoConfiguration机制
标记一个应用为Springboot应用,需要一个SpringBootApplication注解,下面是一个标准的spring boot启动程序。
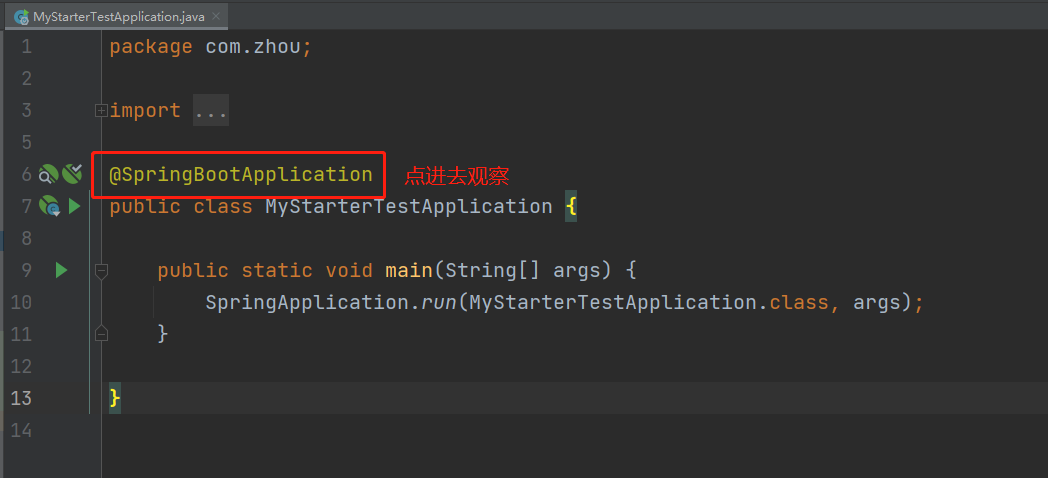
点进去看源码发现,SpringBootApplication注解又被一个EnableAutoConfiguration注解。EnableAutoConfiguration注解就是自动加载配置的关键。

EnableAutoConfiguration是一个组合注解,用Import把AutoConfigurationImportSelector导入容器中,springboot启动的时候会加载所有的selector并执行selectImports方法,这个方法会加载META-INF/spring.factories中配置的EnableAutoConfiguration,从而加载自动配置。

3.自定义starter
首先:编写启动器
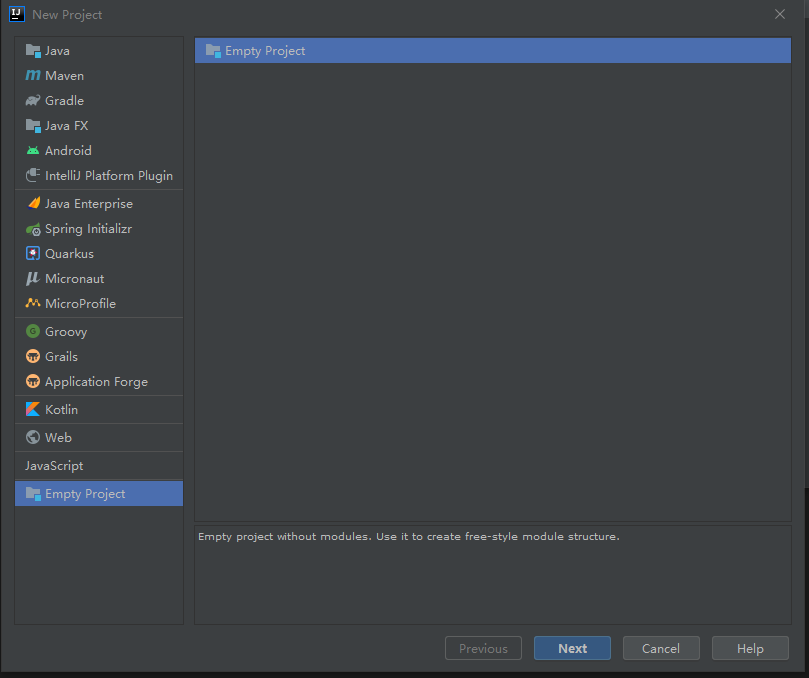
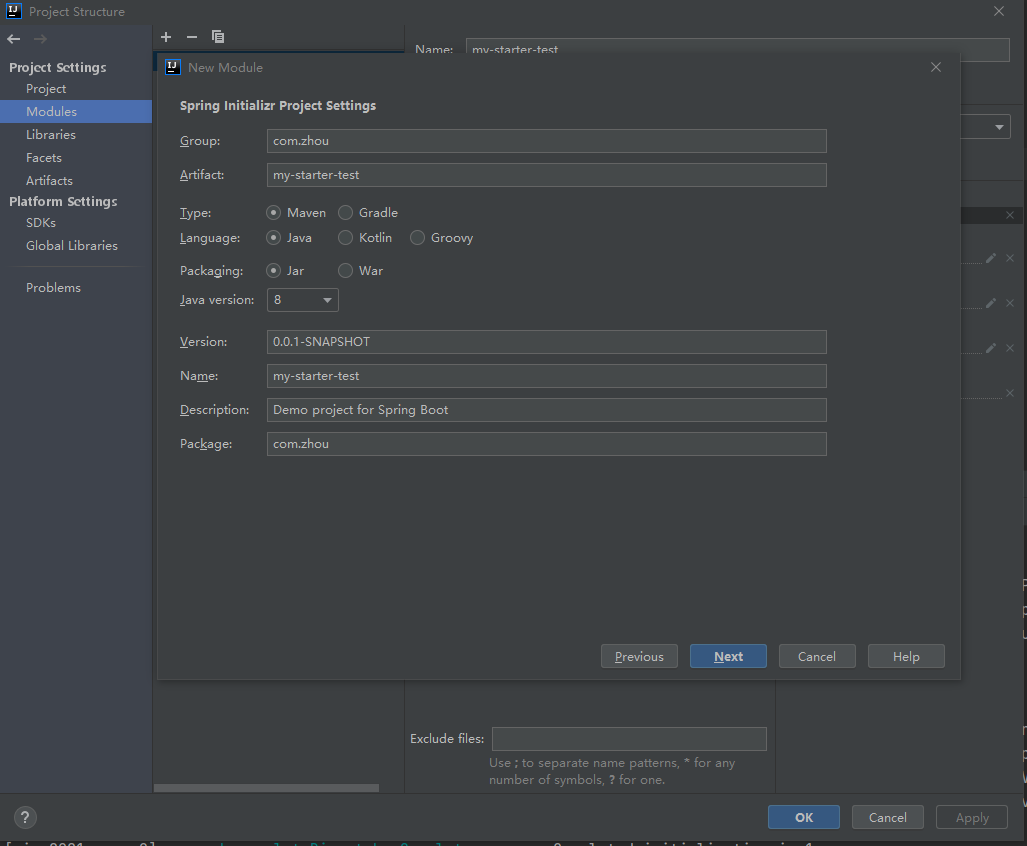
1.在IDEA中新建一个空项目:mystarter
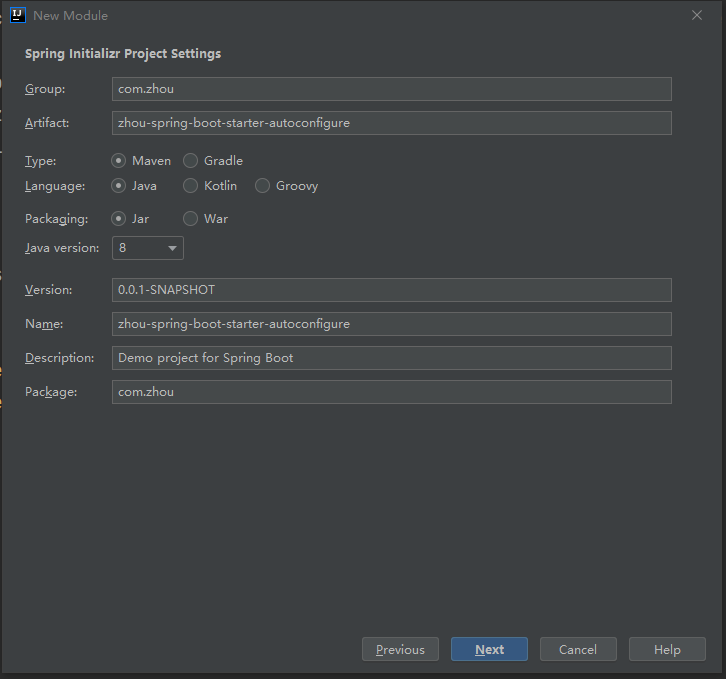
2、新建一个Springboot模块:zhou-spring-boot-starter-autoconfigure
3.新建一个Springboot模块:my-starter-test
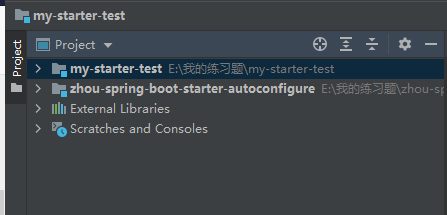
4.基本结构如下:
第二步:编写模块:zhou-spring-boot-starter-autoconfigure
1.导入pom依赖
<dependencies>

        <dependency>

            <groupId>org.springframework.boot</groupId>

            <artifactId>spring-boot-starter</artifactId>

            <version>2.4.3</version>

        </dependency>

        <dependency>

            <groupId>org.springframework.boot</groupId>

            <artifactId>spring-boot-configuration-processor</artifactId>

            <optional>true</optional>

        </dependency>

        <dependency>

            <groupId>org.springframework.boot</groupId>

            <artifactId>spring-boot-starter-web</artifactId>

        </dependency>

        <dependency>

            <groupId>org.junit.jupiter</groupId>

            <artifactId>junit-jupiter-api</artifactId>

            <version>5.5.0</version>

            <scope>test</scope>

        </dependency>

        <dependency>

            <groupId>org.springframework.boot</groupId>

            <artifactId>spring-boot-test</artifactId>

            <version>2.4.3</version>

        </dependency>

    </dependencies>
2.定义配置类:HelloProperties类,添加注解@ConfigurationProperties(prefix = "zhou.hello")

package com.zhou;

import org.springframework.boot.context.properties.ConfigurationProperties;

//编写HelloProperties 配置类

//前缀 zhou.hello

@ConfigurationProperties(prefix = "zhou.hello")

public class HelloProperties {

    private String prefix;

    private String suffix;

    public String getPrefix() {

        return prefix;

    }

    public void setPrefix(String prefix) {

        this.prefix = prefix;

    }

    public String getSuffix() {

        return suffix;

    }

    public void setSuffix(String suffix) {

        this.suffix = suffix;

    }

}
3.创建一个自己的服务类:HelloService类
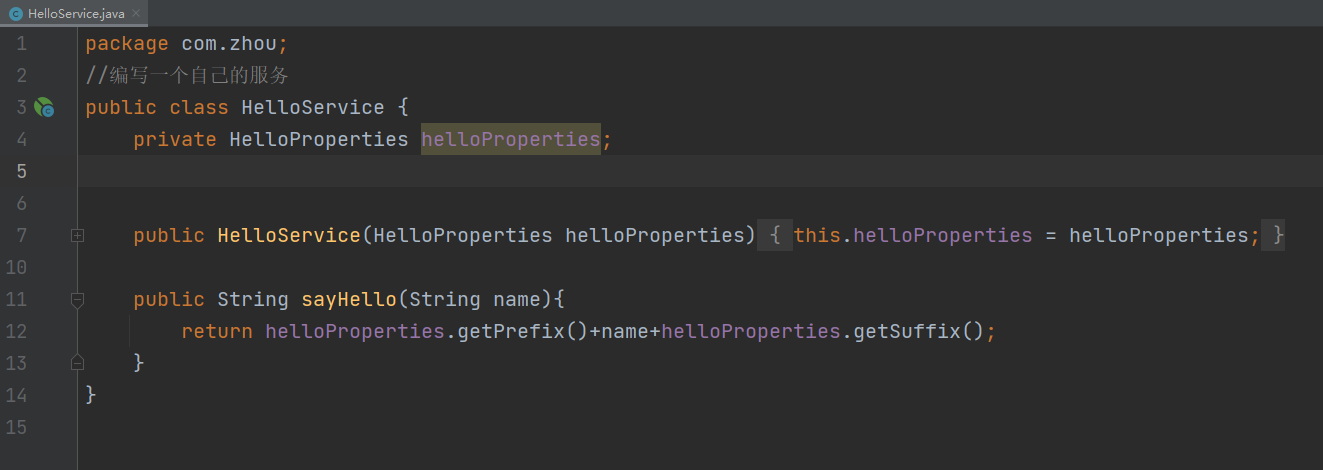
package com.zhou;

//编写一个自己的服务

public class HelloService {

    private HelloProperties helloProperties;

    public HelloService(HelloProperties helloProperties) {

        this.helloProperties = helloProperties;

    }

    public String sayHello(String name){

        return helloProperties.getPrefix()+name+helloProperties.getSuffix();

    }

}
4.创建Configuration类:HelloServiceAutoConfiguration类,添加注解@Configuration和@EnableConfigurationProperties,把当前类设置成配置类,并且注入HelloProperties。
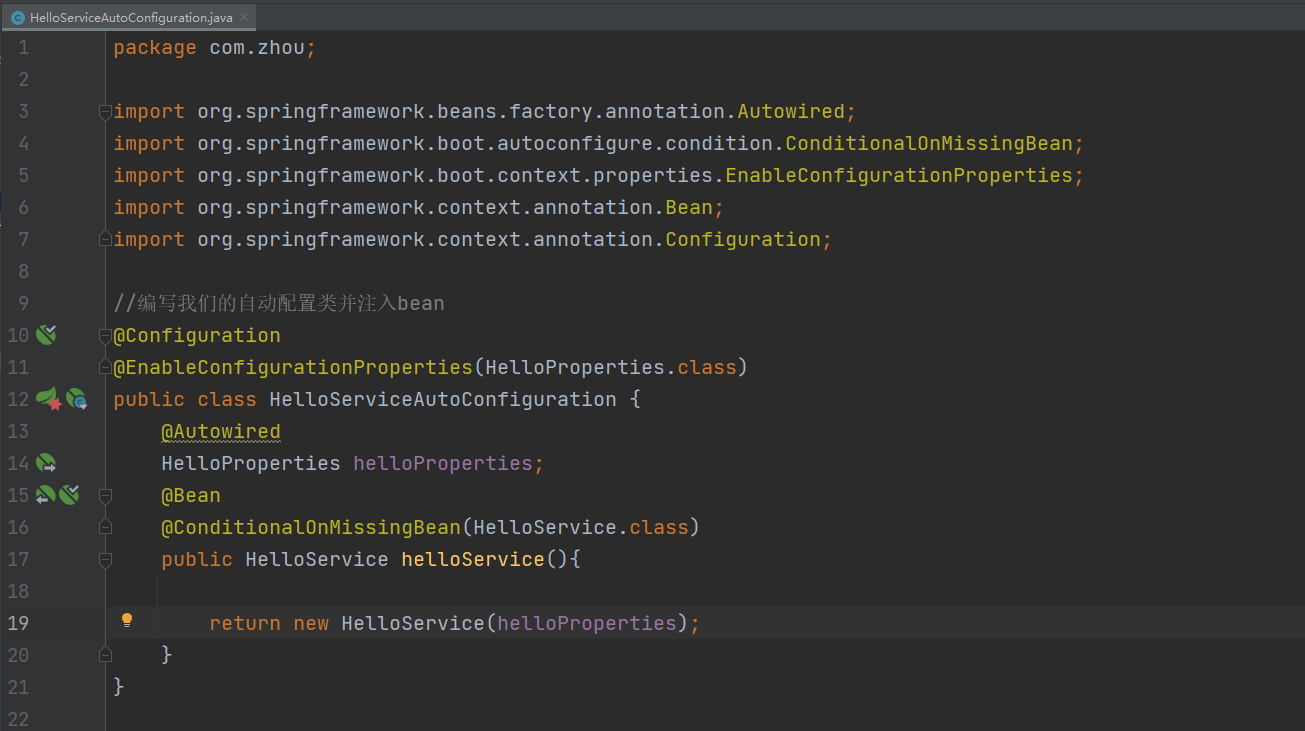
package com.zhou;

import org.springframework.beans.factory.annotation.Autowired;

import org.springframework.boot.autoconfigure.condition.ConditionalOnMissingBean;

import org.springframework.boot.context.properties.EnableConfigurationProperties;

import org.springframework.context.annotation.Bean;

import org.springframework.context.annotation.Configuration;

//编写我们的自动配置类并注入bean

@Configuration

@EnableConfigurationProperties(HelloProperties.class)

public class HelloServiceAutoConfiguration {

    @Autowired

    HelloProperties helloProperties;

    @Bean

    @ConditionalOnMissingBean(HelloService.class)

    public HelloService helloService(){

        return new HelloService(helloProperties);

    }

}
5.重要的一步,在resources目录下创建META-INF目录,并添加文件spring.factories。在这个文件中配置EnableAutoConfiguration,具体如下:
org.springframework.boot.autoconfigure.EnableAutoConfiguration=\

com.zhou.HelloServiceAutoConfiguration
6.避免端口冲突(不想干掉Tomcat端口号)

7.编写完成后,可以安装到maven仓库中!
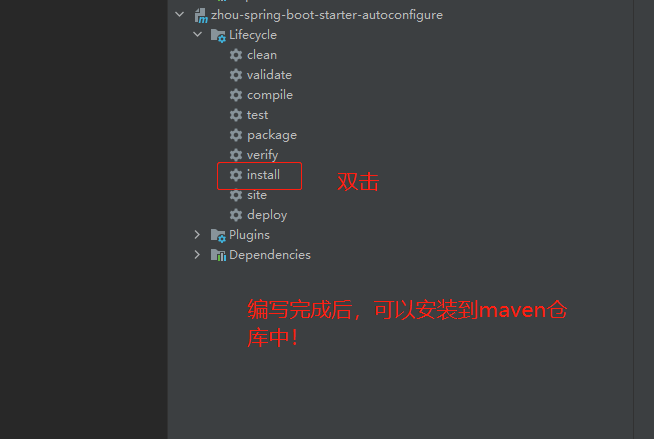
模块:zhou-spring-boot-starter-autoconfigu的整体结构如下:

第三步:模块:my-starter-test(测试自定义的Starter)
1.pom文件添加刚刚创建好的依赖:
<dependency>

	<groupId>com.zhou</groupId>

		<artifactId>zhou-spring-boot-starter-autoconfigure</artifactId>

		<version>0.0.1-SNAPSHOT</version>

</dependency>
2.在application.properties文件中添加自定义前缀/后缀:
zhou.hello.prefix="你好呀,"

zhou.hello.suffix="成了~"
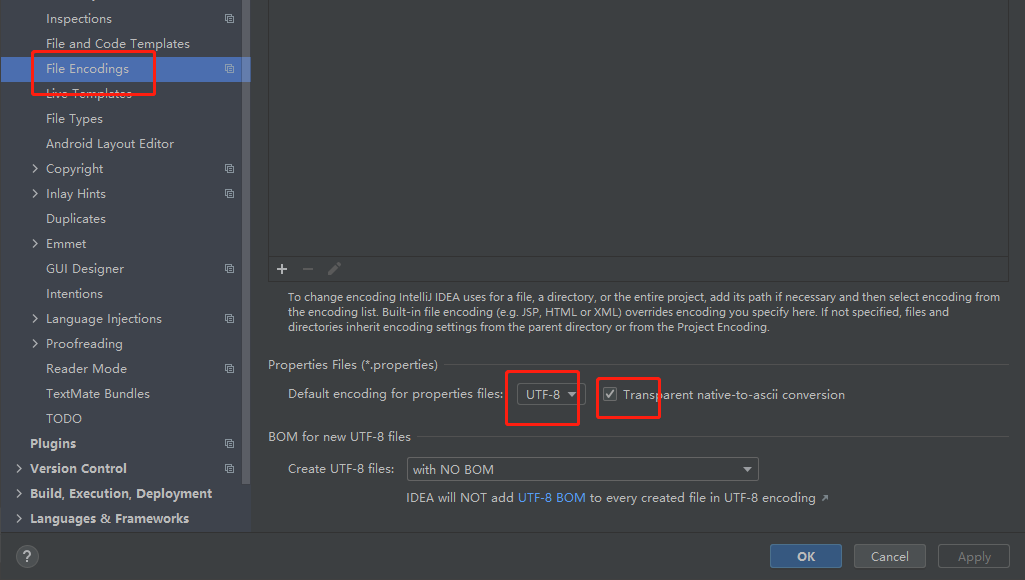
【注意】.properties文件会出现中文会乱码问题。
第一种解决办法:
第二种解决办法:将application.properties文件替换成application.yaml
zhou.hello.prefix: 你好呀,

zhou.hello.suffix: 成了~

3.创建一个Controller,把HelloService注入进来
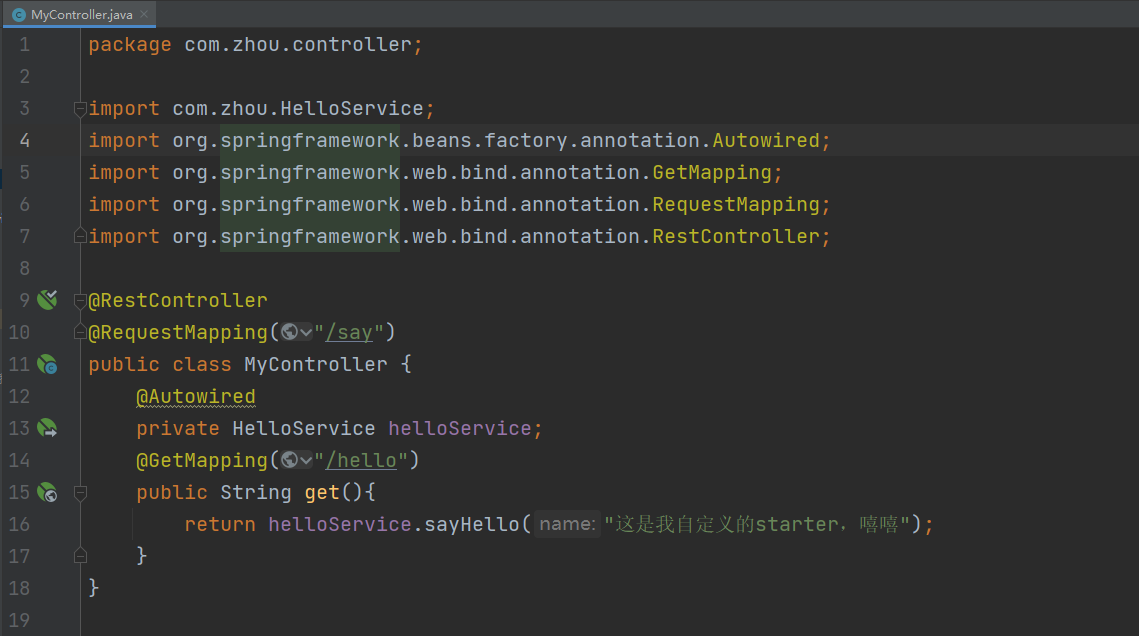
package com.zhou.controller;

import com.zhou.HelloService;

import org.springframework.beans.factory.annotation.Autowired;

import org.springframework.web.bind.annotation.GetMapping;

import org.springframework.web.bind.annotation.RequestMapping;

import org.springframework.web.bind.annotation.RestController;

@RestController

@RequestMapping("/say")

public class MyController {

    @Autowired

    private HelloService helloService;

    @GetMapping("/hello")

    public String get(){

        return helloService.sayHello("这是我自定义的starter,嘻嘻");

    }

}
4.启动,测试
Run:

访问:http://localhost:8081/say/hello

SpringBoot学习笔记(四)的更多相关文章
- SpringBoot学习笔记四之后台登录页面的实现
注:图片如果损坏,点击文章链接: https://www.toutiao.com/i6803542216150090252/ 继续之前完成的内容,首先创建一个常量类 常量类的内容 服务器端渲染 前后端 ...
- SpringBoot学习笔记(2):引入Spring Security
SpringBoot学习笔记(2):用Spring Security来保护你的应用 快速开始 本指南将引导您完成使用受Spring Security保护的资源创建简单Web应用程序的过程. 参考资料: ...
- C#可扩展编程之MEF学习笔记(四):见证奇迹的时刻
前面三篇讲了MEF的基础和基本到导入导出方法,下面就是见证MEF真正魅力所在的时刻.如果没有看过前面的文章,请到我的博客首页查看. 前面我们都是在一个项目中写了一个类来测试的,但实际开发中,我们往往要 ...
- IOS学习笔记(四)之UITextField和UITextView控件学习
IOS学习笔记(四)之UITextField和UITextView控件学习(博客地址:http://blog.csdn.net/developer_jiangqq) Author:hmjiangqq ...
- java之jvm学习笔记四(安全管理器)
java之jvm学习笔记四(安全管理器) 前面已经简述了java的安全模型的两个组成部分(类装载器,class文件校验器),接下来学习的是java安全模型的另外一个重要组成部分安全管理器. 安全管理器 ...
- SpringBoot学习笔记
SpringBoot个人感觉比SpringMVC还要好用的一个框架,很多注解配置可以非常灵活的在代码中运用起来: springBoot学习笔记: .一.aop: 新建一个类HttpAspect,类上添 ...
- Learning ROS for Robotics Programming Second Edition学习笔记(四) indigo devices
中文译著已经出版,详情请参考:http://blog.csdn.net/ZhangRelay/article/category/6506865 Learning ROS for Robotics Pr ...
- Typescript 学习笔记四:回忆ES5 中的类
中文网:https://www.tslang.cn/ 官网:http://www.typescriptlang.org/ 目录: Typescript 学习笔记一:介绍.安装.编译 Typescrip ...
- Springboot学习笔记(六)-配置化注入
前言 前面写过一个Springboot学习笔记(一)-线程池的简化及使用,发现有个缺陷,打个比方,我这个线程池写在一个公用服务中,各项参数都定死了,现在有两个服务要调用它,一个服务的线程数通常很多,而 ...
- ES6学习笔记<四> default、rest、Multi-line Strings
default 参数默认值 在实际开发 有时需要给一些参数默认值. 在ES6之前一般都这么处理参数默认值 function add(val_1,val_2){ val_1 = val_1 || 10; ...
随机推荐
- μC/OS-III---I笔记11---就绪任务列表管理
就绪优先级为映像响表 在UCOSIII内,任务调度是要先找到优先级最高的任务,然后执行.理论上对于UCOSIII可以有无数个优先级,每个优先级又可以有无数个任务但是对于这么多的任务如何快速查到到当先就 ...
- Javascript实现"点按钮出随机背景色的"三个DIV
<!DOCTYPE html> <html> <head> <title>Random_Color-Transformation</title&g ...
- js Nullish Coalescing Operator
js Nullish Coalescing Operator 空值合并 const n = null ?? 'default string'; console.log(n); // "def ...
- CSS 弹性盒子模型
CSS 弹性盒子模型 https://www.w3.org/TR/2016/CR-css-flexbox-1-20160526/ CSS Flexible Box Layout Module Leve ...
- React Toolchains
React Toolchains Create React App / component library https://create-react-app.dev/docs/getting-star ...
- js & void() & void(0)
js & void() & void(0) https://www.runoob.com/js/js-void.html void() <a href="javascr ...
- map & scale bug
map & scale TW bug https://antv.alipay.com/zh-cn/g2/3.x/demo/map/drill-down.html import React, { ...
- uniapp设置不同的主题(Theme)
App.vue: <style lang="stylus"> @css { html { --primary: blue; --bg-image: url(https: ...
- ffmpeg concat设置绝对路径
https://superuser.com/questions/718027/ffmpeg-concat-doesnt-work-with-absolute-path/1551017#1551017 ...
- 破除区块链支付壁垒,NGK支付架构方案浮出水面
什么叫做区块链支付?区块链支付系统与传统支付系统有哪些不同?简要地说,原来传统的支付系统是有一个类似于银行的中间平台存在的,用户们的支付交易第一时间是寄存在平台,由平台核实验证交易行为之后,方才放行交 ...