吴裕雄--天生自然 pythonTensorFlow图形数据处理:TensorFlow图像处理函数
import numpy as np
import tensorflow as tf
import matplotlib.pyplot as plt #读取图片
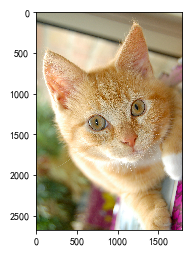
image_raw_data = tf.gfile.FastGFile("F:\\TensorFlowGoogle\\201806-github\\datasets\\cat.jpg",'rb').read() with tf.Session() as sess:
img_data = tf.image.decode_jpeg(image_raw_data)
# 输出解码之后的三维矩阵。
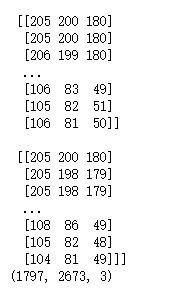
print(img_data.eval())
img_data.set_shape([1797, 2673, 3])
print(img_data.get_shape())
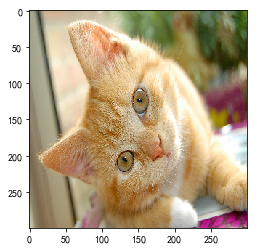
#打印图片

with tf.Session() as sess:

    plt.imshow(img_data.eval())

    plt.show()

#重新调整图片大小

with tf.Session() as sess:

    # 如果直接以0-255范围的整数数据输入resize_images,那么输出将是0-255之间的实数,

    # 不利于后续处理。建议在调整图片大小前,先将图片转为0-1范围的实数。

    image_float = tf.image.convert_image_dtype(img_data, tf.float32)

    resized = tf.image.resize_images(image_float, [300, 300], method=0)

    plt.imshow(resized.eval())

    plt.show()
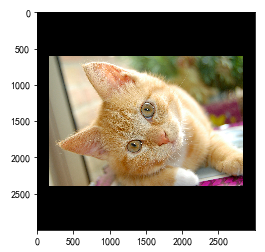
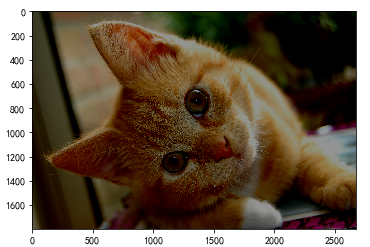
#裁剪和填充图片

with tf.Session() as sess:

    croped = tf.image.resize_image_with_crop_or_pad(img_data, 1000, 1000)

    padded = tf.image.resize_image_with_crop_or_pad(img_data, 3000, 3000)

    plt.imshow(croped.eval())

    plt.show()

    plt.imshow(padded.eval())

    plt.show()
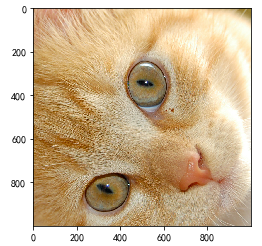
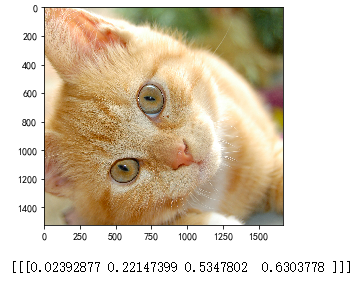
#截取中间50%的图片

with tf.Session() as sess:

    central_cropped = tf.image.central_crop(img_data, 0.5)

    plt.imshow(central_cropped.eval())

    plt.show()

#翻转图片

with tf.Session() as sess:

    # 上下翻转

    #flipped1 = tf.image.flip_up_down(img_data)

    # 左右翻转

    #flipped2 = tf.image.flip_left_right(img_data)

    #对角线翻转

    transposed = tf.image.transpose_image(img_data)

    plt.imshow(transposed.eval())

    plt.show()

    # 以一定概率上下翻转图片。

    #flipped = tf.image.random_flip_up_down(img_data)

    # 以一定概率左右翻转图片。

    #flipped = tf.image.random_flip_left_right(img_data)
#图片色彩调整

with tf.Session() as sess:

    # 在进行一系列图片调整前,先将图片转换为实数形式,有利于保持计算精度。

    image_float = tf.image.convert_image_dtype(img_data, tf.float32)

    # 将图片的亮度-0.5。

    #adjusted = tf.image.adjust_brightness(image_float, -0.5)

    # 将图片的亮度0.5

    #adjusted = tf.image.adjust_brightness(image_float, 0.5)

    # 在[-max_delta, max_delta)的范围随机调整图片的亮度。

    adjusted = tf.image.random_brightness(image_float, max_delta=0.5)

    # 将图片的对比度-5

    #adjusted = tf.image.adjust_contrast(image_float, -5)

    # 将图片的对比度+5

    #adjusted = tf.image.adjust_contrast(image_float, 5)

    # 在[lower, upper]的范围随机调整图的对比度。

    #adjusted = tf.image.random_contrast(image_float, lower, upper)

    # 在最终输出前,将实数取值截取到0-1范围内。

    adjusted = tf.clip_by_value(adjusted, 0.0, 1.0)

    plt.imshow(adjusted.eval())

    plt.show()
#添加色相和饱和度

with tf.Session() as sess:

    # 在进行一系列图片调整前,先将图片转换为实数形式,有利于保持计算精度。

    image_float = tf.image.convert_image_dtype(img_data, tf.float32)

    adjusted = tf.image.adjust_hue(image_float, 0.1)

    #adjusted = tf.image.adjust_hue(image_float, 0.3)

    #adjusted = tf.image.adjust_hue(image_float, 0.6)

    #adjusted = tf.image.adjust_hue(image_float, 0.9)

    # 在[-max_delta, max_delta]的范围随机调整图片的色相。max_delta的取值在[0, 0.5]之间。

    #adjusted = tf.image.random_hue(image_float, max_delta)

    # 将图片的饱和度-5。

    #adjusted = tf.image.adjust_saturation(image_float, -5)

    # 将图片的饱和度+5。

    #adjusted = tf.image.adjust_saturation(image_float, 5)

    # 在[lower, upper]的范围随机调整图的饱和度。

    #adjusted = tf.image.random_saturation(image_float, lower, upper)

    # 将代表一张图片的三维矩阵中的数字均值变为0,方差变为1。

    #adjusted = tf.image.per_image_whitening(image_float)

    # 在最终输出前,将实数取值截取到0-1范围内。

    adjusted = tf.clip_by_value(adjusted, 0.0, 1.0)

    plt.imshow(adjusted.eval())

    plt.show()

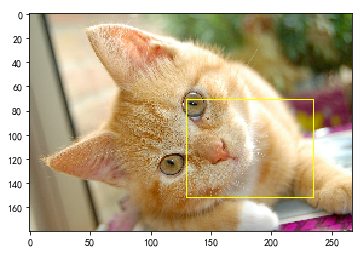
#添加标注框并裁减。

with tf.Session() as sess:

    boxes = tf.constant([[[0.05, 0.05, 0.9, 0.7], [0.35, 0.47, 0.5, 0.56]]])

    # sample_distorted_bounding_box要求输入图片必须是实数类型。

    image_float = tf.image.convert_image_dtype(img_data, tf.float32)

    begin, size, bbox_for_draw = tf.image.sample_distorted_bounding_box(tf.shape(image_float), bounding_boxes=boxes, min_object_covered=0.4)

    # 截取后的图片

    distorted_image = tf.slice(image_float, begin, size)

    plt.imshow(distorted_image.eval())

    plt.show()

    # 在原图上用标注框画出截取的范围。由于原图的分辨率较大(2673x1797),生成的标注框

    # 在Jupyter Notebook上通常因边框过细而无法分辨,这里为了演示方便先缩小分辨率。

    image_small = tf.image.resize_images(image_float, [180, 267], method=0)

    batchced_img = tf.expand_dims(image_small, 0)

    image_with_box = tf.image.draw_bounding_boxes(batchced_img, bbox_for_draw)

    print(bbox_for_draw.eval())

    plt.imshow(image_with_box[0].eval())

    plt.show()
吴裕雄--天生自然 pythonTensorFlow图形数据处理:TensorFlow图像处理函数的更多相关文章
- 吴裕雄--天生自然 pythonTensorFlow图形数据处理:windows操作系统安装指定版本的tensorflow
pip install tensorflow==1.14.0
- 吴裕雄--天生自然 pythonTensorFlow图形数据处理:windows操作系统删除tensorflow
输入:pip uninstall tensorflow Proceed(y/n):y
- 吴裕雄--天生自然 pythonTensorFlow图形数据处理:解决module 'tensorflow' has no attribute 'Session'
原因:因为是tensorflow 2.0版本
- 吴裕雄--天生自然 pythonTensorFlow图形数据处理:循环神经网络预测正弦函数
import numpy as np import tensorflow as tf import matplotlib.pyplot as plt # 定义RNN的参数. HIDDEN_SIZE = ...
- 吴裕雄--天生自然 pythonTensorFlow图形数据处理:数据集高层操作
import tempfile import tensorflow as tf # 1. 列举输入文件. # 输入数据生成的训练和测试数据. train_files = tf.train.match_ ...
- 吴裕雄--天生自然 pythonTensorFlow图形数据处理:数据集基本使用方法
import tempfile import tensorflow as tf # 1. 从数组创建数据集. input_data = [1, 2, 3, 5, 8] dataset = tf.dat ...
- 吴裕雄--天生自然 pythonTensorFlow图形数据处理:输入数据处理框架
import tensorflow as tf # 1. 创建文件列表,通过文件列表创建输入文件队列 files = tf.train.match_filenames_once("F:\\o ...
- 吴裕雄--天生自然 pythonTensorFlow图形数据处理:输入文件队列
import tensorflow as tf # 1. 生成文件存储样例数据. def _int64_feature(value): return tf.train.Feature(int64_li ...
- 吴裕雄--天生自然 pythonTensorFlow图形数据处理:多线程队列操作
import tensorflow as tf #1. 定义队列及其操作. queue = tf.FIFOQueue(100,"float") enqueue_op = queue ...
随机推荐
- EUI库 - 10 - 使用自定义组件
步骤 1 在根节点,添加一个自定义的命名空间 2 可以设置skinName 自定义组件规范 1 不复用的不要用自定义组件 2 属性必须要有默认值(赋值为null也可以),因为TS编译器会把没有默 ...
- BGP的地址聚合
aggregate-address ip make——多用于地址聚合命令. 但,因此很容易产生路由环路. 所以多加一个参数. as-set as-set,可以是BGP聚合路不丢失原来的AS-Path属 ...
- UVA 11997 The K smallest Sums
给出K*K的矩阵,每一行取一个数,构成K个数的和,总共有 k^k种可能,从中取出前k个最小的. 一开始犯了错,因为只要对每行排序,最小的必定是第一列的和,然后我当时就想着,逐步推进,每次将某行的那个数 ...
- Essay写作关键:严谨的逻辑关系
一篇好的文章并不是句子的机械堆砌,而是一个有机整体,句子和句子之间是存在严谨的逻辑关系的,要注意句子和句子之间,段落和段落之间的衔接和连贯(Coherence and Cohesion). 要写出逻辑 ...
- 实验吧web-易-拐弯抹角(url伪静态)
<?php // code by SEC@USTC echo '<html><head><meta http-equiv="charset" c ...
- Aspectj切入点语法定义
例如定义切入点表达式 execution (* com.sample.service.impl..*.*(..)) execution()是最常用的切点函数,其语法如下所示: 整个表达式可以分为五个 ...
- 了解redis
redis:非关系型数据库,基于内存高性能,key-value存储,一般用作缓存,开源的使用ANSI C语言编写,遵守BSD协议,支持网络,可基于内存亦可持久化的日志型.Key-Value数据库,并提 ...
- App基本界面组件案例
今天的收获颇大呀,我发现了一个更高效快速的学习方法,如果真的是因为学习内容太多,无从下手的话,不妨去别人或者自己崇拜的大佬里的博客园里面转一转,你就会有意外的收获,不仅给你学习的压力,还更直观的给介绍 ...
- GRUB&MBR引导
(ubuntu下搜索gnome-disk可以打开磁盘管理) 简单开机过程 : ①按下电源后,计算机自检(POST),如果硬件设备(CPU.内存.硬盘.光驱.各种卡)都没有问题,BIOS会检查各个硬盘的 ...
- 吴裕雄--天生自然TensorFlow2教程:Broadcasting
Broadcasting可以理解成把维度分成大维度和小维度,小维度较为具体,大维度更加抽象.也就是小维度针对某个示例,然后让这个示例通用语大维度. import tensorflow as tf x ...