IdentityServer4 (2) 密码授权(Resource Owner Password)
写在前面
1、源码(.Net Core 2.2)
git地址:https://github.com/yizhaoxian/CoreIdentityServer4Demo.git
2、相关章节
2.1、《IdentityServer4 (1) 客户端授权模式(Client Credentials)》
2.2、《IdentityServer4 (2) 密码授权(Resource Owner Password)》
2.3、《IdentityServer4 (3) 授权码模式(Authorization Code)》
2.4、《IdentityServer4 (4) 静默刷新(Implicit)》
2.5、《IdentityServer4 (5) 混合模式(Hybrid)》
3、参考资料
IdentityServer4 中文文档 http://www.identityserver.com.cn/
IdentityServer4 英文文档 https://identityserver4.readthedocs.io/en/latest/
4、流程图
此文章是在上一篇文章的基础上继续修改的,基础代码请查看上一篇文章《IdentityServer4(1)客户端授权模式》
密码授权模式,允许一个客户端发送用户名和密码到令牌服务并获得一个表示该用户的访问令牌(AccessToken),这里多了一个概念就是【用户】,账号密码需要用户提供给客户端
一、IdentityServer修改
1、添加一个新的客户端,IdpConfig.GetClients()
       new Client

       {

           // 客户端ID 这个很重要

           ClientId = "client pwd",

           //资源所有者密码授权客户端定义

           AllowedGrantTypes = GrantTypes.ResourceOwnerPassword,

           // 用于认证的密码

           ClientSecrets =

           {

               new Secret("secret".Sha256())

           },

           // 客户端有权访问的范围(Scopes)

           AllowedScopes = {

               "api1",

               IdentityServerConstants.StandardScopes.OpenId,

               IdentityServerConstants.StandardScopes.Profile,

               IdentityServerConstants.StandardScopes.Address,

               IdentityServerConstants.StandardScopes.Email,

               IdentityServerConstants.StandardScopes.Phone

           }

       }
2、添加测试用户
新建一个类 TestUsers.cs
    public class TestUsers

    {

        public static List<TestUser> Users

        {

            get

            {

                var address = new

                {

                    street_address = "ChaoYang",

                    locality = "BeiJing",

                    postal_code = ,

                    country = "China"

                };

                return new List<TestUser>

                {

                    new TestUser

                    {

                        SubjectId = "",

                        Username = "alice",

                        Password = "alice",

                        Claims =

                        {

                            new Claim(JwtClaimTypes.Name, "TestUser.Alice Smith"),

                            new Claim(JwtClaimTypes.GivenName, "TestUser.Alice"),

                            new Claim(JwtClaimTypes.FamilyName, "TestUser.Smith"),

                            new Claim(JwtClaimTypes.PhoneNumber, "TestUser.13812345678"),

                            new Claim(JwtClaimTypes.Email, "TestUser.AliceSmith@email.com"),

                            new Claim(JwtClaimTypes.EmailVerified, "true", ClaimValueTypes.Boolean),

                            new Claim(JwtClaimTypes.WebSite, "TestUser.http://alice.com"),

                            new Claim(JwtClaimTypes.Address,

                            JsonConvert.SerializeObject(address), IdentityServerConstants.ClaimValueTypes.Json)

                        }

                    },

                    new TestUser

                    {

                        SubjectId = "",

                        Username = "bob",

                        Password = "bob",

                        Claims =

                        {

                            new Claim(JwtClaimTypes.Name, "Bob Smith"),

                            new Claim(JwtClaimTypes.GivenName, "Bob"),

                            new Claim(JwtClaimTypes.FamilyName, "Smith"),

                            new Claim(JwtClaimTypes.Email, "BobSmith@email.com"),

                            new Claim(JwtClaimTypes.EmailVerified, "true", ClaimValueTypes.Boolean),

                            new Claim(JwtClaimTypes.WebSite, "http://bob.com"),

                            new Claim(JwtClaimTypes.Address,    JsonConvert.SerializeObject(address), IdentityServerConstants.ClaimValueTypes.Json)

                        }

                    }

                };

            }

        }

    }
3、注册相关信息
StartUp.cs 添加测试用户和用户认证信息
        public void ConfigureServices(IServiceCollection services)

        {

            services.AddIdentityServer()

                    .AddDeveloperSigningCredential()

                    //添加测试用户

                    .AddTestUsers(TestUsers.Users)

                    //添加用户认证信息

                    .AddInMemoryIdentityResources(IdpConfig.GetApiResources())

                    .AddInMemoryApiResources(IdpConfig.GetApis())

                    .AddInMemoryClients(IdpConfig.GetClients());

            services.AddMvc().SetCompatibilityVersion(CompatibilityVersion.Version_2_2);

        }
二、API修改
1、修改 SuiBianController Get() 返回内容
随意这里改不改无所谓,因为我下面截图,和上一篇对不上 所以在这里说明一下
   [HttpGet]

   public IActionResult Get()

   {

       return new JsonResult(from c in User.Claims select new { c.Type, c.Value });

   }
三、客户端修改
1、添加一个 Action 请求 AccessToken
   public async Task<IActionResult> TokenPwd()

   {

       var client = new HttpClient();

       var disco = await client.GetDiscoveryDocumentAsync(_idpBaseUrl);

       if (disco.IsError)

       {

           return Content("获取发现文档失败。error:" + disco.Error);

       }

       #region 第一种方式请求 token

            //var tokenclient = new TokenClient(client, new TokenClientOptions

            //{

            //    ClientId = "client pwd",

            //    ClientSecret = "secret",

            //    Address = disco.TokenEndpoint,

            //});

            //var token = await tokenclient.RequestPasswordTokenAsync("alice", "alice", "api1");

       #endregion

       var token = await client.RequestPasswordTokenAsync(new PasswordTokenRequest

       {

           Address = disco.TokenEndpoint,

           //下面2个属性对应的是 IdentityServer定义的测试用户,这里应是 Action 参数传递进来的,为了方便直接写死的

           UserName = "alice",

           Password = "alice",

           //下面3个属性对应的是 IdentityServer定义的客户端

           ClientId = "client pwd",

           ClientSecret = "secret",

           Scope = "api1 openid profile email phone address"

       });

       if (token.IsError)

       {

           return Content("获取 AccessToken 失败。error:" + token.Error);

       }

       //将token 临时存储到 缓存中

       _memoryCache.Set("AccessToken_Pwd", token.AccessToken);

       return Content("获取 AccessToken 成功。Token:" + token.AccessToken);

   }
2、添加一个Action 测试请求 api1
 public async Task<IActionResult> SuiBianPwd()

        {

            string token, apiurl = GetApiUrl("suibian");

            _memoryCache.TryGetValue("AccessToken_Pwd", out token);

            if (string.IsNullOrEmpty(token))

            {

                return Content("token is null");

            }

            var client = new HttpClient();

            client.SetBearerToken(token);

            var response = await client.GetAsync(apiurl);

            var result = await response.Content.ReadAsStringAsync();

            if (!response.IsSuccessStatusCode)

            {

                _memoryCache.Remove("AccessToken");

                return Content($"获取 {apiurl} 失败。StatusCode:{response.StatusCode} \r\n Token:{token} \r\n result:{result}");

            }

            return Json(JsonConvert.DeserializeObject(result));

        }
3、添加一个Action 测试获取用户认证信息
    public async Task<IActionResult> IdentityInfoPwd()

    {

        string token;

        _memoryCache.TryGetValue("AccessToken_Pwd", out token);

        if (string.IsNullOrEmpty(token))

        {

            return Content("token is null");

        }

        var client = new HttpClient();

        var disco = await client.GetDiscoveryDocumentAsync(_idpBaseUrl);

        if (disco.IsError)

        {

            return Content("获取发现文档失败。error:" + disco.Error);

        }

        client.SetBearerToken(token);

        var response = await client.GetAsync(disco.UserInfoEndpoint);

        var result = await response.Content.ReadAsStringAsync();

        if (!response.IsSuccessStatusCode)

        {

            _memoryCache.Remove("AccessToken");

            return Content($"获取 UserInfo 失败。StatusCode:{response.StatusCode} \r\n Token:{token} \r\n result:{result}");

        }

        return Json(JsonConvert.DeserializeObject(result));

    }
三、客户端测试
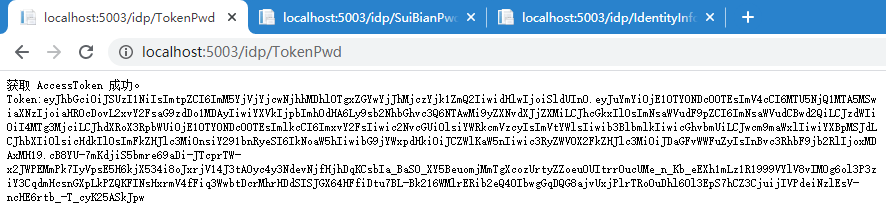
1、获取 token
访问 http://localhost:5003/Idp/tokenpwd 获取token成功
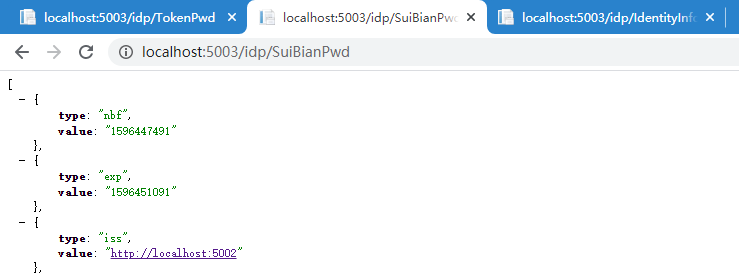
2、请求 api1
访问 http://localhost:5003/Idp/suibianpwd 获取api信息成功
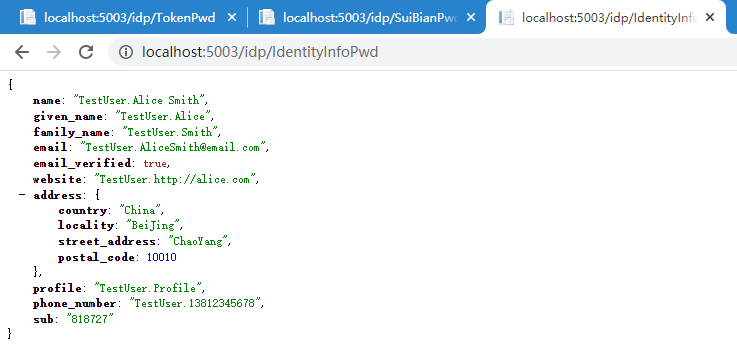
3、获取用户认证信息
访问 http://localhost:5003/Idp/identityinfopwd 获取成功
IdentityServer4 (2) 密码授权(Resource Owner Password)的更多相关文章
- 基于 IdentityServer3 实现 OAuth 2.0 授权服务【密码模式(Resource Owner Password Credentials)】
密码模式(Resource Owner Password Credentials Grant)中,用户向客户端提供自己的用户名和密码.客户端使用这些信息,向"服务商提供商"索要授权 ...
- 基于OWIN WebAPI 使用OAuth授权服务【客户端验证授权(Resource Owner Password Credentials Grant)】
适用范围 前面介绍了Client Credentials Grant ,只适合客户端的模式来使用,不涉及用户相关.而Resource Owner Password Credentials Grant模 ...
- 第37章 资源所有者密码验证(Resource Owner Password Validation) - Identity Server 4 中文文档(v1.0.0)
如果要使用OAuth 2.0资源所有者密码凭据授权(aka password),则需要实现并注册IResourceOwnerPasswordValidator接口: public interface ...
- IdentityServer4专题之六:Resource Owner Password Credentials
实现代码: (1)IdentityServer4授权服务器代码: public static class Config { public static IEnumerable<Identity ...
- asp.net core IdentityServer4 实现 resource owner password credentials(密码凭证)
前言 OAuth 2.0默认四种授权模式(GrantType) 授权码模式(authorization_code) 简化模式(implicit) 密码模式(resource owner passwor ...
- IdentityServer4之Resource Owner Password Credentials(资源拥有者密码凭据许可)
IdentityServer4之Resource Owner Password Credentials(资源拥有者密码凭据许可) 参考 官方文档:2_resource_owner_passwords ...
- IdentityServer4 之 Resource Owner Password Credentials 其实有点尴尬
前言 接着IdentityServer4的授权模式继续聊,这篇来说说 Resource Owner Password Credentials授权模式,这种模式在实际应用场景中使用的并不多,只怪其太开放 ...
- 使用Resource Owner Password Credentials Grant授权发放Token
对应的应用场景是:为自家的网站开发手机 App(非第三方 App),只需用户在 App 上登录,无需用户对 App 所能访问的数据进行授权. 客户端获取Token: public string Get ...
- asp.net权限认证:OWIN实现OAuth 2.0 之密码模式(Resource Owner Password Credential)
asp.net权限认证系列 asp.net权限认证:Forms认证 asp.net权限认证:HTTP基本认证(http basic) asp.net权限认证:Windows认证 asp.net权限认证 ...
随机推荐
- Java入门系列之final
前言 在C#经典面试中掺杂过Java的final关键字,主要用于类不能被继承,在C#则是利用关键字seal修饰类为密封类,而在Java中的final关键字的具体用法包含C#中const.readonl ...
- java 面向对象(三十五):泛型在继承上的体现
泛型在继承上的体现: /* 1. 泛型在继承方面的体现 虽然类A是类B的父类,但是G<A> 和G<B>二者不具备子父类关系,二者是并列关系. 补充:类A是类B的父类,A< ...
- java 面向对象(十二):面向对象的特征二:继承性 (一) 前言
1.为什么要有类的继承性?(继承性的好处) * ① 减少了代码的冗余,提高了代码的复用性 * ② 便于功能的扩展 * ③ 为之后多态性的使用,提供了前提图示: 2.继承性的格式:class A ext ...
- git分支管理的策略和冲突问题
目录 备注: 知识点 关于分支中的冲突 分支管理的策略 分支策略 备注: 本文参考于廖雪峰老师的博客Git教程.依照其博客进行学习和记录,感谢其无私分享,也欢迎各位查看原文. 知识点 git log ...
- jdk安装无反应解决方法
找到该文件(隐藏文件),如果里面是只有空格,清空后重新安装就可以.若有内容设置INSTALL_SILENT=0 后重新安装.
- 数字图像处理 第四章 P157 小错误
问题 我认为P157中部的卷积公式是错的,f(x)h(x-m)应当写为f(m)h(x-m) 解决方法 为了证明,我就用我蹩脚的python实现一下图4.28左列 源代码如下 import numpy ...
- 一起学Blazor WebAssembly 开发(1)
最近blazor的WebAssembly 正式版出来了,正好手头有一个项目采用的前后端分离模式做的,后端用的abp vnext(.net core 的一个很著名的框架)框架开发的,其实前端之前考虑的使 ...
- 题解 CF613D 【Kingdom and its Cities】
考虑树形\(DP\),设\(num_x\)记录的为当\(1\)为根时,以\(x\)为子树中重要城市的个数. 那么进行分类讨论: ① 当\(num_x≠0\)时,则需将其所有满足\(num_y≠0\)的 ...
- vscode 无法自动补全第三方库
点击Settings 找到“Extentions”下的“Python”,点击“Auto Completes: Extra Paths”的“Edit in settings.json”,如下图: 在se ...
- vue的双向数据绑定实现原理(简单)
如果有人问你,学vue学到了什么,那双向数据绑定,是必然要说的. 我们都知道,在vue中,使用数据双向绑定我们都知道是v-modle实现的. 实现原理是通过Object.defineProperty的 ...