WebSSH之录屏安全审计(三)
第一篇:Gin+Xterm.js实现WebSSH远程Kubernetes Pod(一)
第二篇:WebSSH远程管理Linux服务器、Web终端窗口自适应(二)
支持用户名密码认证
支持SSH密钥认证
支持Web终端窗口自适应
支持录屏审计
Asciinema
Asciinema是一款开源的终端会话录制工具。
官网: https://asciinema.org/
安装Asciinema
CentOS
yum install asciinema -y用法
以下内容来自官方文档:https://asciinema.org/docs/usage
- 通过运行
rec [filename]如果filename省略该参数,则(在要求确认后)将生成的 asciicast 上传到 asciinema-server(默认为 asciinema.org),在那里可以观看和共享。
如果filename给出参数,则生成的记录(称为 asciicast)将保存到本地文件中。稍后可以使用 .asciinema 重播和asciinema play <filename>/或上传到 asciinema 服务器asciinema upload <filename>。
ASCIINEMA_REC=1添加到记录的进程环境变量中。.bashrcshell 的配置文件 ( , )可以使用它来.zshrc更改提示或在录制 shell 时播放声音。
可用选项:
--stdin- 启用标准输入(键盘)录制(见下文)
--append- 附加到现有录音
--raw- 保存原始 STDOUT 输出,没有计时信息或其他元数据
--overwrite- 如果录音已存在,则覆盖录音
-c, --command=<command>- 指定要记录的命令,默认为$SHELL
-e, --env=<var-names>- 要捕获的环境变量列表,默认为SHELL,TERM
-t, --title=<title>- 指定asciicast的标题
-i, --idle-time-limit=<sec>- 将记录的终端不活动限制为最大<sec>秒数
-y, --yes- 对所有提示回答“是”(例如上传确认)
-q, --quiet- 保持安静,禁止所有通知/警告(隐含 -y)
标准输入记录允许捕获用户在当前记录的 shell 中输入的所有字符。播放器(例如asciinema-player )可以使用它 来显示按下的键。因为它基本上是一个按键记录(范围仅限于单个 shell 实例),所以默认情况下它是禁用的,并且必须通过 --stdin选项显式启用。
在终端中播放录制的asciicast
play <filename>从本地文件播放
asciinema play /path/to/asciicast.cast从HTTP(S) URL播放
asciinema play https://asciinema.org/a/22124.cast

asciinema play http://example.com/demo.cast
从 asciicast 页面 URL 播放(需要<link rel="alternate" type="application/x-asciicast" href="/my/ascii.cast">在页面的 HTML 中)
asciinema play https://asciinema.org/a/22124

asciinema play http://example.com/blog/post.html
从标准输入播放
cat /path/to/asciicast.cast | asciinema play -

ssh user@host cat asciicast.cast | asciinema play -
从 IPFS 播放
asciinema play dweb:/ipfs/QmNe7FsYaHc9SaDEAEXbaagAzNw9cH7YbzN4xV7jV1MCzK/ascii.cast可用选项
-i, --idle-time-limit=<sec>- 将重播的终端不活动限制为最大<sec>秒数

-s, --speed=<factor>- 播放速度(可以是小数)
快捷键
空格:切换暂停

Ctrl+C: exit
配置文件
您可以通过在 处创建配置文件来配置 asciinema
$HOME/.config/asciinema/config配置分为 ( [api], [record], [play]) 部分。以下是每个部分的所有可用选项的列表
[api]

; API服务器的URL,默认值:https://asciinema.org

; 如果你运行自己的 asciinema-server 实例,那么在这里设置它的地址

; 也可以通过设置环境变量 ASCIINEMA_API_URL 来覆盖此设置

url = https://asciinema.example.com

[record]

;要记录的命令,默认值: $SHELL

command = /bin/bash -l

; 启用 stdin (键盘) 记录, 默认值: no

stdin = yes

; 要捕获的环境变量列表,默认值: SHELL,TERM

env = SHELL,TERM,USER

; 将记录的终端不活动限制为最多 n 秒,默认值: off

idle_time_limit = 2

; 自动回答所有交互式提示的"是",默认值: no

yes = true

;  安静模式,禁止所有通知/警告,默认值: no

quiet = true

[play]

; 回放速度(可以是小数),默认值: 1

speed = 2

; 将重播的终端不活动限制到最多 n 秒,默认值: off

idle_time_limit = 1
Asciicast数据格式
asciicast 文件格式 (version 1)
https://github.com/asciinema/asciinema/blob/develop/doc/asciicast-v1.md
asciicast 文件是 JSON 文件,包含元数据(例如录制的持续时间或标题)以及录制期间打印到终端标准输出的实际内容。
asciinema 记录器版本 1.0 至 1.4 使用该格式的版本 1。
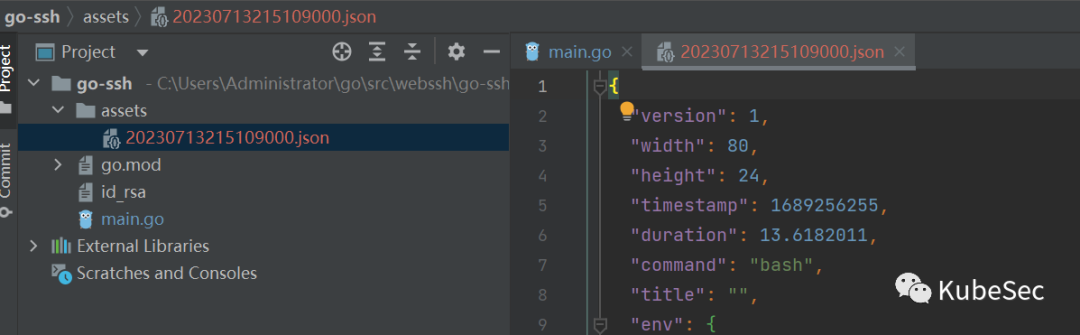
每个 asciicast 都包含以下属性集:
version:设置为 1,
width:终端宽度(列数),
height:终端高度(行数),
duration:asciicast 作为浮点数的总持续时间,
command:记录的命令,通过-c选项给出rec,
title:asciicast 的标题,通过-t选项给出rec,
env:对于调试播放问题有用的环境变量图,
stdout: 最重要的部分是 "stdout" 数组。此数组中的每个元素都包含一个浮点数和一个字符串。浮点数标记着从会话开始到当前输出发生时经过的时间(单位:秒),字符串则记录了该时间点的具体输出内容。[5.4321, "foo\rbar\u0007..."]
Asciicast示例
{

  "version": 1,

  "width": 80,

  "height": 24,

  "duration": 1.515658,

  "command": "/bin/zsh",

  "title": "",

  "env": {

    "TERM": "xterm-256color",

    "SHELL": "/bin/zsh"

  },

  "stdout": [

    [

      0.248848,

      "\u001b[1;31mHello \u001b[32mWorld!\u001b[0m\n"

    ],

    [

      1.001376,

      "I am \rThis is on the next line."

    ]

  ]

}
asciicast 文件格式(version 2)
https://github.com/asciinema/asciinema/blob/develop/doc/asciicast-v2.md
asciicast v2 文件是以换行符分隔的 JSON文件,其中:
第一行包含标头(初始终端大小、时间戳和其他元数据),编码为 JSON 对象,
以下所有行形成一个事件流,每行代表一个单独的事件,编码为 3 元素 JSON 数组。
示例
{"version": 2, "width": 80, "height": 24, "timestamp": 1504467315, "title": "Demo", "env": {"TERM": "xterm-256color", "SHELL": "/bin/zsh"}}

[0.248848, "o", "\u001b[1;31mHello \u001b[32mWorld!\u001b[0m\n"]

[1.001376, "o", "That was ok\rThis is better."]

[1.500000, "m", ""]

[2.143733, "o", "Now... "]

[6.541828, "o", "Bye!"]
在HTML中使用asciinema-player
https://github.com/asciinema/asciinema-player
在releases page中下载最新的asciinema-player.min.js和asciinema-player.css文件
首先,将 和您的录音文件添加asciinema-player.min.js到asciinema-player.css您.cast网站的资产中。下面的 HTML 代码段假设它们位于 Web 服务器的根目录中。
然后将必要的包含添加到您的 HTML 文档中并在空元素内初始化播放器<div>
<!DOCTYPE html>

<html>

  <head>

    ...

    <link rel="stylesheet" type="text/css" href="/asciinema-player.css" />

    ...

  </head>

  <body>

    ...

    <div id="demo"></div>

    ...

    <script src="/asciinema-player.min.js"></script>

    <script>

      AsciinemaPlayer.create('/demo.cast', document.getElementById('demo'));

    </script>

  </body>

</html>
后端go-ssh支持asciicast v1
- 定义AsciiCast结构体
type AsciiCast struct {

 Version int `json:"version"`

 Width   int `json:"width"`

 Height  int `json:"height"`

 // 可选属性

 Timestamp float64 `json:"timestamp"`

 Duration  float64 `json:"duration"`

 Command   string  `json:"command"`

 Title     string  `json:"title"`

 Env       struct {

  Term  string `json:"TERM"`

  Shell string `json:"SHELL"`

 } `json:"env"`

 Stdout [][]interface{} `json:"stdout"`

}
修改WSClient,增加如下属性
type WSClient struct {

 // AsciiCast

 asciiCast *AsciiCast

 // 会话开始时间

 startTime time.Time

 // 持续时间

 duration float64

 // 上次用户交互时间

 prevTime float64

}
Read方法中记录持续时间,上次记录时间(间隔时间)
func (c *WSClient) Read(p []byte) (n int, err error) {

 // ...

 c.duration = time.Since(c.startTime).Seconds()

 c.prevTime = c.duration

 // ...

}
Write方法中记录持续时间,上次记录时间(间隔时间)、记录stdin、stdout、stder添加到asciiCast.Stdout
func (c *WSClient) Write(p []byte) (n int, err error) {

 // ...

 err = c.ws.WriteMessage(websocket.TextMessage, p)

 c.duration = time.Since(c.startTime).Seconds()

 timeDiff := c.duration - c.prevTime

 // 增加间隔时间,

 timeDiff += 300.0 / 1000.0

 c.asciiCast.Stdout = append(c.asciiCast.Stdout, []interface{}{timeDiff, string(p)}) // ...

}
SSHHandler中记录会话开始时间、会话终止时保存AsciiCast文件
func SSHHandler(wsClient *WSClient, user, password, ip, authType, command string, port int) {

 // ...

  wsClient.startTime = time.Now()

 // ...

  SaveAsciiCast(wsClient)

}
SaveAsciiCast保存AsciiCast文件
func SaveAsciiCast(c *WSClient) {

 c.asciiCast.Duration = c.duration

 castData, err := json.MarshalIndent(c.asciiCast, "", "  ")

 if err != nil {

  log.Fatal(err)

 }

 if err := os.WriteFile(fmt.Sprintf("./assets/%s.json", time.Now().Format("20060102150405000")), castData, 0644); err != nil {

  log.Fatal(err)

 }

}
后端项目完整代码:https://gitee.com/KubeSec/webssh/tree/master/go-ssh
Vue中使用asciinema-player
更多用法请参考官方文档:https://github.com/asciinema/asciinema-player
从https://github.com/asciinema/asciinema-player/releases页面中下载最新的asciinema-player.min.js和asciinema-player.css文件。
把asciinema-player.min.js和asciinema-player.css文件放到项目public目录下
在public目录下新建asciinema.html
<!DOCTYPE html>

<html lang="en">

<head>

  <meta charset="UTF-8">

  <link rel="stylesheet" type="text/css" href="/asciinema-player.css" />

  <title>asciinema-player</title>

</head>

<body>

  <div id="demo"></div>

  <script src="/asciinema-player.min.js"></script>

  <script>

    AsciinemaPlayer.create('http://127.0.0.1:9191/assets/20230713200759000.json', document.getElementById('demo'));

  </script>

</body>

</html>
在src/views/ssh目录下新建log.vue文件
<template>

  <div style="height: 800px; width: 100%">

    <iframe src="/asciinema.html" width="100%" height="100%"></iframe>

  </div>

</template>

<script>

export default {

  data() {

    return {

    }

  },

  methods: {

  }

}

</script>

<style scoped>

html, body {

  height: 100%;

}

</style>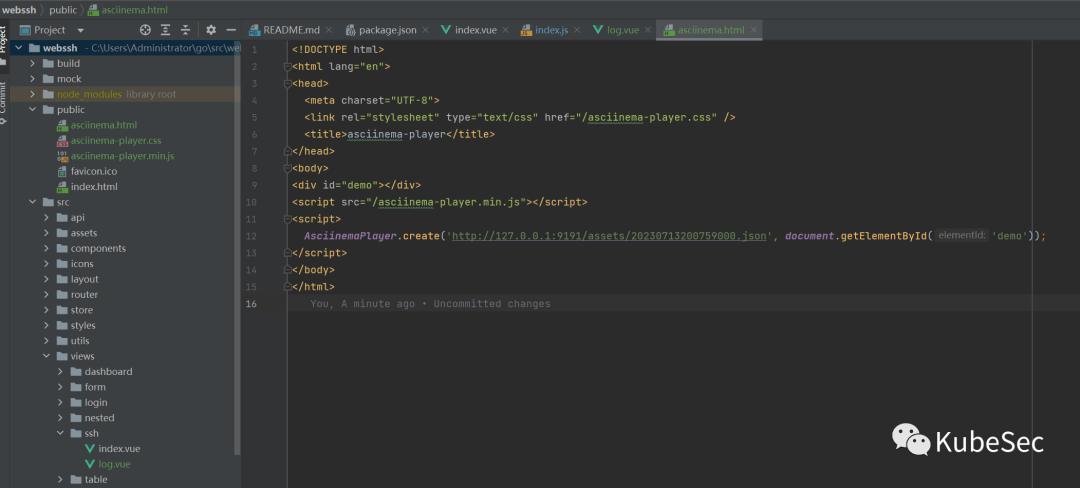
在src/router/index.js文件中增加路由
{

    path: '/ssh-logs',

    component: Layout,

    children: [

      {

        path: 'ssh-logs',

        name: 'SSH-logs',

        component: () => import('@/views/ssh/log.vue'),

        meta: { title: 'SSH-log', icon: 'form' }

      }

    ]

  },
启动项目
npm install

npm run dev
前端全部代码
https://gitee.com/KubeSec/webssh/tree/master/webssh
测试
在go-ssh项目目录下新建目录assets
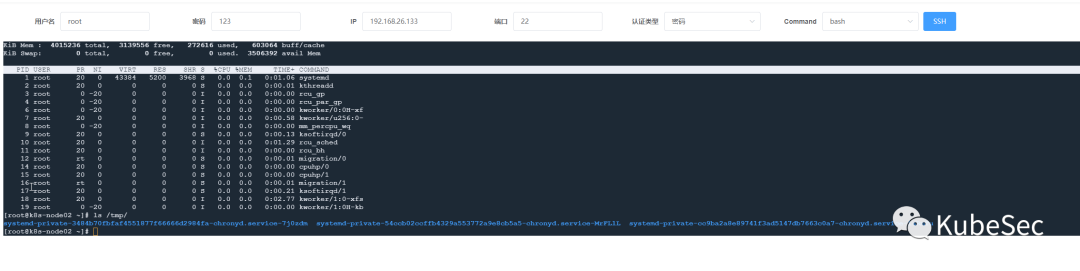
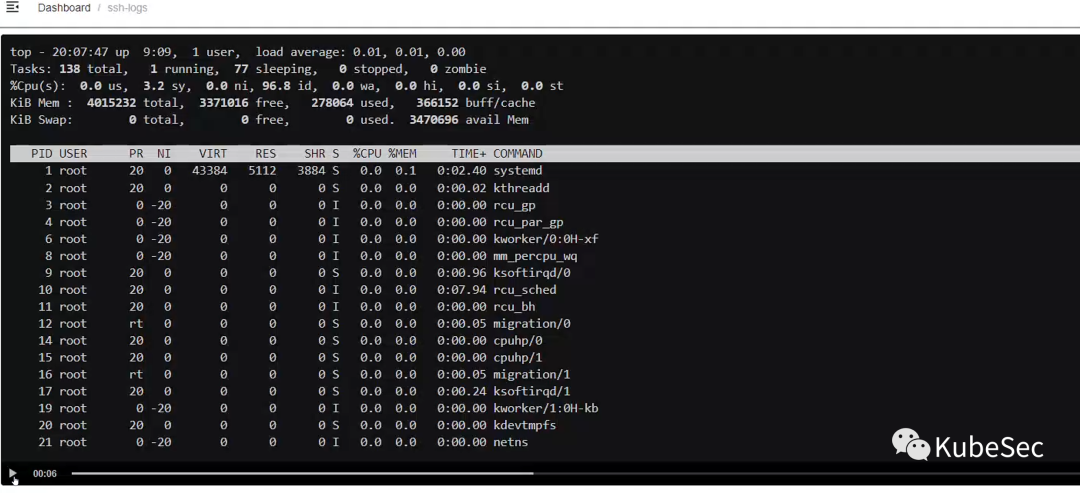
登录WebSSH连接主机,输入ls、top等指令,输入exit后关闭会话

查看go-ssh项目assets目录下录制的asciicast文件
修改前端项目public/asciinema.html

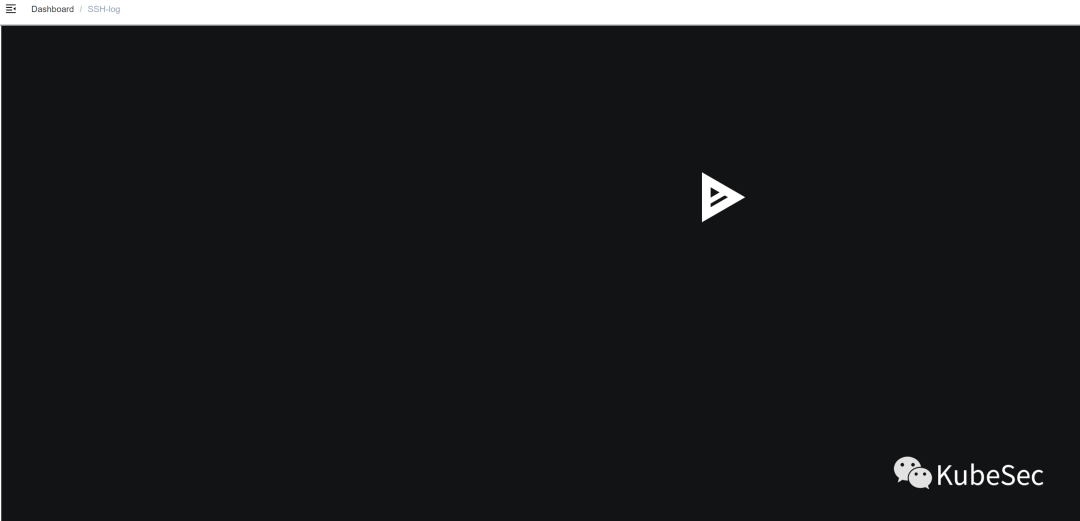
浏览器访问:http://localhost:9528/#/ssh-logs/ssh-logs 播放录制的视频
WebSSH之录屏安全审计(三)的更多相关文章
- Ubuntu下三个实用的录屏软件
Ubuntu下三个实用的录屏软件 Kazam 优点: 易安装 可选择区域录制,也可全屏录制 有录屏和截图功能 安装: sudo apt-get install kazam 展示: Simple Scr ...
- 转:三款免费好用的Gif录屏神器
原文链接:三款免费好用的Gif录屏神器 自己用了 ScreenToGif 版本2.14.1下载地址 原文内容: 三款免费好用的Gif录屏神器 2018年06月02日 18:52:21 独家雨 ...
- 三款免费好用的Gif录屏神器
三款免费好用的Gif录屏神器 1. 免费开源的GIF录制工具ScreenToGif 官网地址:http://www.screentogif.com/ ScreenToGif,国外免费开源小巧实用的Gi ...
- Android实现录屏直播(三)MediaProjection + VirtualDisplay + librtmp + MediaCodec实现视频编码并推流到rtmp服务器
请尊重分享成果,转载请注明出处,本文来自Coder包子哥,原文链接:http://blog.csdn.net/zxccxzzxz/article/details/55230272 Android实现录 ...
- Android 手机怎么录屏制成gif图片
参考:http://www.cnblogs.com/dasusu/p/4903511.html 上面的博主说的很详细了,但作为学习记录我就重新写一遍帮助自己加深记忆 一.准备条件 1.你搭建了Andr ...
- webex录屏
你在寻找好用的录屏软件吗?商用级品质的 WebEx Recorder 就是一款优秀的录屏软件.WebEx Recorder可以录制全屏或指定窗口,可以设定是否包含声音,生成的文件体积极小且极清晰,录制 ...
- android——使用自带录屏工具进行屏幕录像
在做开源项目的时候,想传一个gif效果图上去.但是,要有连贯的动画效果.所以,就想到先录制视频,然后视频转gif.但是,用第三录屏软件总是不完美. 那么,怎么办呢? android4.4 提供了自带录 ...
- vivo怎么录屏 手机录制屏幕详细教程
在手机上我们经常可以刷到许多类似于手机游戏之类的屏幕视频我想肯定会有很多人好奇怎么录制的,今天小编所说的便是教大家如何在安卓手机上进行屏幕录像,下面便是关于vivo怎么录屏的具体操作方法,希望能对你们 ...
- Android设备一对多录屏直播--(UDP组播连接,Tcp传输)
原文:https://blog.csdn.net/sunmmer123/article/details/82734245 近期需要学习流媒体知识,做一个Android设备相互投屏Demo,因此找到了这 ...
- C#实现录音录像录屏源码
以前写过两篇录音和录像的文章(实现语音视频录制.在服务器端录制语音视频),最近有朋友问,如果要实现屏幕录制这样的功能,该怎么做了?实际上录屏的原理跟录音.录像是差不多的,如果了解了我前面两篇文章中介绍 ...
随机推荐
- ABC294Ex K-Coloring
Statement 对一张简单无向图进行 \(k\) 染色,满足对于每条边的两个端点颜色不同,求方案数. \(n,m\leq 30\). Solution 无向图 \(k\) 染色问题,很经典的问题. ...
- SRIO接口卡航电总线解决方案
TES600是天津拓航科技的一款基于FPGA与DSP协同处理架构的通用高性能实时信号处理平台,该平台采用1片TI的KeyStone系列多核浮点/定点DSP TMS320C6678作为主处理单元,采用1 ...
- 2022-08-05:以下go语言代码输出什么?A:65, string;B:A, string;C:65, int;D:报错。
2022-08-05:以下go语言代码输出什么?A:65, string:B:A, string:C:65, int:D:报错. package main import ( "fmt&quo ...
- 2022-06-18:golang与 C++数据结构类型对应关系是怎样的?
2022-06-18:golang与 C++数据结构类型对应关系是怎样的? 答案2022-06-18: uintptr和unsafe.Pointer相当于c++的void*,也就是任意指针. uint ...
- 2021-08-29:N * M的棋盘(N和M是输入参数),每种颜色的格子数必须相同的,上下左右的格子算相邻,相邻格子染的颜色必须不同,所有格子必须染色,返回至少多少种颜色可以完成任务。 福大大 答
2021-08-29:N * M的棋盘(N和M是输入参数),每种颜色的格子数必须相同的,上下左右的格子算相邻,相邻格子染的颜色必须不同,所有格子必须染色,返回至少多少种颜色可以完成任务. 福大大 答案 ...
- drf——Request源码分析、序列化组件、序列化类的使用(字段类和参数)、反序列化校验和保存
1.Request类源码分析 # APIView+Response写个接口 # 总结: 1.新的request有个data属性,以后只要是在请求body体中的数据,无论什么编码格式,无论什么请求方式 ...
- SpringCloud+Eureka初识+Ribbon+Feign+Hystrix(服务熔断,服务降级)+hashbroad
Eureka注册中心 1.导包 <dependencies> <!-- https://mvnrepository.com/artifact/org.springframework ...
- 代码随想录算法训练营Day6 哈希表|242.有效的字母异位词 349.两个数组的交集 202.快乐数 1.两数之和
哈希表理论基础 哈希表 哈希表(Hash tble)是根据关键码的值而进行直接访问的数据结构. 哈希表简单来说是数组,当我们遇到了要快速判断一个元素是否出现在集合里的时候,就要考虑哈希表. 哈希表中的 ...
- git上传对象文件错误解决方案
git上传对象文件错误解决方案 时隔一个星期, 当我再次完成开发之后, 准备将代码上传, 却出现了一个上传代码的错误, 记录一下错误和解决方案 解决方案: 运行git fsck --full (b ...
- CentOS Linux 7 配置 nginx 支持 CGI
Nginx 本身不能执行外部程序,Nginx 处理 PHP 是通过 PHP 的 fastcgi 管理器(php-fpm)进行处理,然后 nginx 再将结果返回给用户:所以如果我们需要通过 cgi 程 ...