玩转Spring Cloud之服务注册发现(eureka)及负载均衡消费(ribbon、feign)
如果说用Spring Boot+Spring MVC是开发单体应用(或单体服务)的利器,那么Spring Boot+Spring MVC+Spring Cloud将是开发分布式应用(快速构建微服务)的又一法宝,相信大家如果看到我近期总结的《JAVA WEB快速入门》系列文章,对Spring Boot+Spring MVC应该是比较熟悉了吧,从本文开始,一起来熟悉Spring Cloud、玩转Spring Cloud,至于什么是Spring Cloud?我这里就不再介绍了,网上资源太多了,比如:大话Spring Cloud、SpringCloud是什么?,当然介绍Spring Cloud系列文章也比较多(比如:https://blog.csdn.net/forezp/article/details/70148833),大家也可以参考,我这里只是结合当前最新的Spring Boot、Spring MVC、Spring Cloud来重新演练一遍,把重要的知识点、遇到的一些坑分享出来,一来是为自己做记录(所谓“好记性不如烂笔头”),二来可以避免大家学习时走弯路,又因为介绍Spring Cloud文章实在太多了,故玩转Spring Cloud系列文章更多的是以把实现的DEMO代码一步步贴出来,一些组件名词我就不再详细解释了,然后对于涉及的重要知识点及踩坑点进行说明,以便大家可以:知其然还能知其所以然。(注:所有示例代码均采用IDEA IDE编写)
一、实现eureka server(注册中心)
1.1.通过IDEA来创建一个空的spring boot项目(类型是:maven-archtype-quickstart,这样最精简,当然如果你使用webapp项目也是可以,只是认为没有必要)。
创建步骤有2种,第一种是使用maven创建: maven->maven-archtype-quickstart,然后手动添加相关的spring boot依赖;第二种是使用spring initializer->填写项目参数->选择相关依赖(可直接选择spring cloud相关依赖,如:eureka,这样就一步到位,这里全部先不选),最终的初始POM XML如下:
<?xml version="1.0" encoding="UTF-8"?>

<project xmlns="http://maven.apache.org/POM/4.0.0" xmlns:xsi="http://www.w3.org/2001/XMLSchema-instance"

  xsi:schemaLocation="http://maven.apache.org/POM/4.0.0 http://maven.apache.org/xsd/maven-4.0.0.xsd">

  <modelVersion>4.0.0</modelVersion>

  <groupId>cn.zuowenjun.cloud</groupId>

  <artifactId>eurekaserver</artifactId>

  <version>1.0-SNAPSHOT</version>

  <name>eurekaserver</name>

  <!-- FIXME change it to the project's website -->

  <url>http://www.zuowenjun.cn</url>

  <properties>

    <project.build.sourceEncoding>UTF-8</project.build.sourceEncoding>

    <maven.compiler.source>1.8</maven.compiler.source>

    <maven.compiler.target>1.8</maven.compiler.target>

  </properties>

  <parent>

    <groupId>org.springframework.boot</groupId>

    <artifactId>spring-boot-starter-parent</artifactId>

    <version>2.1.3.RELEASE</version>

  </parent>

  <dependencies>

    <dependency>

      <groupId>junit</groupId>

      <artifactId>junit</artifactId>

      <version>4.11</version>

      <scope>test</scope>

    </dependency>

  </dependencies>

  <build>

    <plugins>

      <plugin>

        <groupId>org.springframework.boot</groupId>

        <artifactId>spring-boot-maven-plugin</artifactId>

      </plugin>

    </plugins>

  </build>

</project>
如上所示(如果不是请改成这样,如果只是多点依赖没关系,当然我认为此时只需要这么多的依赖即可,多了也无用),我们只是有spring boot的POM依赖,并没有spring cloud的相关依赖。
1.2添加spring cloud相关依赖,如下所示:(添加了dependencyManagement节点,并配置spring-cloud-dependencies pom import依赖,目的是:便于依赖继承,与parent节点功能类似,添加具体依赖时,若包含在parent中或pom import依赖中则无需版本号,能够保证组件的一致性,详见:https://blog.csdn.net/mn960mn/article/details/50894022,相反如果没有配置spring-cloud-dependencies pom import依赖,则添加具体依赖时需要指定version版本号,而且需要注意各依赖组件间的兼容性问题,如下面我把version注释掉)
  <dependencyManagement>

  <dependencies>

    <dependency>

      <groupId>org.springframework.cloud</groupId>

      <artifactId>spring-cloud-dependencies</artifactId>

      <version>Greenwich.RELEASE</version>

      <type>pom</type>

      <scope>import</scope>

    </dependency>

  </dependencies>

</dependencyManagement>

  <dependencies>

    ... ...其它原有依赖

    <dependency>

      <groupId>org.springframework.cloud</groupId>

      <artifactId>spring-cloud-starter</artifactId>

      <!--<version>2.1.0.RELEASE</version>-->

    </dependency>

    <dependency>

      <groupId>org.springframework.cloud</groupId>

      <artifactId>spring-cloud-starter-netflix-eureka-server</artifactId>

      <!--<version>2.1.0.RELEASE</version>-->

    </dependency>

  </dependencies>
1.3.在resouces目录下(若没有请创建,注意设为souces root目录,方法:右键文件夹->Mark directory as->souces root)创建application.yml(或application.properties,本文示例全部使用yml),添加如下配置:
server:

  port: 8800

spring:

  applcation:

    name: demo-eurekaserver

# config detail:https://www.jianshu.com/p/98f4e5f6bca7  or https://blog.csdn.net/wo18237095579/article/details/83276352

eureka:

  instance:

    hostname: eurekaserver1 #实例主机名,集群时需要且唯一

  server:

    enable-self-preservation: true #自我保护,正式环境不要这么做

    eviction-interval-timer-in-ms: 5000 #定期清理失效节点,默认60s

    peer-eureka-nodes-update-interval-ms: 6000 #同步更新节点频率,默认10min

    renewal-percent-threshold: 0.49 #默认0.85

    response-cache-auto-expiration-in-seconds: 30

  client:

    registerWithEureka: false

    fetchRegistry: false

    serviceUrl:

      defaultZone: http://localhost:${server.port}/eureka/
1.4.在spring boot 启动类中添加@EnableEurekaServer即可,如下代码:
package cn.zuowenjun.cloud;

import org.springframework.boot.SpringApplication;

import org.springframework.boot.autoconfigure.SpringBootApplication;

import org.springframework.cloud.netflix.eureka.server.EnableEurekaServer;

@EnableEurekaServer

@SpringBootApplication

public class App

{

    public static void main( String[] args )

    {

        SpringApplication.run(App.class, args);

    }

}
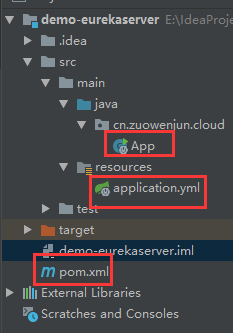
整个项目结构如下图示,启动后浏览地址:http://localhost:8800/,会出现spring eureka的主页,就表明eureka server成功了。
二、实现service provider(含eureka client)--服务提供者
【即:具体微服务项目,注册服务信息,暴露API】,当然也有可能同时是service consumer【服务消费者】,需要远程调用其它服务
2.1.参照1.1方式创建一个空的spring boot项目,然后添加spring cloud 相关依赖(这里主要是:eureka-client【实现服务自动发现与注册】、web【即:springMVC,实现服务API】),POM XML添加配置如下:
  <dependencyManagement>

    <dependencies>

      <dependency>

        <groupId>org.springframework.cloud</groupId>

        <artifactId>spring-cloud-dependencies</artifactId>

        <version>Greenwich.RELEASE</version>

        <type>pom</type>

        <scope>import</scope>

      </dependency>

    </dependencies>

  </dependencyManagement>

  <dependencies>

    <dependency>

      <groupId>junit</groupId>

      <artifactId>junit</artifactId>

      <version>4.11</version>

      <scope>test</scope>

    </dependency>

    <dependency>

      <groupId>org.springframework.cloud</groupId>

      <artifactId>spring-cloud-starter-netflix-eureka-client</artifactId>

    </dependency>

    <dependency>

      <groupId>org.springframework.boot</groupId>

      <artifactId>spring-boot-starter-web</artifactId>

    </dependency>

    <!--当.yml配置不生效时,应添加snakeyaml依赖,但一般spring-boot-starter中默认有此依赖,非spring boot项目需要添加-->

    <dependency>

      <groupId>org.yaml</groupId>

      <artifactId>snakeyaml</artifactId>

      <version>1.23</version>

    </dependency>

  </dependencies>
2.2.在application.yml文件中添加如下配置(若没有请参见1.3法创建):注意spring.application.name,这个是服务实例名,注册及服务消费时均需使用该名称
server:

  port: 8801

spring:

  application:

    name: helloservice

    ip: localhost #自定义配置,在demo代码中有用到

eureka:

  client:

    serviceUrl:

      defaultZone: http://localhost:8800/eureka/
3.3.编写controller 服务相关代码,在spring boot启动类上添加@EnableDiscoveryClient注解,具体完整实现代码如下:(除了@EnableDiscoveryClient注解,基余代码与普通的spring MVC项目代码均相同)
//controller:

package cn.zuowenjun.cloud.controller;

import cn.zuowenjun.cloud.model.Result;

import org.springframework.beans.factory.annotation.Value;

import org.springframework.cloud.client.discovery.DiscoveryClient;

import org.springframework.beans.factory.annotation.Autowired;

import org.springframework.web.bind.annotation.GetMapping;

import org.springframework.web.bind.annotation.PathVariable;

import org.springframework.web.bind.annotation.RequestMapping;

import org.springframework.web.bind.annotation.RestController;

@RestController

public class DemoController {

    @Value("${spring.application.name}")

    private String serviceName;

    @Value("${spring.application.ip}")

    private String address;

    @Value("${server.port}")

    private String port;

    @Autowired

    DiscoveryClient discoveryClient;

    @GetMapping(value = "/")

    public String index(){

        return "demo service";

    }

    @RequestMapping("/hello")

    public  Object hello(){

        return discoveryClient.getServices();

    }

    @RequestMapping("/info")

    public Result info(){

        Result result = new Result();

        result.setServiceName(serviceName);

        result.setHost(String.format("%s:%s", address, port));

        result.setMessage("hello");

        return result;

    }

    @RequestMapping(value = "/multiply/{a}/{b}")

    public Result multiply(@PathVariable("a") int a,@PathVariable("b") int b){

        Result result = new Result();

        result.setServiceName(serviceName);

        result.setHost(String.format("%s:%s", address, port));

        result.setMessage("ok");

        result.setContent(a * b);

        return result;

    }

}

//model:

package cn.zuowenjun.cloud.model;

public class Result {

    private int code;

    private String message;

    private Object content;

    private String serviceName;

    private String host;

    public int getCode() {

        return code;

    }

    public void setCode(int code) {

        this.code = code;

    }

    public String getMessage() {

        return message;

    }

    public void setMessage(String message) {

        this.message = message;

    }

    public Object getContent() {

        return content;

    }

    public void setContent(Object content) {

        this.content = content;

    }

    public String getServiceName() {

        return serviceName;

    }

    public void setServiceName(String serviceName) {

        this.serviceName = serviceName;

    }

    public String getHost() {

        return host;

    }

    public void setHost(String host) {

        this.host = host;

    }

}

//App spring boot启动类:

package cn.zuowenjun.cloud;

import org.springframework.boot.SpringApplication;

import org.springframework.boot.autoconfigure.SpringBootApplication;

import org.springframework.cloud.client.discovery.EnableDiscoveryClient;

@EnableDiscoveryClient

@SpringBootApplication

public class App

{

    public static void main( String[] args )

    {

        SpringApplication.run(App.class, args);

    }

}
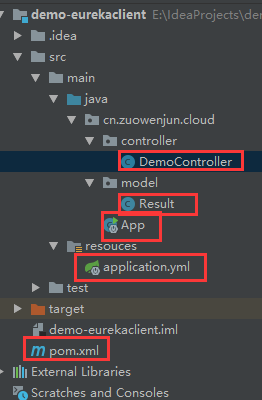
完成上述步骤后即实现了服务提供者项目,完整项目结构如下图示,启动运行http://localhost:8801/multiply/324/561(只需关注这个服务方法,后面服务消费会调用这个方法) ,可以看到正常响应出JSON结果,如:"code":0,"message":"ok","content":181764,"serviceName":"helloservice","host":"localhost:8801"}
 为了后面服务消费者能体验出负载均衡的效果,可以把该项目再以另一个端口(server.port=8802)重新启动运行一个实例(IDEA启动多个实例的方法请参见:https://blog.csdn.net/forezp/article/details/76408139,最后不一定要改yml中的port配置,也可以直接在Edit Configuration--> program argements中指定:--server.port=8802即可,原理与直接通过命令:java -jar xxx --server.port=8802类似),这样就会有两个服务提供者了,如果查看eureka server主页(http://localhost:8800/)会在Instances currently registered with Eureka列表中展示出2个服务实例信息,如下图示:

三、实现service consumer(含eureka client)--服务消费者
【即:需要调用微服务API的项目,相对eureka,service provider来讲,就是客户端,消费方】,当然也有可能是service provider【服务提供者】,暴露服务API给其它微服务项目
3.0.参照1.1方式创建一个空的spring boot项目,然后添加spring cloud 相关依赖(这里仅先是:eureka-client【实现服务自动发现与注册】、web【即:springMVC,实现服务API】),POM XML添加配置如下:
    <properties>

        <java.version>1.8</java.version>

        <spring-cloud.version>Greenwich.RELEASE</spring-cloud.version>

    </properties>

    <dependencies>

        <dependency>

            <groupId>org.springframework.boot</groupId>

            <artifactId>spring-boot-starter-web</artifactId>

        </dependency>

        <dependency>

            <groupId>org.springframework.cloud</groupId>

            <artifactId>spring-cloud-starter-netflix-eureka-client</artifactId>

        </dependency>

        <dependency>

            <groupId>org.springframework.boot</groupId>

            <artifactId>spring-boot-starter-test</artifactId>

            <scope>test</scope>

        </dependency>

    </dependencies>

    <dependencyManagement>

        <dependencies>

            <dependency>

                <groupId>org.springframework.cloud</groupId>

                <artifactId>spring-cloud-dependencies</artifactId>

                <version>${spring-cloud.version}</version>

                <type>pom</type>

                <scope>import</scope>

            </dependency>

        </dependencies>

    </dependencyManagement>
3.1方式一:使用restTemplate+ribbon实现服务消费(负载均衡调用远程服务)
3.1.1.在POM XML中添加spring-cloud-starter-netflix-ribbon依赖,如下:
        <dependency>

            <groupId>org.springframework.cloud</groupId>

            <artifactId>spring-cloud-starter-netflix-ribbon</artifactId>

        </dependency>
3.1.2.编写controller相关代码(含远程服务调用类HelloService),修改spring boot 启动类,具体完整实现代码如下:
//spring boot启动类:

package cn.zuowenjun.cloud;

import org.springframework.boot.SpringApplication;

import org.springframework.boot.autoconfigure.SpringBootApplication;

import org.springframework.cloud.client.discovery.EnableDiscoveryClient;

import org.springframework.cloud.client.loadbalancer.LoadBalanced;

import org.springframework.cloud.openfeign.EnableFeignClients;

import org.springframework.context.annotation.Bean;

import org.springframework.web.client.RestTemplate;

@EnableDiscoveryClient

@SpringBootApplication

class EurekaclientconsumerApplication {

    public static void main(String[] args) {

        SpringApplication.run(EurekaclientconsumerApplication.class, args);

    }

    @LoadBalanced

    @Bean

    public RestTemplate restTemplate(){

        return  new RestTemplate();

    }

}

//controller:

package cn.zuowenjun.cloud.controller;

import cn.zuowenjun.cloud.service.HelloRemoteService;

import cn.zuowenjun.cloud.service.HelloService;

import org.springframework.beans.factory.annotation.Autowired;

import org.springframework.web.bind.annotation.PathVariable;

import org.springframework.web.bind.annotation.RequestMapping;

import org.springframework.web.bind.annotation.RequestParam;

import org.springframework.web.bind.annotation.RestController;

@RestController

public class HelloController {

    @Autowired

    private  HelloService helloService;

    @RequestMapping("/x")

    public Object multiplyForRestTemplate(@RequestParam int a, @RequestParam int b) {

       return   helloService.multiply(a,b);

    }

}

//HelloService(远程服务代理类) :

package cn.zuowenjun.cloud.service;

import org.springframework.beans.factory.annotation.Autowired;

import org.springframework.beans.factory.annotation.Value;

import org.springframework.stereotype.Service;

import org.springframework.web.client.RestTemplate;

@Service

public class HelloService {

    @Autowired

    private RestTemplate restTemplate;

    @Value("${spring.application.helloServiceProvider}")

    private String  helloServiceName;

    public Object multiply(int a,int b){

        String url="http://"+ helloServiceName +"/multiply/" + a +"/" + b;

        return restTemplate.getForObject(url,String.class);

    }

}
如上代码中最核心的是:HelloService类,通过这个类远程调用【消费】注册在eureka server上对应的服务API,而这个类中最核心的对象是:RestTemplate,而这个又是通过在spring boot启动类(EurekaclientconsumerApplication)中通过代码注入到Spring IOC容器中的(当然也可以自定义一个config类然后统一写BEAN注入的方法),重点请看这个restTemplate Bean注册方法上面的注解:@LoadBalanced,这个就是实现负载均衡(默认是采用轮询的负载均衡算法,还有其它的负载均衡Rule),就这么简单吗?是的,用起来简单,但内部实现还是非常复杂的,Ribbon的运行原理详见:深入理解Ribbon之源码解析,核心思路是:RestTemplate内部维护了一个被@LoadBalance注解的RestTemplate列表,而这些RestTemplate列表又被添加了LoadBalancerInterceptor拦截器,而LoadBalancerInterceptor内部又使用了LoadBalancerClient,而LoadBalancerClient(实现类:RibbonLoadBalancerClient)具体选择服务实例的逻辑又由ILoadBalancer来处理,ILoadBalancer通过配置IRule、IPing等信息,向EurekaClient获取注册列表的信息,并定时向EurekaClient发送“ping”心跳,进而检查是否更新了服务列表,最后得到注册服务实例列表后,ILoadBalancer根据IRule的策略进行负载均衡。
3.1.3.在application.yml文件中添加如下配置(若没有请参见1.3法创建):
server:

  port: 8666

spring:

  application:

    name: ribbonclient

    helloServiceProvider: helloservice #自定义配置,指定访问远程服务名称,当然也可以写死在代码中

eureka:

  client:

    serviceUrl:

      defaultZone: http://localhost:8800/eureka/ #指向eureka server
完成上述步骤即实现了一个基于Ribbon的负载均衡服务消费者(客户端)项目。
3.2方式二:使用feign实现服务消费(负载均衡调用远程服务调用)
我们仍然基于3.1节原有项目基础上实现基于feign的负载均衡服务调用,注意feign的底层仍然使用了Ribbon。当然也可以单独创一个新的spring boot项目(参照第一节介绍)然后再按下文步骤操作即可。
3.2.1.在POM XML中添加spring-cloud-starter-openfeign依赖,配置如下:
        <dependency>

            <groupId>org.springframework.cloud</groupId>

            <artifactId>spring-cloud-starter-openfeign</artifactId>

        </dependency>

    </dependencies>
3.2.2.在spring boot启动类(EurekaclientconsumerApplication)上添加:@EnableFeignClients 注解,然后在cn.zuowenjun.cloud.service包中添加自定义HelloRemoteService,这个就是远程服务调用接口类(或称:客户端代理类【接口】),这个就是与3.1中定义的HelloService作用完全类似,只是实现方式不同而矣,最后在controller中添加一个新的API ACTION方法,以便可以调用HelloRemoteService中的服务方法,完整实现代码如下:
//spring boot启动类

package cn.zuowenjun.cloud;

import org.springframework.boot.SpringApplication;

import org.springframework.boot.autoconfigure.SpringBootApplication;

import org.springframework.cloud.client.discovery.EnableDiscoveryClient;

import org.springframework.cloud.client.loadbalancer.LoadBalanced;

import org.springframework.cloud.client.loadbalancer.LoadBalancerAutoConfiguration;

import org.springframework.cloud.client.loadbalancer.LoadBalancerInterceptor;

import org.springframework.cloud.openfeign.EnableFeignClients;

import org.springframework.context.annotation.Bean;

import org.springframework.web.client.RestTemplate;

@EnableDiscoveryClient

@SpringBootApplication

@EnableFeignClients(basePackages = "cn.zuowenjun.cloud.service") // 如果启动类不在根目录需要指定basePackages,否则不需要

class EurekaclientconsumerApplication {

    public static void main(String[] args) {

        SpringApplication.run(EurekaclientconsumerApplication.class, args);

    }

    @LoadBalanced

    @Bean

    public RestTemplate restTemplate(){

        return  new RestTemplate();

    }

}

//HelloRemoteService:

package cn.zuowenjun.cloud.service;

import org.springframework.cloud.openfeign.FeignClient;

import org.springframework.stereotype.Service;

import org.springframework.web.bind.annotation.PathVariable;

import org.springframework.web.bind.annotation.RequestMapping;

/*

*  bug-refer https://blog.csdn.net/zlh313_01/article/details/80309144

*  bug-refer https://blog.csdn.net/alinyua/article/details/80070890

 */

@FeignClient(name= "helloservice")

public interface HelloRemoteService {

    @RequestMapping("/multiply/{a}/{b}")

    Object  multiply(@PathVariable("a") int a, @PathVariable("b") int b);

}

//controller:

package cn.zuowenjun.cloud.controller;

import cn.zuowenjun.cloud.service.HelloRemoteService;

import cn.zuowenjun.cloud.service.HelloService;

import org.springframework.beans.factory.annotation.Autowired;

import org.springframework.web.bind.annotation.PathVariable;

import org.springframework.web.bind.annotation.RequestMapping;

import org.springframework.web.bind.annotation.RequestParam;

import org.springframework.web.bind.annotation.RestController;

@RestController

public class HelloController {

    @Autowired

    private  HelloService helloService;

    @Autowired

    private HelloRemoteService helloRemoteService;

    @RequestMapping("/x")

    public Object multiplyForRestTemplate(@RequestParam int a, @RequestParam int b) {

       return   helloService.multiply(a,b);

    }

    @RequestMapping("/multiply/{a}/{b}")

    public Object multiplyForFeignClient(@PathVariable int a, @PathVariable int b) {

        return helloRemoteService.multiply(a,b);

    }

}
如上代码HelloRemoteService是重点,需要注意:
a.必需是interface,因为@FeignClient注解只能用于interface中,而且很显然HelloRemoteService 是远程调用,本地不应有实现的,如果知道原理就更明白这个接口只是为了生成可供restTemplate调用的URL方法而矣;
b.@FeignClient注解的name(别名属性)或value必填,这个就是需要远程调用服务的应用名称【即:表明消费哪个服务】
c.接口中定义的方法应与远程服务的controller中的方法保持一致(方法签名,注解),同时注意方法上的一些映射请求的注解,如:@RequestMapping,这些与我们在spring MVC用法相同,但含义却不相同,spring MVC是指处理请求路径,而这里是调用请求路径,这个路径必需与服务提供者API 的对应的ACITON方法上的保持相同,否则将无法成功发送请求。常见问题及解决办法可参见:https://blog.csdn.net/zlh313_01/article/details/80309144
3.2.3.application.yml配置与3.1.3配置相同,即保持不变即可,最后启动项目即可(现在这个项目同时包含了Ribbon与Feign的负载均衡远程调用服务的方式),通过多次访问:http://localhost:8666/x?a=数字&b=数字 (基于Ribbon实现)、http://localhost:8666/multiply/数字/数字(基于Feign实现)可以看到远程调用服务成功(即:消费服务成功)。
FeignClient的运行原理详见:深入理解Feign之源码解析,核心思路是:spring boot项目启动时检查@EnableFeignClients,若有则扫描被@FeignClient注解接口并注入到spring IOC容器中,然后在请求被@ FeignCleint标注的接口方法时,会通过JDK动态代理来生成具体的RequesTemplate,RequesTemplate又会生成Request,Request交给Client去处理,最后Client被封装到LoadBalanceClient类,这个类Ribbon中的LoadBalancerClient相同,后面的负载均衡的处理请求相同。
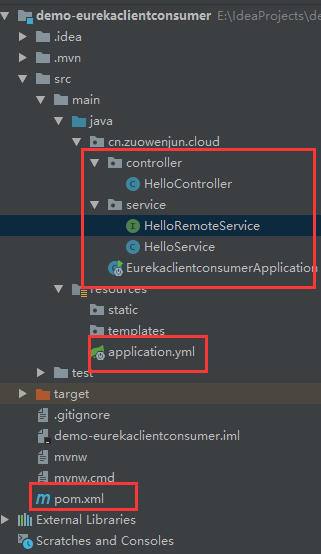
项目结构及远程调用效果如下图所示:
 、
、
 、
、
四、下面分享相关可参考的博文资料链接:
Spring Cloud之Eureka服务注册与发现(概念原理篇)
Spring Cloud Netflix - Eureka Server源码阅读
提示:本文相关示例项目代码已上传GITHUB,地址如下:
https://github.com/zuowj/learning-demos/tree/master/java/demo-eurekaserver
https://github.com/zuowj/learning-demos/tree/master/java/demo-eurekaclient
https://github.com/zuowj/learning-demos/tree/master/java/demo-eurekaclientconsumer
说明:文中若有不足之处欢迎指出,码字不易,请多支持,谢谢!
玩转Spring Cloud之服务注册发现(eureka)及负载均衡消费(ribbon、feign)的更多相关文章
- spring cloud(二)服务(注册)中心Eureka
Eureka是Netflix开源的一款提供服务注册和发现的产品,它提供了完整的Service Registry和Service Discovery实现.也是springcloud体系中最重要最核心的组 ...
- Spring Cloud 之 服务注册与发现
作为微服务框架,提供服务注册发现是最基本的功能.Spring Cloud 针对服务注册发现 提供了 Eureka版本的实现 .Zookeeper版本的实现.Consul版本的实现.由于历史原因 Eur ...
- 如何优化Spring Cloud微服务注册中心架构?
作者: 石杉的架构笔记 1.再回顾:什么是服务注册中心? 先回顾一下什么叫做服务注册中心? 顾名思义,假设你有一个分布式系统,里面包含了多个服务,部署在不同的机器上,然后这些不同机器上的服务之间要互相 ...
- Spring cloud实现服务注册及发现
服务注册与发现对于微服务系统来说非常重要.有了服务发现与注册,你就不需要整天改服务调用的配置文件了,你只需要使用服务的标识符,就可以访问到服务. 本文属于<7天学会spring cloud系列& ...
- 服务注册发现Eureka之一:Spring Cloud Eureka的服务注册与发现
Spring Cloud简介 Spring Cloud是一个基于Spring Boot实现的云应用开发工具,它为基于JVM的云应用开发中的配置管理.服务发现.断路器.智能路由.微代理.控制总线.全局锁 ...
- 服务注册发现Eureka之三:Spring Cloud Ribbon实现客户端负载均衡(客户端负载均衡Ribbon之三:使用Ribbon实现客户端的均衡负载)
在使用RestTemplate来消费spring boot的Restful服务示例中,我们提到,调用spring boot服务的时候,需要将服务的URL写死或者是写在配置文件中,但这两种方式,无论哪一 ...
- Spring Cloud中服务的发现与消费
之前没注意,微信公众号的图片不能引用到其他地方,本文图片显示不正常,原图在写完博客后已经删了,,,,,,所以本文小伙伴可以移步这里https://mp.weixin.qq.com/s/GoIZdwt5 ...
- 服务注册发现Eureka之二:高可用服务注册中心
前言 在Spring Cloud系列文章的开始,我们就介绍了服务注册与发现,其中,主要演示了如何构建和启动服务注册中心Eureka Server,以及如何将服务注册到Eureka Server中,但是 ...
- 用ZooKeeper做为注册中心搭建基于Spring Cloud实现服务注册与发现
前提: 先安装好ZooKeeper的环境,搭建参考:http://www.cnblogs.com/EasonJim/p/7482961.html 说明: 可以再简单的理解为有两方协作,一个是服务提供这 ...
随机推荐
- vue目录结构
构建新的项目后生成目录结构如下图: 1.build目录下: 最终发布de代码存放的位置 2.config 配置目录,包括端口号等.我们初学可以使用默认的 3.node_modules npm加载的项目 ...
- java项目获取根路径(web项目和application项目的区分)
Java项目中经常要读取配置文件,涉及到读取配置文件的地方,就会要读定位文件的路径.因此,在项目如何正确获取文件路径尤为关键. 根据不同的java项目,在获取文件路径时候有一些 小区别 测试环境:E: ...
- Spring Boot 发送邮件
需求 最近因为业务的变更,需要对老用户进行发送邮件处理.目前市面上也有很多代发邮件的接口,可以接入.由于量不是特别大,放弃了这个途径.改用我们自己通过 smtp 发送邮件来处理. 技术选择 Java ...
- iOS 波浪效果的实现
iOS 波浪效果的实现 p.p1 { margin: 0.0px 0.0px 0.0px 0.0px; font: 14.0px Menlo; color: #4f8187; background-c ...
- SSM-Spring-11:Spring中使用代理工厂Bean实现aop的四种增强
------------吾亦无他,唯手熟尔,谦卑若愚,好学若饥------------- 说说那四种增强:前置增强,后置增强,环绕增强,异常增强 那什么是代理工厂bean呢? org.springfr ...
- linux,windows下检测指定的IP地址是否可用或者检测IP地址冲突的3种方式(批处理程序,python程序,linux shell 批量ping)
本文中的脚本适用范围: 1)检测某些IP地址是否被占用: 2)检测网络中某些设备是否存活: 3)在分配新的ip地址之前,批量检测环境中是否存在冲突的机器 以上检测基于ICMP Ping报文,要求所有的 ...
- Enabling Chrome Developer Tools inside Postman
Chrome's Developer Tools are an indispensable part of the modern web development workflow. However, ...
- Android 框架练成 教你打造高效的图片加载框架
转载请标明出处:http://blog.csdn.net/lmj623565791/article/details/41874561,本文出自:[张鸿洋的博客] 1.概述 优秀的图片加载框架不要太多, ...
- 如何最简便的利用Python实现数据可视化?当然离不开matplotlib!
01|Figure和Subplot: matplotlib的图像全部在figure对象里面,就像是一片画布.figsize是figure的一个设置大小的属性.一个figure里面可以有无数个subpl ...
- left join,right join,inner join,full join之间的区别
参考 https://www.cnblogs.com/assasion/p/7768931.html https://blog.csdn.net/rongbo_j/article/details/46 ...